Note: The “cloud host” mentioned in this article refers to the development desktop provided free of charge to every registered user in Huawei Developer Space, which operates purely through a web interface, making it convenient for casual use without leaving traces on work computers.
Using Typora in conjunction with PicGo, you can write technical sharing posts and publish them all at once on platforms like Huawei Cloud Forum, CSDN Forum, and SegmentFault Forum.
Installing Typora for Linux
Add the official GPG key
wget -qO - https://typoraio.cn/linux/public-key.asc
sudo tee /etc/apt/trusted.gpg.d/typora.asc
Add the repository source
sudo add-apt-repository 'deb https://typoraio.cn/linux ./'
Update and install
sudo apt update
sudo apt install typora
Installing PicGo on the Cloud Host
The default version of Node.js on the cloud host is too low to install PicGo directly.
1. First, upgrade the NVM on the cloud host to the latest version, then use NVM to upgrade Node.js to the latest version, and switch to the installed Node.js version.
curl -o- https://raw.githubusercontent.com/nvm-sh/nvm/v0.39.1/install.sh | bash
nvm install --lts
nvm use XX
2. Then, install the command-line version of PicGo (1.5.8) using npm, refer to https://github.com/PicGo/PicGo-Core.
sudo npm install -g picgo
3. Install the PicGo plugin picgo-plugin-huawei-uploader, refer to https://github.com/YunfengGao/picgo-plugin-huawei-uploader.
# Plugin installation
picgo install picgo-plugin-huawei-uploader

# Set plugin parameters, refer to the above plugin configuration
picgo set uploader

# Select the picgo-plugin-huawei-uploader plugin and apply
picgo use uploader
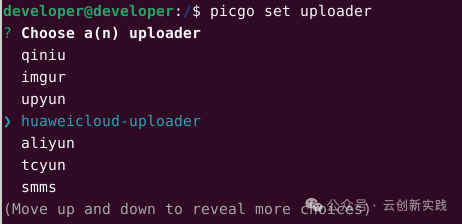
When setting the plugin parameters, you will need to input the following parameters: AccessKey, SecretKey, OBS bucket name, OBS storage region, etc.
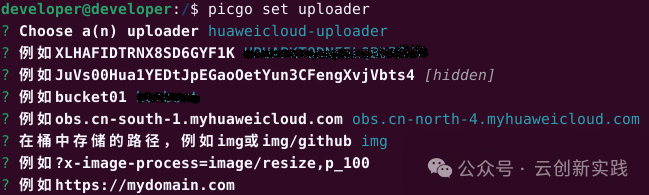
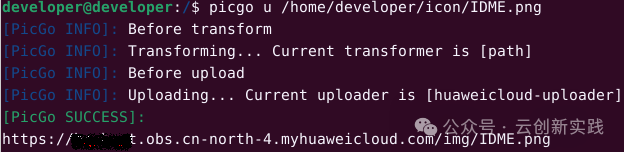
Input “picgo u file location” to test if PicGo is functioning properly.
Installing Pandoc for Easy File Uploads or Downloads in Typora
sudo apt update
sudo apt install pandoc
Open Typora, hover over the “File” menu, click on “Preferences…”, and then click on “Images”.
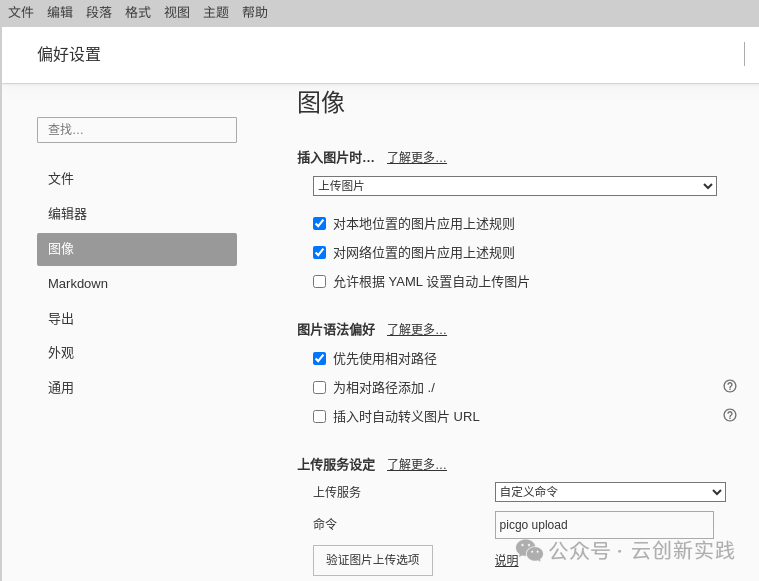
In the “Upload Service” section, select “Custom Command”.
In the “Command” field, input “picgo upload” or “picgo u”.
You can click “Verify Image Upload Options”.
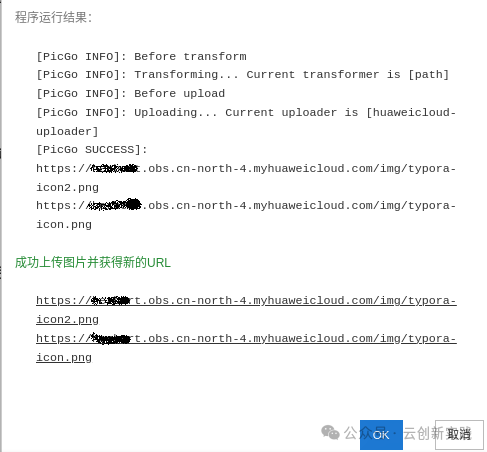
If the verification fails, return to the command line and input “picgo u file location” to test if PicGo is functioning properly.
Now, try pasting an image in Typora, and it will automatically save to your own OBS storage bucket.
