
Click “Read the Original” for more VxWorks resources
Free download of VxWorks technical materials, resources sourced from the internet, copyright belongs to the original authors!
1. Introduction
This article details how to install and configure QT on the VxWorks 6.8 operating system, providing a thorough process with images and text, along with detailed steps for compiling and running QT demo programs on the vxsim virtual machine and actual target boards.
2. Development Environment and Tools
Before installation, prepare the following tools:
| Serial No. | Name | Remarks |
|---|---|---|
| 1 | Qt-vxworks-commercial-src-4.8.3.zip | |
| 2 | MinGW5.1.6 | |
| 3 | Strawberry Perl | |
| 4 | vxWorks6.8 (workbench3.2) | |
| 5 | Win7 (64bit) | Development machine operating system |
Strawberry can be downloaded from the official website (http://strawberryperl.com), and MinGW can also be downloaded from the official website (http://sourceforge.net/projects/mingw/files). QT for VxWorks version and VxWorks 6.8 must be purchased from relevant channels.
3. Development Environment Installation Configuration
3.1. Install Workbench 3.2
Refer to the VxWorks 6.8 installation manual, and follow the instructions step by step, as it is not the focus of this article.
3.2. Install MinGW
Unzip MinGW, double-click MinGW-5.1.6.exe and install with default settings, preferably on the C drive.
3.3. Install Strawberry Perl
Double-click strawberry-perl-5.18.1.1-32bit.exe, install with default settings, preferably on the C drive. After installation, set the environment variables. Add the following to the Path value:
C:\MinGW\bin;C:\strawberry\c\bin;C:\strawberry\perl\site\bin;C:\strawberry\perl\bin
3.4. Install QT 4.8.3
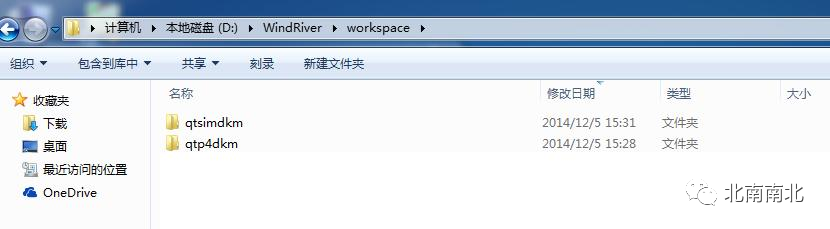
Unzip Qt-vxworks-commercial-src-4.8.3.zip and copy it to the workspace directory in the Wind River Workbench. After copying, rename it; for the vxsim virtual machine, rename it to qtsimdkm, and for the target machine, rename it to qtp4dkm. This prevents different configurations from being introduced during cross-compilation, which could lead to QT program compilation errors.
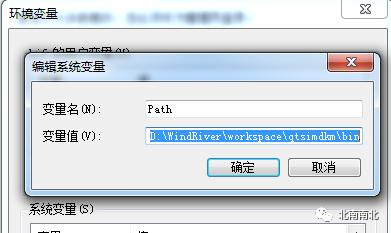
Set environment variables: If developing QT programs in the vxsim virtual machine, point the PATH environment variable to the qtsimdkm directory path, adding D:\WindRiver\workspace\qtsimdkm\bin to the path value.
If developing QT programs on the target machine, point the PATH environment variable to the qtp4dkm directory path, adding D:\WindRiver\workspace\qtp4dkm\bin to the path value.
Note: Do not write both paths at the same time to avoid errors.
4. QT Application Development on vxsim Virtual Machine
4.1. Compile windML Library
Refer to the windML official manual Wind River Media Library SDK Programmer’s Guide, 5.3, and follow the standard steps for configuration and compilation. Note that the CPU selected during configuration must be SIMPC.
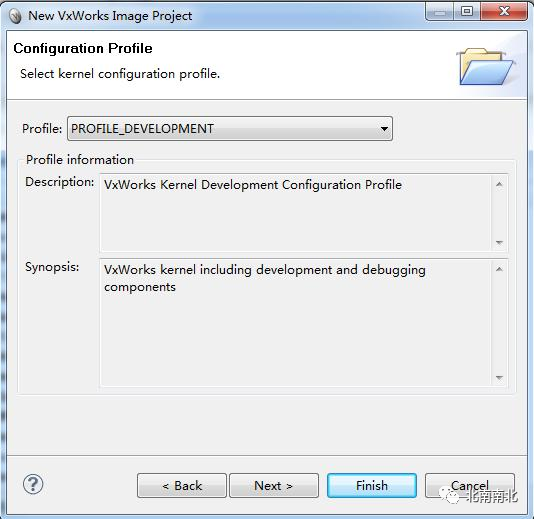
4.2. Create a VxWorks Image
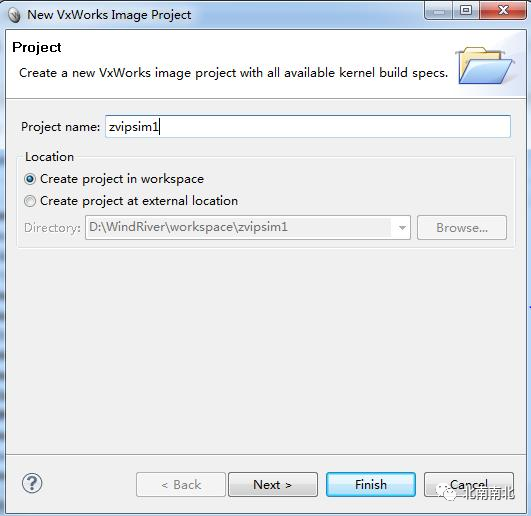
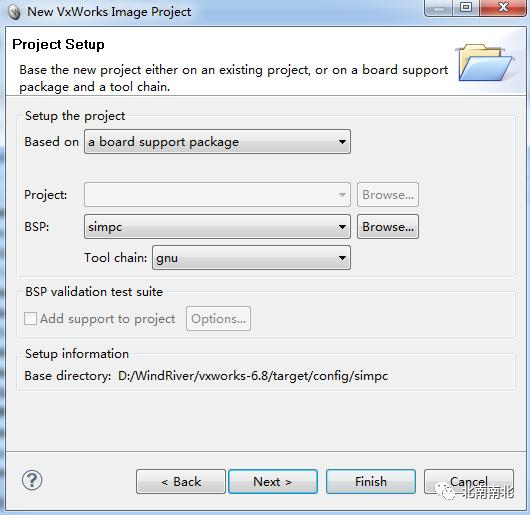
Taking the vxsim virtual machine as an example, in Workbench 3.2, navigate to File->New->VxWorks Image Project to create a zvipsim virtual machine image project.


After the project is established, configure the image by double-clicking Kernel Configuration to open the image configuration package interface.
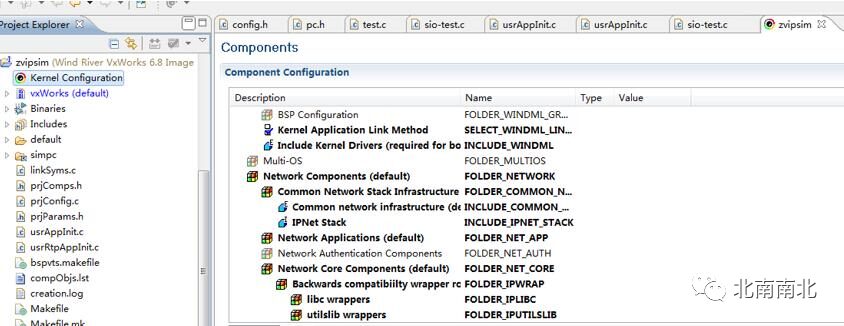
Add the following packages:
INCLUDE_WINDML
INCLUDE_POSIX_ADVISORY_FILE_LOCKING
INCLUDE_POSIX_FTRUNC
INCLUDE_POSIX_MQ
INCLUDE_POSIX_MEM
INCLUDE_POSIX_SCHED
INCLUDE_POSIX_SEM
INCLUDE_POSIX_PTHREADS
INCLUDE_POSIX_PTHREAD_SCHEDULER
NUM_FILES=200
RTP_FD_NUM_MAX=200
INCLUDE_MMAP (Note: This package is not available in VxWorks 6.8)
INCLUDE_POSIX_MAPPED_FILES
INCLUDE_HRFS
INCLUDE_HRFS_FORMAT
HRFS_DEFAULT_MAX_BUFFER=1024
HRFS_DEFAULT_MAX_FILES=200
INCLUDE_XBD_RAMDRV
INCLUDE_XBD_PART_LIB
Then, add the following code to the usrAppInit.c file in the project to create a RAM disk at system startup:
/*for QT */
#include "stdio.h"
#include "hrFsLib.h"
#include "xbdPartition.h"
#include "xbdRamDisk.h"
#define DEVNAME "/tmpram"
/*name of the RAM disk*/
#define BLOCKSIZE 512
#define DISKSIZE (BLOCKSIZE * 10000)
/*end of QT */
void usrAppInit (void)
{
#ifdef USER_APPL_INIT
USER_APPL_INIT;
/* for backwards compatibility */
#endif
/* add application specific code here */
/*for QT -----------------*/
STATUS error;
device_t xbd;
xbd = xbdRamDiskDevCreate(BLOCKSIZE,DISKSIZE,0,DEVNAME);
if(xbd == NULLDEV)
{
printf("**Failed to create RAM disk\n");
return ;
}
printf(" RAM disk created OK\n");
error= hrfsFormat(DEVNAME,DISKSIZE,BLOCKSIZE,1000);
if(error != OK)
{
printf("**failed to format RAM disk, errno=0x%0x\n",error);
return ;
}
printf("RAM create and format OK\n");
/*end of QT ---------------------*/
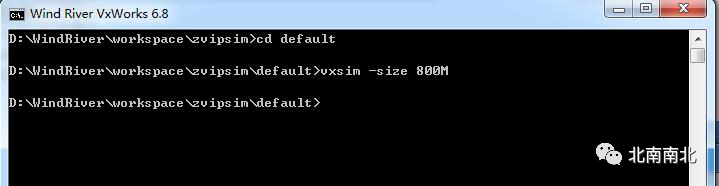
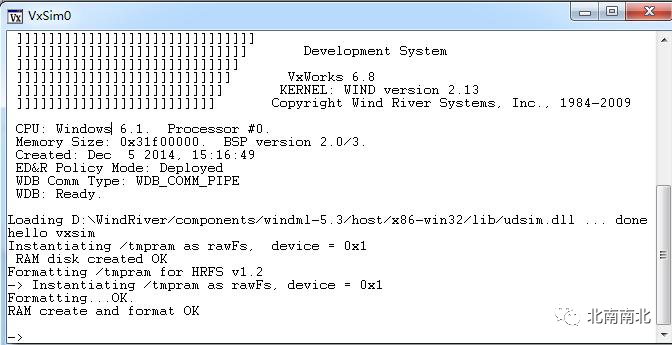
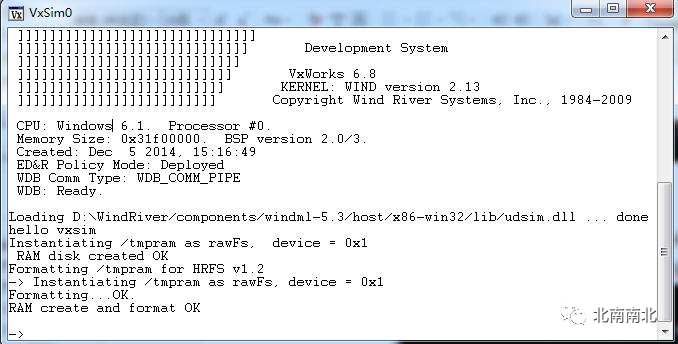
}After completing the above work, compile the image. After successful compilation, enter the zvipsim/default directory using the VxWorks 6.8 development shell and run vxsim –size 800M to start the virtual machine, as shown below.
4.3. Configure QT
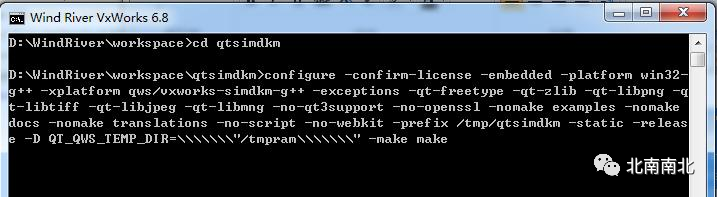
In the VxWorks 6.8 development shell, navigate to the qtsimdkm directory and execute configure. The specific configure configuration content is as follows:
configure -confirm-license -embedded -platform win32-g++ -xplatform qws/vxworks-simdkm-g++ -exceptions -qt-freetype -qt-zlib -qt-libpng -qt-libtiff -qt-libjpeg -qt-libmng -no-qt3support -no-openssl -nomake examples -nomake docs -nomake translations -no-script -no-webkit -prefix /tmp/qtsimdkm -static -release -D QT_QWS_TEMP_DIR=\\\"/tmpram\\\" -make makeThe bold black font in the above configuration content should be modified according to different development environments. The configuration command and results interface are as follows:
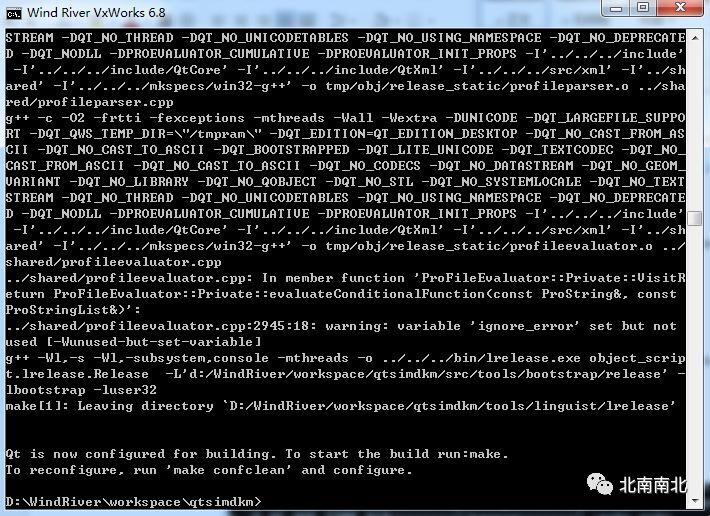
After the configure command is executed successfully, a makefile file will be generated in the qtsimdkm directory. After that, perform the make operation.
In the Start->Search, enter cmd, navigate to the workspace\qtsimdkm directory, and enter the make command to compile, which takes about ten to twenty minutes.
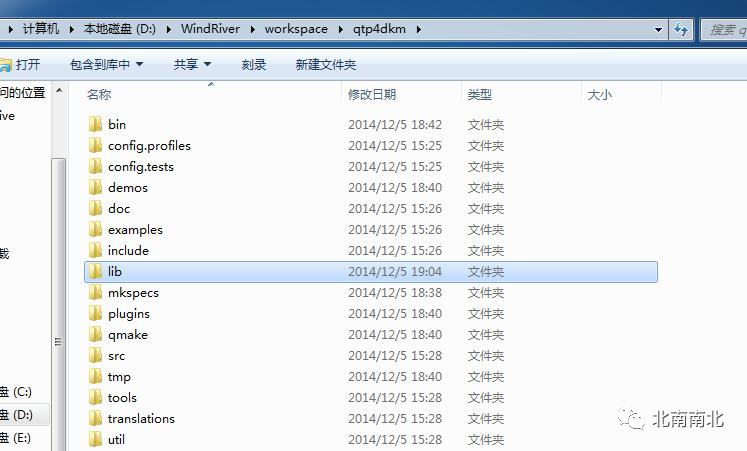
After the make compilation is successful, copy all contents from workspace\qtsimdkm\lib to c:\tmp\qtsimdkm\lib. If in the target environment, copy the compiled lib to the target machine hard disk /ata0a/tmp/qtp4dkm/lib.
4.4. Compile and Run QT Program
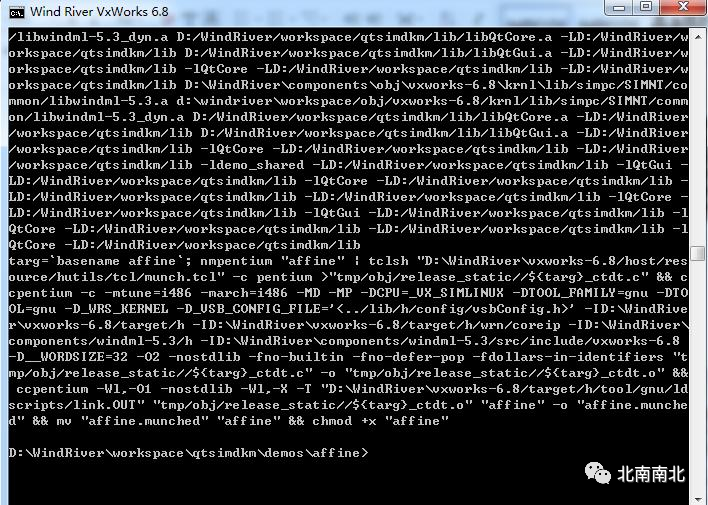
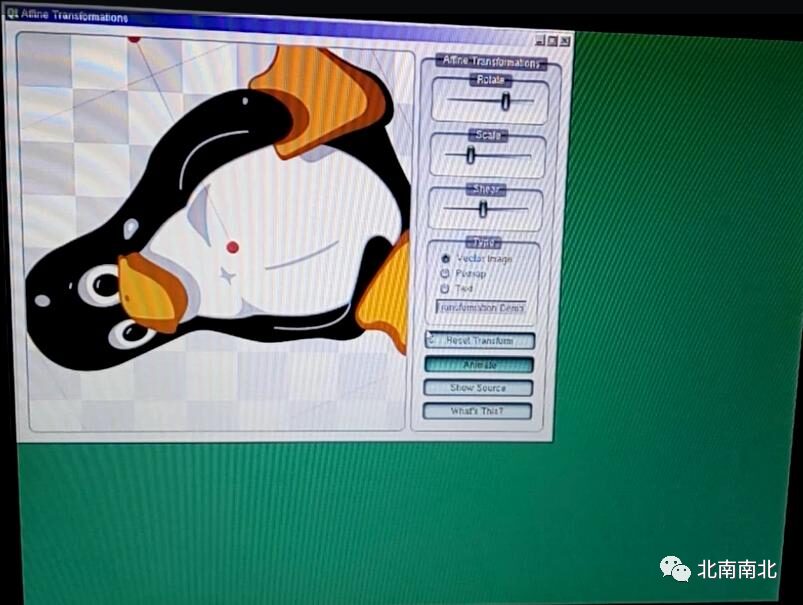
In the VxWorks Development shell, navigate to qtsimdkm\demos\affine, run make to compile the affine program, generating the executable affine.
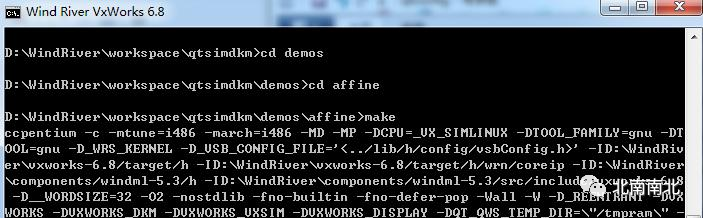
After successful compilation, the prompt is as follows:
Running the QT program:
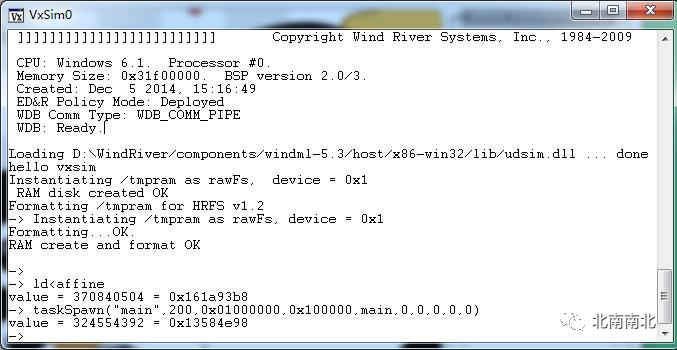
Copy the compiled qtsimdkm\demos\affine\affine file to the virtual machine image directory workspace\zvipsim\default. In the VxWorks Development shell, enter the directory where the vxsim file is located, workspace\zvipsim\default, and execute vxsim –size 800M to start the virtual machine.

In vxsim0, enter ld<affine, press enter to import affine; enter taskSpawn(“main”,200,0×01000000,0x100000,main,0,0,0,0,0) to start the program, and you will see the QT demo program!
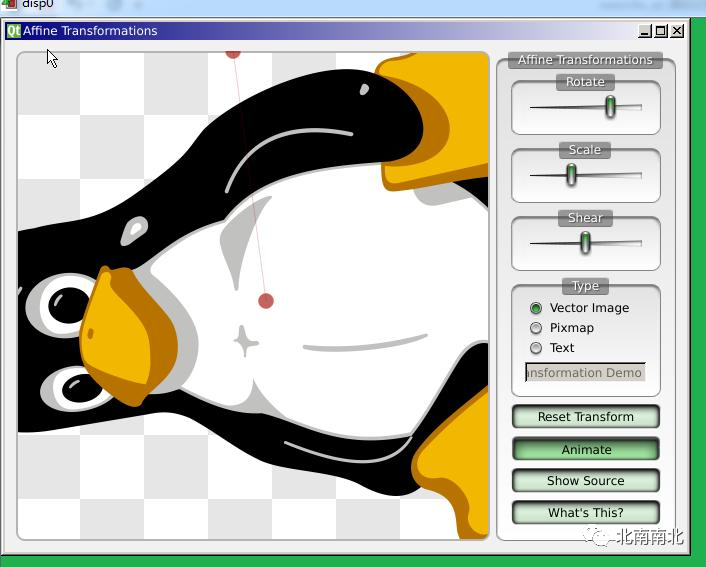
Successfully running QT on VxWorks vxsim virtual machine!
5. QT Application Development on Target Machine
5.1. Compile windML Library
Follow the windML official manual Wind River Media Library SDK Programmer’s Guide, 5.3, and perform configuration and compilation step by step. Note that the CPU selection must match the target board; the CPU tested in this article is Intel ATOM, and the CPU selected is Pentium4.
5.2. Create a VxWorks Image
Follow the steps in section 4.2 to create a VxWorks Image Project. Note to select the actual BSP of the target board when choosing CPU and BSP in the second step. After creating the image, also add the code to create a RAM disk in the usrAppInit.c file as in section 4.2. After establishing the image project, the following packages need to be added:
INCLUDE_WINDML
INCLUDE_POSIX_ADVISORY_FILE_LOCKING
INCLUDE_POSIX_FTRUNC
INCLUDE_POSIX_MQ
INCLUDE_POSIX_MEM
INCLUDE_POSIX_SCHED
INCLUDE_POSIX_SEM
INCLUDE_POSIX_PTHREADS
INCLUDE_POSIX_PTHREAD_SCHEDULER
NUM_FILES=200
RTP_FD_NUM_MAX=200
INCLUDE_MMAP (Note: This package is not available in VxWorks 6.8)
INCLUDE_POSIX_MAPPED_FILES
INCLUDE_HRFS
INCLUDE_HRFS_FORMAT
HRFS_DEFAULT_MAX_BUFFER=1024
HRFS_DEFAULT_MAX_FILES=200
INCLUDE_XBD_RAMDRV
INCLUDE_XBD_PART_LIB
After completing the above work, compile, download to the target board via the network for testing, and it should run successfully.
5.3. Configure QT
In the VxWorks 6.8 development shell, navigate to the qtp4dkm directory and execute configure. The specific configure configuration content is as follows:
configure -confirm-license -embedded -platform win32-g++ -xplatform qws/vxworks-Pentium4dkm-g++ -exceptions -qt-freetype -qt-zlib -qt-libpng -qt-libtiff -qt-libjpeg -qt-libmng -no-qt3support -no-openssl -nomake examples -nomake docs -nomake translations -no-script -no-webkit -prefix /ata0a/tmp/qtp4dkm -static -release -D QT_QWS_TEMP_DIR=\\\"/tmpram\\\" -make makeThe black font in the above configuration content should be modified according to different development environments. The configure command is as follows:

After successful configuration, the result is as follows, and a makefile file will be generated in the qtp4dkm directory.
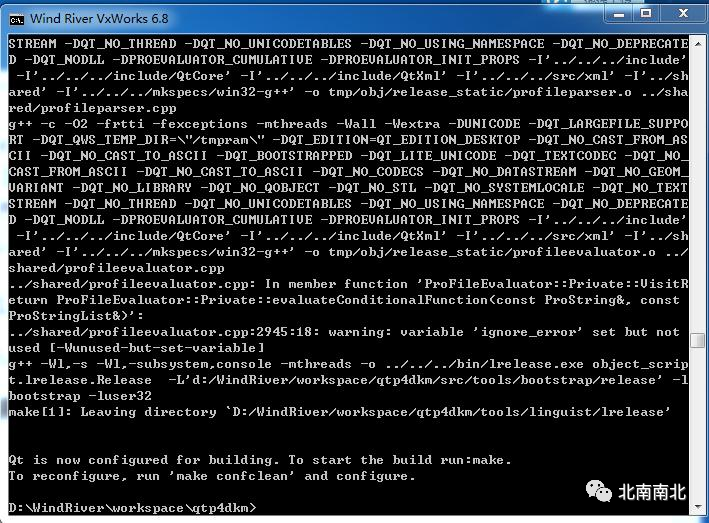
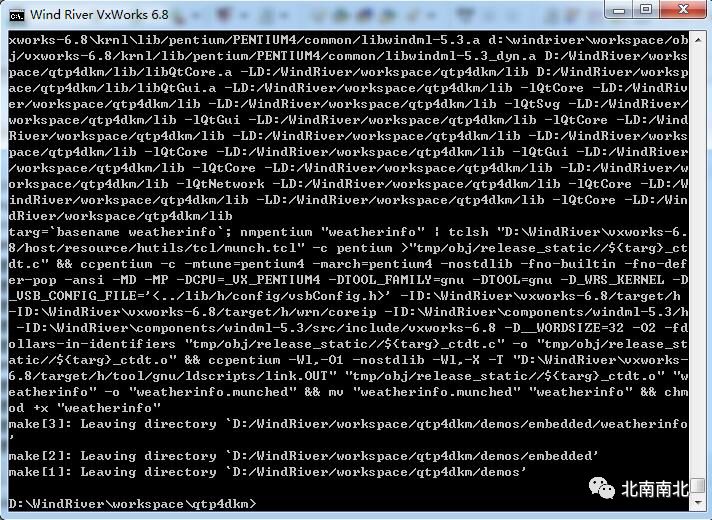
Open the command line, enter cmd, navigate to the workspace\qtp4dkm directory, and use the make command to compile QT, which takes about ten to twenty minutes. After successful compilation, the prompt is as follows:
Then copy the compiled lib to the target machine hard disk /ata0a/tmp/qtp4dkm/lib, and the configuration is complete.
After uploading the lib library files to the target machine hard disk, you can start testing the QT program. Start the target machine via the network, establish a remote connection on the Workbench, and download the application program D:\WindRiver\workspace\qtp4dkm\demos\affine\affine to the target machine.
After downloading the program, enter the startup command taskSpawn(“main”,200,0×01000000,0x100000,main,0,0,0,0,0) on the debugging machine shell or on the target machine to start the QT program.

For BSP, please follow the WeChat public account: Beinan Nanbei