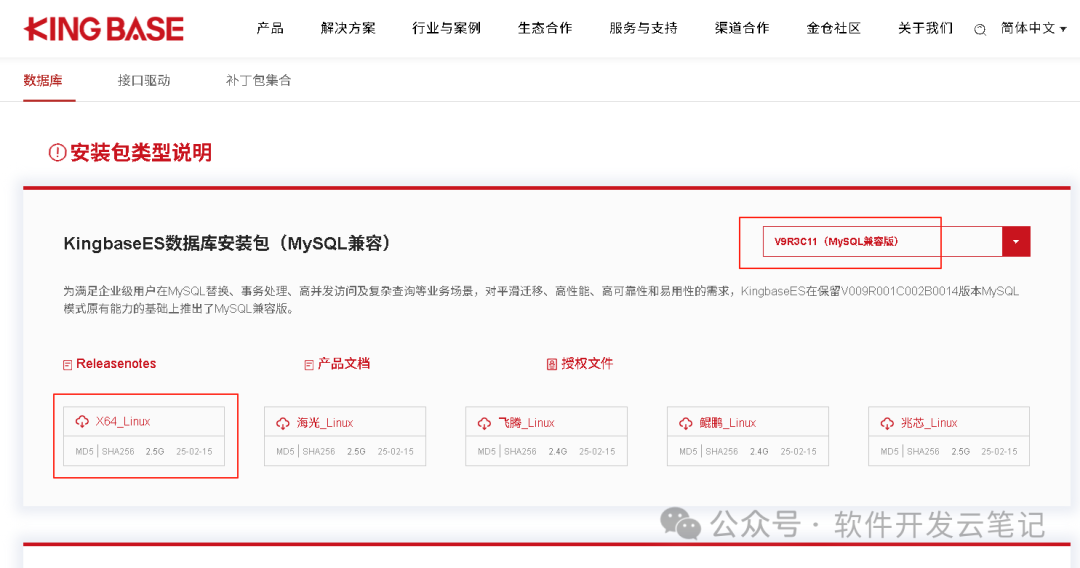
1. Download the installation package:
Official download address for Kingbase Database:
https://www.kingbase.com.cn/download.html
Download the corresponding version based on your server’s system version.
2. Check hardware configuration. Memory should be above 512M, and there should be more than 11G of free space on the hard drive. You can check the relevant configuration using the commands (free -m) and (df -hl). As shown in the figure:
3. Configure kernel parametersOfficial note: To avoid issues during the installation and use of KingbaseES, it is necessary to check and set kernel parameters. The commands to check the kernel parameters are as follows:
|
Parameter |
Check Command |
|
semmsl, semmns, semopm, and semmni |
/sbin/sysctl -a | grep sem |
|
shmall, shmmax, and shmmni |
/sbin/sysctl -a | grep shm |
|
file-max |
/sbin/sysctl -a | grep file-max |
|
ip_local_port_range |
/sbin/sysctl -a | grep ip_local_port_range |
|
rmem_default |
/sbin/sysctl -a | grep rmem_default |
|
rmem_max |
/sbin/sysctl -a | grep rmem_max |
|
wmem_default |
/sbin/sysctl -a | grep wmem_default |
|
wmem_max |
/sbin/sysctl -a | grep wmem_max |
|
aio-max-nr |
/sbin/sysctl -a | grep aio-max-nr |
|
tcp_wmem |
/sbin/sysctl -a | grep tcp_wmem |
|
tcp_rmem |
/sbin/sysctl -a | grep tcp_rmem |
Reference values for kernel parameters are as follows:
|
Parameter |
Reference Value |
Location |
|
semmsl |
250 |
/proc/sys/kernel/sem |
|
semmns |
32000 |
|
|
semopm |
100 |
|
|
semmni |
128 |
|
|
shmall |
2097152 |
/proc/sys/kernel/shmall |
|
shmmax |
Minimum: 536870912 Maximum: Physical memory value minus 1 byte Recommendation: Greater than half of physical memory |
/proc/sys/kernel/shmmax |
|
shmmni |
4096 |
/proc/sys/kernel/shmmni |
|
file-max |
6815744 |
/proc/sys/fs/file-max |
|
aio-max-nr |
1048576 Note: This parameter limits the number of concurrent requests. It should be set to avoid failures in the IO subsystem. |
/proc/sys/fs/aio-max-nr |
|
ip_local_port_range |
Minimum: 9000 Maximum: 65500 |
/proc/sys/net/ipv4/ip_local_port_range |
|
rmem_default |
262144 |
/proc/sys/net/core/rmem_default |
|
rmem_max |
4194304 |
/proc/sys/net/core/rmem_max |
|
wmem_default |
262144 |
/proc/sys/net/core/wmem_default |
|
wmem_max |
1048576 |
/proc/sys/net/core/wmem_max |
If the kernel parameters do not match the reference values, you can modify the parameters by editing the /etc/sysctl.conf file as follows:
fs.aio-max-nr= 1048576
fs.file-max= 6815744
kernel.shmall= 2097152
kernel.shmmax= 4294967295
kernel.shmmni= 4096
kernel.sem= 250 32000 100 128
net.ipv4.ip_local_port_range= 9000 65500
net.core.rmem_default= 262144
net.core.rmem_max= 4194304
net.core.wmem_default= 262144
net.core.wmem_max= 1048576
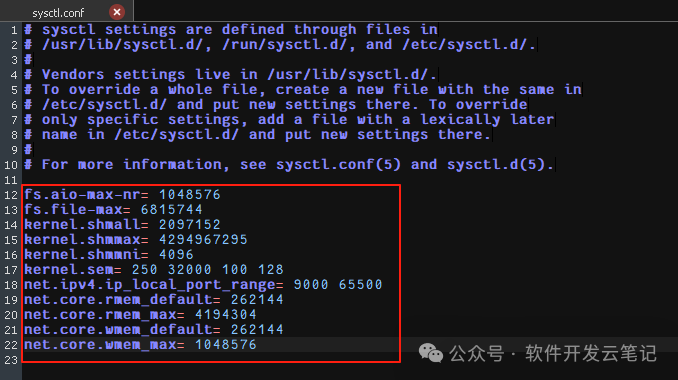
After modifying the kernel parameters, restart the Linux system and check if the modifications are correct by entering the following commands:
/sbin/sysctl -p
/sbin/sysctl -a
4. Resource usage parameter configuration
The Linux resource limit configuration file is /etc/security/limits.conf. Limiting the number of resources that users can use is very important for system stability. Adjusting resource limits can improve system performance. The limits.conf file is as follows:
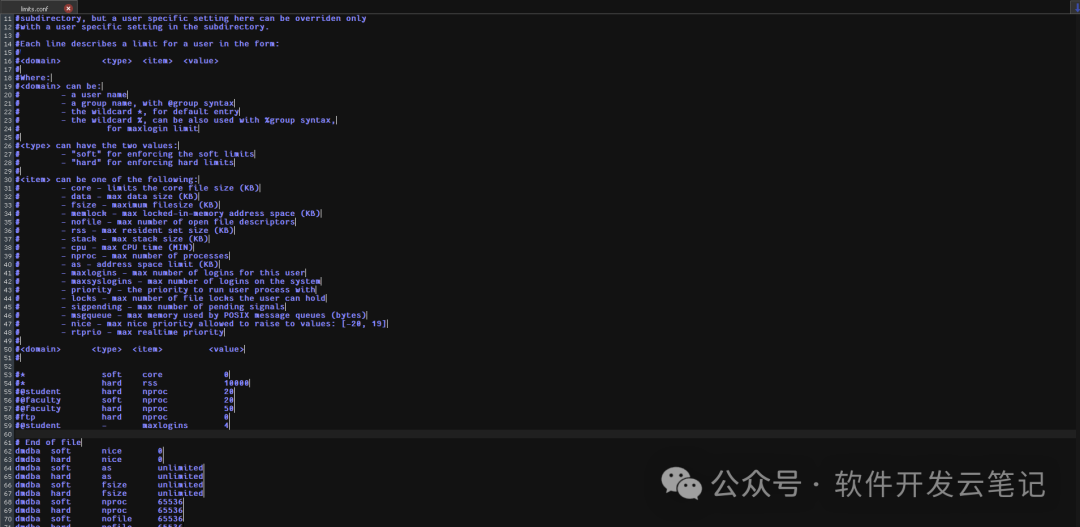
Where soft is a warning value, and hard is the actual threshold. If exceeded, the system will report an error. Generally, both are set to the same value. It is usually sufficient to keep the default values from the system installation. Configurable resources include the following types:
|
Resource Item |
Meaning |
|
core |
Kernel file size (KB) |
|
data |
Maximum data size (KB) |
|
fsize |
Maximum file size (KB) |
|
memlock |
Maximum locked memory address space (KB) |
|
nofile |
Maximum number of open file descriptors |
|
rss |
Maximum persistent set size (KB) |
|
stack |
Maximum stack size (KB) |
|
cpu |
Maximum CPU time (minutes) |
|
noproc |
Maximum number of processes |
|
as |
Address space limit (KB) |
|
maxlogins |
Maximum number of logins per user |
|
maxsyslogins |
Maximum number of logins on the system |
|
priority |
Priority of running user processes |
|
locks |
Maximum number of file locks a user can hold |
|
sigpending |
Maximum number of pending signals |
|
msgqueue |
Maximum memory used by POSIX message queues (bytes) |
|
nice |
Maximum nice priority that can be raised |
|
rtprio |
Maximum real-time priority |
Parameters nofile, noproc, and core can be modified to the following values:
# * indicates all users, can set only for root and kingbase users
* soft nofile 65536
# Note: The hard limit for nofile cannot exceed /proc/sys/fs/nr_open, otherwise, you will not be able to log in normally after logging out
* hard nofile 65535
* soft nproc 65536
* hard nproc 65535
# unlimited indicates no limit
* soft core unlimited
* hard core unlimited
5. Remove the RemoveIPC parameter
This is a feature introduced in the systemd-logind service, which deletes all related IPC objects when a user logs out of the system. This feature is controlled by the RemoveIPC parameter in the /etc/systemd/logind.conf file. Some operating systems have this enabled by default, which can cause issues such as signal loss in programs (only Red Hat 7 and above and some special domestic Linux versions need to be modified; check if this is set to yes by default). Set RemoveIPC=no. After setting, restart the service:
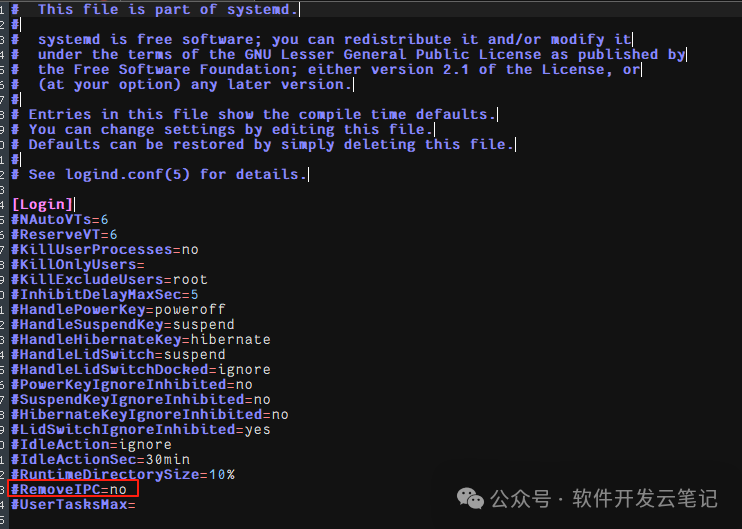
systemctl daemon-reload
systemctl restart systemd-logind.service
6. Create an installation user
Before the official installation, create a new user named kingbase as a dedicated system user for KingbaseES (Creating a dedicated user can mitigate risks. If there are vulnerabilities in the database or the process is attacked, it can prevent the attacker from compromising the entire system).Additionally, the installation user must have “read”, “write”, and “execute” permissions for the installation path.
(1) Create the user by entering the command (useradd -m kingbase), as shown below:
 -m: Automatically create the user’s home directory (default is /home/kingbase)
(2) Change the user password by entering the command (passwd kingbase), then enter the password twice. As shown below:

7. Installation Directory
(1) Default installation directory
The default installation directory for KingbaseES is /opt/Kingbase/ES/V9. If it does not exist, use the root user to create this directory first and grant the kingbase user read and write permissions for this directory. Enter the following commands, as shown below:
mkdir /opt/Kingbase
mkdir /opt/Kingbase/ES
mkdir /opt/Kingbase/ES/V9
chmod o+rwx /opt/Kingbase/ES/V9

(2) Custom installation directory
You can customize the installation path. For example, if the custom installation path is /home/kingbase/kdb, create the directory using the kingbase user by entering the following commands, as shown below:
su – kingbase
mkdir /home/kingbase/kdb

8. Data Directory
The data directory is where the data files are stored in KingbaseES, and by default, it is located in the data directory under the installation directory. It can also be set separately from the installation directory. You can set the data directory path based on the data volume of the business system, for example, initializing the data directory on the local hard drive or mounting it on a disk array. Enter the command (mkdir /opt/Kingbase/ES/V9/data) to create the data directory, as shown below:

This step can be skipped; you can create the data directory when prompted during the installation process.
9. Install the Database
(1) Mount the installation package
The installation package in ISO format needs to be mounted before use. Mounting the ISO file requires root user privileges. For example, if the mount directory is the same level as the ISO file, run the following command to mount it, as shown below:
mount KingbaseES_V009R003C011_Lin64_install.iso ./KingbaseESV9

After mounting, you can see the setup directory and the setup.sh script in the directory.
(2) Unmount the installation package
Enter the command (umount ./KingbaseESV9) to unmount.
(3) Command line installation
Start the installation program. The command line installation supports prompts in both Chinese and English. The prompts will display in the corresponding language based on the operating system’s language settings. To check the operating system’s language settings, enter the command (
echo $LANG), as shown below:

If the system displays a value containing “zh_CN”, it indicates the Chinese language, and the installation program will display content in Chinese. Otherwise, enter the command (export LANG=zh_CN.UTF-8) to change the language setting to Chinese.
Next, begin the command line installation process. Navigate to the directory where the setup.sh script is located and enter the command (sh setup.sh -i console) as the kingbase user. After executing the command, the installation program will start, as shown below:

-
Introduction, press <Enter> to proceed to the next step, as shown below:
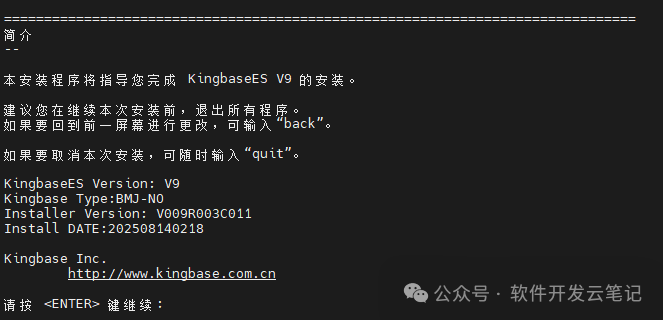
-
License agreement, press “Y” to accept the terms of this agreement, as shown below:
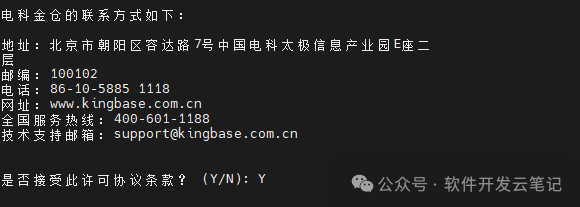
-
Installation set, select the installation set. The default value is a full installation. Press <Enter> to proceed to the next step, as shown below:
Full installation: Includes database server, high availability components, interfaces, database development management tools, database migration tools, and database deployment tools.
Client installation: Includes interfaces, database development management tools, database migration tools, and database deployment tools.
Custom installation: Freely select from all components including database server, high availability components, interfaces, database development management tools, database migration tools, and database deployment tools.
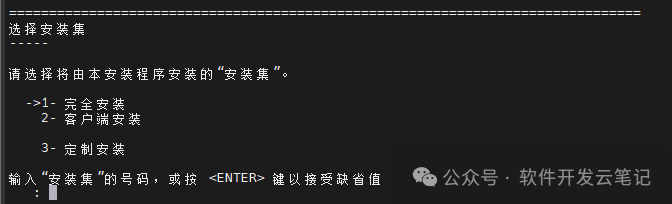
-
Authorization file, select the authorization file. If there is no authorization file, press <Enter> to proceed to the next step. The default will select the applicable version authorization, as shown below:

-
Select installation folder, enter the directory, and press <Enter> to proceed to the next step. The default selection is the default directory (/opt/Kingbase/ES/V9), as shown below:

If there are files in the directory, press <Enter> to confirm the overwrite. The default value is confirmation, as shown below:
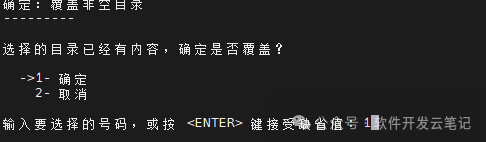
-
Pre-installation summary, displays a summary of the product installation. Press <Enter> to proceed to the next step, as shown below:
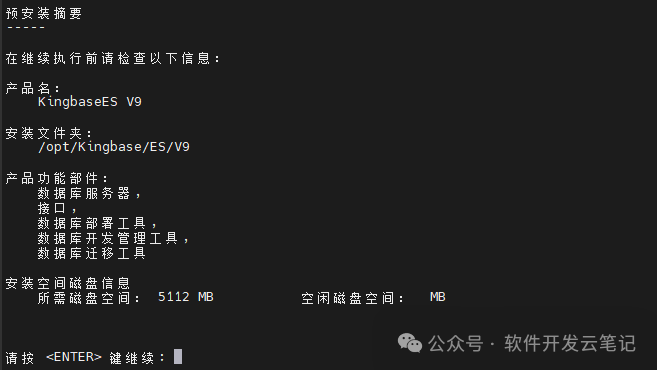
-
Installation confirmation, press <Enter> to proceed to the next step, as shown below:
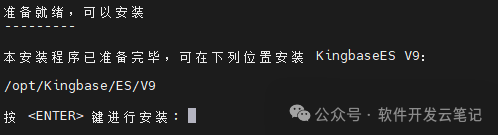
-
Database data directory, select the storage directory for the database data. The default is the data directory under the database installation directory. Press <Enter> to proceed to the next step, as shown below:
 Initialize database parameters, the following are the descriptions of each parameter:
-
The default port is: 54321 (customizable)
-
The default account is: system (customizable)
-
Password (customizable)
-
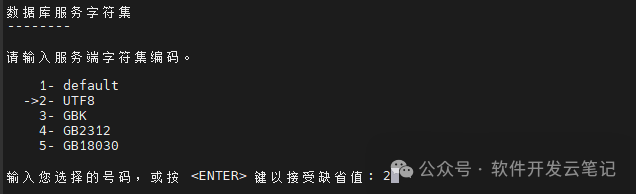
The default character set encoding is: GBK (options: default, UTF8, GB2312, GB18030)
-
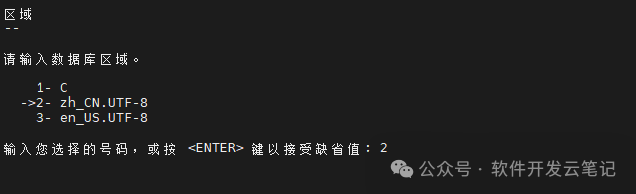
Locale, optional values will change with character set encoding options.
(a) When the character set encoding is default, the default locale value is: default (optional C)
(b) When the character set encoding is UTF8, the default locale value is: zh_CN.UTF-8 (optional en_US.UTF-8, C)
(c) When the character set encoding is GBK, the default locale value is: zh_CN.GBK (optional C)
(d) When the character set encoding is GB2312, the default locale value is: zh_CN.GB2312 (optional C)
(e) When the character set encoding is GB18030, the default locale value is: zh_CN.GB18030 (optional C)
-
The default case sensitivity is: yes (optional no)
-
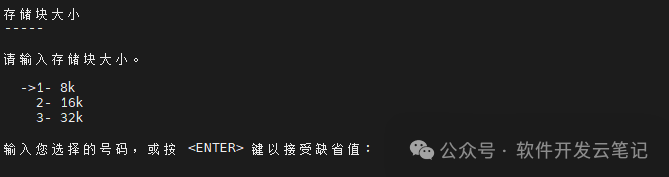
The default block size is: 8k (options: 16k, 32k)
-
The default authentication method is scram-sha-256 (options: scram-sm3, sm4, sm3)
-
Custom parameters (customizable), you can freely enter any value as initialization parameters for the database
Port, as shown below:

Account, as shown below:
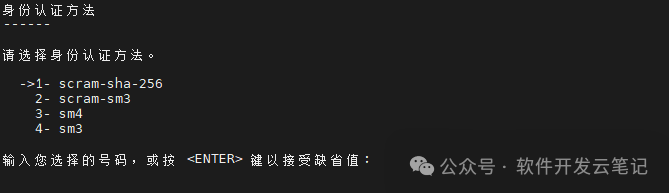
Password, as shown below:
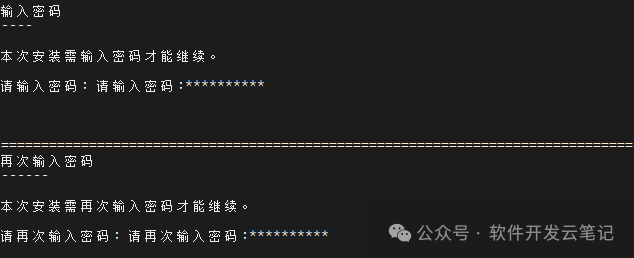
Character set, as shown below:
Locale, as shown below:
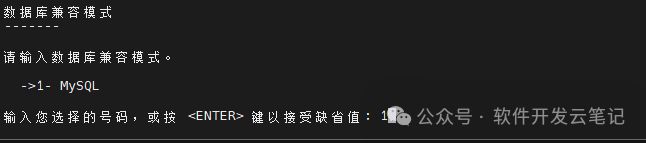
Compatibility mode, as shown below:
Case sensitivity, as shown below:

Storage block, as shown below:
Authentication method, as shown below:
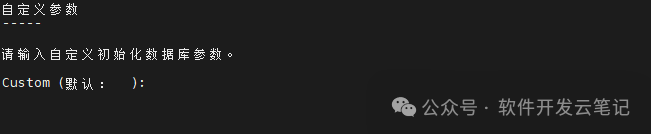
Custom parameters, as shown below:
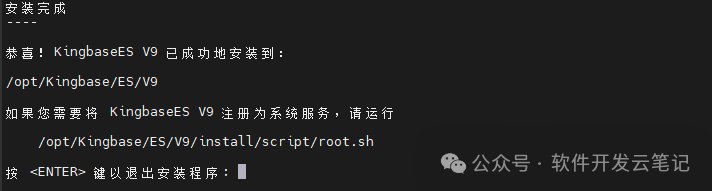
Finally, press <Enter> to exit the installation.
The database installation is now complete.
10. Register as a system serviceAfter installing and initializing the database, execute the root.sh script to register and start the database service. The steps are as follows:(1) Open a new terminal(2) Switch to the root user(3) Run${installation_directory}/install/script/root.sh .
After successful registration, if you want to start or stop the database service, navigate to the ${installation_directory}/Server/bin directory and execute the following commands:
(1) Start the service
sys_ctl -w start -D ${data_directory} -l “${data_directory}/sys_log/startup.log”
(2) Stop the service
sys_ctl stop -m fast -w -D ${data_directory}