Click the "Little White Learns Vision" above, choose to add "star" or "top"
Heavy dry goods, delivered at the first time
Editor: Chinese Sister | Source: segmentfault.com/a/1190000021143144
1. Introduction
During this period, I came across something called Raspberry Pi. After a preliminary understanding, I found it very interesting, so I wanted to record the whole process.
2. What is Raspberry Pi?
Raspberry Pi (Chinese name: 树莓派, abbreviated as RPi, (or RasPi / RPI) is designed for computer programming education), a microcomputer the size of a credit card, with a system based on Linux. With the release of Windows 10 IoT, we can also run Windows on Raspberry Pi. Since its launch, it has been sought after by many computer enthusiasts and makers, and it was once difficult to obtain a “Pi”. Don’t be fooled by its “small” appearance; its internal capabilities are very powerful, with functions such as video and audio, making it a small but mighty device.
1. My Understanding
In my words, Raspberry Pi is a host that you can connect to a monitor, keyboard, mouse, USB drive, and other peripherals. Because of its small size and many serial and external ports, it can directly call many low-level hardware.
2. Models on the Market
The most common model on the market is the 3B+ version, and a search for Raspberry Pi on Taobao yields a lot of results. The price for the bare board (without any peripherals) is around 230+, which is a bit expensive and exceeds my budget, so I continued to look for cheaper options and finally found a Raspberry Pi for over 100.
3. Raspberry Pi Zero W
Raspberry Pi Zero W is a mini version of the Raspberry Pi, with a size only 1/3 of the 3B+. When you actually get it, you will find it really super small and super cute. Here is a picture of my actual product, so you can see how mini it really is.
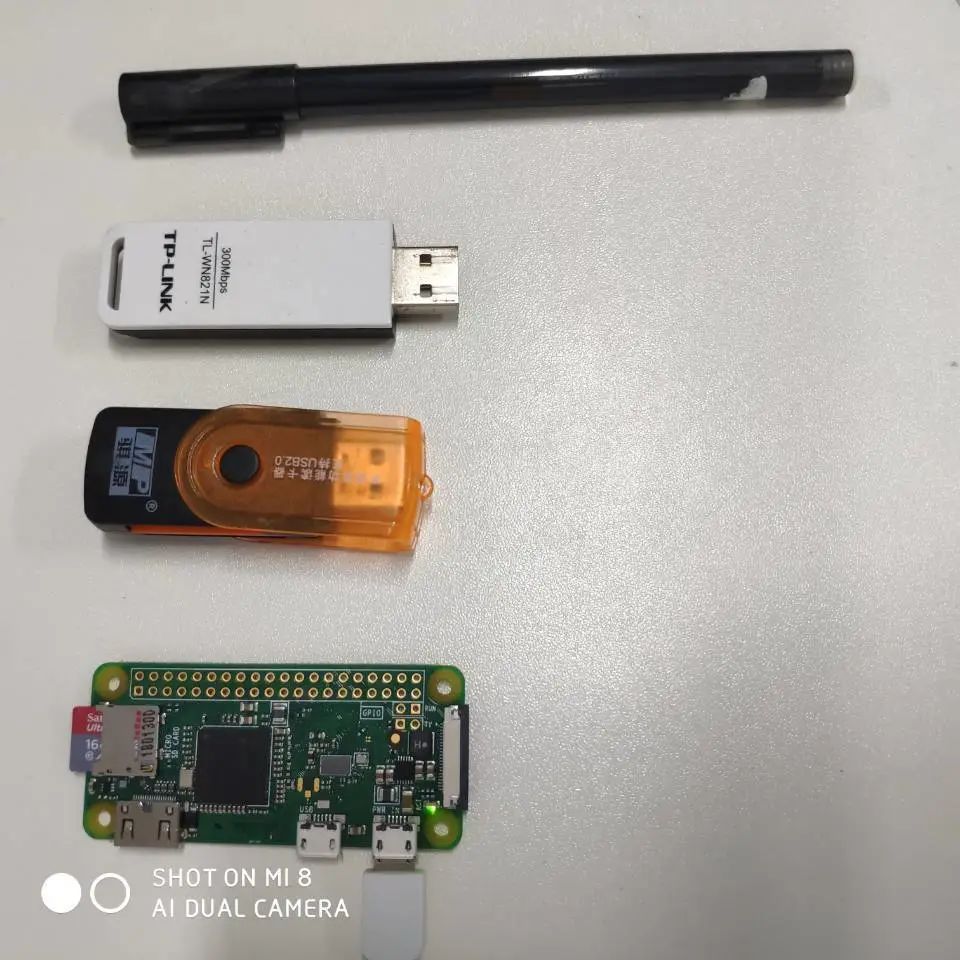
You can see that at the top is a regular black pen, followed by a plug-and-play external WiFi network card, then a USB card reader, and at the bottom is our protagonist today, the Zero W. It is really super small, isn’t it? It perfectly embodies the saying “small but complete”.
The main parameters of the Zero W are as follows:
-
BCM2835 processor, 1GHz clock speed, 512MB RAM -
BCM43438 WiFi / BT chip -
micro-USB power interface -
micro-USB OTG interface -
miniHDMI port -
Composite video and reset expansion interface -
Fragile CSI camera interface -
micro-SD card slot for the operating system -
40-pin GPIO expansion interface -
Size: 65mm*30mm
Don’t be fooled by its single-core CPU and 512MB RAM; you might think it can’t do much, but in fact, its performance is quite good, and running a website is really a small case.
4. More Raspberry Pi
For more Raspberry Pi models or usage tutorials, you can visit the Raspberry Pi Lab website, which has rich resources.
3. Installing the System on Raspberry Pi Zero W
1. Preparation
You may need to prepare the following items:
-
16GB or 32GB SanDisk memory card (note that it is the small type used in phones) -
A very ordinary USB Android data cable (not type-C) -
USB drive formatting tool (recommended using SDFormatter) -
System burning tool (Win32DiskImager) -
Raspberry Pi system (can be downloaded from the official website)
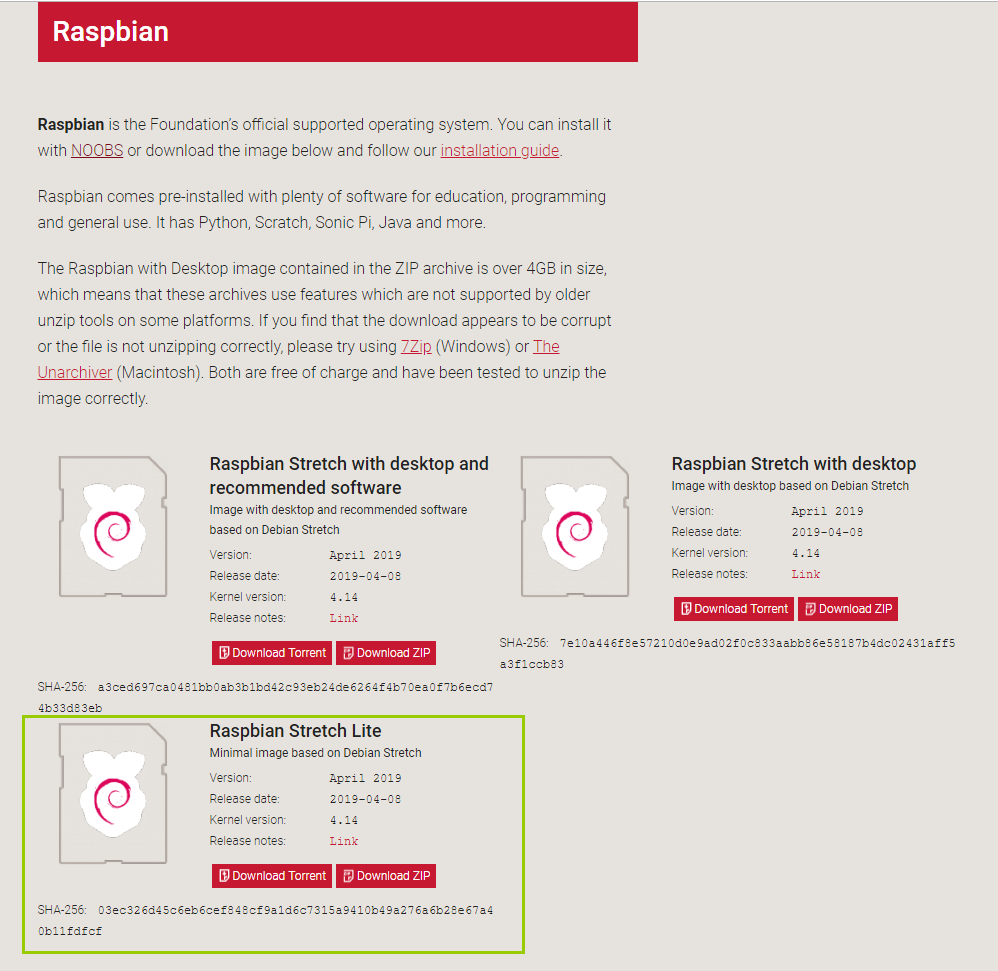
I am using the Raspbian Stretch Lite system image. This system is officially produced, and the lite version is without a desktop, only a black console. The advantage is that it is small in size, saving performance and memory.
Versions with “desktop” in the name have a desktop UI, which may be more user-friendly for those unfamiliar with Linux systems, but they are larger and consume more resources.
2. Step One: Download the System Image
After downloading the required system image, as shown in the figure below:
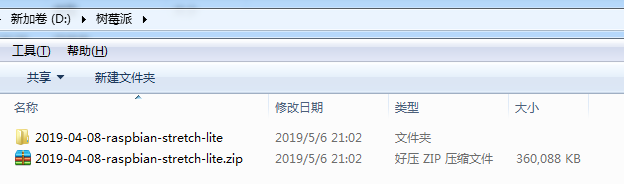
At first, there is only a zip compressed file, about 360MB in size. You need to unzip it to get the folder shown in the picture.
Awesome! Must-have N open-source projects for taking private jobs! Hurry and bookmark it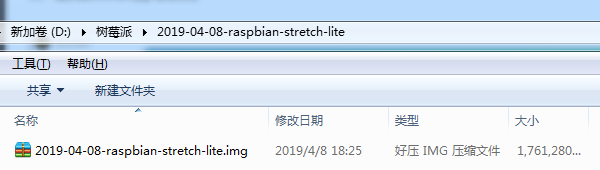
Then enter the folder to find an img image, about 1.7GB in size.
PS: This is the official Raspbian image. If it’s another third-party image, the downloaded compressed file may not be an img image after unzipping. In this case, please search for a solution on Baidu.
3. Use Win32DiskImager to Write the Image to the Memory Card
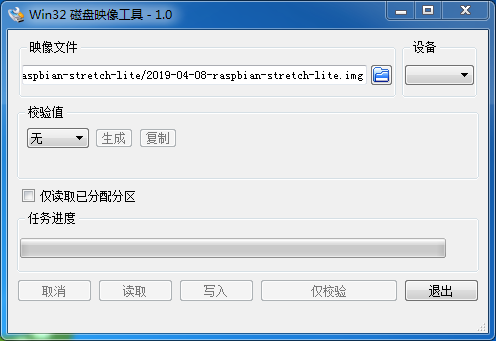
Insert the memory card into the card reader, then connect it to the computer. Open the Win32DiskImager software, select the img image, choose your USB drive, and then click write. After writing is complete, a success message will pop up.
PS: I did not select a device in the picture above because the card reader was not plugged in; it was just a demonstration.
4. Modify the Boot Partition Files
Don’t rush to remove the card reader. At this point, we can see that the USB drive only has a partition named boot, which may only be about 40MB in size. Don’t worry because Windows does not recognize other partitions of the Linux system on the memory card.
4.1 Create an SSH File
Since our Zero W has a mini HDMI interface, but I don’t need a screen, I need to use SSH to connect to the system in Zero W, so I need to enable SSH at first boot. We enter the boot partition and then create a file named ssh (note: do not add a file extension! Also, do not write anything inside!).
4.2 Create a wpa_supplicant.conf File
Since SSH connection requires an IP address, we need to make Zero W automatically connect to WiFi at first boot so that it is in the same local area network as our computer. This way, we can connect to the system in Zero W via SSH. Similarly, in the boot partition, create a file named wpa_supplicant.conf and write the following content inside:
country=CN
ctrl_interface=DIR=/var/run/wpa_supplicant GROUP=netdev
update_config=1

network={
ssid="Your WiFi Name"
psk="Your WiFi Password"
}
5. Assemble Our Minimal Host and Connect
Take the memory card out of the card reader and insert it into the Zero W. Use a USB Android data cable to connect the power (5V1A). Wait a few minutes; during this time, the indicator light on our Zero W will keep flashing, which is normal. When the indicator light is steady, we go to the router to check the IP address of the Raspberry Pi.

We can see that the IP of our Zero W is 192.168.0.104. Then use an SSH connection tool (recommended using PuTTY) to connect to the Raspberry Pi. The initial account is pi, and the password is raspberry.
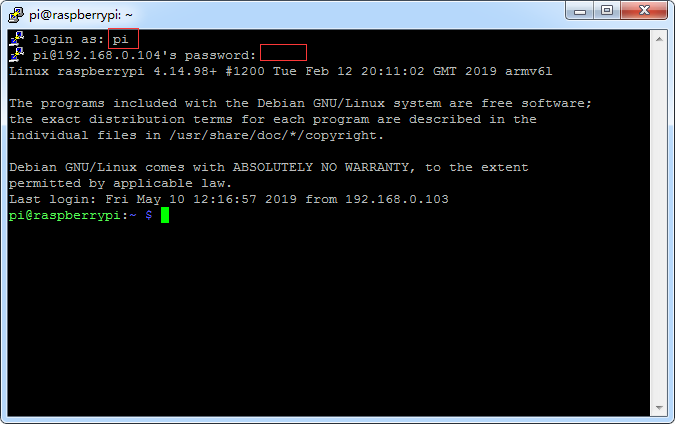
Connection successful, as shown in the figure above. This way, our system is correctly installed.
PS: If using a phone to turn on a hotspot as a router, we can download an app called Android Terminal, then enter the command
ip neighto find the IP information of devices connected to the phone.
6. Optimize Our Raspberry Pi System
6.1 Modify the Source
Because the foreign source has a very slow connection speed from within China, we need to change to a domestic source. I modified it to the source from USTC.
6.1.1 Modify the sources.list File
sudo nano /etc/apt/sources.list
-- Comment out other contents and add the following:
deb http://mirrors.ustc.edu.cn/raspbian/raspbian/raspbian stretch main contrib non-free rpi
6.1.2 Modify the raspi.list File
sudo nano /etc/apt/sources.list.d/raspi.list
-- Comment out other contents and add the following:
deb http://mirrors.ustc.edu.cn/archive.raspberrypi.org/debian stretch main ui
6.1.3 Execute Update
sudo apt-get update
sudo apt-get upgrade
6.2 Modify Time Zone
sudo dpkg-reconfigure tzdataFind Asia and then select Shanghai. Additionally, search for the public account Linux Chinese Community and reply “Private Kitchen” to get a surprise gift package.
6.3 Enable SSH on Boot
First method:
sudo raspi-configEnter and find the interfacing option, then find SSH, press enter to enable it.
Second method: After starting the SSH service in the terminal command line, the SSH service is off by default when the system restarts or shuts down, and it still needs to be started manually. To make it easier, we can set the SSH service to start automatically on boot. Open the /etc/rc.local file and add: /etc/init.d/ssh start before the exit 0 statement.
It is recommended to try both methods; for me, both worked.
7. Install Nginx
# Install
sudo apt-get install nginx
# Start
sudo /etc/init.d/nginx start
# Restart
sudo /etc/init.d/nginx restart
# Stop
sudo /etc/init.d/nginx stop
Open the browser and visit 192.168.0.104 (your Raspberry Pi IP address), and you should see the Nginx page, indicating that it has been installed. I uploaded my blog, as shown in the figure below:
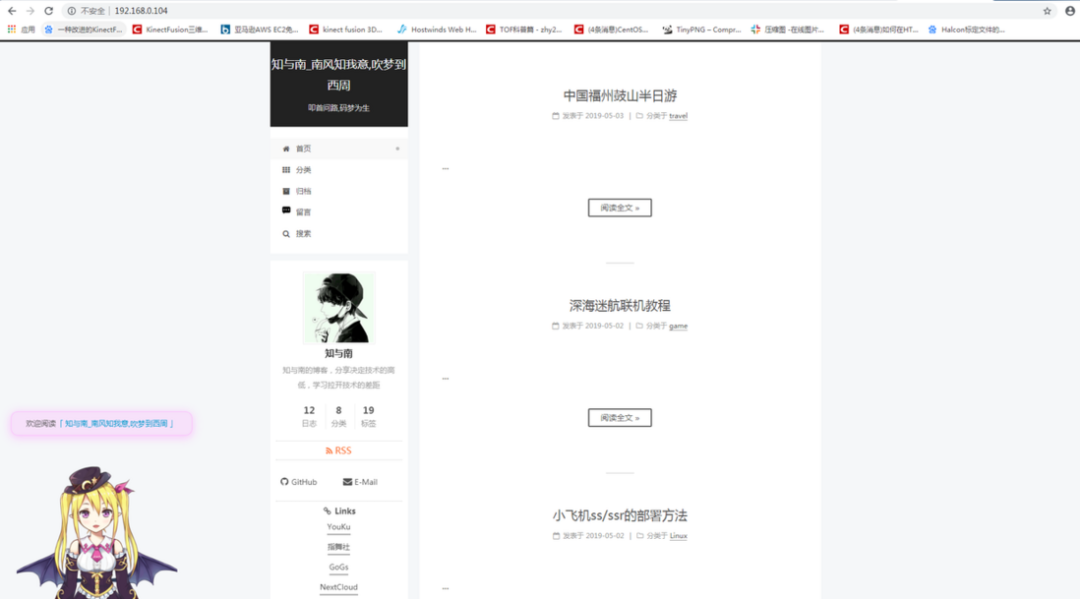
The page can be seen normally, but this can only be accessed in the local network (LAN). What if I want everyone to access it?
8. NAT Traversal
NAT traversal means penetrating the local network (LAN) web applications to the public network through NAT, allowing others to access them.
NAT traversal is mainly done by ngrok and frp, both of which are very useful. The free versions of ngrok available in China are ittun, sunny, and natapp. The first two allow custom domain names, while the latter requires a VIP version to customize domain names.
I have tried all three, and I found that the sunny ARM version of the ngrok client does not run on my Raspberry Pi, but ittun and natapp versions of ngrok work. Since I need to customize the domain name, I am using the ittun ngrok_arm version.
The usage methods are detailed on the official websites of these three, so please check them yourself.
This is a screenshot during normal operation:
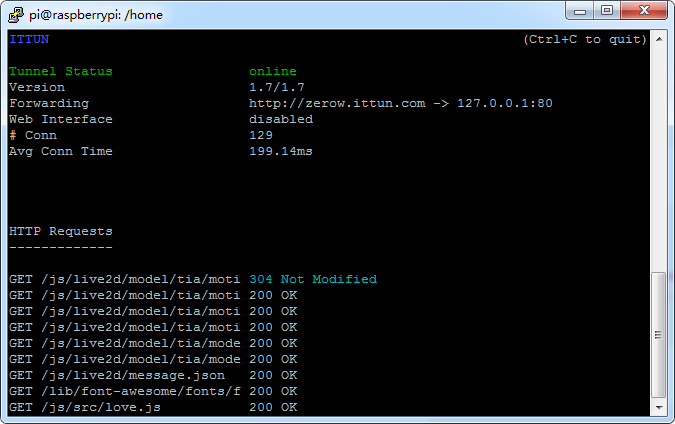
Since ngrok needs to run in the background, I used a screen session to keep it running in the background. However, I have not yet implemented auto-starting it; in case of a power outage or disconnection, I have to manually run ngrok again, which is currently an unresolved pain point.
9. More
Raspberry Pi can be used not only to run a website but also has many other functions waiting for your development. You can check out the Raspberry Pi Lab, where many experts have written many practical tutorials.
The status information of my Zero W is as follows:
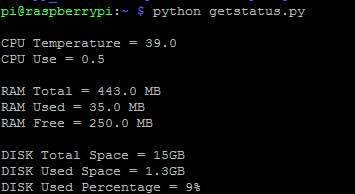
I have started an Nginx and ngrok service, with 250MB of memory remaining, which is quite comfortable. The CPU temperature is also not high, running between 37-39 degrees for two days.
Download 1: OpenCV-Contrib Extension Module Chinese Version Tutorial

Reply "Extension Module Chinese Tutorial" in the "Little White Learns Vision" public account to download the first OpenCV extension module tutorial in Chinese, covering installation, SFM algorithms, stereo vision, object tracking, biological vision, super-resolution processing, and more than twenty chapters of content.

Download 2: Python Visual Practical Project 52 Lectures

Reply "Python Visual Practical Project" in the "Little White Learns Vision" public account to download 31 visual practical projects, including image segmentation, mask detection, lane line detection, vehicle counting, eye line addition, license plate recognition, character recognition, emotion detection, text content extraction, and face recognition, to help you quickly learn computer vision.

Download 3: OpenCV Practical Projects 20 Lectures

Reply "OpenCV Practical Projects 20 Lectures" in the "Little White Learns Vision" public account to download 20 practical projects based on OpenCV for advanced OpenCV learning.

Group Chat

Welcome to join the reader group of the public account to communicate with peers. Currently, there are WeChat groups for SLAM, 3D vision, sensors, autonomous driving, computational photography, detection, segmentation, recognition, medical imaging, GAN, algorithm competitions, etc. (will gradually be subdivided in the future). Please scan the WeChat ID below to join the group, and note: "Nickname + School/Company + Research Direction", for example: "Zhang San + Shanghai Jiao Tong University + Visual SLAM". Please follow the format; otherwise, you will not be approved. After successfully adding, you will be invited to the relevant WeChat group based on your research direction. Please do not send ads in the group; otherwise, you will be removed. Thank you for your understanding~