Running EDA tools like Vivado on Linux is significantly faster than on Windows, likely due to optimization issues. Therefore, choosing to develop on Linux is a wise choice (mainly because it’s free). In China, people are accustomed to the Windows system, so Linux is less commonly used. Is there a way to work on documents in Windows while also developing for FPGA on Linux?

The answer is: no, what are you thinking? This article is just fluff~

But the answer is yes, and it’s super simple. Microsoft has already thought of it for us, and related software is available in the Microsoft Store.
PS: In the past, people used virtual machines, but virtual machines have many drawbacks. I can tolerate most of them, but the lag is unbearable; virtual machines often crash~

System Requirements
Windows 11 version 22000 or higher
Note: There will be a system restart required in the middle!
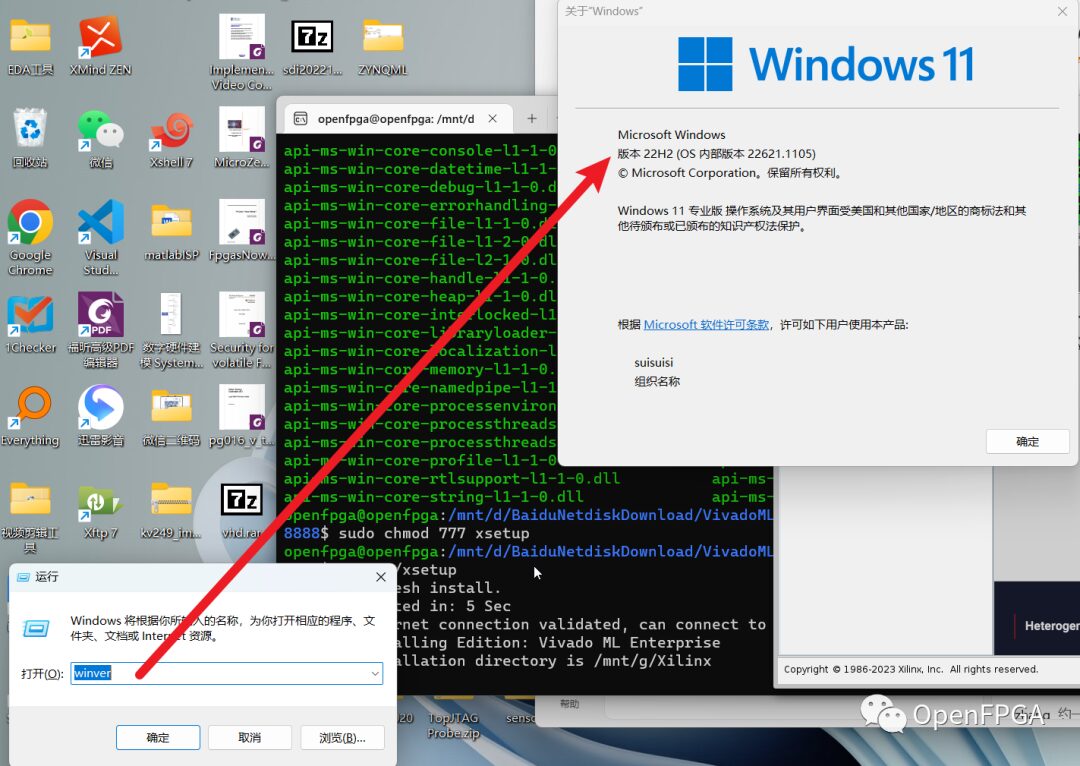
You can check your system version in the image below

Step 1: Install Graphics Drivers
Install according to your graphics card:
-
Intel
https://www.intel.com/content/www/us/en/download/19344/intel-graphics-windows-dch-drivers.html
-
AMD
https://www.amd.com/en/support/kb/release-notes/rn-rad-win-wsl-support
-
NVIDIA
https://developer.nvidia.com/cuda/wsl
Download and install from the official website~
Step 2: Install WSL
You can install WSL using PowerShell commands or by using the Windows Store. Those who use the first method won’t be reading my article, so we’ll use the second method.
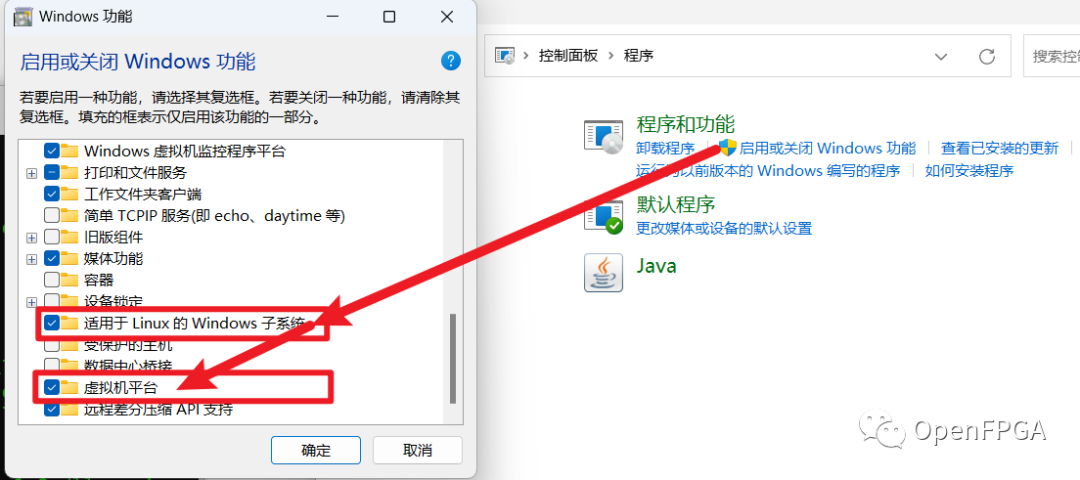
In the Control Panel –> Programs –> Turn Windows features on or off, check the box as shown in the image.

Next, restart the system as prompted.
Step 3: Install Ubuntu
Search for Ubuntu in the Microsoft Store, as shown below:

Currently, there are several options available. The difference between the ones with version numbers and those without is that the ones with version numbers are fixed, while those without will prompt you to update to the latest version.
Choose according to your needs, and it will install automatically.
Step 4: Install Windows Subsystem for Linux
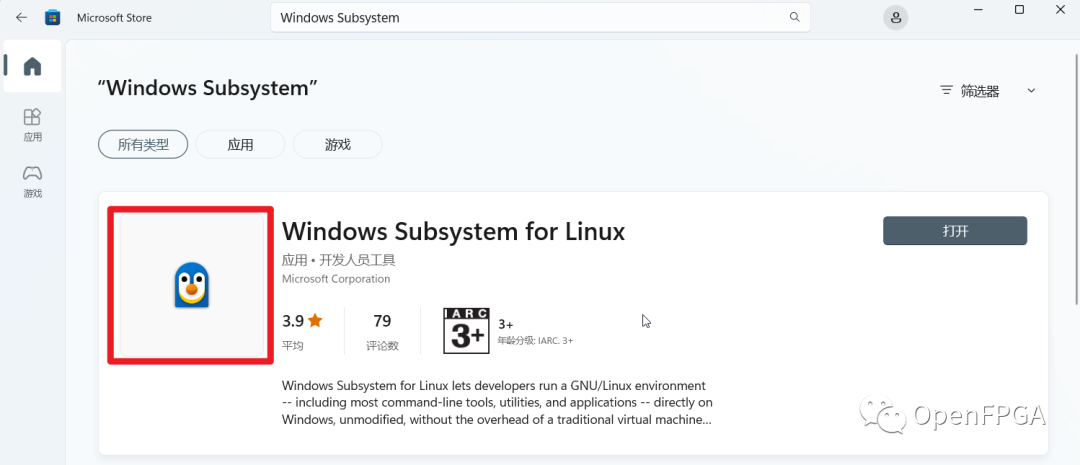
This is not WSL, but a desktop program. Similarly, search for Windows Subsystem for Linux in the store.
As shown below:

Select to install.
Desktop Environment
Now that all the work is done, you can start using it. Let’s try installing gedit.
After installation, the software will show up on the start desktop, and we can use Windows Subsystem for Linux, as shown below:

After opening, it looks like this

Enter the following command in the command line
sudo apt-get install gedit

Wait for the installation to complete, then type:
gedit
This will pop up the gedit window. Other applications are similar, so this is a desktop application window, but it’s sufficient for our use.

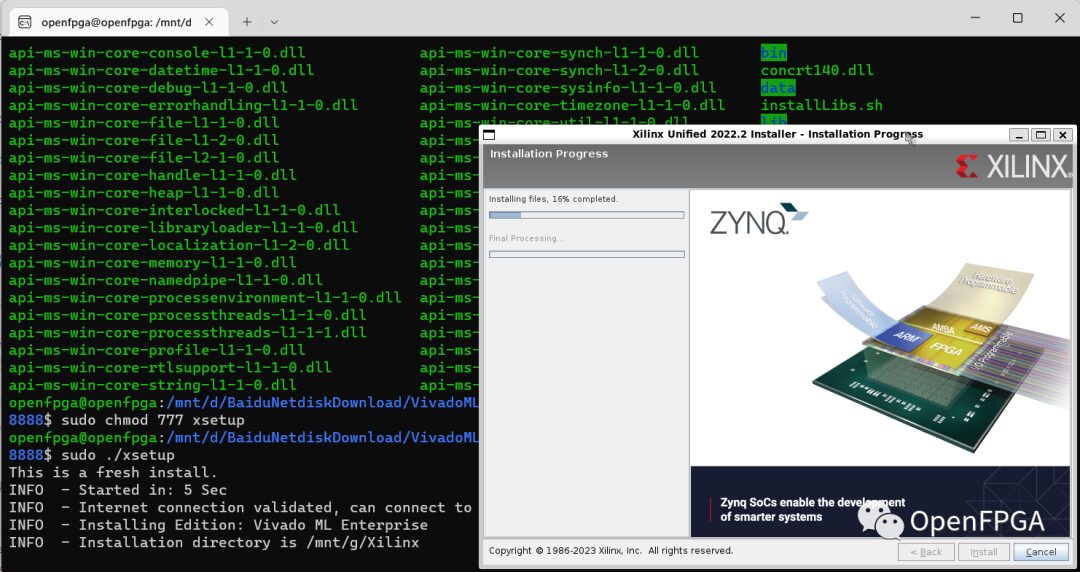
Below is the installation interface for Vivado:

PS: In WSL, the mnt directory will mount the Windows system disks, as shown below:

In the image, c, d, e … are the drive letters of the Windows disks.
Conclusion
It works quite well~
Beware if you don’t know command lines~
