Hardware Selection
-
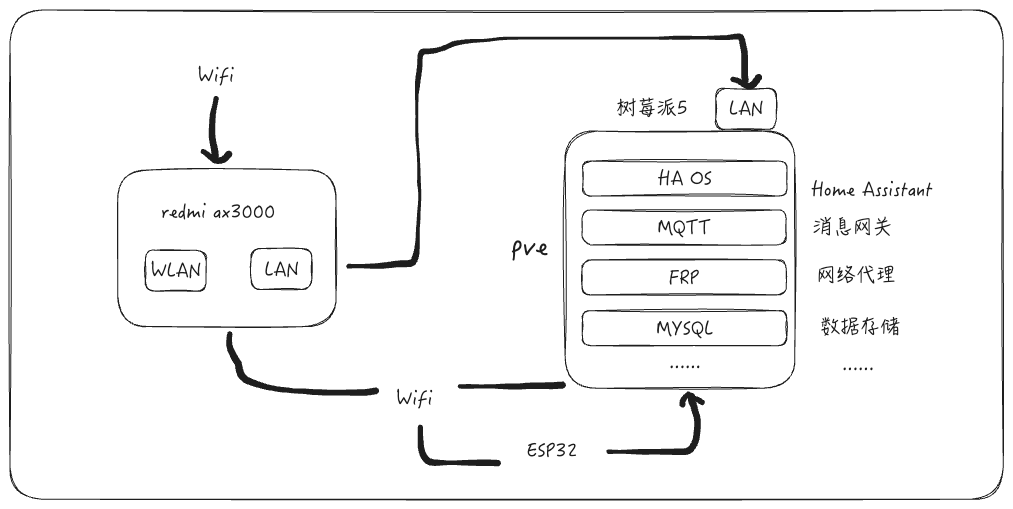
Raspberry Pi 5 (PVE)
-
Gigabit Router (Redmi AX3000)
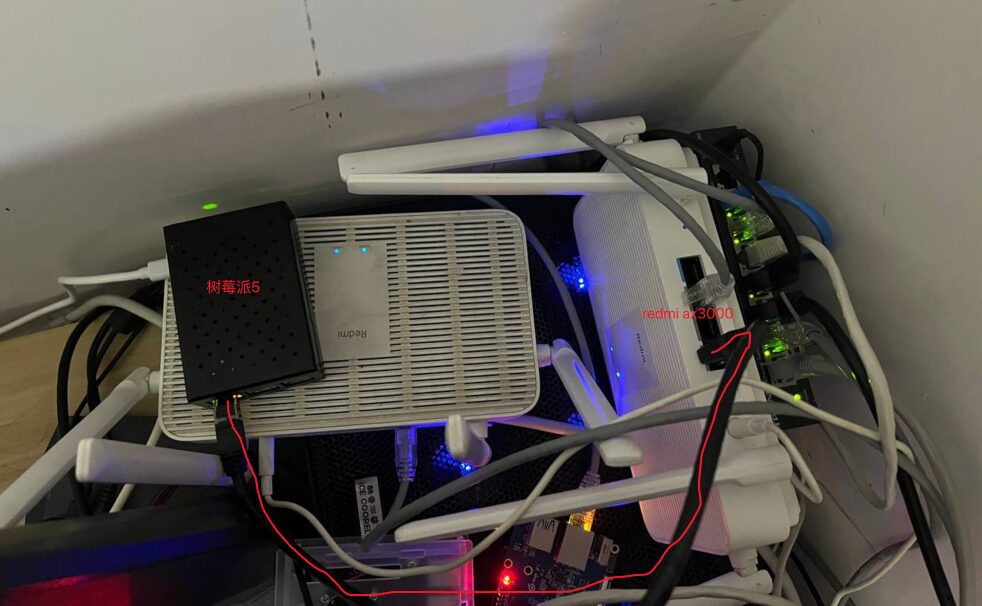
The PVE relies on wired Ethernet
Considering the network relay method, the router needs to support both wireless and wired relaying
This requires at least two network ports, one WLAN port and one LAN port, with LAN assigned to PVE and WLAN receiving the wired network
This article adopts a wireless bridge scheme
It receives other wireless Wi-Fi through the Redmi router, then generates its own Wi-Fi and wired LAN network
This allows the Raspberry Pi 5 and router to move freely without being restricted by wired networks
During use, the access location of PVE needs to be modified (to stay on the same subnet as the router)
Reference Article
<<HomeLab [PVE] (X86_64): Modify PVE Network Access Address>>
Reference Article
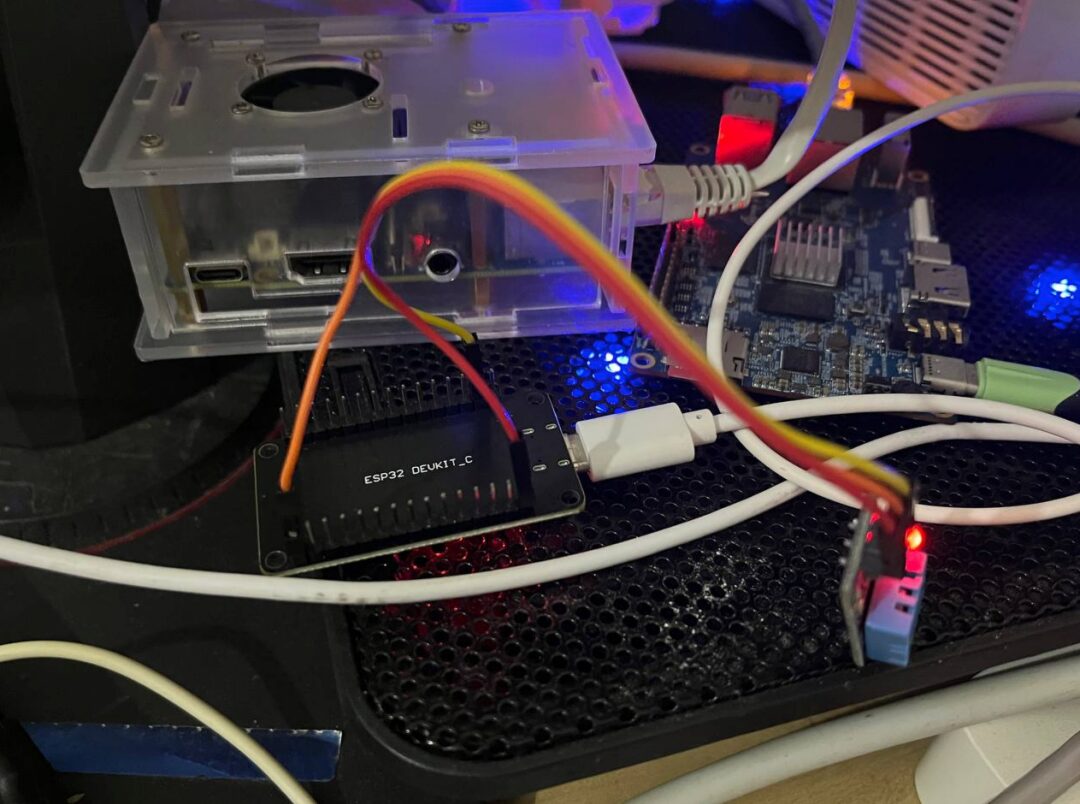
<<Home Assistant Setting Up ESPHome with ESP32 + DHT11 Temperature and Humidity Sensor>>
During the actual operation, some issues were encountered
The HA OS system space is full, only 0% available
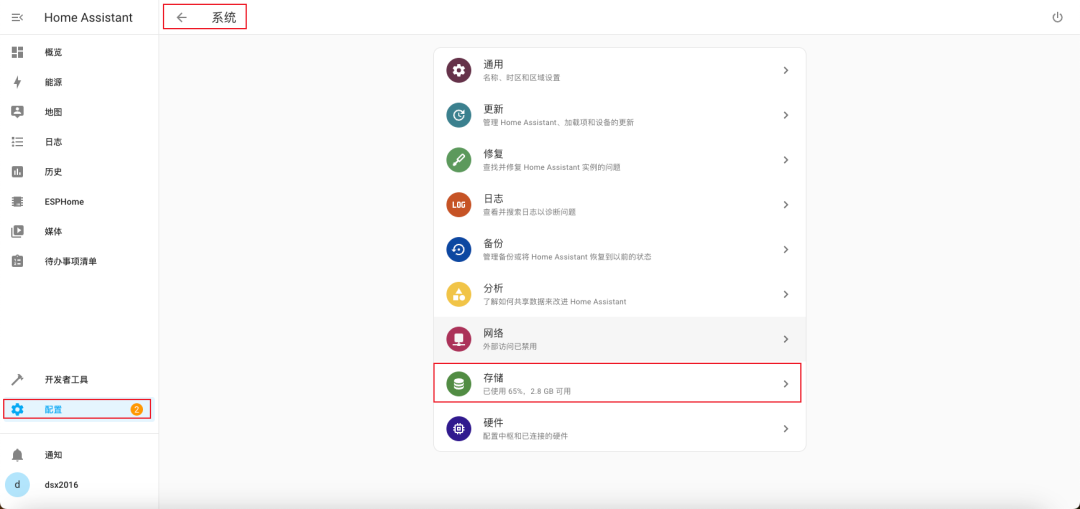
This caused an insufficient space error when flashing ESPHome onto the ESP32
esphome Tool Manager: Warning! Package Mirror: [Errno 28] No space left on device
WARNING Warning! Package Mirror: [Errno 28] No space left on device
The solution is to directly add space to the PVE HA disk
Reference Article
<<HomeLab [PVE] (X86_64): Expanding Disk Space When Only Half of the PVE Ubuntu Server Disk is Installed>>
Unlike Ubuntu in PVE, HAOS only needs to add space; after shutting down and restarting, HAOS will automatically recognize the newly added disk space
This article refers to previous articles that could not connect to the ESP32’s Wi-Fi
In the configuration, write the current router’s 2.4G frequency band Wi-Fi and password directly (manual entry)
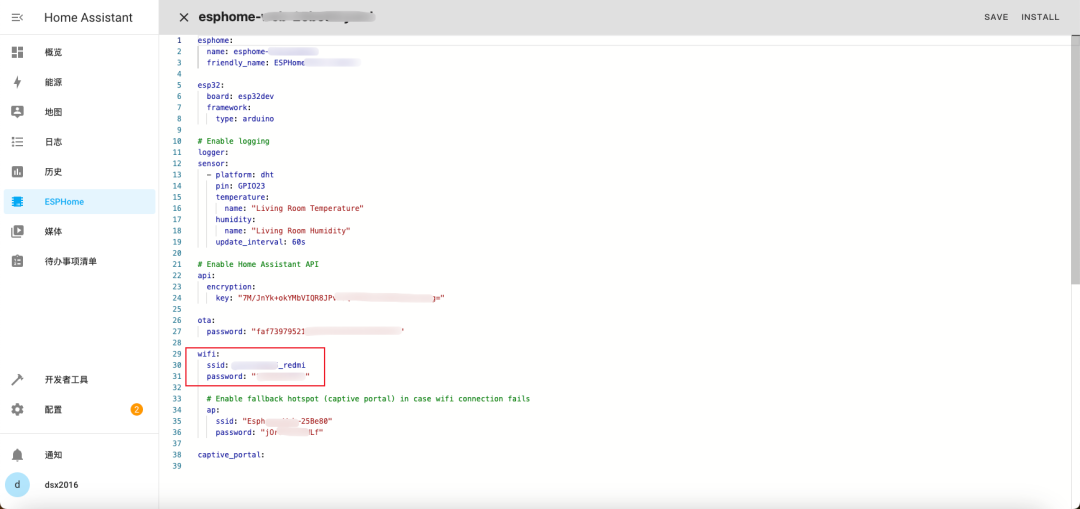
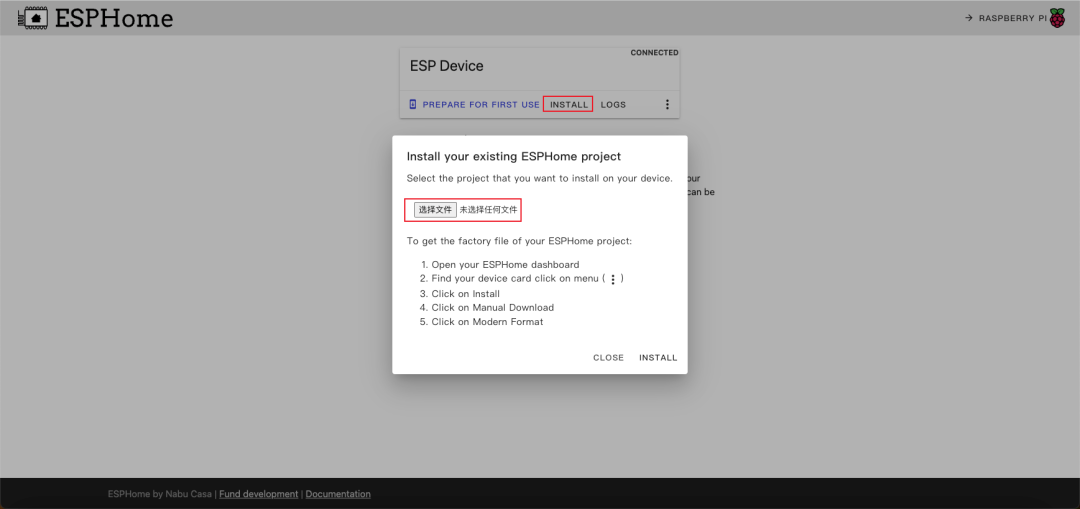
Using the fourth method, generate the firmware (install)

Then use the ESPHome webpage to input the firmware
This method retains the bin firmware file
The firmware flashed using this method for ESP32 + DHT11 can be accessed normally, without Wi-Fi failure or other issues
Configuring HA home page card display
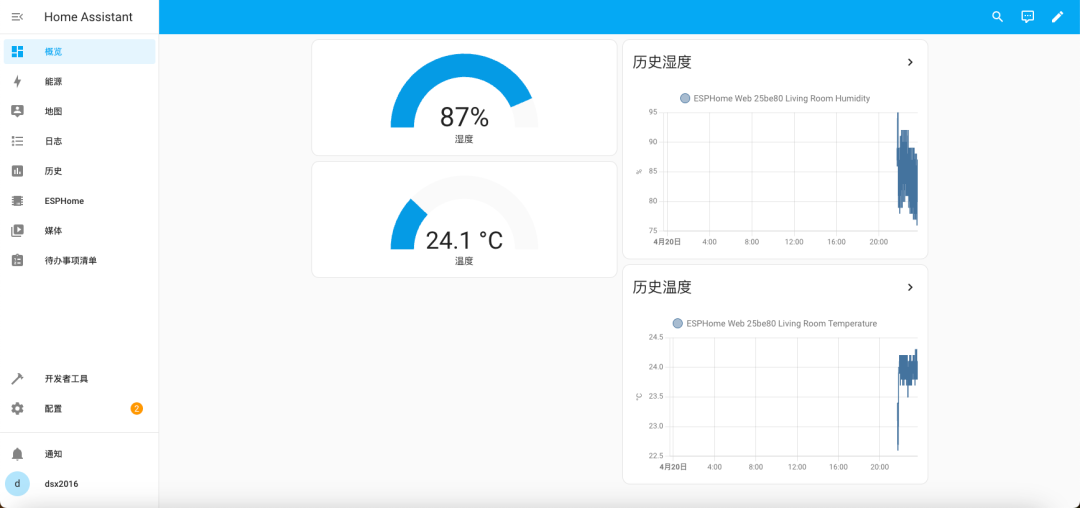
The most commonly used currently are temperature and humidity and ESP32CAM camera
The CAM scenario can be used for timed photography of water meters, electric meters, especially natural gas meters and other common data instruments
For recording and summarizing, combined with OCR, it can provide warnings for electricity, water, and natural gas
The following image shows the ESP32 + DHT11 temperature and humidity sensor
In the previous issue, the Orange Pi 3B attempted HA
-
2GB of memory is not enough for PVE, at least 8GB is needed
-
The Orange Pi 3B has been removed from Taobao, chasing the new and not the old, 3B is no longer considered
END.
Send the keywordJoin Group to join the discussion group
If you find this article helpful, feel free to like and bookmark, see you next time.
Recommended Reading
<<HomeLab Development Board (ARM64) [PVE]: Home Assistant OS Smart Home System Installation>>
<<HomeLab Development Board (ARM64) [PVE]: Raspberry Pi 5 Initializing Desktop OS + aaPanel + PVE8>>
☕ Friends, if you have read this far, are you sure you don’t want to follow? 👇