During the development of security systems, the process of embedded software development is well-known. The output of software development is source code, which must be compiled using a compiler to obtain an executable target file, which is then flashed onto the target board for execution. With the use of Artificial Intelligence (AI) technology, how does one execute the final target file, and how does it differ from traditional embedded software development? Below, I will share my experience through an example of embedded AI development.
The example is based on an embedded AI development board I recently worked with—the Horizon Sunrise X3 development board. This board is designed for ecological developers and is compatible with Raspberry Pi interfaces. Here are the key technical specifications of the development board:
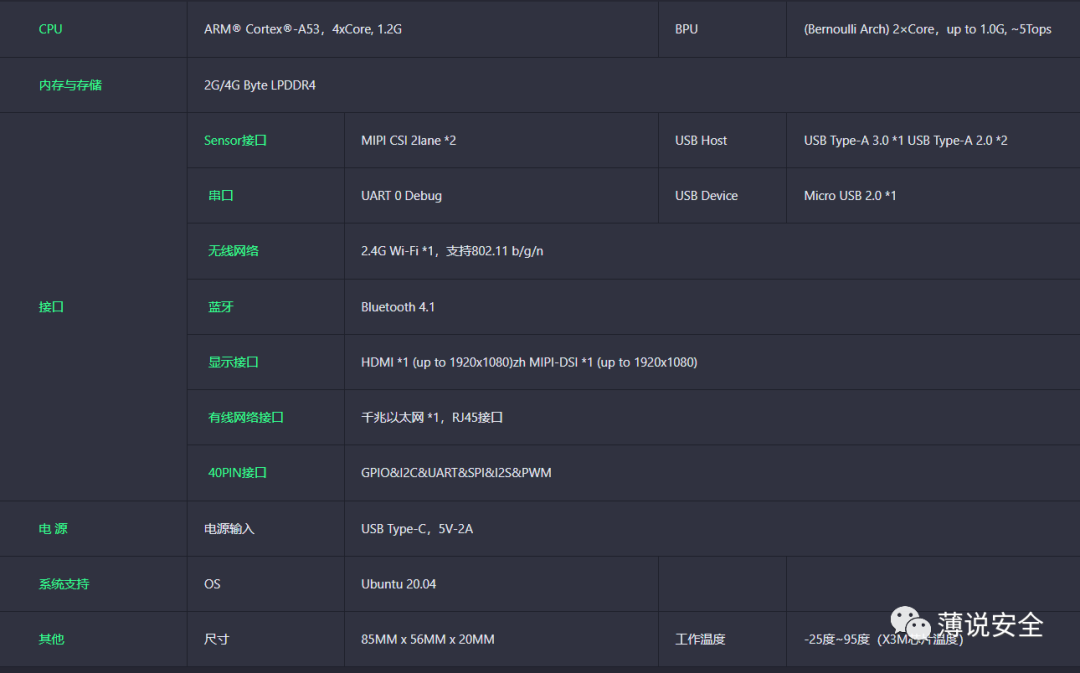
Among the key technical specifications, the core CPU is a 4-core Cortex A 53 at 1.2GHz and a dual-core 5 Tops computing power BPU, which can be used to run AI algorithm models.
Although the CPU of this development board is not an automotive-grade chip, its application fields are in robotics and the Internet of Things, rather than the autonomous driving field used in security systems. However, it is sufficient for personal experience in embedded AI development.
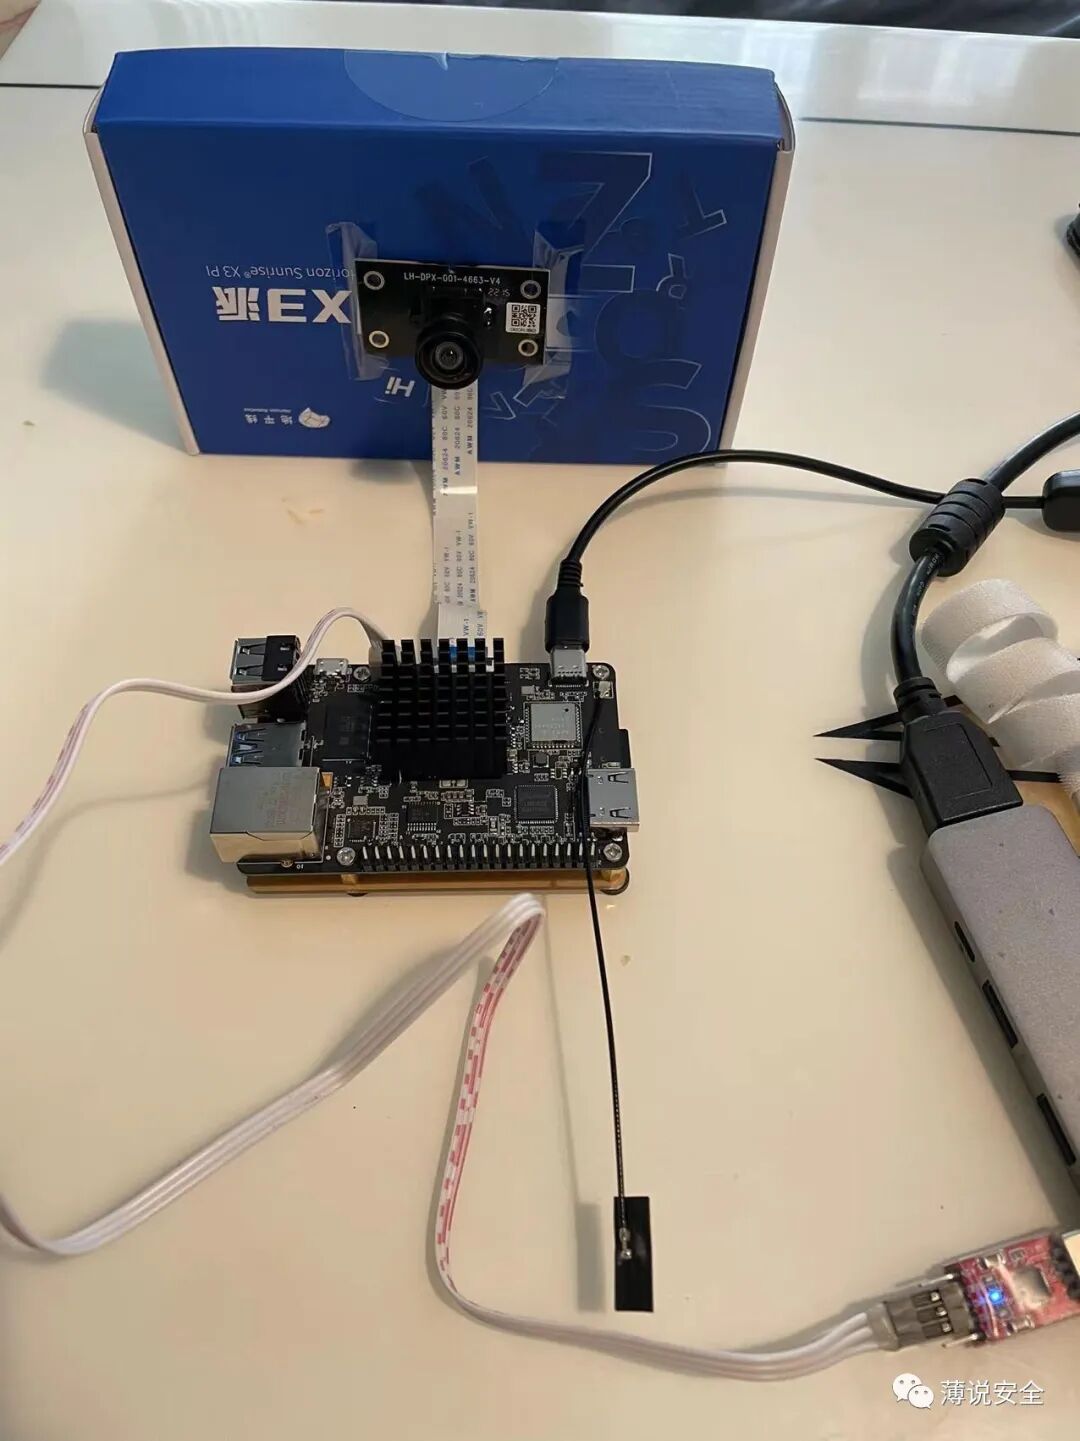
Upon receiving the development board, I connected the system according to the user manual. The board is compact, comparable in size to a Raspberry Pi, and is powered via a USB type-C interface. The development kit provides a serial cable for connecting to a computer to display printed information, and there is an HDMI interface that can be used to display camera video information. I also purchased a MIPI interface camera to experience target detection and classification algorithms. The setup of the development environment is shown below:
The user manual of the development board contains detailed installation steps, which I will not elaborate on here, but I will describe the key steps in embedded AI development.
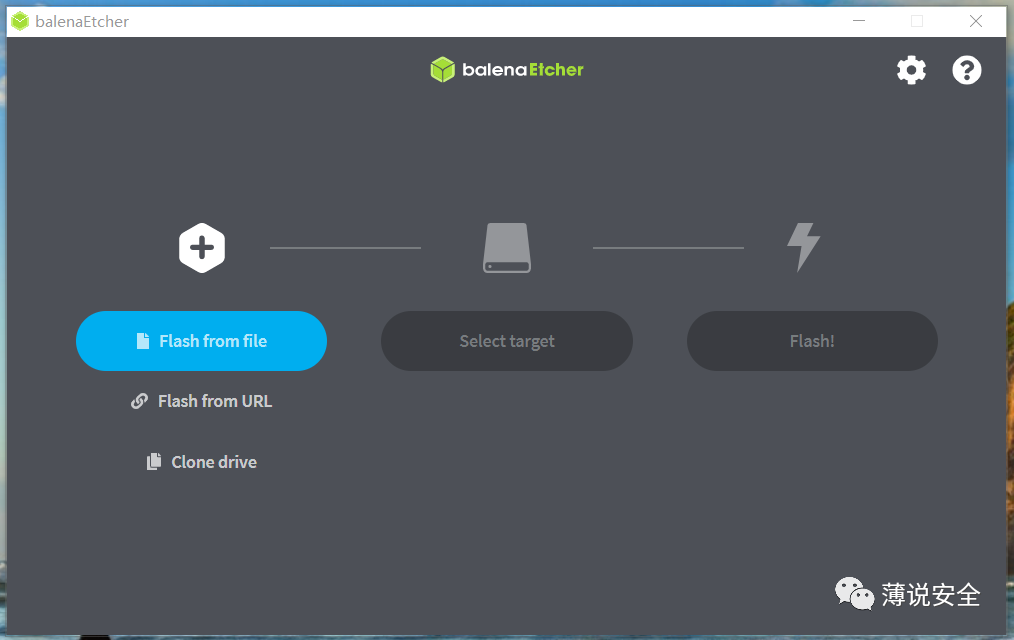
Step 1: System Flashing
The development board boots from a micro SD card, so the first step is to flash the Ubuntu Linux system onto the SD card. After downloading the system image from the official website, I used third-party tools such as balenaEtcher or Rufus to create the boot disk. I used balenaEtcher.
After completing the flashing steps, insert the SD card into the slot and power it on.
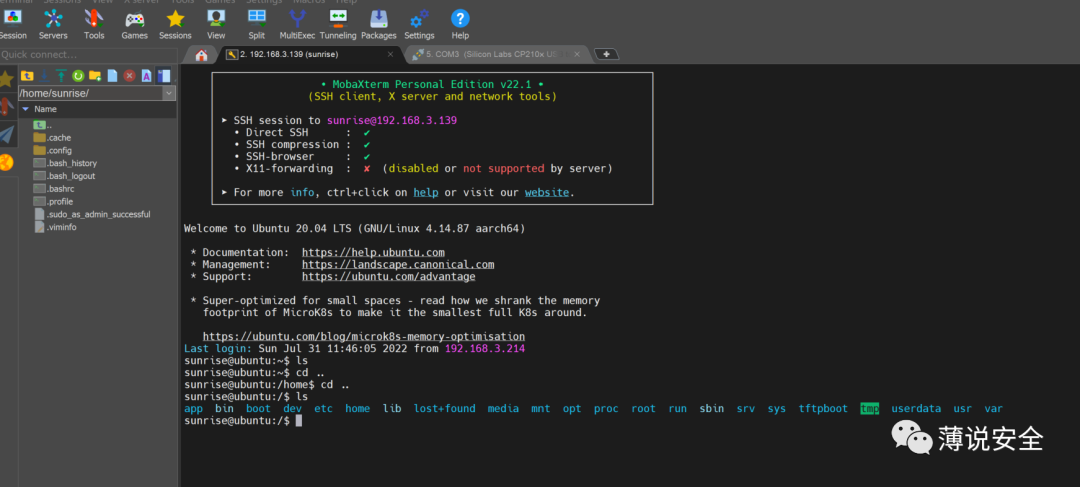
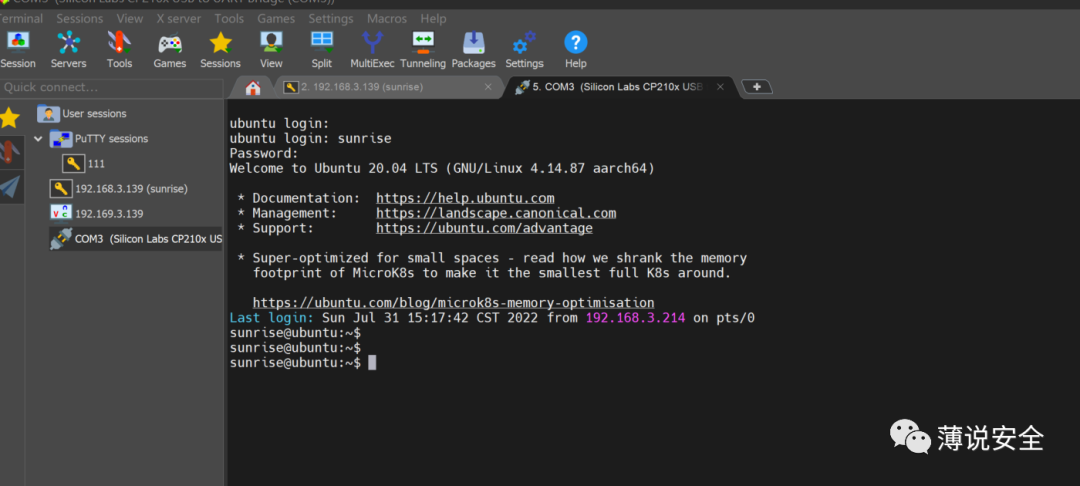
Step 2: System Login
In embedded development, it is necessary to establish a communication channel between the developer and the board, which means remotely logging into the Linux system after booting. The development board provides multiple login methods, including serial, wired, and wireless connections. I used a wireless login to establish an SSH connection with the board for accessing it. Using MobaXterm terminal software makes it convenient to access the board’s directory.
Wireless network login
Serial login
Step 3: Algorithm Running Experience
In the root directory under the app directory, there are 6 AI algorithm examples provided:
/app/ai_inference/01_basic_sample/ Image classification algorithm
/app/ai_inference/02_usb_camera_sample/ Image target detection algorithm
/app/ai_inference/03_mipi_camera_sample/ MIPI camera-based target detection HDMI demonstration
/app/ai_inference/04_segment_sample/ Image segmentation algorithm
/app/ai_inference/05_web_display_camera_sample/ MIPI camera-based target detection web display
/app/ai_inference/06_yolov3_sample/ Yolov3 detection model
/app/ai_inference/06_yolov5_sample/ Yolov5 detection model
The first example implements image classification by loading the mobilenetv1 image classification model on the development board, reading a photo of an object as input for the model, and the algorithm runs to determine the category of the object in the image.
Run the following command in the test program directory:
sudo python3 ./test_mobilenetv1.py
It identifies the following four photos, with the resulting object categories and confidence levels as follows:

Zebra:


Tiger:


Goose:

Paper towel:

In the output of the above program, the number of cls id corresponds to the classification result, which can be found in the imagenet1000_clsidx_to_labels file:
340: ‘zebra’, 292: ‘tiger, Panthera tigris’, 99: ‘goose’, 700: ‘paper towel’,
It can be seen that: the test model accurately classified the four photos, with confidence levels varying, the highest being 0.991851 and the lowest being 0.699466.
The above is an example of a static image classification algorithm. Next, I will experience real-time video image reading using the MIPI camera for target detection.
/app/ai_inference/03_mipi_camera_sample/
On the development board, the fcos image target detection algorithm model is loaded, reading video images from the MIPI camera, rendering the detection results onto the image, and outputting it to the display via HDMI.
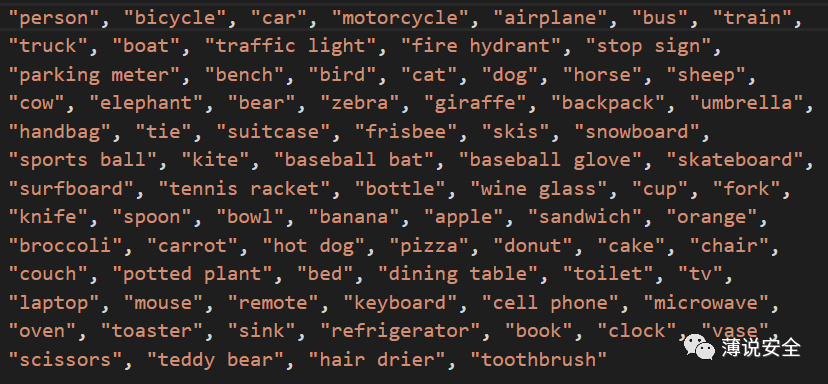
The running algorithm model is trained on the COCO dataset, capable of detecting 80 categories, as shown below:
After execution, the display shows the recognized targets and confidence levels, as shown in the figure:
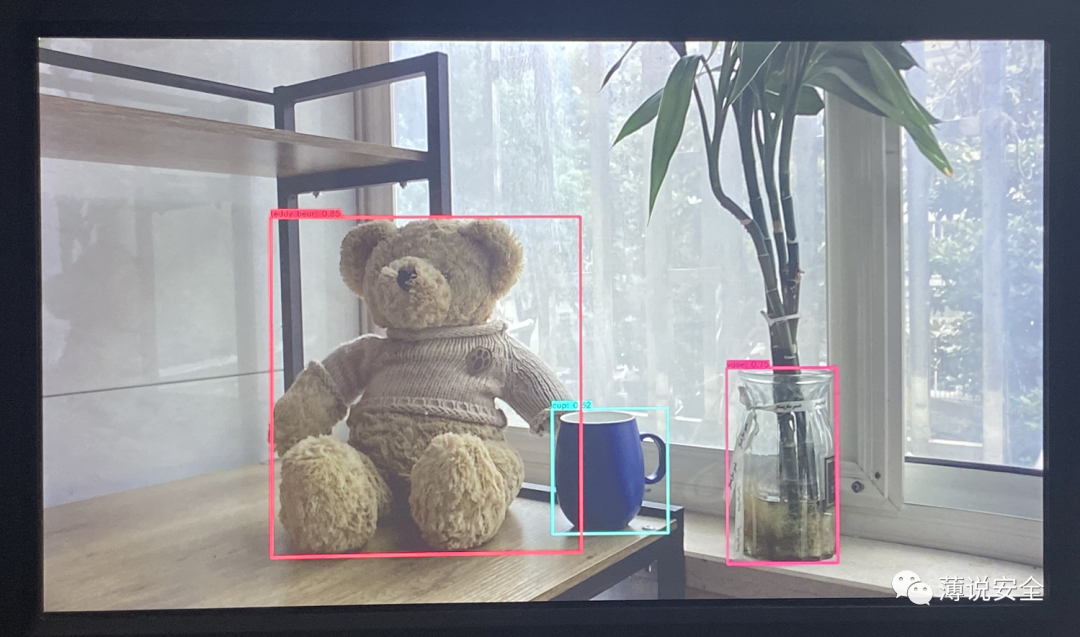
Note: I borrowed an image from the official website; my home is a bit messy, so I couldn’t display it.
Summary:
The above sections demonstrate the operational effects of the Horizon Sunrise X3 embedded AI development board through two example programs: static image classification recognition and image video capture recognition. Combining AI applications in security systems, I have the following insights:
-
First, I must commend the chips and development boards developed by Horizon. Compared to the thousands of dollars for NVIDIA modules, the Sunrise X3 development board is very affordable at under a thousand. My experience over the past week has shown that it runs very smoothly, and many technical issues can be resolved by searching the community. I hope domestic chip manufacturers can continue to improve.
-
With the support of many general software libraries and the convenience of Python language, embedded AI development is not as complex as traditional embedded systems. Even for someone like me, who has been away from hands-on coding for many years, I can easily get started by looking at the manual.
-
The operation of embedded AI algorithm models on the target machine is fundamentally similar to that of general software on the target machine. However, for the convenience of general development, the test programs use Python as the execution code. In security systems, Python has not been used as execution code, and other development languages need to be selected.
-
The examples called Python language algorithm model libraries and general function libraries, such as numpy and opencv. Most of these libraries are open-source software, and how to test and validate their use is a concern in security system development.
-
Currently, most operating systems used for embedded AI development adopt Ubuntu Linux. If used in security systems, Ubuntu Linux cannot pass certification. Even if trimmed to retain only necessary software components, there is still a significant gap from meeting security certification requirements.
-
The operation of algorithm models requires support from model libraries and multiple general function libraries. The compatibility and matching of these software modules need to be noted. During development, software integration strategies should be considered. Simply adopting a comprehensive software integration strategy can make troubleshooting difficult, while software integration is often overlooked in traditional software development.
The above experience only involves the execution part of the target machine. As I gain a deeper understanding of this AI development board, I will discuss model training, parameter tuning, and other aspects of the host computer process later.