Many friends have asked how to develop using Eclipse (and its various modified versions). This question is quite broad, so I can only provide a brief overview.
On the last day of the long holiday, let’s discuss software again. If I don’t share something related to hardware soon, many people will secretly ask me to reveal the secrets of my unbeatable board tricks.
Those familiar with my posts should have noticed that I’ve consistently recommended using Eclipse (and its various modified versions, including MCUXpresso) for developing microcontrollers when feasible. To do a good job, a modern IDE can greatly assist developers; the efficiency of the Java Virtual Machine can easily be offset by the machine’s performance. Don’t be constrained by ideas from ten years ago; just imagine how fast Android has become.
One of the selling points of MCUXpresso is that the J-Link plugin is officially produced by NXP. Although I don’t know the differences compared to the community version, the official version should integrate most smoothly with its own system.
 The development support for Zephyr on Linux is the best. Developing on Windows can be quite troublesome, believe me. Therefore, if you want to work with Zephyr, it’s best to do so on Linux.
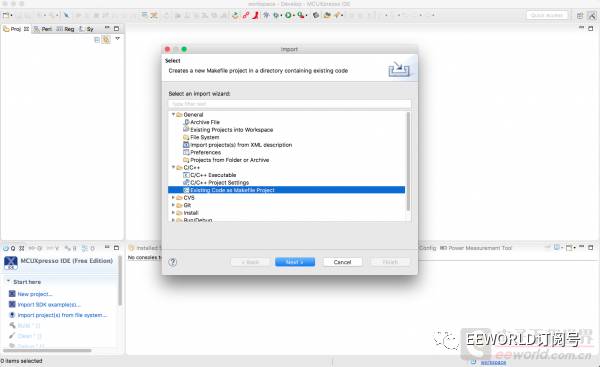
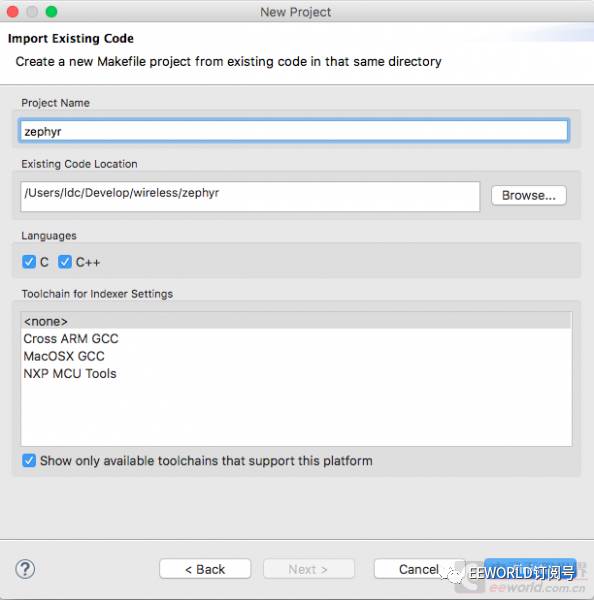
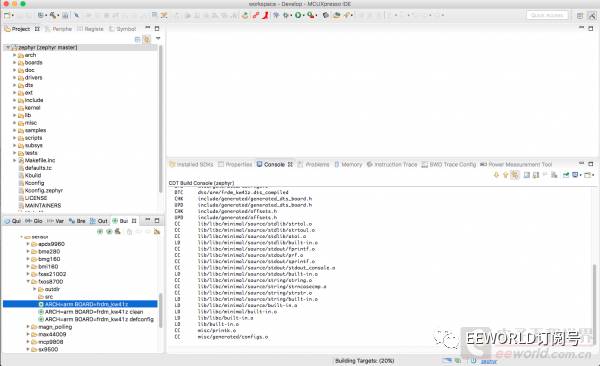
Besides extracting Zephyr, there is nothing extra that needs to be installed. MCUXpresso comes with a built-in compiler, so there’s no need to install a new one. My installation directory is /Applications/MCUXpressoIDE_10.0.0_344/ide/tools. 1. Import the project, import
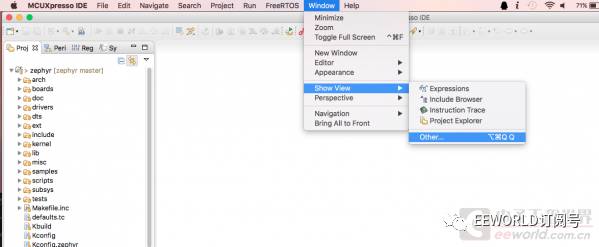
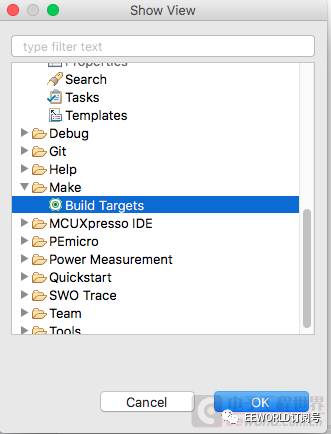
2. Open the Make view
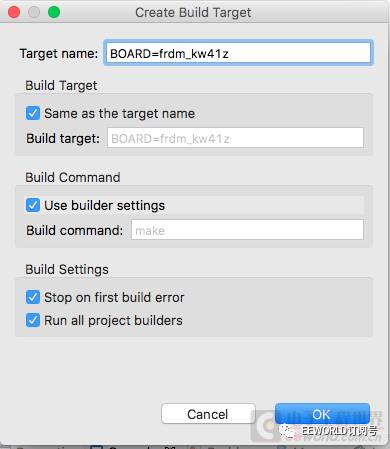
3. Create a new Make target
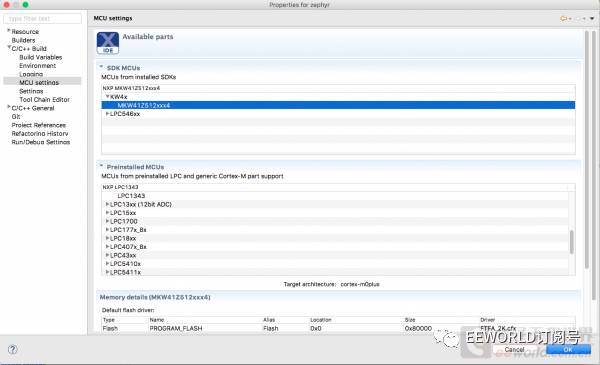
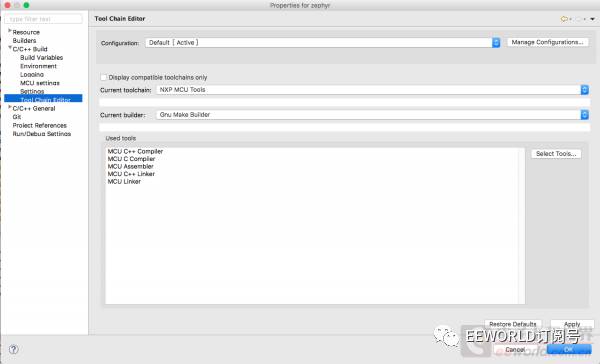
4. Set the MCU environment; you need to find NXP MCU tools, otherwise, NXP’s environment may not work well.
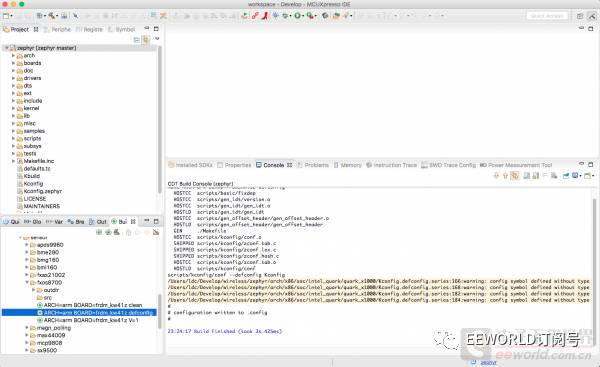
5. Double-click the Make target you just created to compile Zephyr; you can also do it via the command line.
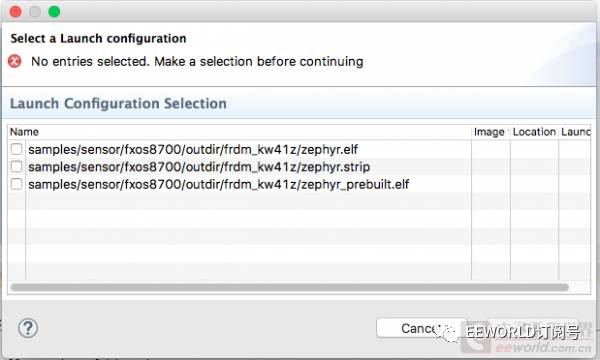
6. After compilation, you can debug using the purple bug in the quickstart panel or toolbar. I’m using J-Link here. Select the ELF file with a clearly recognizable name.

7. For the initial error handling, since we created a manual project, we need to prevent Eclipse from automatically using its project method for Make during debugging.
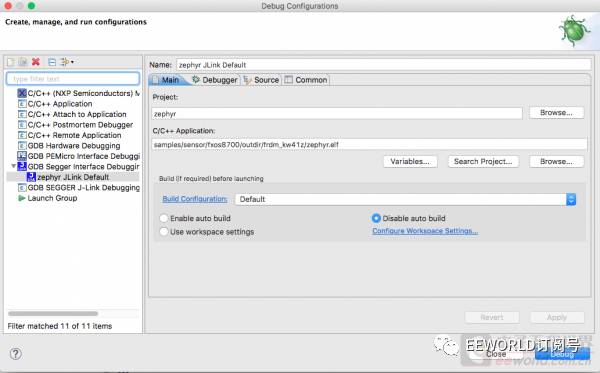
8. Then, use the purple bug to debug, and you’re done. The error from step 7 only needs to be handled once during the first run.
Feel free to click to read the original text and communicate with the author.
Follow EEWORLD (Electronic Engineering World) on WeChat: reply “Submission” to have your original work featured in our WeChat push; add WeChat friend: “HelloEeworld” to not miss any WeChat activities.
To communicate with more industry peers, please click to read the original text to log in to the EEWORLD forum.

EEWORLD WeChat subscription account Exciting Hot Posts E at Your Fingertips

EEWORLD WeChat service account EE Benefits At Your Fingertips


WeChat ID: EEXINRUI Chip News Sharp Interpretations