Chapter 5: Generating Keil Projects Using RASC
5.1
Creating a New Project
5.1.1
Selecting the Workspace Directory
Manually create a folder named “Workspace_Keil” and set this folder as our workspace, where all our Keil projects will be stored. It is important to note that to avoid compilation errors, this workspace folder must be located in a path that contains only English characters and must not include any Chinese characters.
5.1.2
Creating a New Project
The steps to create a new project using RASC software are similar to those in e2 studio. However, in the final step, we will directly use RASC to automatically generate a Keil project. Therefore, we will create a Keil project for RA MCU development not through the Keil software, but through the RASC software.
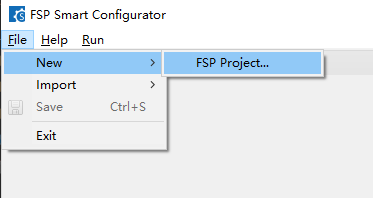
First, open the RASC software, then click on “File” → “New” → “FSP Project” in the menu bar to start creating a new project. As shown in the figure below.
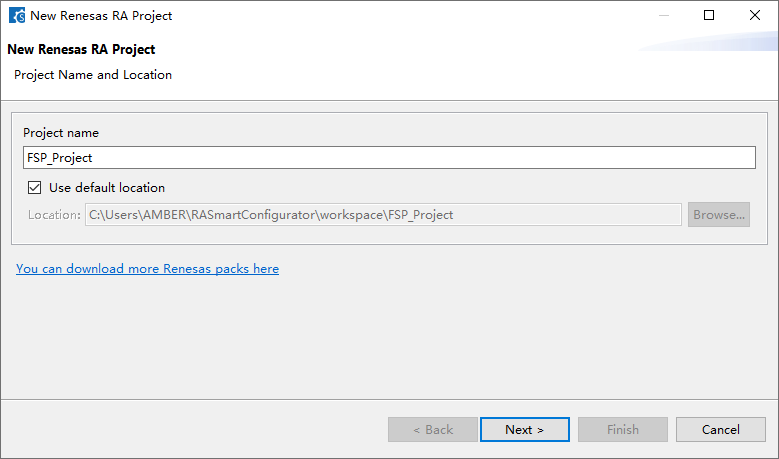
Then the following default interface will pop up.
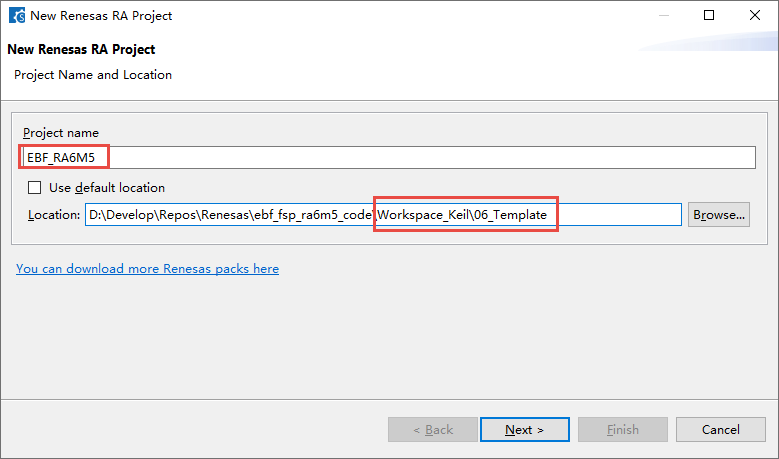
We will uncheck “Use default location”, then change the project name (Project name) in the above image to a unified name: EBF_RA6M5, and set the location path (Location) of the Keil project to: “{workspace path}/06_Template”, as shown in the figure below. The “Workspace_Keil” in the image is the workspace folder, which will contain multiple Keil projects. The “06_Template” is the folder for the Keil project, named to indicate “Chapter 06 of the corresponding tutorial, project template”.
Warning
Note: To avoid compilation errors, the absolute path of the Keil project must be entirely in English and must not contain any Chinese characters.
Next, click “Next” to proceed to the project options interface, as shown in the figure below. Similar to creating a project in e2s, we need to select the FSP library version, board model, device (MCU) model, programming language, compiler, etc. The main difference here is that we need to additionally select the IDE type (Keil, IAR, etc.), and we do not need to select a debugger, as the debugger is selected and configured within the IDE.
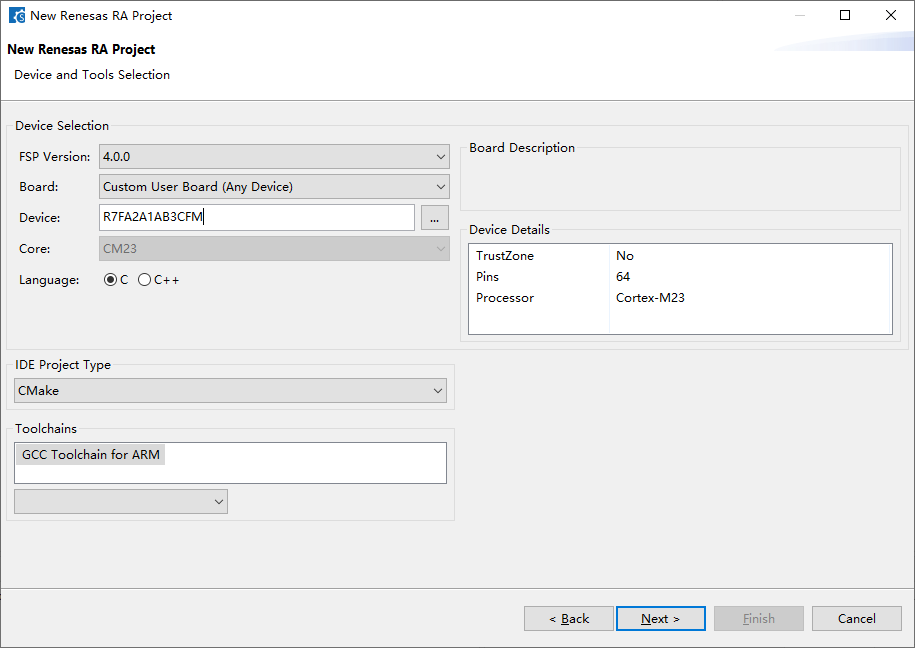
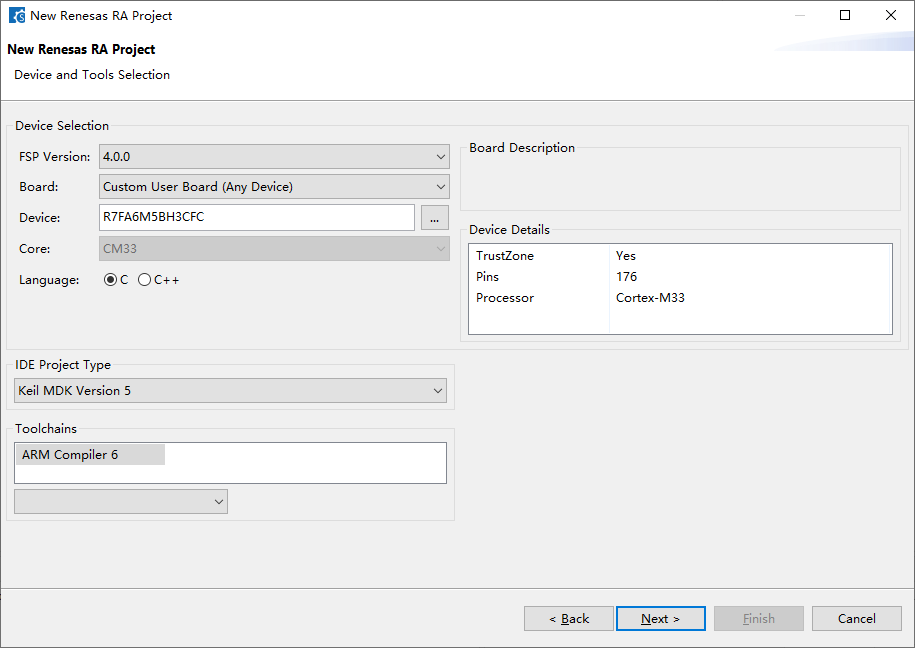
Change the configuration in the above image as follows:
-
In the FSP Version section, select the FSP library version “4.0.0”. Generally, selecting the latest version is sufficient.
-
Select “Custom User Board (Any Device)” for the board model, which indicates a user-customized board. Since the software does not know what chip our board uses, the “Any Device” prompt is provided in parentheses.
-
In the Device section, click the “…” button, select the chip model used on our board in the pop-up interface, and then click “OK”.
-
For the Wildfire Qiming 6M5 development board, select the model “R7FA6M5BH3CFC” under the “RA6M5” list;
-
For the Wildfire Qiming 4M2 development board, select the model “R7FA4M2AD3CFP” under the “RA4M2” list;
-
For the Wildfire Qiming 2L1 development board, select the model “R7FA2L1AB3CFP” under the “RA2L1” list.
-
Programming language: We will default to C language.
-
In the “IDE Project Type” section below, select “Keil MDK Version 5”.
-
In the “Toolchains” section below, select the toolchain “ARM Compiler 6”, which is the official ARM compiler included with Keil.
The configuration after changes is shown in the figure below. Then click “Next” to proceed.
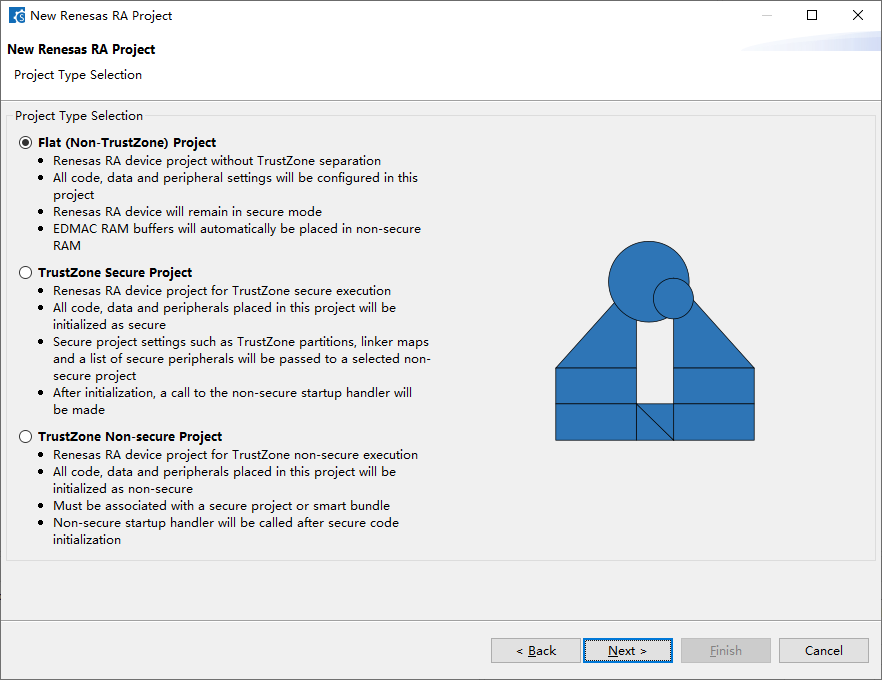
Here, the default selection is “Flat (Non-TrustZone) Project”. Click “Next”.
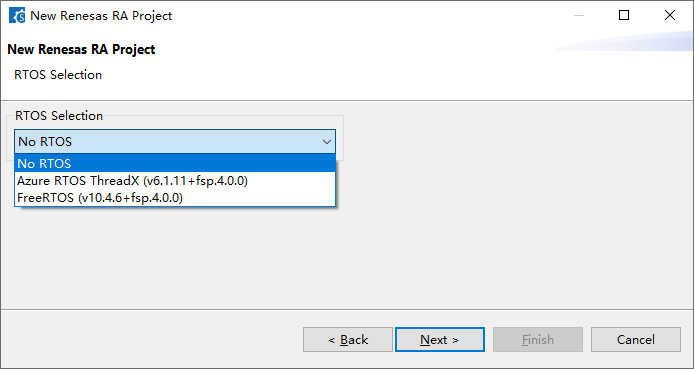
The default selection is “No RTOS”. Then click “Next”. If RTOS is needed, it can be selected from the “RTOS Selection” dropdown list. For beginners, RTOS can be a bit challenging to learn, so we will not use RTOS for now.
The default selection is “Bare Metal – Minimal”. Then click “Next”.
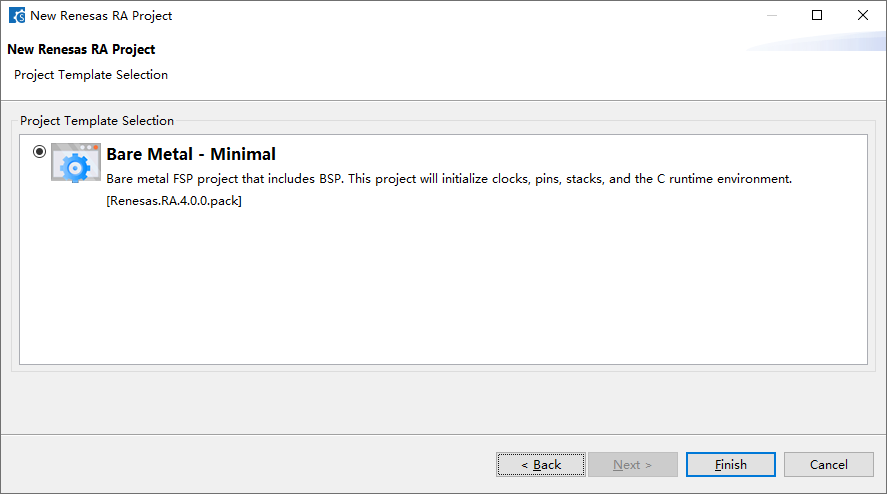
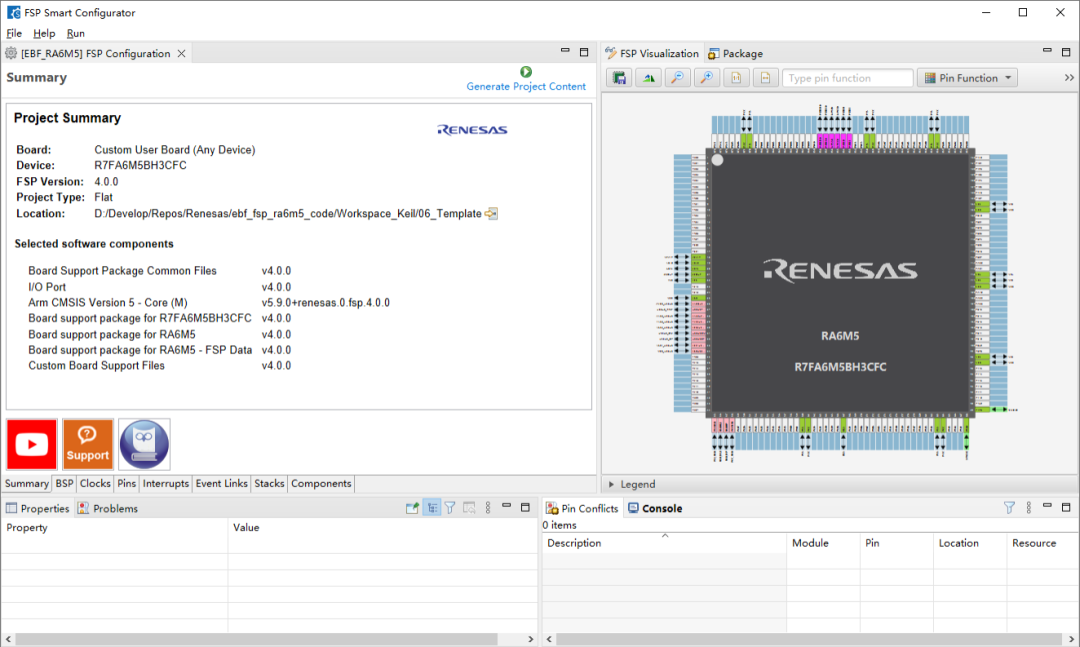
Next, the following interface will be displayed, indicating that the new project has been created. You can close this interface.
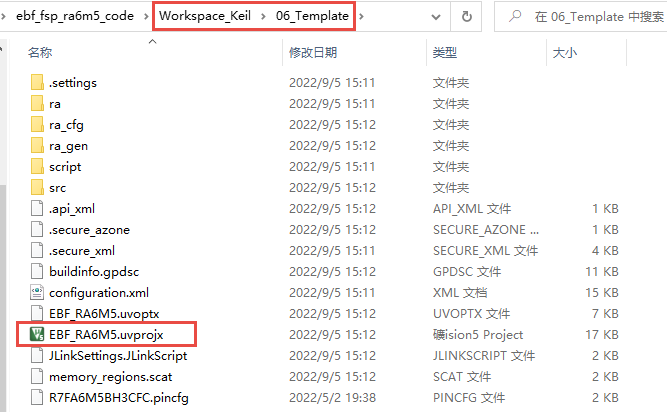
We can see that RASC has automatically generated a Keil project for us in the directory “{workspace path}/06_Template”. As shown in the figure below.


Need Technical Support?
If you have any questions while using Renesas MCU/MPU products, you can scan the QR code below or copy the URL into your browser to access the Renesas Technical Forum for answers or online technical support.

https://community-ja.renesas.com/zh/forums-groups/mcu-mpu/
To be continued
Recommended Reading
Open the FSP Configurator Interface – Practical Guide to Renesas RA Series FSP Library Development (13)

Delete Project from Workspace – Practical Guide to Renesas RA Series FSP Library Development (12)

Using e²studio to Create a New Project – Practical Guide to Renesas RA Series FSP Library Development (11)