The previous article “Exploring ESP-DL with ESP32-P4: Implementing Face, Human, and Cat Detection” introduced the integration of the ESP-DL module into MicroPython, achieving functionalities such as face detection, human detection, and cat detection. This note continues to share the implementation of YOLO v11 object detection based on ESP-DL.
1. Development Board Introduction
The latest release from DFRobot, the FireBeetle 2 ESP32-P4 development board, is currently the smallest ESP32-P4 development board, yet it integrates a rich set of peripherals:
| Peripheral | Description |
|---|---|
| Type-C USB CDC | Programming + Debugging |
| RST / BOOT Button | Reset + Download |
| IO3 LED & Power LED | Status Indicator |
| MEMS PDM Microphone | Audio Capture |
| USB OTG 2.0 Type-C | 480 Mbps High-Speed USB |
| MIPI-DSI ×2 | Compatible with Raspberry Pi 4B DSI Display |
| MIPI-CSI ×2 | Compatible with Raspberry Pi 4B CSI Camera |
| TF Card Slot | Local Storage Expansion |
| 16 MB Flash | Firmware + Model Storage |
| ESP32-C6-MINI-1 | Extends Wi-Fi 6 / BLE to P4 via SDIO |
2. MicroPython Binding for ESP-DL
There are already repositories shared by experts on GitHub that bind Esp-DL to MicroPython. I have also added the official cat recognition model from Espressif into the branch: 👉 https://github.com/Vincent1-python/mp_esp_dl_models/tree/cat_detect
Add the relevant drivers to <span>~/esp/micropython.cmake</span>:
include(${CMAKE_CURRENT_LIST_DIR}/micropython_csi_camera/micropython.cmake)
include(${CMAKE_CURRENT_LIST_DIR}/mp_jpeg/src/micropython.cmake)
include(${CMAKE_CURRENT_LIST_DIR}/mp_esp_dl_models/src/micropython.cmake)
Recompile the firmware following the guide “ESP32-P4 Development Board MicroPython Firmware Compilation Method” and after flashing, you can start playing.
3. Practical Demonstration
Due to the slow camera, the following examples are all direct image detections.
YOLO v11 Object Detection
from espdl import CocoDetector
from jpeg import Decoder, Encoder
from myufont import CustomBMFont
from machine import Pin, SDCard
import os
sd = SDCard(slot=0, width=4, sck=43, cmd=44, data=(39, 40, 41, 42))
os.mount(sd, '/sd')
decoder = Decoder()
# Capture and process image
img = open("/sd/yolo1.jpg", "rb").read()  # Capture raw image (usually JPEG format)
wh = decoder.get_img_info(img)  # Get image width and height
# Get image width and height
width, height = wh
encoder = Encoder(width=width, height=height, pixel_format="RGB888")
face_detector = CocoDetector(width=width, height=height)
MSCOCO_CLASSES = [
    "person", "bicycle", "car", "motorcycle", "airplane", "bus", "train", "truck", "boat", "traffic light",
    "fire hydrant", "stop sign", "parking meter", "bench", "bird", "cat", "dog", "horse", "sheep", "cow",
    "elephant", "bear", "zebra", "giraffe", "backpack", "umbrella", "handbag", "tie", "suitcase", "frisbee",
    "skis", "snowboard", "sports ball", "kite", "baseball bat", "baseball glove", "skateboard", "surfboard",
    "tennis racket", "bottle", "wine glass", "cup", "fork", "knife", "spoon", "bowl", "banana", "apple",
    "sandwich", "orange", "broccoli", "carrot", "hot dog", "pizza", "donut", "cake", "chair", "couch",
    "potted plant", "bed", "dining table", "toilet", "tv", "laptop", "mouse", "remote", "keyboard",
    "cell phone", "microwave", "oven", "toaster", "sink", "refrigerator", "book", "clock", "vase",
    "scissors", "teddy bear", "hair dryer", "toothbrush"]
font = CustomBMFont('/sd/text_full_16px_2312.v3.bmf')
framebuffer = decoder.decode(img)  # Convert to RGB888 format
# Convert memoryview to bytearray for modification
framebuffer = bytearray(framebuffer)
# Run face detection
results = face_detector.run(framebuffer)
# Draw rectangle
def draw_rectangle(buffer, width, height, x, y, w, h, font, label, color=(255, 0, 0)):
    """
    Draw a rectangle on the RGB888 format image buffer
    :param buffer: Image buffer
    :param width: Image width
    :param height: Image height
    :param x: Top-left x coordinate of the rectangle
    :param y: Top-left y coordinate of the rectangle
    :param w: Width of the rectangle
    :param h: Height of the rectangle
    :param color: Rectangle color (RGB format)
    """
    # Helper function: Set the color of a single pixel
    def set_pixel(buffer, width, x, y, color):
        offset = (y * width + x) * 3
        buffer[offset] = color[0]  # R
        buffer[offset + 1] = color[1]  # G
        buffer[offset + 2] = color[2]  # B
    def is_chinese(ch):
        """Check if a character is a Chinese character"""
        if '\u4e00' <= ch <= '\u9fff' or \
           '\u3400' <= ch <= '\u4dbf' or \
           '\u20000' <= ch <= '\u2a6df':
            return True
        return False
    def text(font, text, x_start, y_start, color, spacing=0, line_spacing=0, max_width=width):
        font_size = font.font_size
        bytes_per_row = (font_size + 7) // 8  # Bytes per row
        x, y = x_start, y_start
        for char in text:
            # Handle newline characters
            if char == '\n':
                y += font_size + line_spacing
                x = x_start
                continue
            if char == '\r':
                x += 2 * font_size
                continue
            # Get character width (full width for Chinese characters, half width for ASCII characters)
            char_width = font_size if is_chinese(char) else font_size // 2
            # Check if a line break is needed
            if max_width is not None and x + char_width > x_start + max_width:
                y += font_size + line_spacing
                x = x_start
            # Get character bitmap
            bitmap = font.get_char_bitmap(char)
            # Draw character
            for row in range(font_size):
                for col in range(char_width if not is_chinese(char) else font_size):
                    byte_idx = row * bytes_per_row + col // 8
                    bit_mask = 0x80 >> (col % 8)
                    if byte_idx < len(bitmap) and (bitmap[byte_idx] & bit_mask):
                        set_pixel(framebuffer, max_width, x + col, y + row, color)
            # Move to the next character position
            x += char_width + spacing
    # Draw top border
    for i in range(x, x + w):
        if 0 <= i < width and 0 <= y < height:
            set_pixel(buffer, width, i, y, color)
    # Draw bottom border
    for i in range(x, x + w):
        if 0 <= i < width and 0 <= y + h < height:
            set_pixel(buffer, width, i, y + h, color)
    # Draw left border
    for j in range(y, y + h):
        if 0 <= j < height and 0 <= x < width:
            set_pixel(buffer, width, x, j, color)
    # Draw right border
    for j in range(y, y + h):
        if 0 <= j < height and 0 <= x + w < width:
            set_pixel(buffer, width, x + w, j, color)
    text(font, label, x, y - 20, color)
# Draw face bounding boxes on the image
for face in results:
    #print(face)
    x1, y1, x2, y2 = face['box']
    label = MSCOCO_CLASSES[face['category']] + ":" + str(int(face['score'] * 100)) + "%"
    draw_rectangle(framebuffer, width, height, x1, y1, x2 - x1, y2 - y1, font, label)  # Use red border
    print(label)
# Re-encode the image with bounding boxes and save
marked_img = encoder.encode(framebuffer)
with open("yolo11效果1.jpg", "wb") as f:
    f.write(marked_img
Effect:
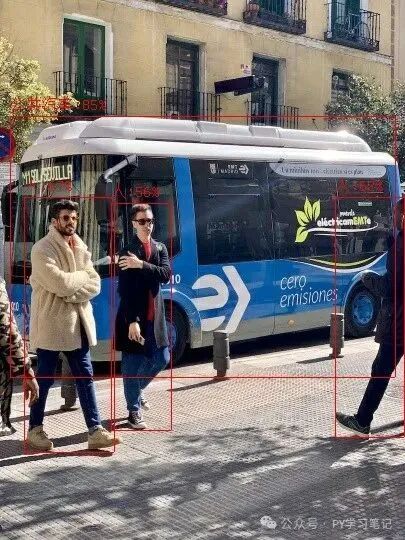
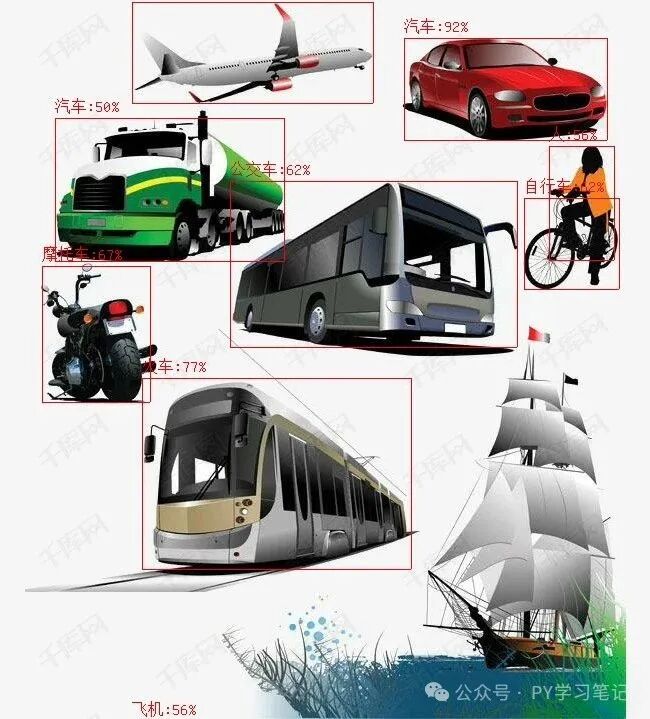
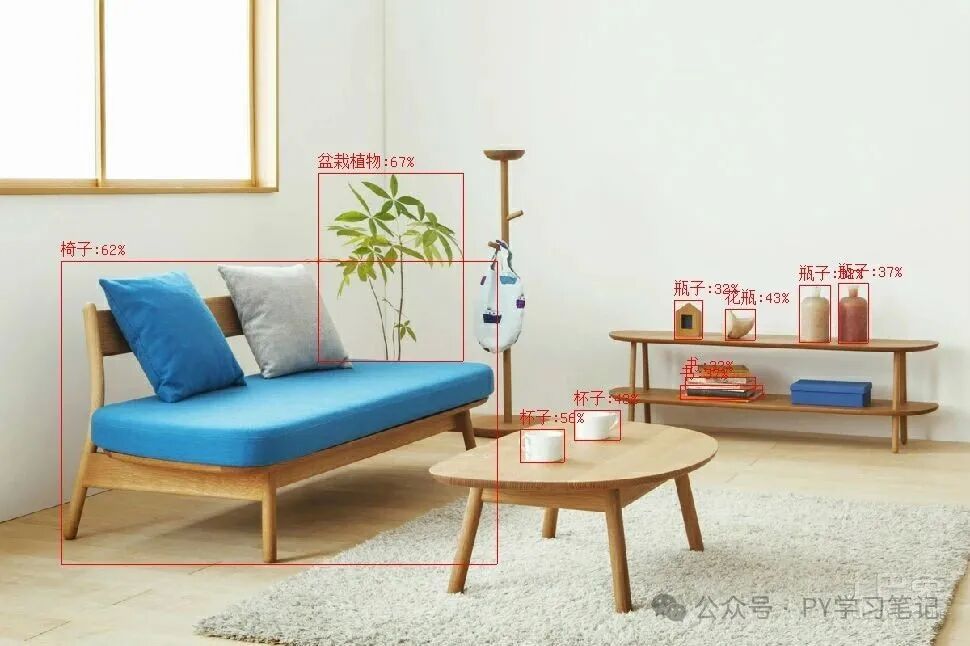
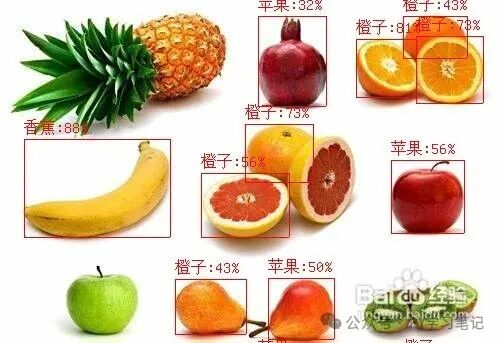
PS: The fruit detection is not very accurate.
Have fun, meow~
Recommended Reading:
-
Face Recognition, Eye Tracking, and Shape Recognition Learning Based on OpenMV
-
XIAO ESP32S3 Sense Development Board ESP-DL (Deep Learning) Testing
- Practical ESP32S3: Experience AI Chatbot
- Exploring OpenMV Journey with WeAct Studio STM32H743VIT6 Development Board
- OpenMV for Color Recognition (Based on STM32H743VIT6)
- OpenMV for Digit Recognition and QR Code Recognition (Based on STM32H743VIT6)
- Modular Remote-Controlled Car – Voice-Controlled Car Based on RP2350 and ASRPRO
