In this issue of the Raspberry Pi original series, I will introduce my experience of using the Raspberry Pi as a desktop. Although it has been a while, one must experience it well to gain insight, right?
I am currently using the Raspberry Pi as a desktop to complete some basic daily entertainment and learning purposes. As for office work, it can handle simple tasks, but for tasks that heavily rely on IE portals and the Office suite, I would advise against “forcing it,” as efficiency is a priority in business. There’s no need to hang on the tree of Linux for office work. This applies to all Linux desktops, not just the Raspberry Pi. It’s better to wait until the U.S. crackdown intensifies, and the domestic Linux system applications become more robust before using it.
1. System Installation
Since the previous series has already introduced the system installation, this section only provides an introduction to system installation for Raspberry Pi desktop usage.
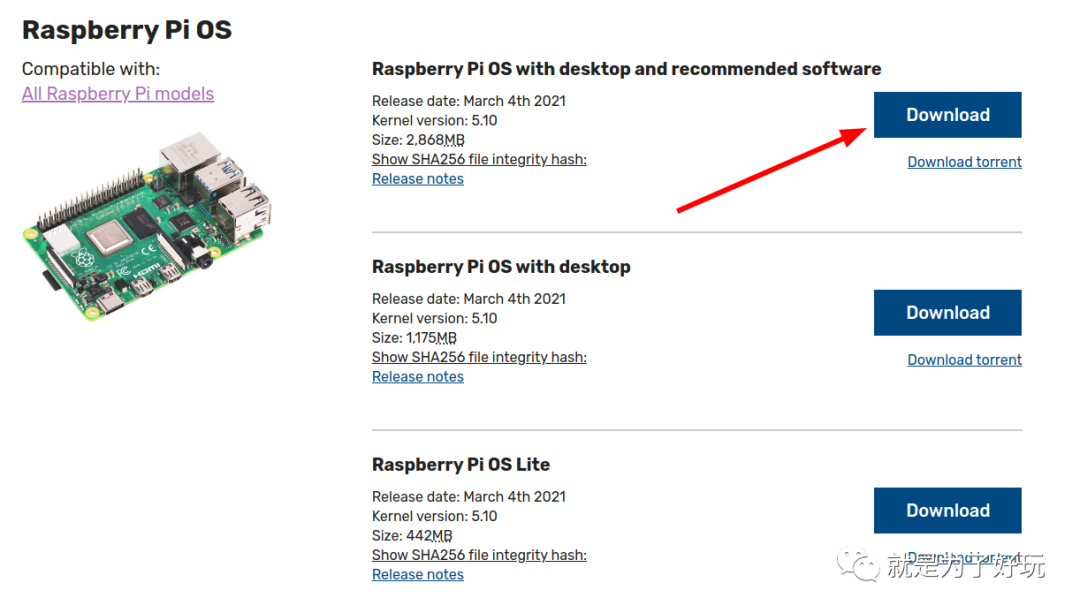
For Raspberry Pi desktop use, I recommend downloading the latest version of Raspberry Pi OS from the official website, specifically Raspberry Pi OS with desktop and recommended software. The latest version offers better system optimization support, such as significant performance improvements for online video playback in Chromium and H.265 encoding support in VLC.
For the system SD card, I recommend starting with 32GB; 16GB might not have much space left after installation, so considering daily use, a slightly larger size is advisable. After all, this version of the image includes many recommended software packages and takes up considerable space.
2. Desktop Configuration
After the system installation, it automatically enters the desktop. First, I configure the apt update source. I set it to use the Aliyun source.
deb http://mirrors.aliyun.com/raspbian/raspbian/ buster main contrib non-free rpi
deb-src http://mirrors.aliyun.com/raspbian/raspbian/ buster main contrib non-free rpi
#deb http://raspbian.raspberrypi.org/raspbian/ buster main contrib non-free rpi
# Uncomment line below then 'apt-get update' to enable 'apt-get source'
#deb-src http://raspbian.raspberrypi.org/raspbian/ buster main contrib non-free rpi
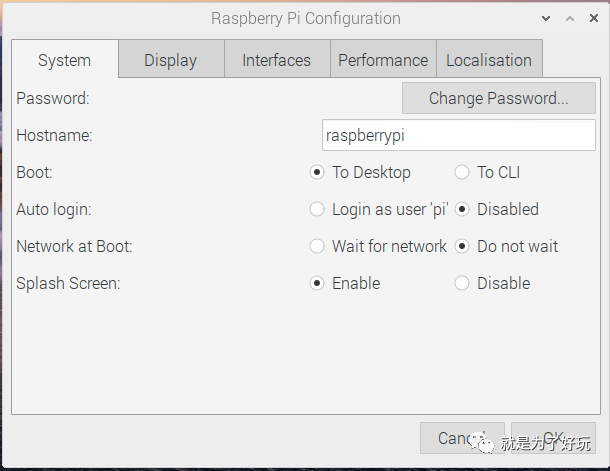
Through Menu >> Preferences >> Raspberry Pi Configuration, I configure the system settings for the Raspberry Pi, similar to the command line function of sudo raspi-config.
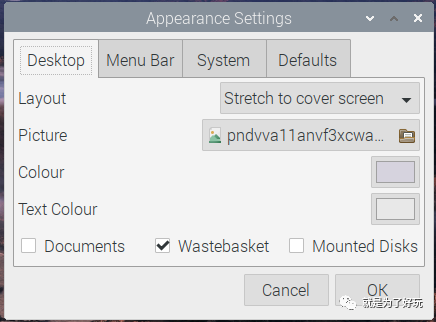
Through Menu >> Preferences >> Appearance Settings, I configure the appearance of the Raspberry Pi desktop, such as the desktop… (It’s undeniable that even a very simple desktop can impress with a beautiful wallpaper, enhancing the overall feel).

3. Software Installation
This section mainly introduces the installation of essential desktop software. First of all, you need a Chinese input method. Otherwise, you might still be typing letters…
Chinese Input Method
For Ubuntu and other Linux systems with i386, x86_x64, amd64 architectures, I recommend going to the Sogou official website, following the installation tutorial, and directly installing the corresponding version of Sogou input method. It’s easy to use, just like on Windows, or even better since there are no ad pop-ups prompting you to install the Sogou browser on Linux. (Although Baidu input method also has a corresponding Linux version, but Baidu… you know the deal)
There are some special cases here. Although the Raspberry Pi’s Linux system is also based on Debian, it is indeed an ARM architecture, and the above input methods do not provide corresponding installation packages. Previously, I used the commonly recommended ones online. This is just a reference, don’t rush to install (after all, I’ve gone through some detours, just to show everyone).
1) The google Pinyin input method based on the Fcitx input framework can be installed by entering the following command in the command line. Installation command:
sudo apt-get install fcitx fcitx-googlepinyin fcitx-module-cloudpinyin fcitx-sunpinyin
2) SCIM supports multiple languages and defaults to support English keyboard, intelligent Pinyin, Wubi, natural code, and Erbi. Installation command:
sudo apt-get install scim-pinyin
3) Ibus input method is a new input method framework developed in Python that supports multiple languages. Installation command:
sudo apt-get install ibus ibus-pinyin
These are the input methods commonly installed for the Raspberry Pi. I chose the google Pinyin input method, which is relatively acceptable, but it’s not comparable to Sogou cloud Pinyin input method.

However, in this case, it feels like going back to the era of Smart ABC input method, where you have to select words for every sentence, leading to a very low input experience and efficiency, which seriously affects my mood for writing public accounts. Is there really no input method that supports ARM architecture…
There really is. Although it’s quite powerful and has a lot of fans, it’s still a bit niche. It’s called the RIME input method (https://rime.im/).
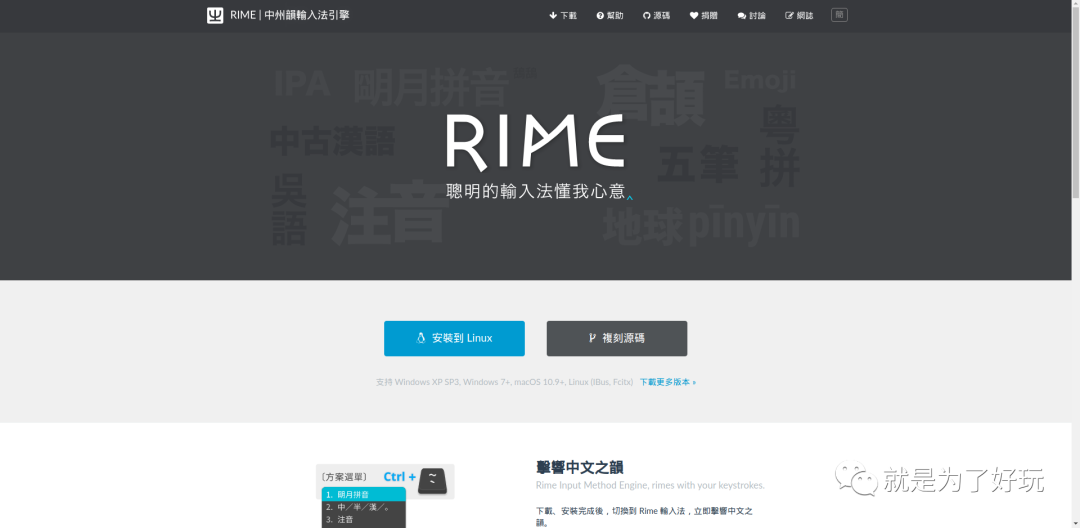
Installing it on the Raspberry Pi is also very simple; just use sudo apt install fcitx-rime. A quick reminder, the default input method is Traditional Chinese, and you can switch the input method scheme (Mingyue Pinyin Simplified) by pressing the F4 key.
This open-source input method (input engine) can theoretically realize all your ideas about input methods. While it may not surpass cloud input methods like Sogou in terms of Pinyin input accuracy, it is much better than the above input methods. Finally, you can immerse yourself in the joy of input. If you are interested, you can install the corresponding input method version on Windows/Mac platforms—Xiao Lang Hao, Shu Xu Guan.
PS. Input methods are indeed a pain point. Without a suitable Chinese input method, there’s no point in discussing further usage.
Music Playback Software
As a desktop user, you can’t be without music playback, right? Of course, you can choose the web version of various music software like NetEase Cloud Music. However, all my music is in NetEase Cloud Music, and I am quite looking forward to the recommended playlists every day, as the recommendation algorithm truly suits my taste.
However, we face a similar problem as with the input method. NetEase Cloud Music is quite considerate, providing an installation version for Linux (only 64-bit version, 32-bit systems are left crying in the toilet), but it’s not so accommodating for the Raspberry Pi.

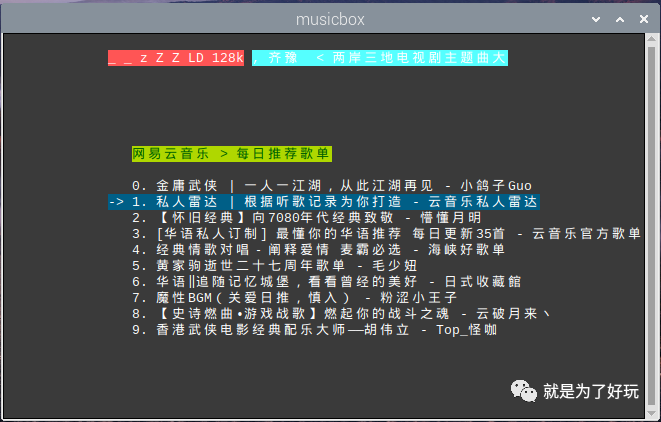
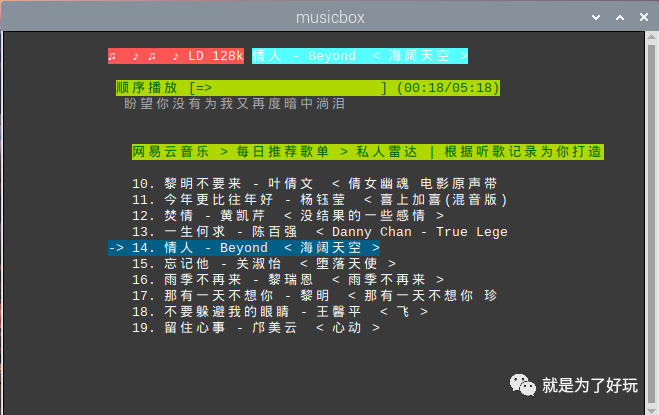
Here, I provide a solution for NetEase Cloud Music—a command line version (https://github.com/darknessomi/musicbox).
Follow the tutorial, I recommend installing via PyPi, pip3 install NetEase-MusicBox, and you need to install related dependencies sudo apt install mpg123 python-fuzzywuzzy. For updating the version, use pip3 install -U NetEase-MusicBox.
Follow the tutorial to log into your account. Of course, there are some shortcut keys to check for in the command line version. However, this command line version of NetEase Cloud Music even shows lyrics. What more could you ask for…
Other Recommendations
-
Use the system’s built-in Chromium browser; perhaps Edge will be available in the future;
-
Strongly recommend VLC as a video player (optimized for Raspberry Pi, the playback of H.265 is very noticeable), and generally recommend mpv for video playback;
-
Code editing is a must with VS Code;
-
If you really need to edit office-type documents, you can use LibreOffice; I can only say it’s usable;
-
For desktop screenshots, I recommend using Flameshot. It’s worth mentioning that the previously good gnome-screenshot in Ubuntu is no longer in the Ubuntu repository due to a deprecated component.
4. Summary
The Raspberry Pi desktop experience mainly covers these aspects. I can now use the Raspberry Pi to update public account articles (the recent issues have all been published using the Raspberry Pi), so it seems that it’s quite good for use and has certain productivity. I will continue to share in the future~~
Feel free to follow my public account for continuous updates~~~
