
This tutorial will provide a detailed guide on how to flash the N1 box from a Linux system (such as Armbian, iStoreOS, OpenWrt, etc.) back to the official Android system. This method involves unmounting the boot partition, formatting the boot partition, and then performing the flashing operation after rebooting the box.
After the flashing is complete, the N1 box will display the official default version interface: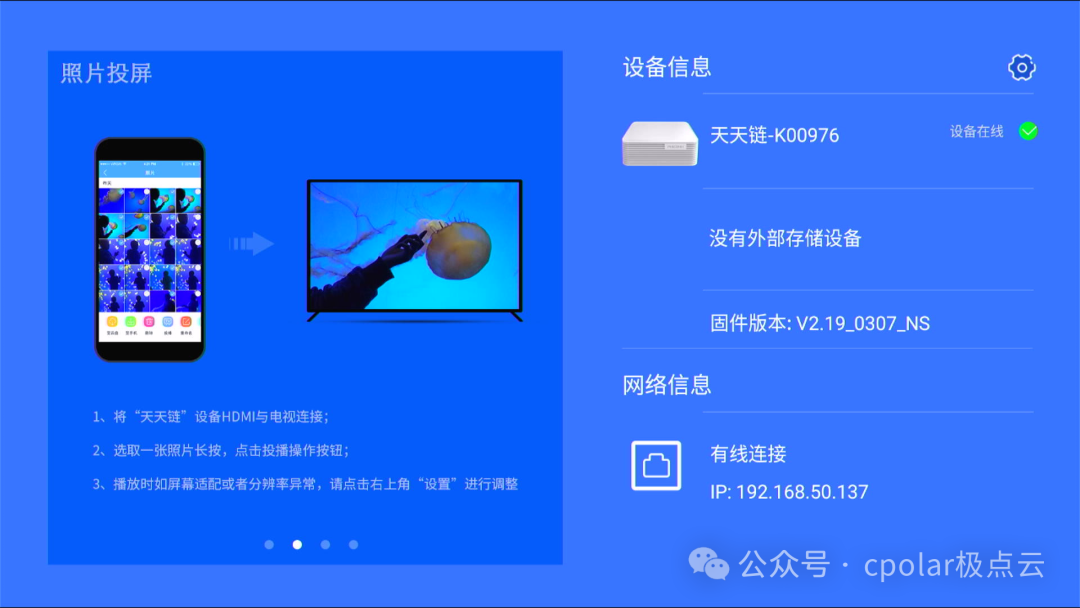
1 Flashing Materials and Software Preparation
Before starting the flashing process, the following materials need to be prepared:
Required:
-
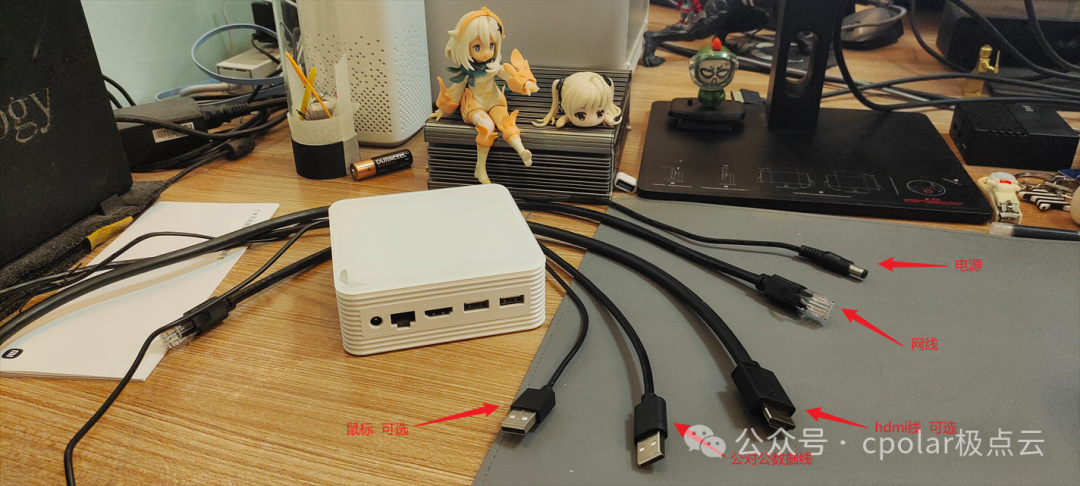
N1 box already running a Linux system *1 (How can you flash if you don’t have a box?)
-
Power supply *1 (12V/1A power supply, 12V2A is also acceptable)
-
USB male-to-male cable *1 (You can also find two unused USB data cables, cut them, and connect them to make a homemade male-to-male data cable)
-
Computer *1 (Windows system is recommended; this tutorial uses Windows as an example)
-
Network cable *1 (Gigabit or Fast Ethernet is fine, used for local SSH connection)
-
Resource files that may be needed for this tutorial (Official firmware for N1 box (aml_upgrade_package), Amlogic burning tool (USB_Burning_Tool_v2.1.2), SSH remote tool)
Permanent link to 123 Cloud Disk:
https://www.123684.com/s/3jOKVv-J3NzH?pwd=1314#
Extraction code: 1314
Optional:
-
HDMI cable *1 (for connecting the N1 box to a monitor, not mandatory)
-
HDMI monitor *1 (for displaying the real-time screen of the N1 box; a capture card can also be used as a substitute, not mandatory)
2 Start Flashing
2.1 Required Files and Introduction
In the previous preparation stage, download the provided resources from the 123 Cloud Disk, and you will see the following software programs and system images:
Software programs include:
-
finalshell: Used for SSH remote connection to the N1 box to input commands
-
USB_Burning_Tool_v2.1.2: Used for flashing the official firmware
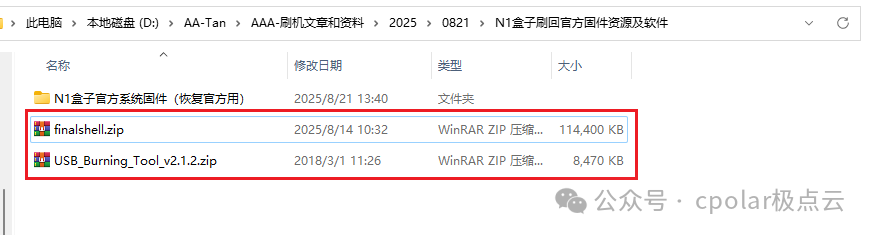
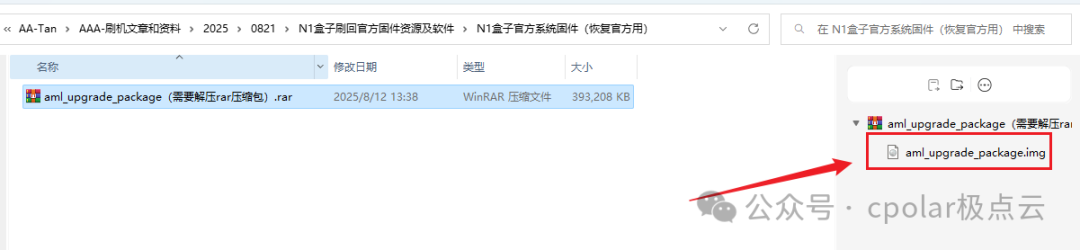
The system image is the official Android system image for N1:
2.2 Start Flashing
This step uses the iStoreOS system as a demonstration to flash back to the official Android version. For the Armbian system, the commands are basically the same; you can refer to this tutorial for operation.
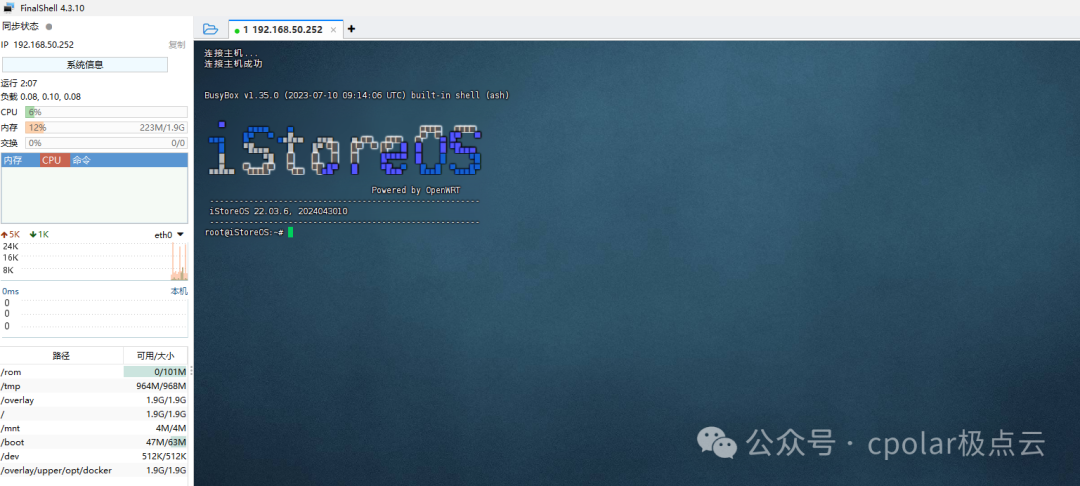
Step 1: SSH Connect to the System
First, open finalshell and use SSH connection to connect to the iStoreOS system (the usage of finalshell software and obtaining the box’s IP address can be referenced in related tutorials, which provide detailed instructions):
Step 2: Check the Boot Partition Name
After logging into the system, enter the following command to check the boot partition name:
df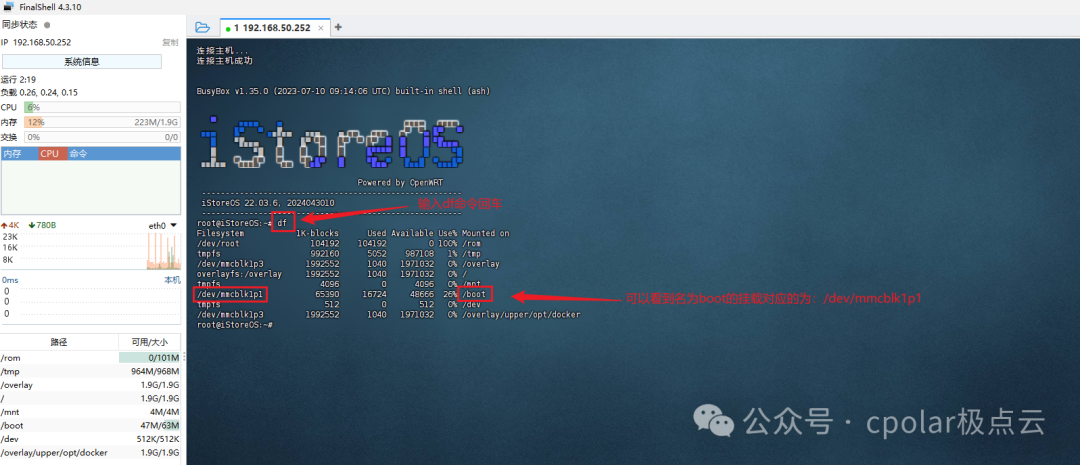
It usually displays as:<span>/dev/mmcblk1p1</span>
Step 3: Unmount the Boot Partition
Next, you need to unmount the boot partition by entering the following command and pressing Enter:
umount /dev/mmcblk1p1
Step 4: Format the Boot Partition
Then enter the following command to format the boot partition, and you need to enter ‘y’ and press Enter to confirm:
mkfs.ext4 /dev/mmcblk1p1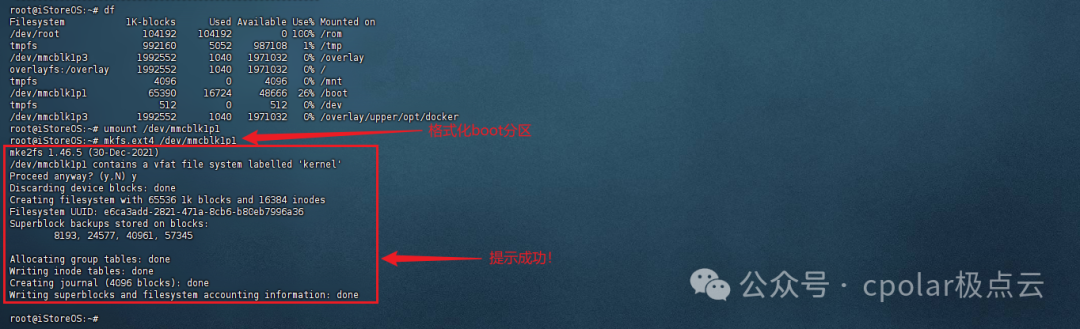
Step 5: Reboot the Box
Next, enter the following command to reboot the box:
reboot
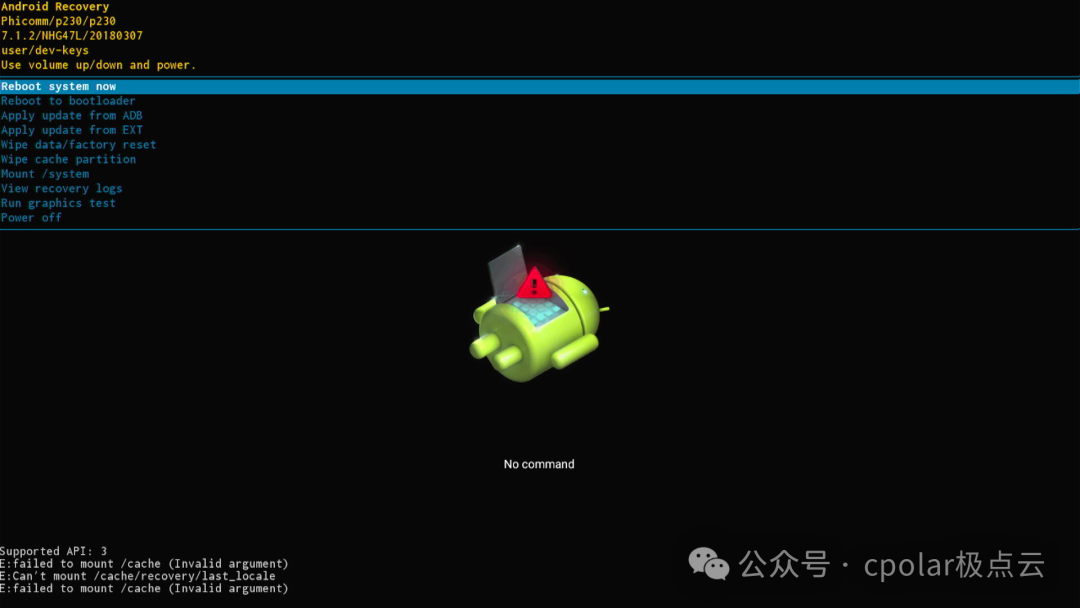
Step 6: Enter Flashing Mode
After rebooting, you will see the “Leopard Head S905D” trademark interface, or the following Android Recovery interface (this image is captured in real-time from the N1 box using an HDMI capture card):
Step 7: Prepare the Flashing Tool
Next, open the USB_Burning_Tool tool, select the official system firmware aml_upgrade_package.img, and you need to extract it to see:
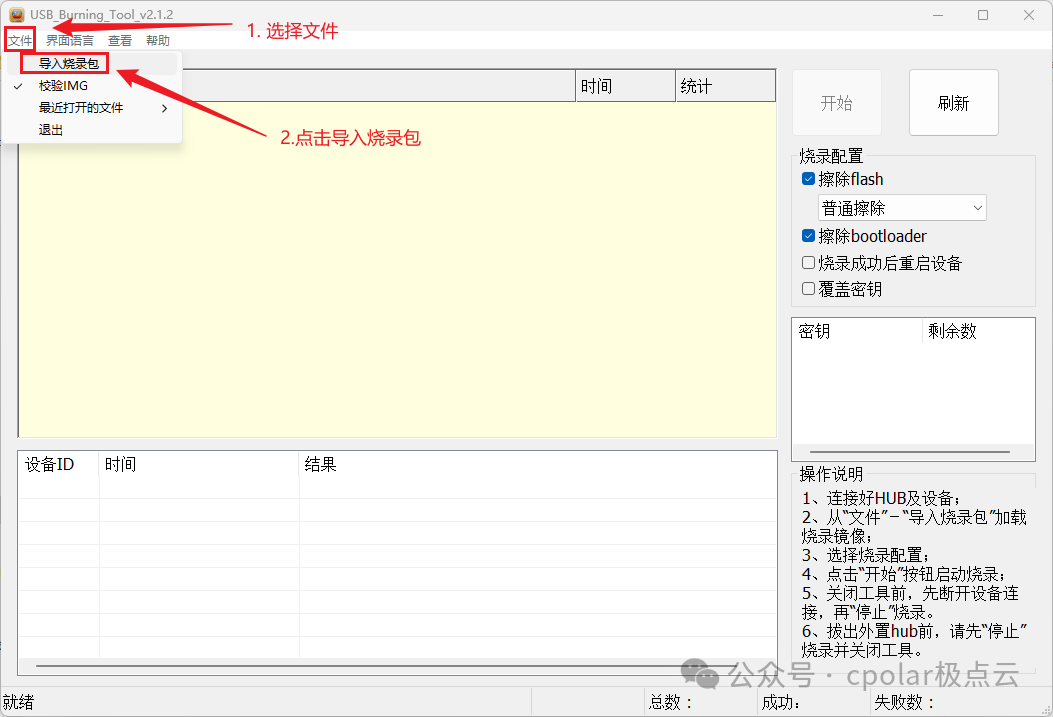
Important Reminder: Next, you need to uncheck the options for Erase Flash and Erase Bootloader, then click the Start button:
Uncheck 【Erase Flash】 and 【Erase Bootloader】!!!
Uncheck 【Erase Flash】 and 【Erase Bootloader】!!!
Uncheck 【Erase Flash】 and 【Erase Bootloader】!!!
Important things need to be said three times:
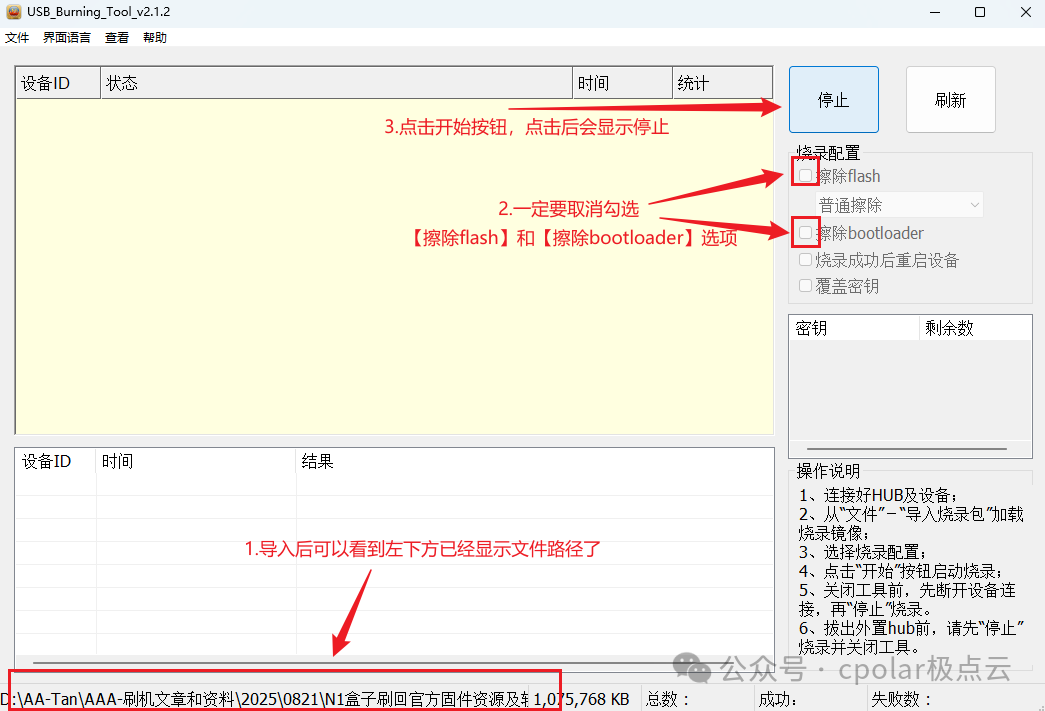
Step 8: Connect the Device
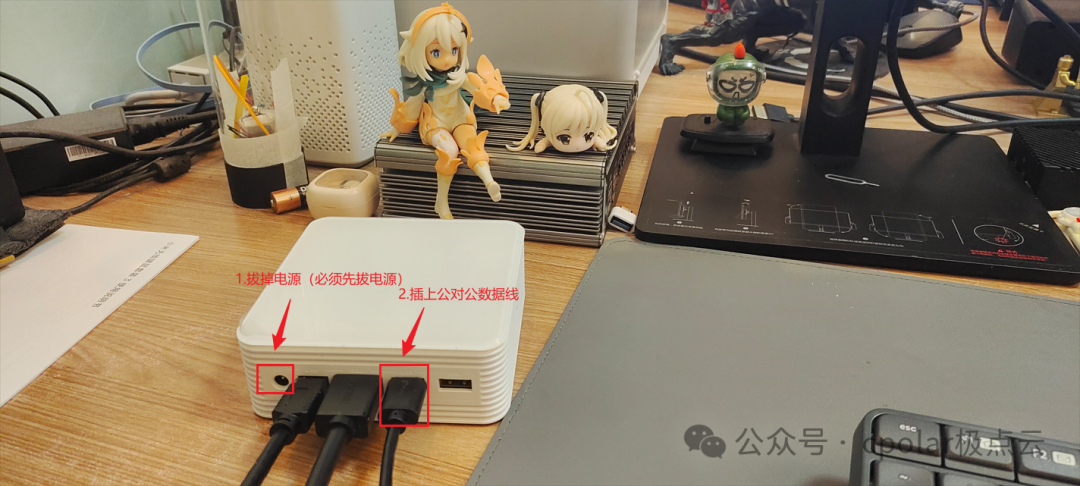
After completing the above operations, first unplug the 【power supply】, then plug in the 【male-to-male data cable】:
If you do not unplug the power supply first and directly plug in the male-to-male data cable, even if you unplug the power supply, the device can still be powered through the male-to-male data cable, so you need to unplug the power supply first
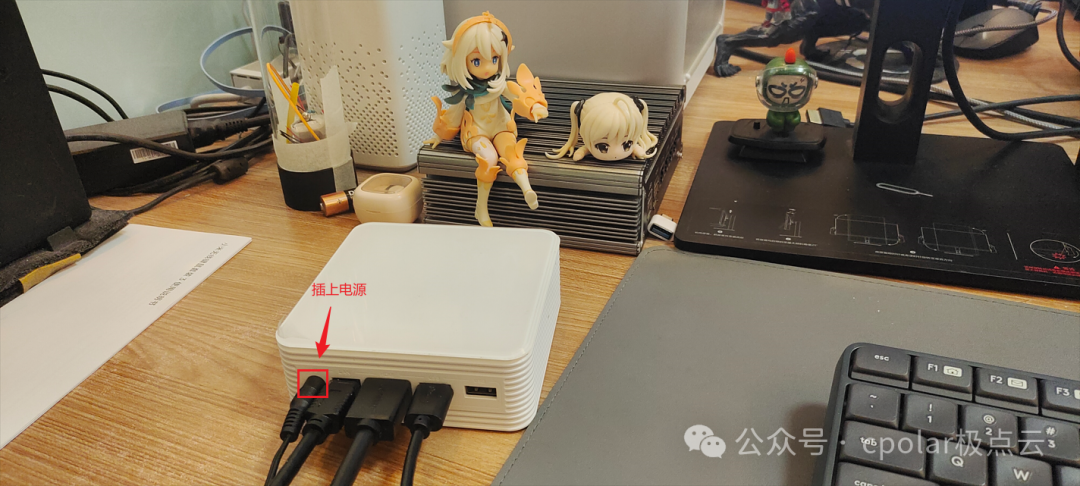
Then plug in the power supply:
Step 9: Start Flashing
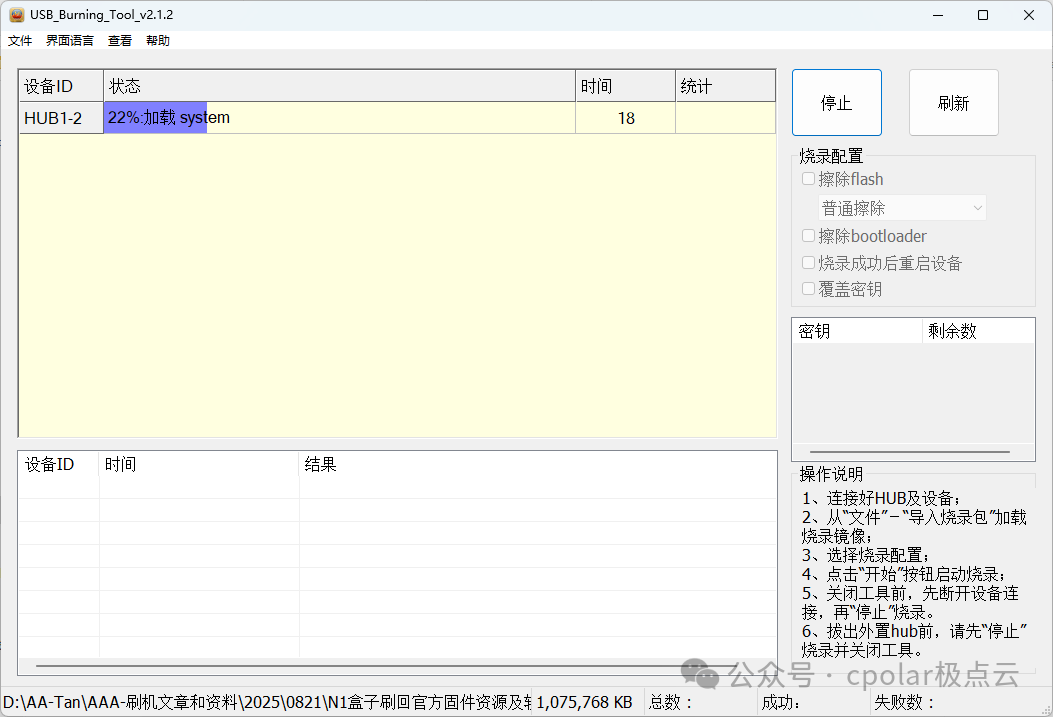
After plugging in the power supply, return to the USB_Burning_Tool tool page, and you will see that the device has been recognized, and the flashing has started:
Step 10: Flashing Completed
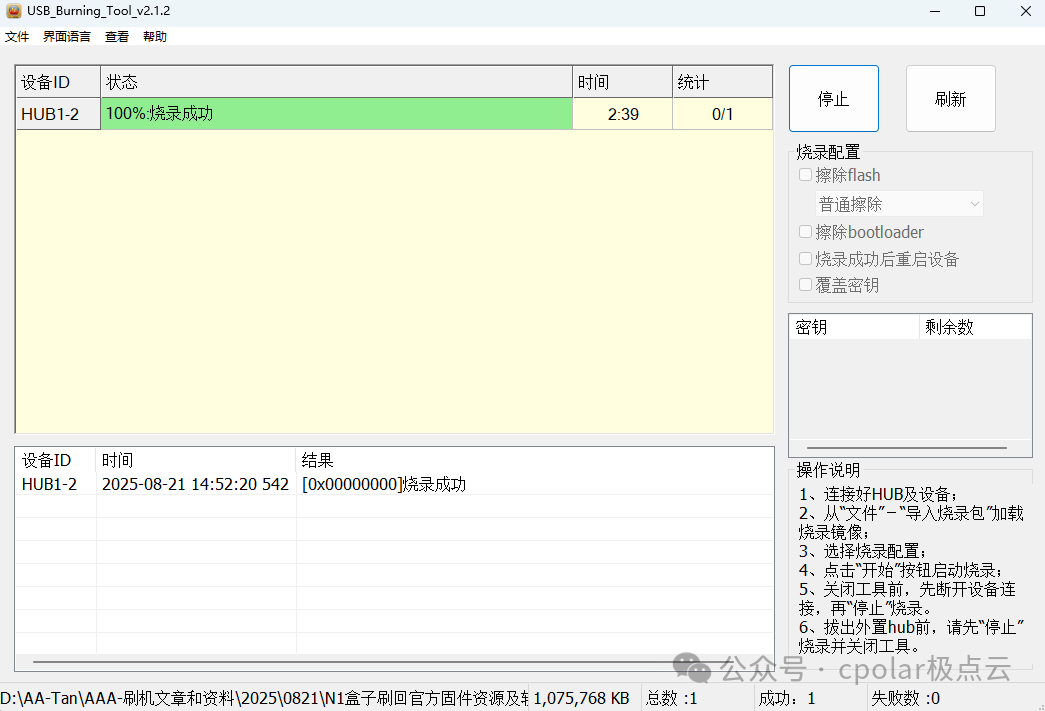
After the flashing is complete, it will display as shown in the image indicating successful burning:
Step 11: Reboot the Device
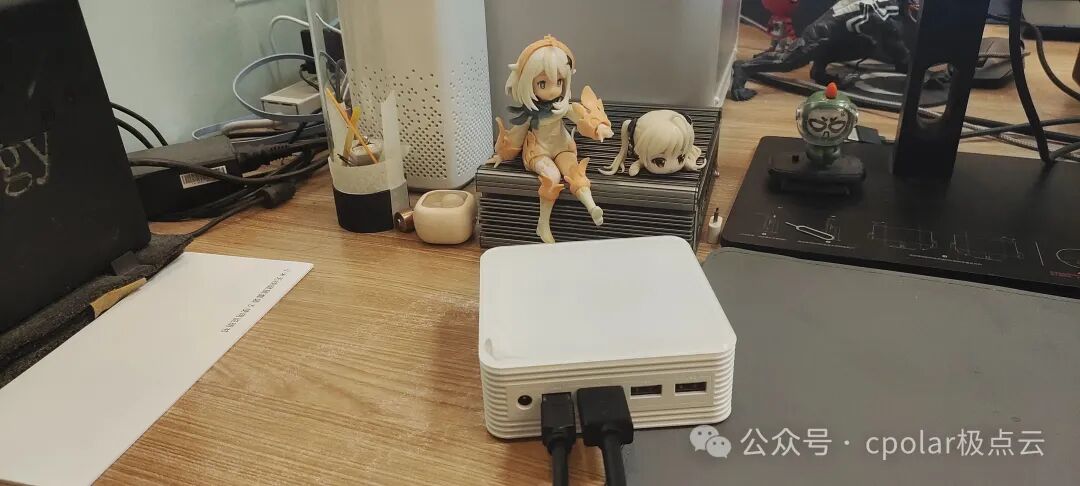
After completion, click stop on the tool, then unplug the male-to-male data cable and power cable:
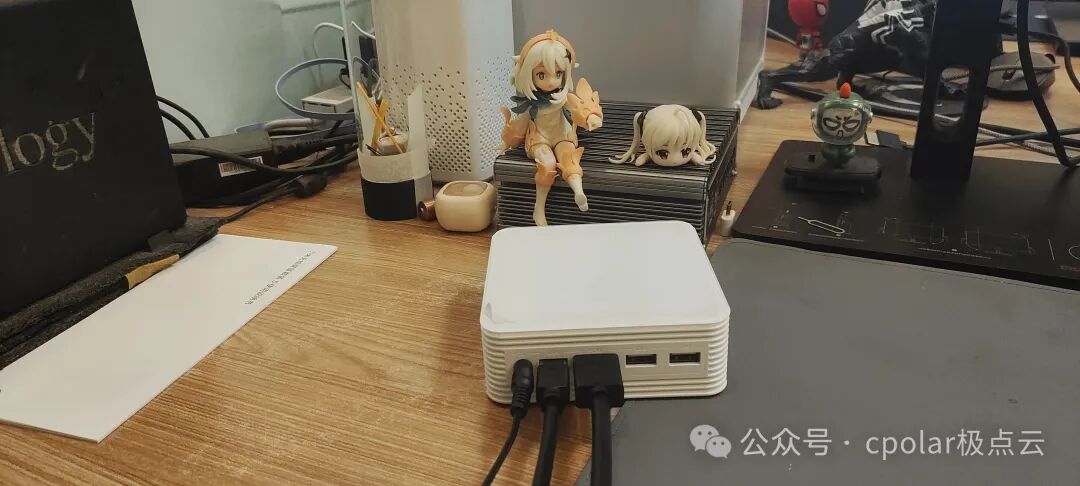
Then plug in the power cable:
Step 12: Verify Flashing Results
You can see that the official system has been successfully flashed back, displaying the Next Generation Home NAS Cloud Disk:

After waiting for the startup to complete, you can see that you have successfully entered the main page:
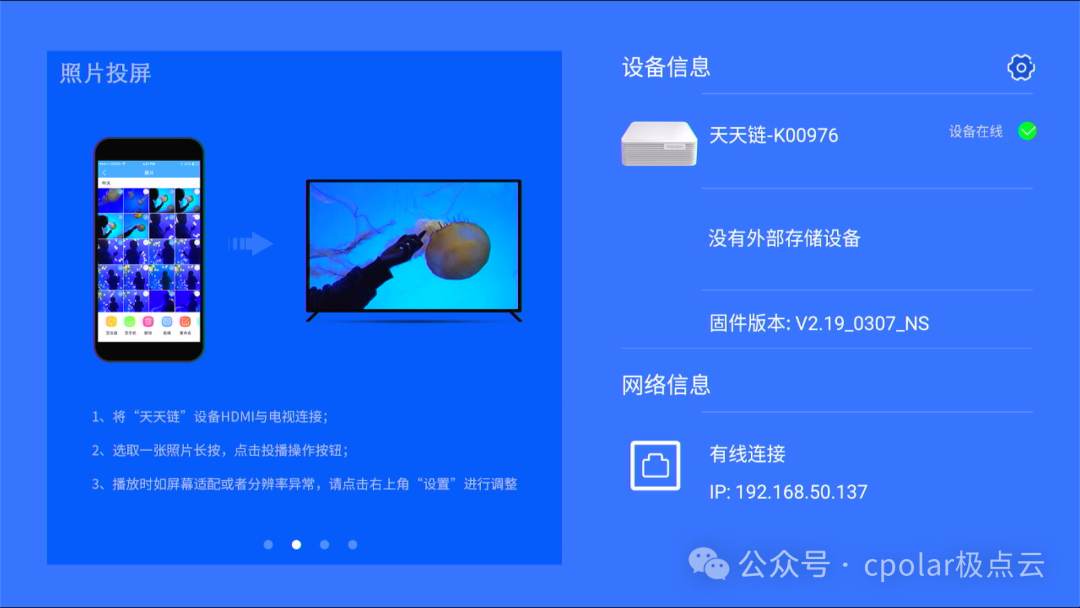
3 Summary
3.1 Summary of Key Points of the Tutorial
This tutorial successfully demonstrated the complete process of flashing back to the official Android system from a Linux system (such as Armbian, iStoreOS). For other systems like OpenWrt and CasaOS, the commands are generally applicable, and the operational process is consistent.
Important Notes:
-
You must uncheck the options for Erase Flash and Erase Bootloader
-
Unplug the power supply before plugging in the data cable, to avoid powering through the data cable
-
Formatting the boot partition is a key step to enter flashing mode
-
Be cautious with command operations, ensuring the partition names are correct
Thank you for your interest in this article. If you have any questions, feel free to leave a comment for discussion.cpolar official website – Secure intranet penetration tool | No public IP required | Remote access | Website setup
If you need to reprint, please indicate the source!