

Dev C++ is a lightweight C/C++ integrated development environment (IDE),and it is the designated tool for competitions such as NOI and NOIP.
When installing this software on Windows, many parents may not know where to start, but installing Dev C++ is just like installing any ordinary software and is far less complicated than installing other compilers.
So how do you install this software? In this issue, Programming Cat brings you theinstallation and usage tutorial, let’s take a look~

Dev C++ Installation Tutorial
01
Download the Installation Package
Download the Dev C++ installation package:[Make sure to select “Normal Download”, do not choose “Safe Download”]
https://pc.qq.com/detail/16/detail_163136.html
02
Select Language
Open the installation package, wait for it to load, and select the language [English]
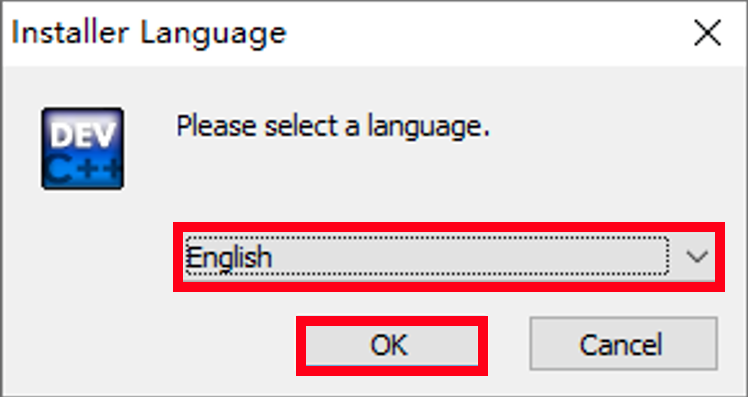

Note: Select English here, you can change it to Simplified Chinese later
03
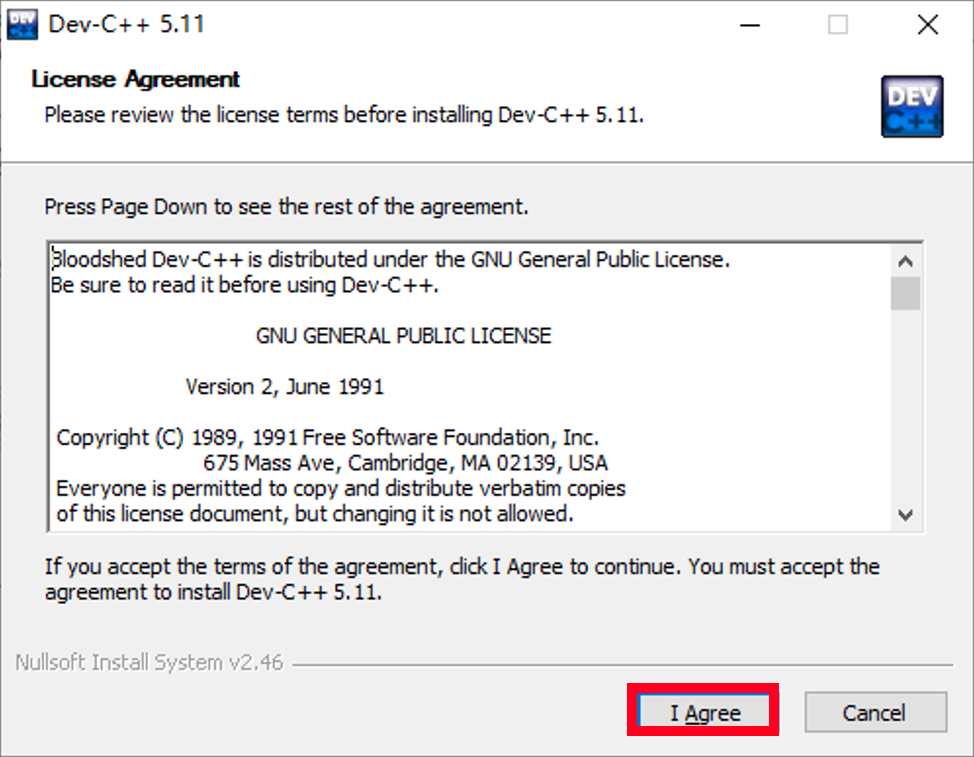
Click I Agree
04
Click Next
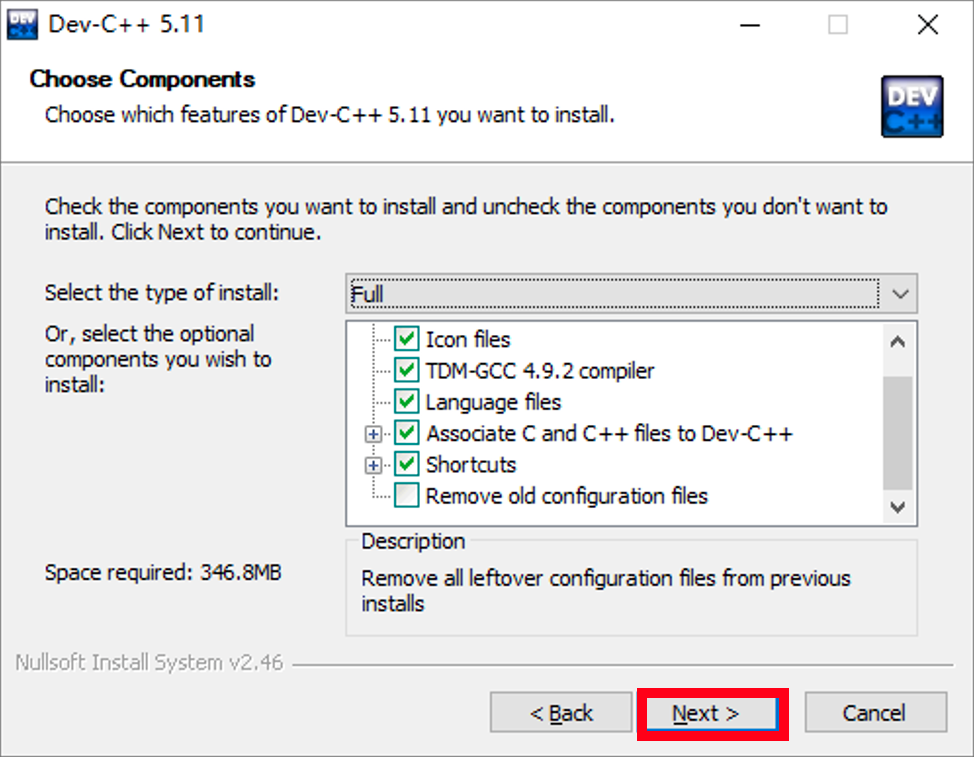
Note:If the previous installation of Dev C++ failed and you are reinstalling, check [Remove old configuration files] here; if this is your first installation, you can leave it unchecked
05
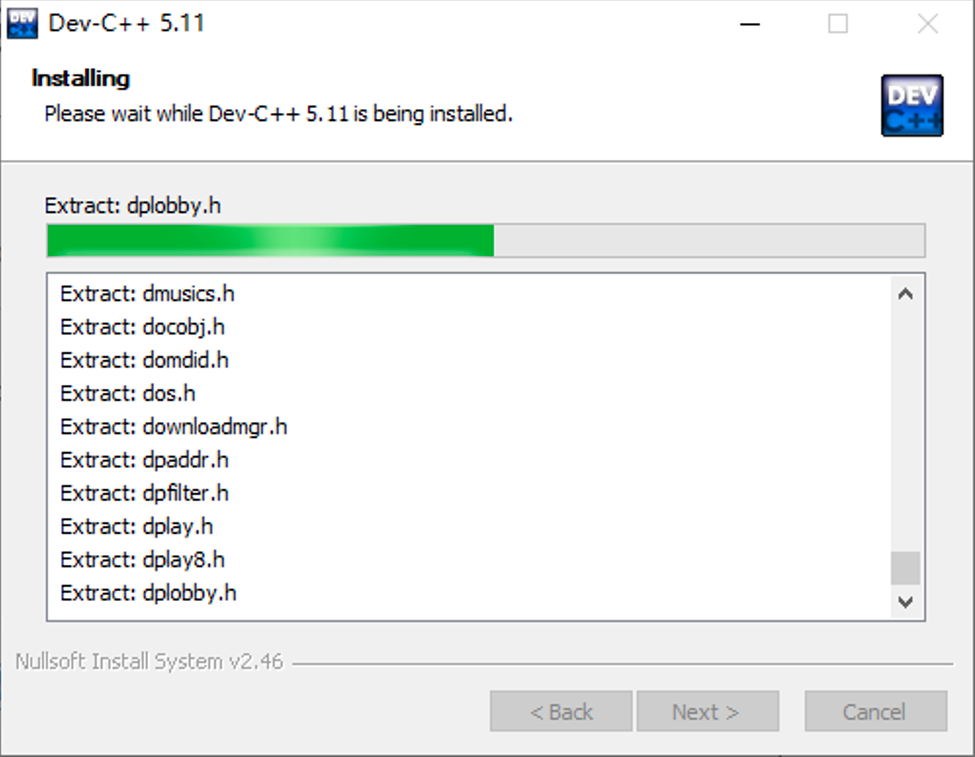
Installation
Select the installation location (it is recommended to install it on the D drive, do not install it on the C drive), and click [Install]
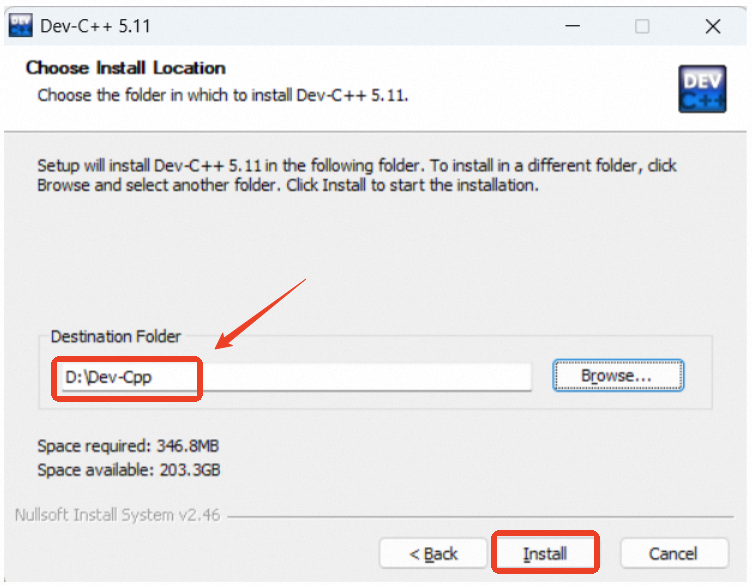
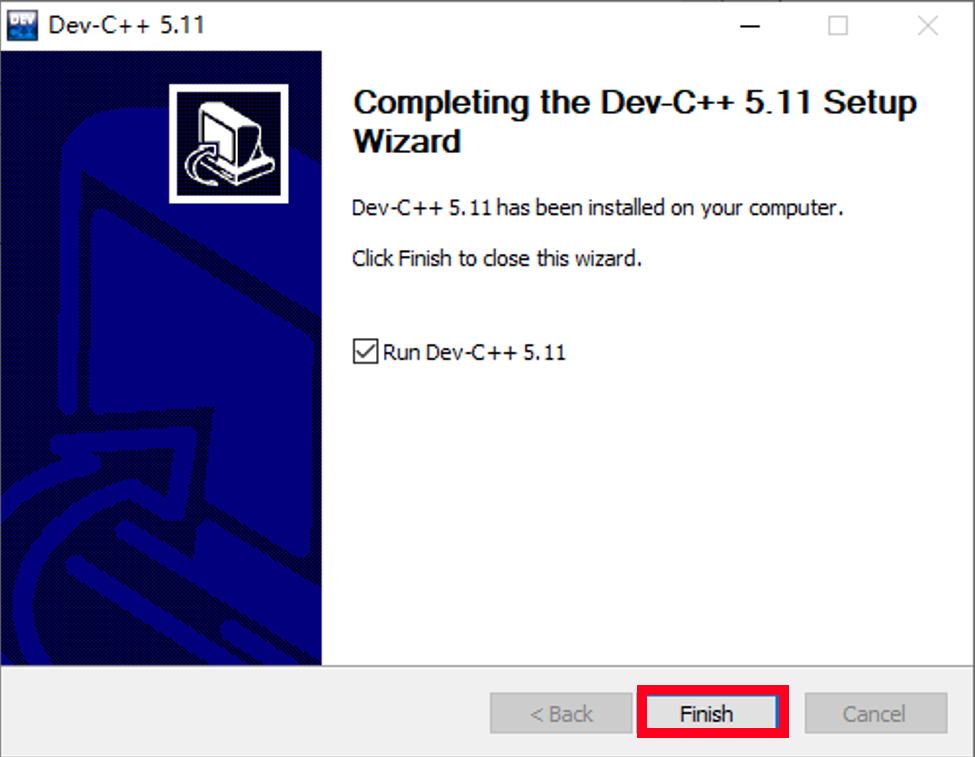
After installation, click [Finish]
06
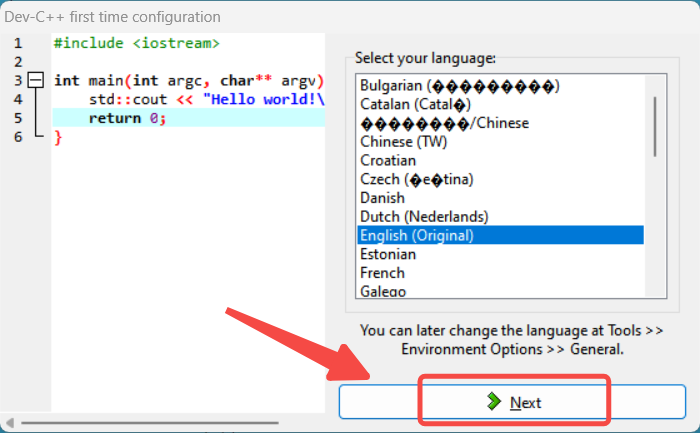
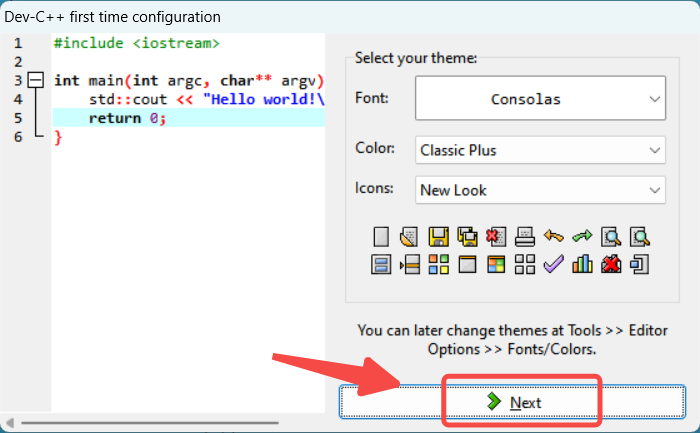
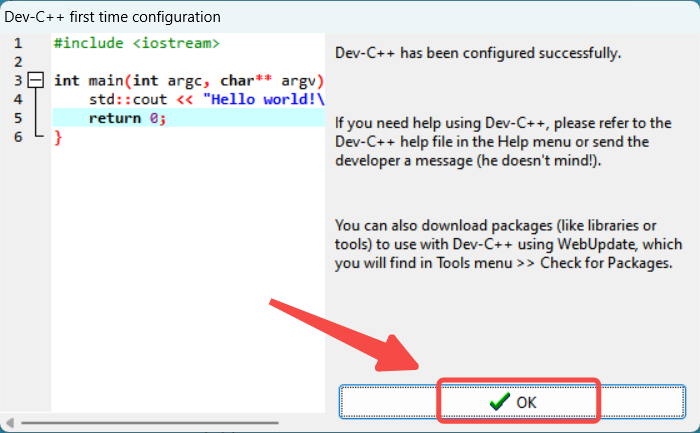
Click Next
After installation, Dev C++ will open, click [Next]
Using Dev C++
—— Changing Language
01
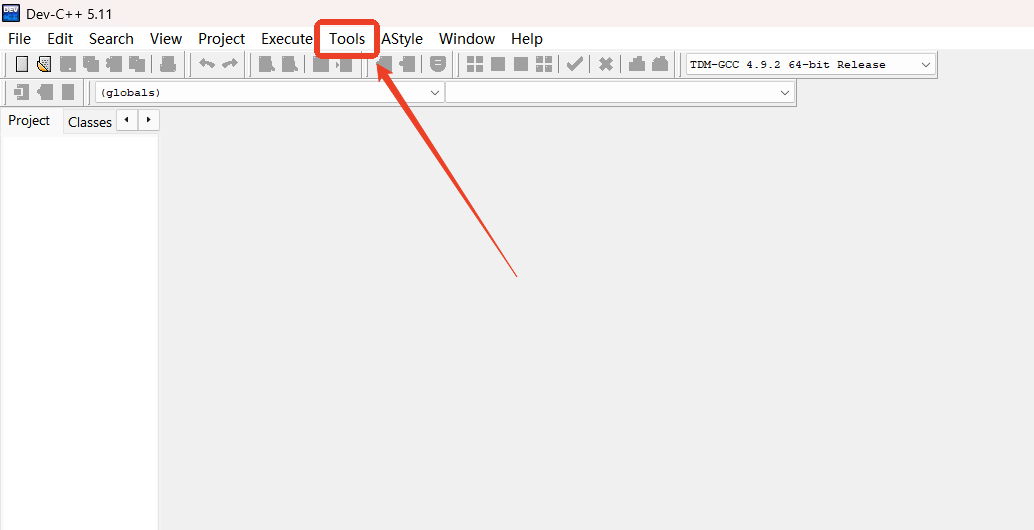
Click Tools
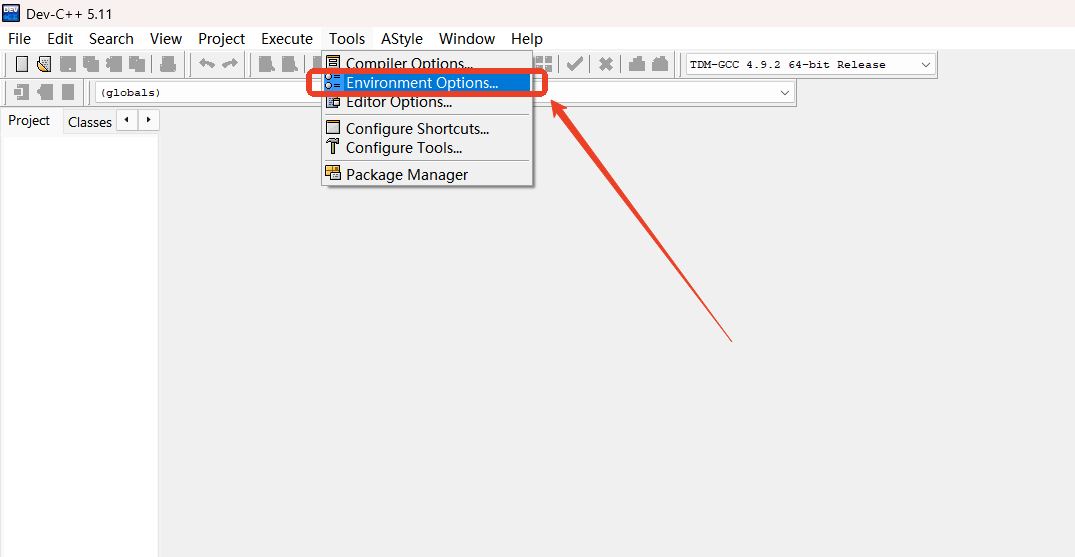
Click [Tools] → Select [Environment Options]
02
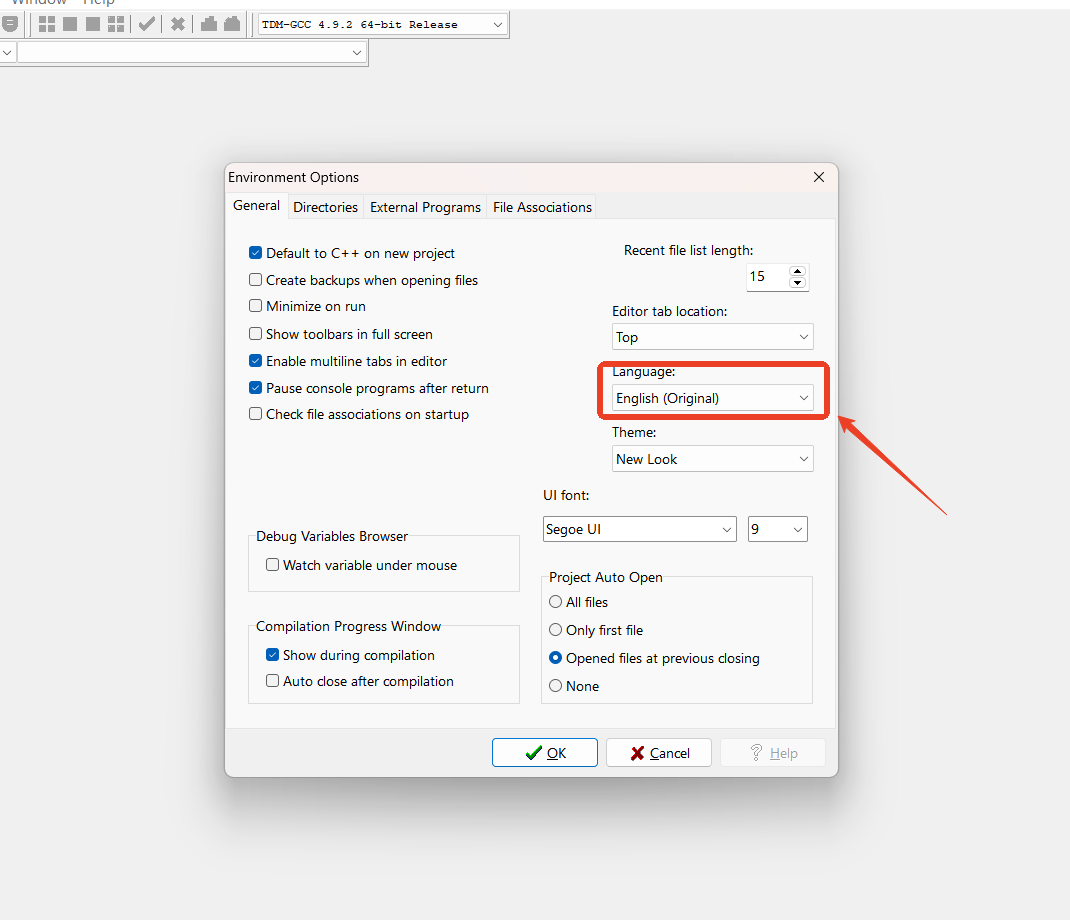
Click the Dropdown Option
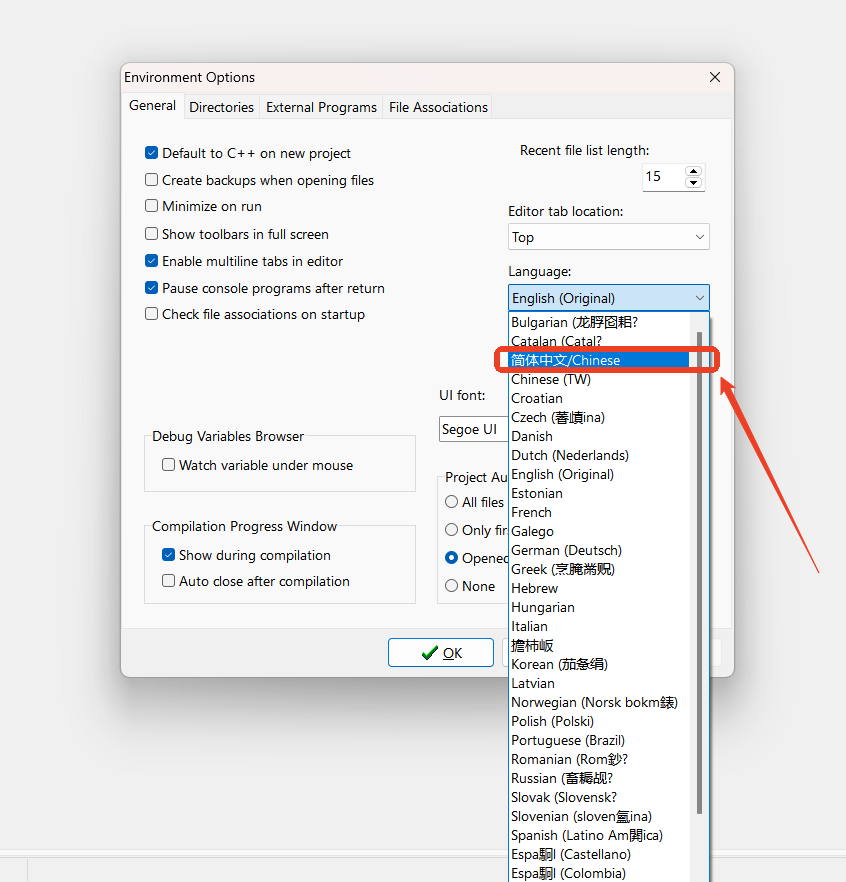
In the pop-up box, click the small arrow next to [Language] to open the dropdown options
03
Select Simplified Chinese
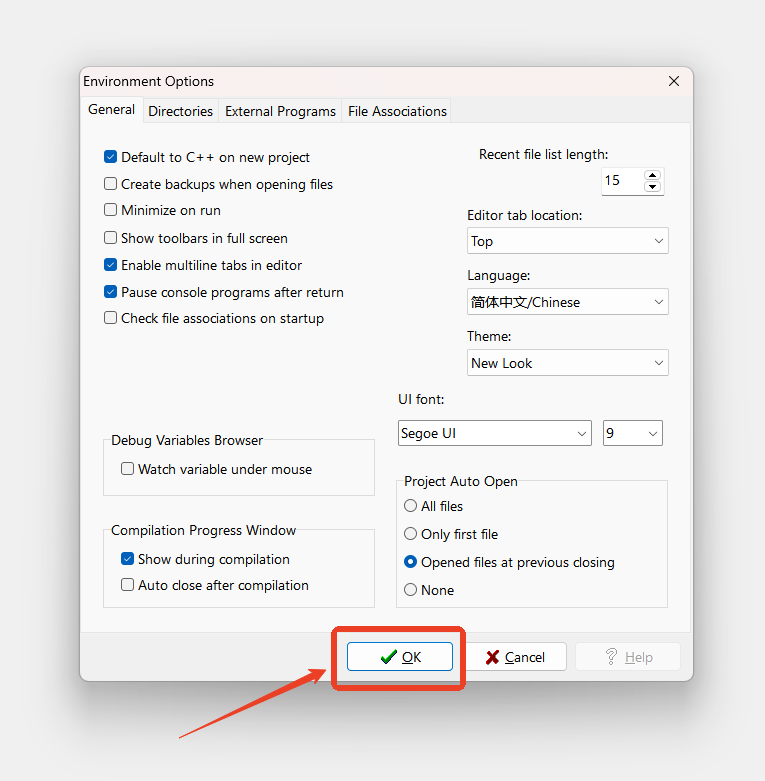
Select [简体中文/Chinese] → Click [OK]

Using Dev C++
—— How to Create Source Code
01
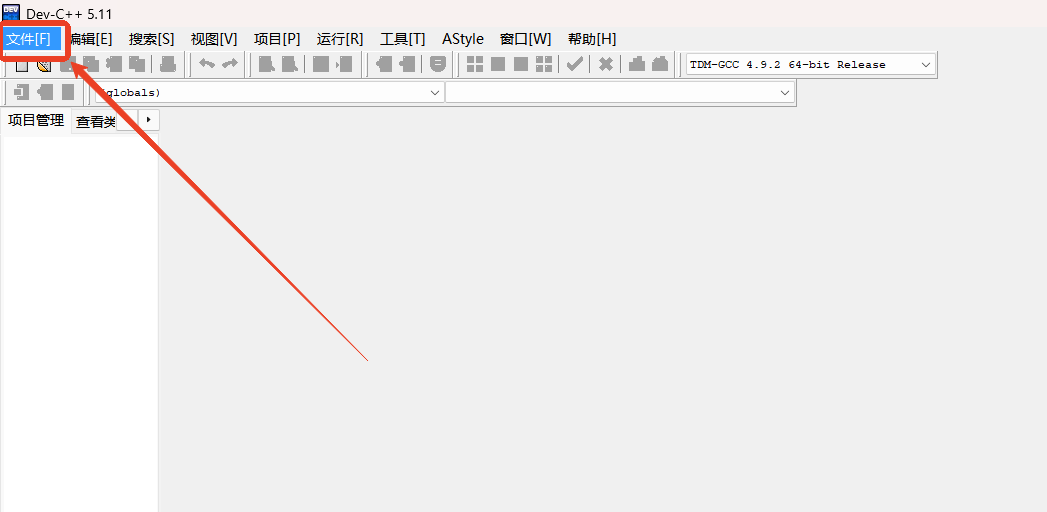
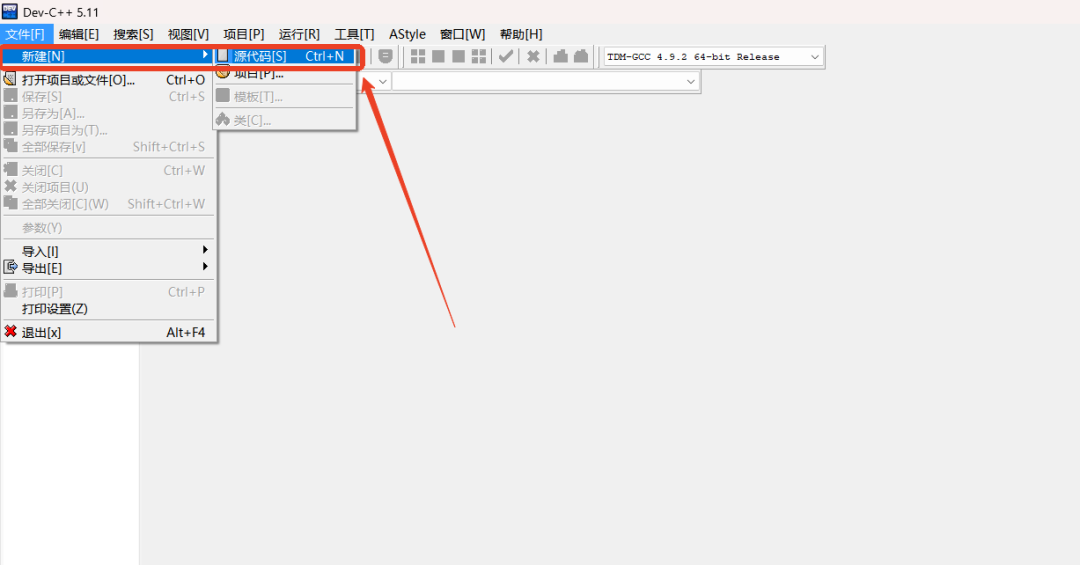
Click File, Select New Source Code
Click “File” → Select “New” → “Source Code”
The shortcut key isCTRL+N

Using Dev C++
—— How to Create a cpp Folder
Method 1
01
Click Compile
Click the four small squares in the toolbar [Compile], the shortcut key isF9
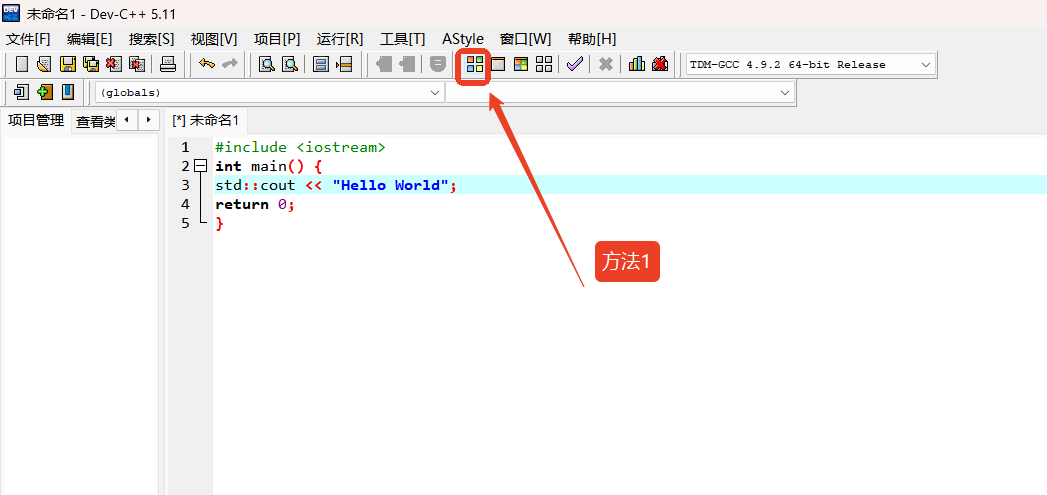
Note:If you find the font too small,hold down the Ctrl key and scroll the mouse wheel to zoom in or out the font.
02
Create a New Folder
Create a new folder specifically to store C++ program code, making it easier to find later
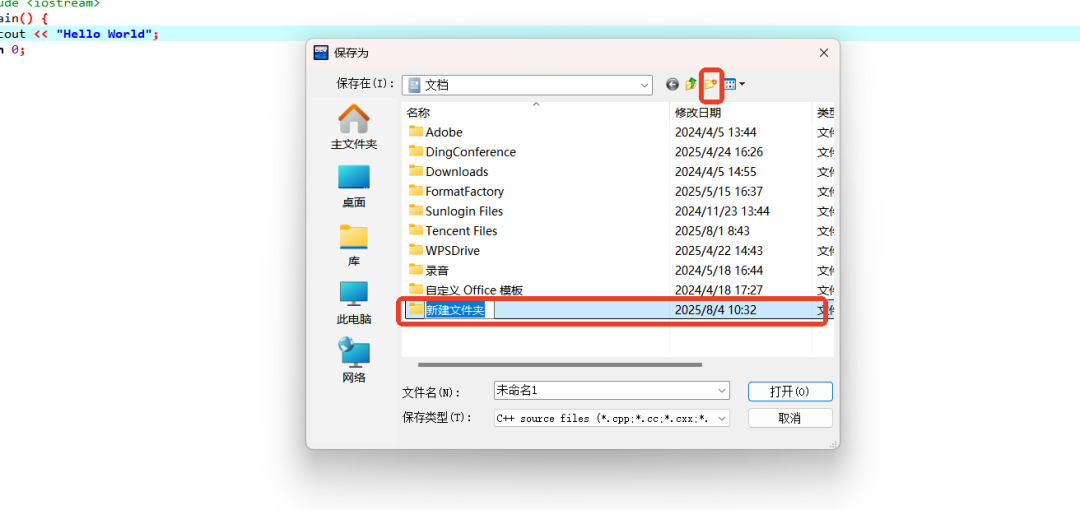
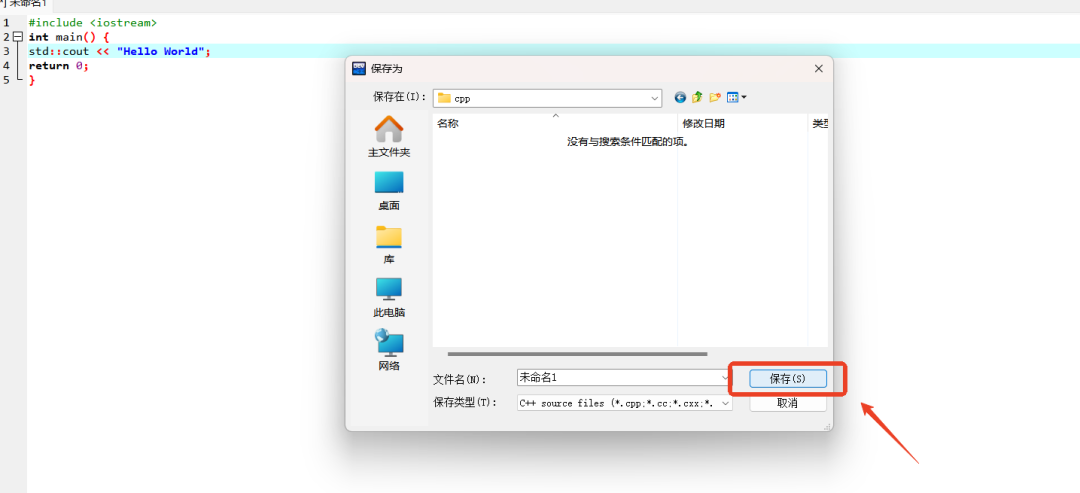
Open the newly created folder and click “Save”
03
Click Run
After compilation, click the small square next to [Run], the shortcut key isF10
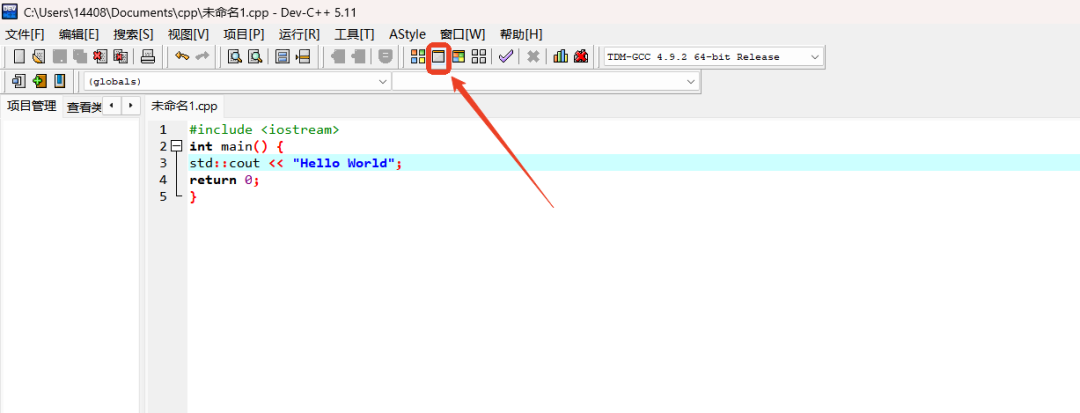
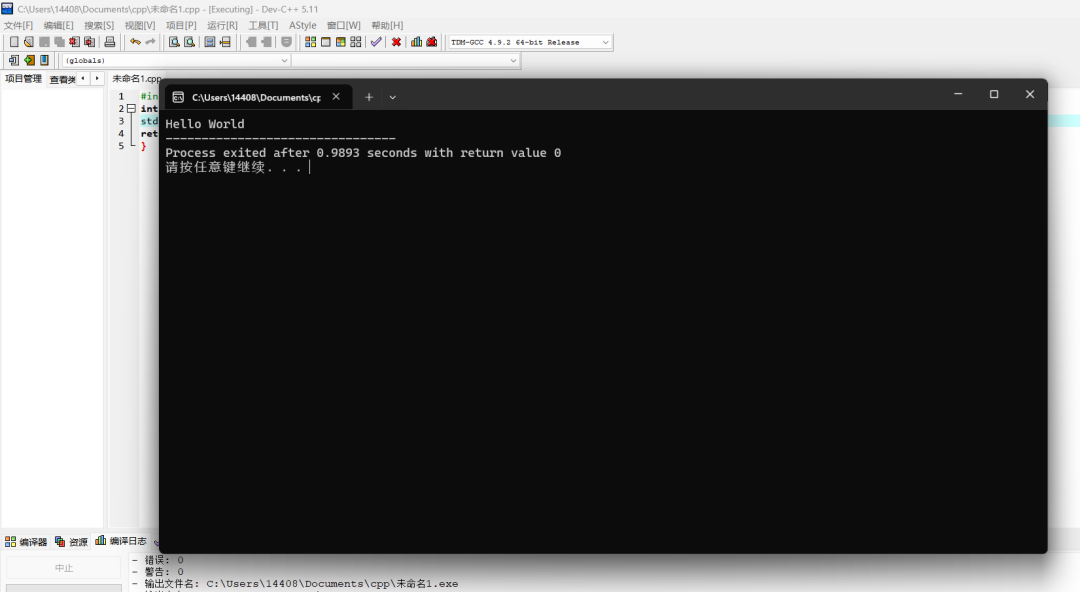
Note:If the code has been modified, you need torecompile and then run, otherwise, you will be running the previous compilation result.
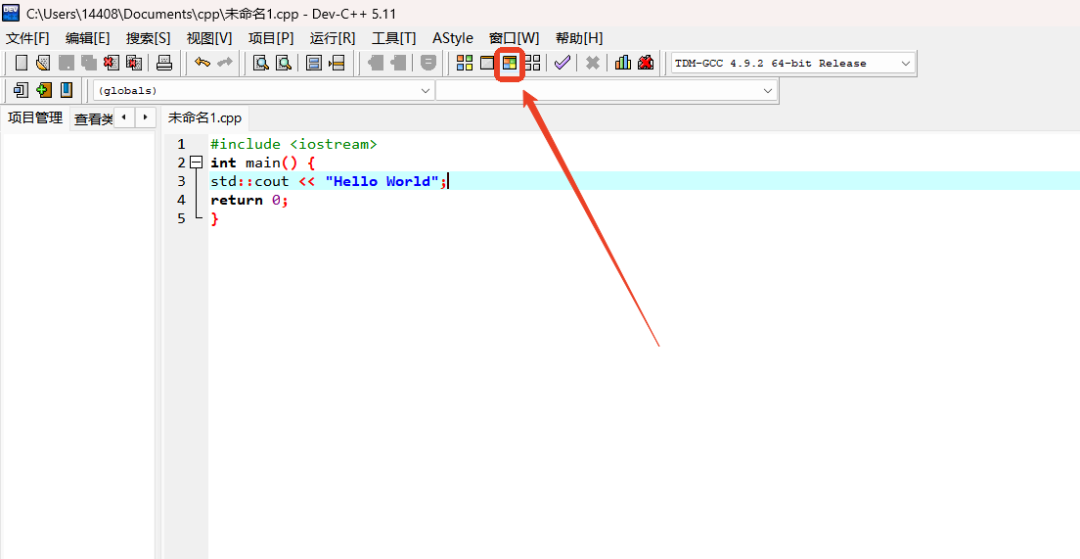
You can also directly click the third small square to [Compile + Run], the shortcut key isF11
Method 2
01
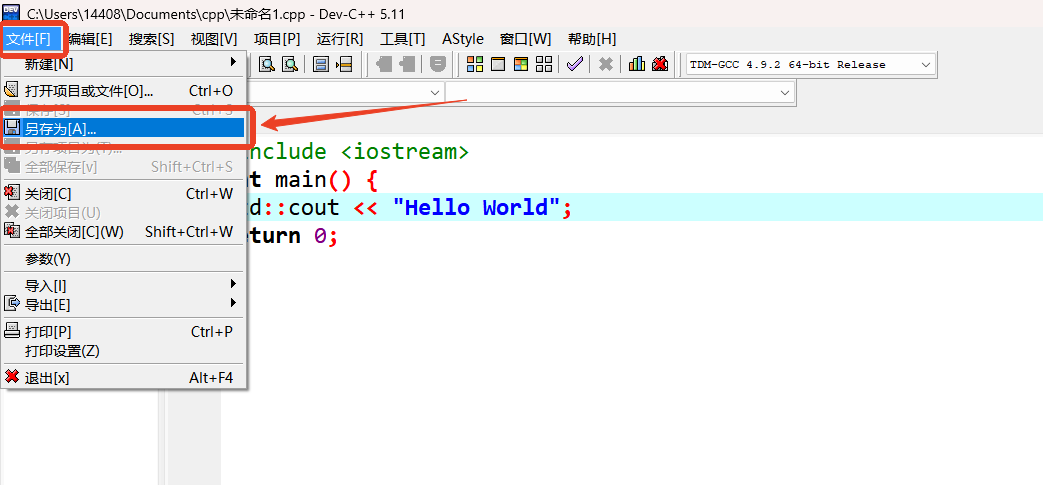
Click File
In the navigation bar, click [File] → [Save As]
02
Create a New Folder
Create a new folder tospecifically store C++ program code, making it easier to find later
Open the newly created folder and click [Save]
03
Compile + Run
Click the third small square to directly [Compile + Run], the shortcut key isF11

Using Dev C++
—— About Errors
01
Click File
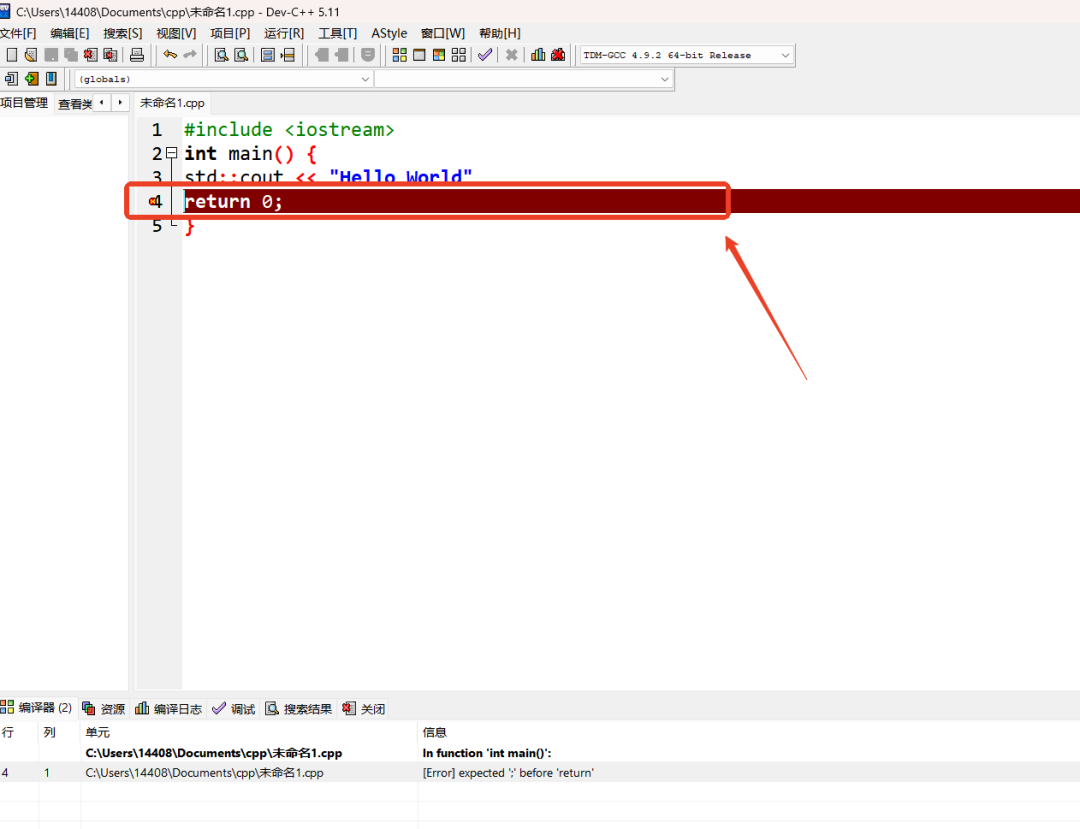
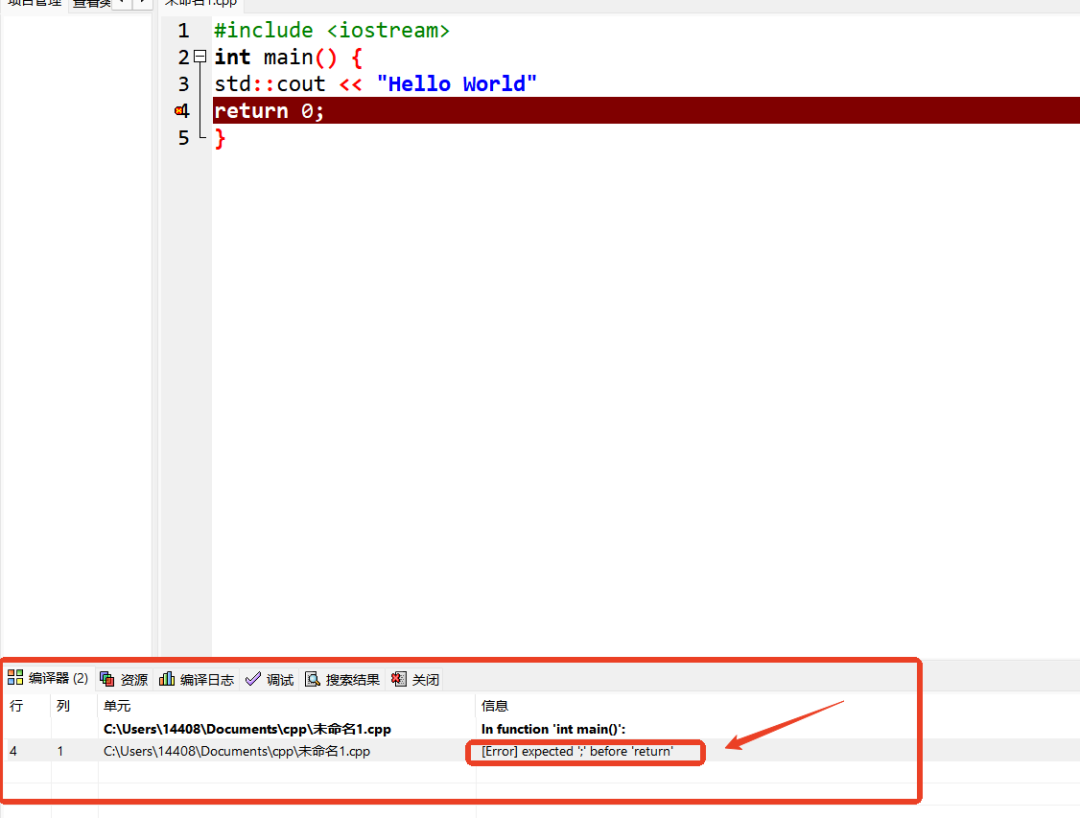
If compilation fails, and there are syntax issues in the program, Dev C++ will indicate the line number of the error.
Note: The line marked in red may not necessarily be the one with the issue, there may also be issues nearby (in the previous or next line), modify the error according to the error prompt around the marked line.

Other Important Notes
1
No Code Autocomplete Feature
Dev C++ does not have a code autocomplete feature, so everyonemust write header files and basic frameworks completely and accurately. In exams, if the framework is not written completely, the program will not run correctly.

2
Special Rules
Dev C++ has a special rule that other compilers do not have:it defaults all variables’ initial values to 0.
In a normal compilation environment, variables should not have default initial values, and this feature may mislead users. For example, when writing code involving array operations, if users are accustomed to the local array elements’ default initial value of 0 in Dev C++, running the same code in other compilers may result in undefined values for uninitialized local array elements, potentially causing runtime errors.


Follow me, strive for excellence, and make steady progress
Previous Recommendations

“The camp does not end” CSP-J award camp review, witness the transformation of the youth

Key points for preparation are all here! CSP-J entry-level exam syllabus
Registration is open | September GESP registration channel has been opened, see the full registration process here