Here is the micro-course video.
Please click the play button to watch.
Task 1: Understand the structure and working principle of the buzzer.
Task 2: Match the buzzer hardware with the software.
Task 3: Use programming to play music with the buzzer.
In this lesson, we will start creating interactive works using the buzzer. Through this lesson, we aim to understand the classification of buzzers, their sound generation principles, and practical applications; connect the buzzer to the Arduino development board using DuPont wires; consciously read the printed pin labels on the development board; be able to correspond the pin labels with the corresponding block code pins in the Mind+ software; master loading the Arduino Uno expansion module, connecting devices, and running the written program; have a general understanding of the effects of setting the pin to high and low levels; master the method of programming the buzzer to emit different tones and rhythms; write the corresponding buzzer performance program according to the music score; and play corresponding songs based on background changes.
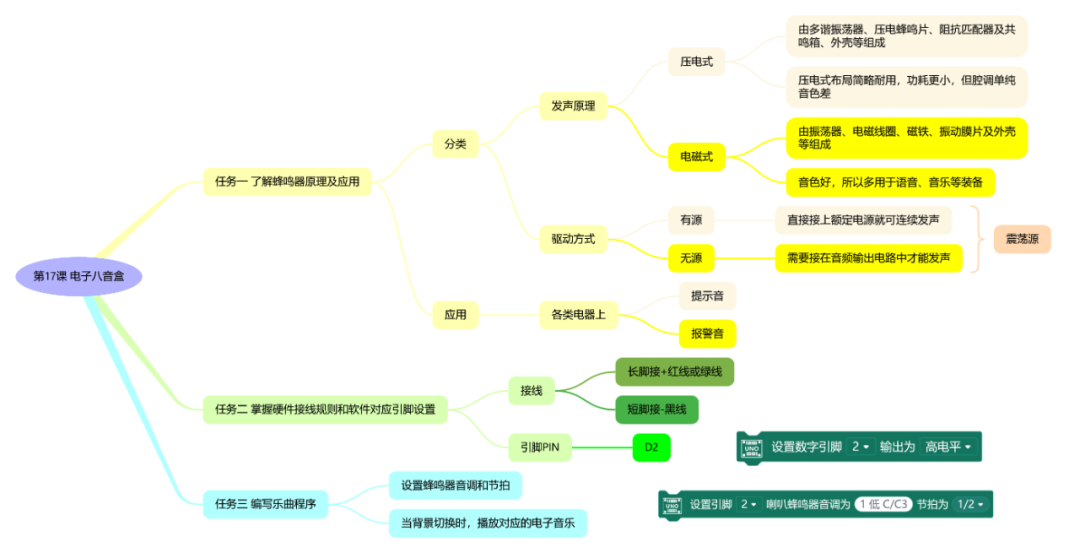


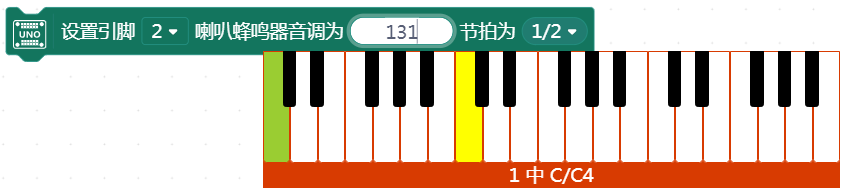
When the output is set to high level, the buzzer circuit closes to form a current and produce sound; when the output is set to low level, the voltage across both ends of the buzzer power supply is 0, with no current, thus silencing the sound.
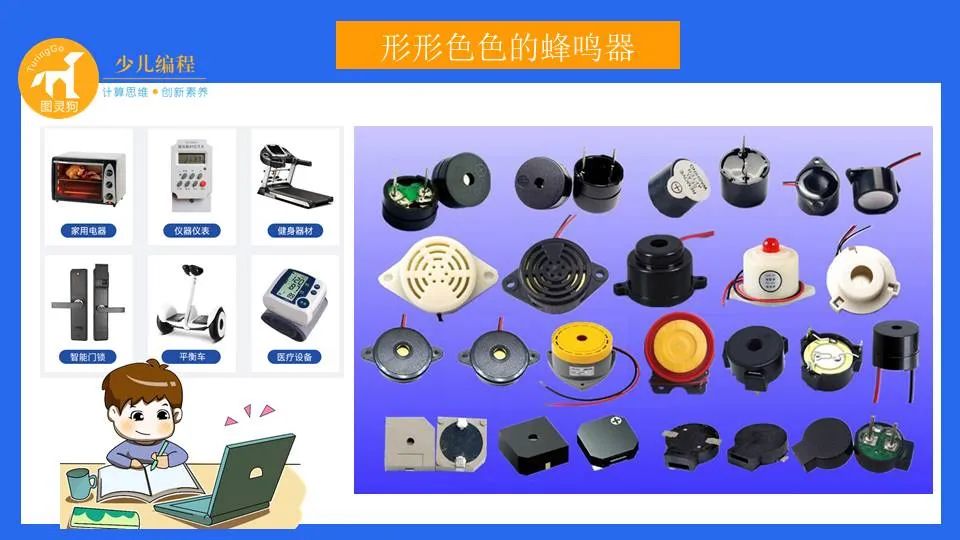
The buzzer is an integrated electronic sound generator powered by DC voltage, widely used in computers, printers, copiers, alarms, electronic toys, automotive electronics, telephones, timers, and other electronic products as a sound-generating device. Buzzers are mainly divided into two types: piezoelectric buzzers and electromagnetic buzzers.
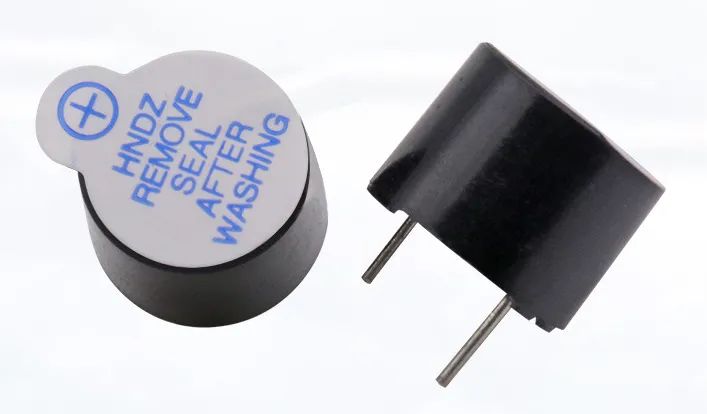
The buzzer used in this lesson is a 5V active electromagnetic buzzer.
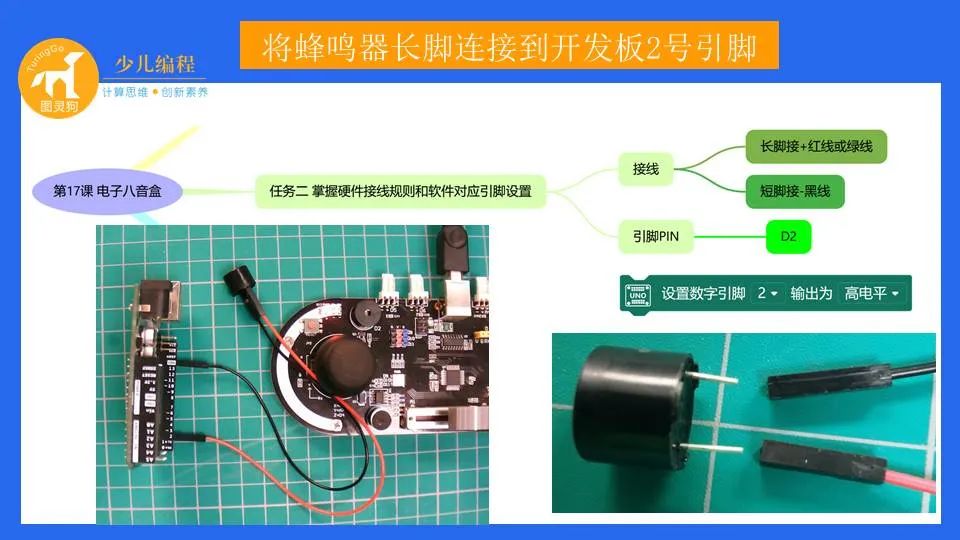
The buzzer and LED light tube both have long legs as + and short legs as -.
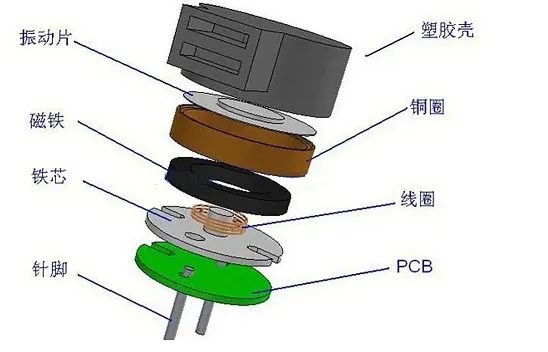
Internal structure of the electromagnetic buzzer.
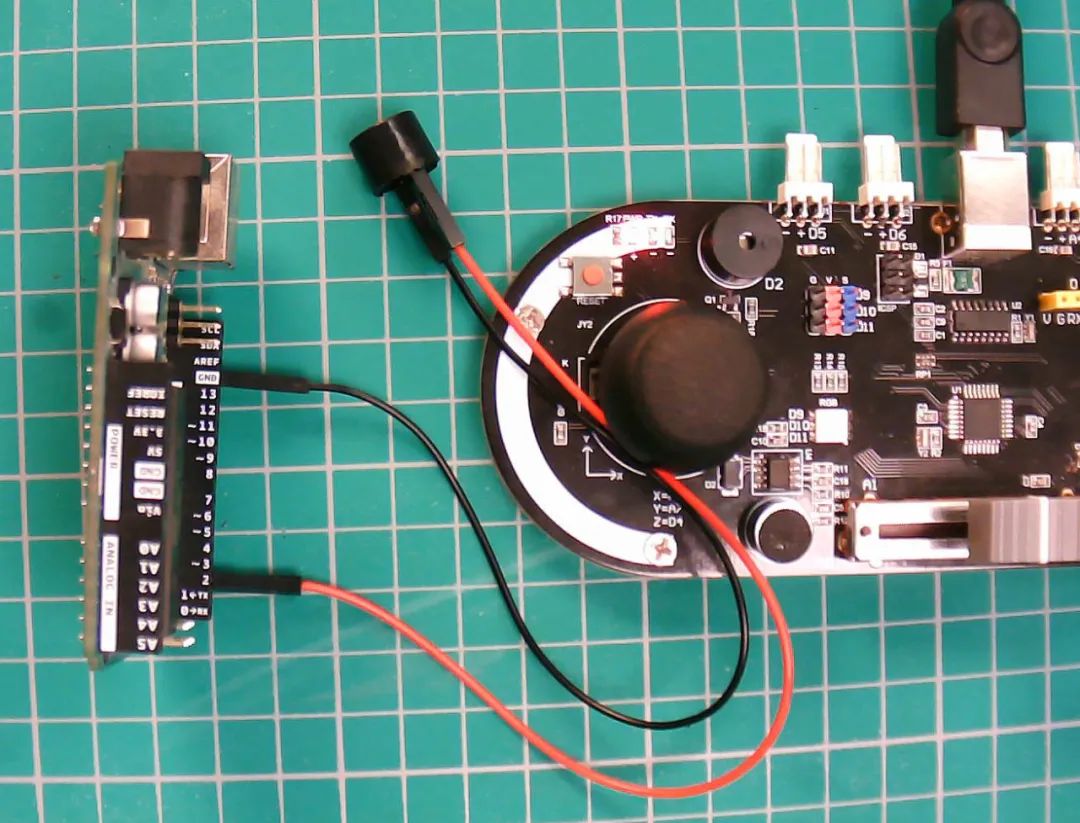
Read the circuit board labels; D2 is the pin connected to the buzzer.
The buzzer is widely used in various electronic instruments. It emits sound when a button is pressed, enhancing the interactive experience; the timer emits an alarm to remind people to pay attention to the instrument.
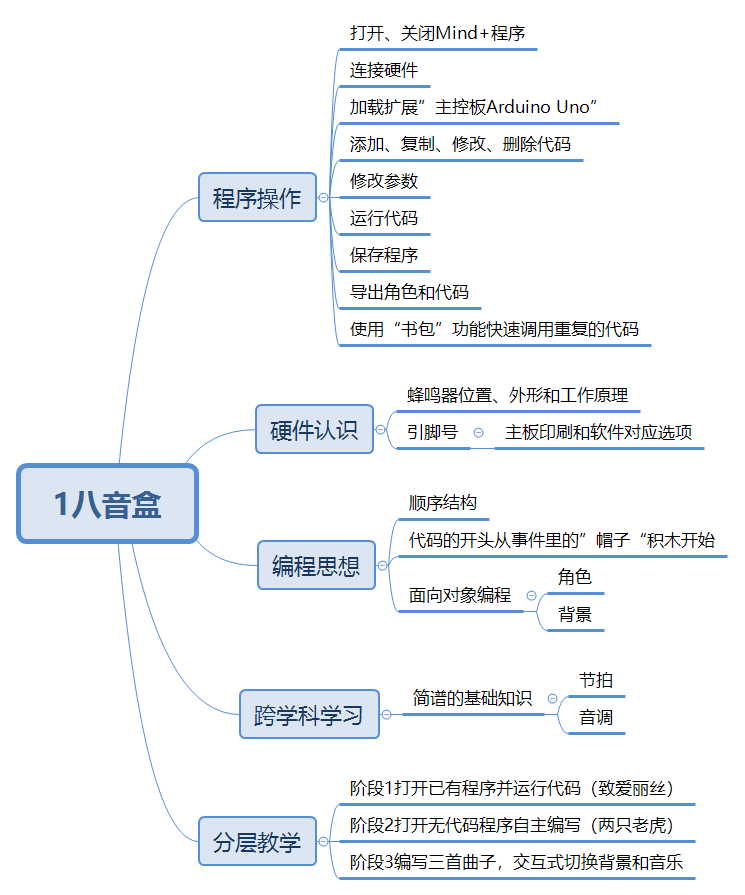
This lesson includes a detailed task mind map:
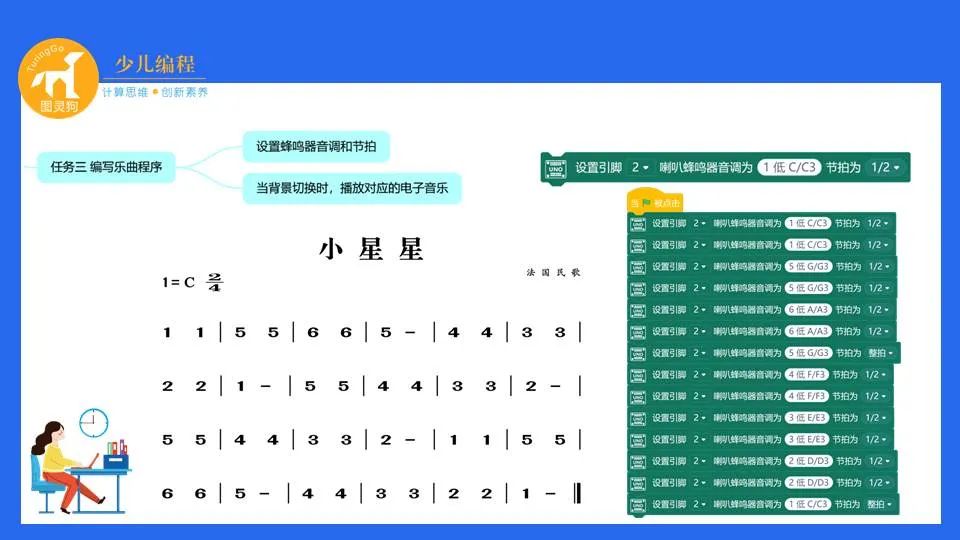
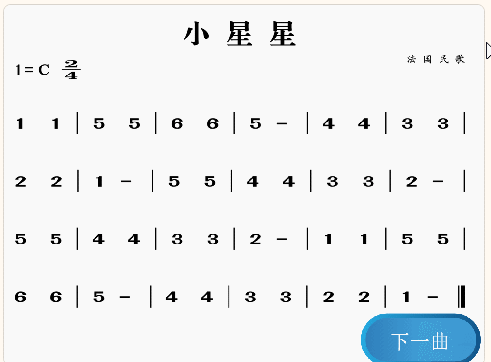
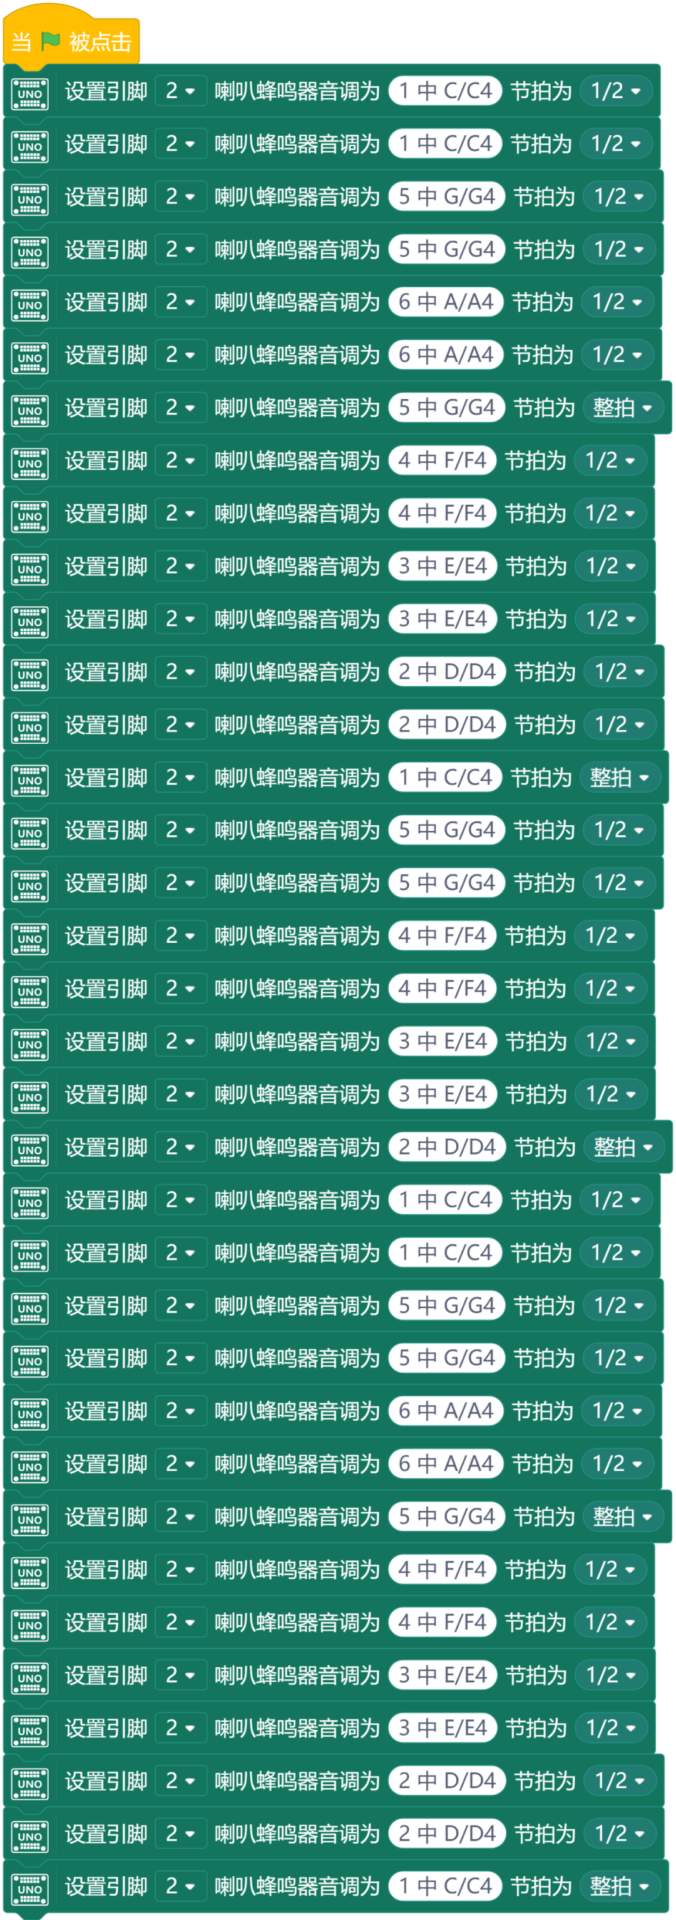
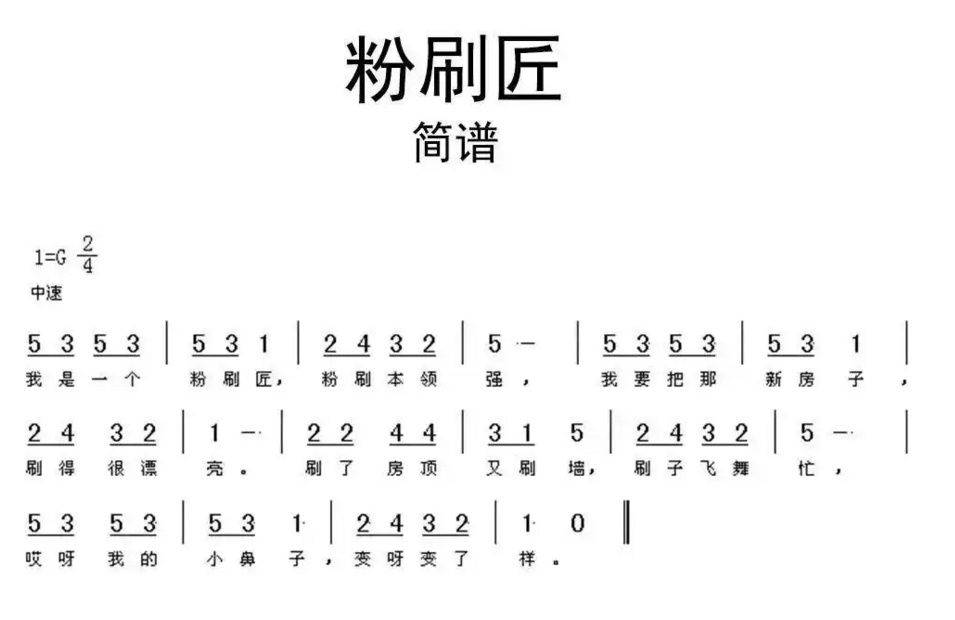
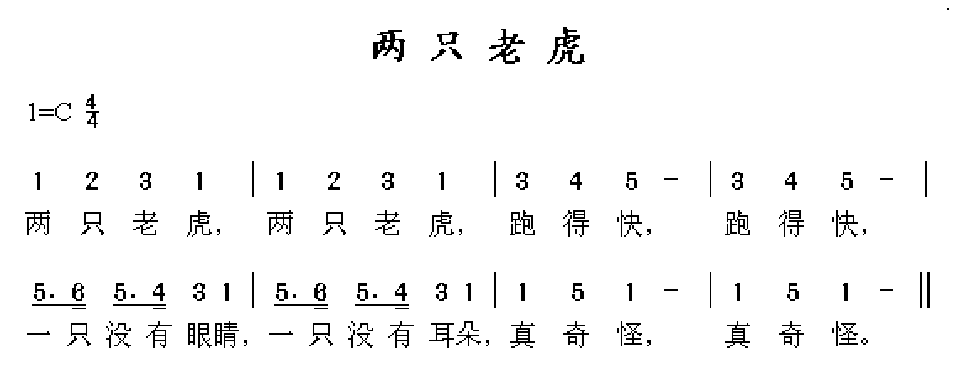
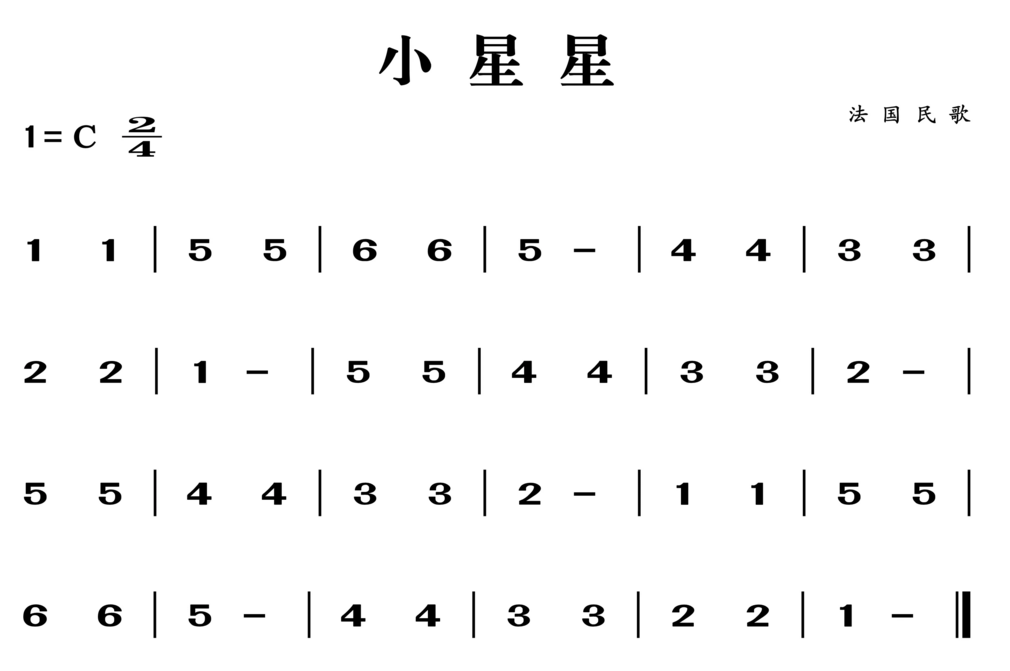
Sample code for the “Twinkle Twinkle Little Star” tune:
Please download and use the background image used in this lesson.
Real-time interaction demonstration effect of the controller.
Download link for the programming software Mind+:
https://mindplus.cc/download.html
Download link for mind mapping software iThoughts:
https://www.toketaware.com/trial-download
——————————————
Please download the essential tools and source code from Alibaba Cloud Drive:
https://www.aliyundrive.com/s/6BFFvFtUcJJ——————————————
Speaker: Jin Lei
Shandong Province Special Grade Teacher