 MAKER:terrang/ Translated by:Fun Endless
Staying at home for too long can make people lazy, so gather your friends and kids to play a real-life CS game! What? No equipment? Alright, here’s a DIY tutorial for making an infrared laser gun and vest, along with a basic game framework developed in Python. Once you DIY, you can play right on-site!
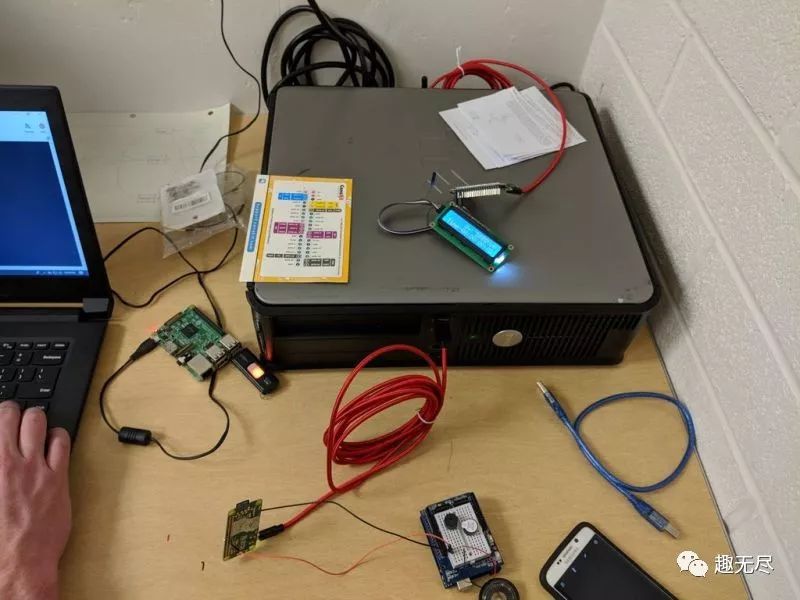
First, let’s briefly explain the principle. The game requires a computer as a server to synchronize data for each player (the infrared laser gun in hand). The infrared gun emits infrared light that triggers the infrared receiver on the vest, recording hit data during the game.
The infrared laser gun used by players is the client, based on the Raspberry Pi Zero, equipped with an LCD screen to display game progress. The gun synchronizes data with the server via WIFI. In the following example, we will explain using 3 sets of infrared laser guns.
Materials List
1 Computer3 Raspberry Pi Zero W3 microSD Cards3 Infrared LEDs6 Infrared Receivers3 Red LEDs3 Blue LEDs3 Green LEDs3 Passive Buzzers6 Buttons3 LCD Screens with I2C Interface 16023 Portable Battery Packs3 micro to USB Cables3 PN2222 Transistors3 100 Ohm Resistors9 1k Ohm Resistors3 Vests3 Ribbon Wires1 3D Printed Laser Gun Shell
Deploying the Server
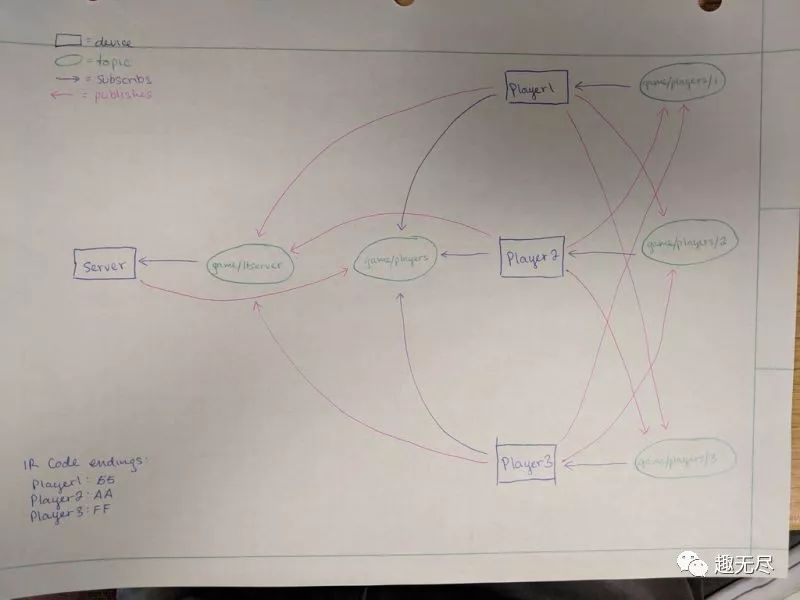
Install Mosquitto MQTT Broker Service on the computer (which serves as the game server). Mosquitto will provide a communication framework for each client device in the game, basically sending data to each Raspberry Pi connected to the server. Run the following commands in the server terminal for installation.
sudo apt-get update
sudo apt-get upgrade
sudo apt-get install mosquitto -y
sudo apt-get install python3-pip -y
sudo pip3 install paho-mqtt
Some GUIs for the server are created with the Pygubu GUI Designer. Run the following command to install:
pip3 install pygubu
For more information about Pygubu, please refer to:https://github.com/alejandroautalan/pygubu
After installing MQTT and Pygubu, create a new directory and copy the following files:ltag.py, pregame.py, game_statistics.py, gvars.py, pygubu.ui, pygubu_limited.ui, home.png, self.png, enemies.png, laser.jpg.
Files can be downloaded from the project repository:https://make.quwj.com/project/153
Installing Raspberry Pi

The Raspberry Pi inside the game guns needs to be processed as follows.
1. Install the Operating SystemInstall the latest version of Raspbian. It is recommended to use the Lite version. Refer tohttp://shumeipai.nxez.com/2013/09/07/raspberry-pi-under-windows-system-installation-to-sd-card.html
2. Install MQTTInstall the MQTT broker service, which will be used in Mosquitto. Run the following commands in the terminal.
sudo apt-get update
sudo apt-get upgrade
sudo apt-get install mosquitto -y
sudo apt-get install python3-pip -y
sudo pip3 install paho-mqtt
3. Install I2C ToolsRun the following commands to install the library for the LCD screen.
sudo apt-get install -y python3-smbus i2c-tools
sudo apt-get install rpi.gpio -y
The I2C address may need to be changed in the lcddriver.py file. Use the following command to find that address.
i2cdetect -y 1
4. Install and Configure LIRCStep 1: Create a new directory and download the attachments to that directory.
Most browsers cannot download files without extensions.Therefore, two files with temporary extensions have been uploaded, “lircrc.deleteExtension” and “modules.deleteExtension”.After downloading, please rename them to “lircrc” and “modules”.
Step 2: Install and configure the dependencies for the Linux Infrared Remote Control (LIRC) software package.For more tutorials on setting up LIRC, please refer to:http://alexba.in/blog/2013/01/06/setting-up-lirc-on-the-raspberrypi/or refer to:http://shumeipai.nxez.com/2016/12/04/configuring-lirc-for-hifibox-dac-volumio.html
Use the following command to install the library.
sudo apt-get install python3-lirc -y
In the newly created directory, run the following command to move the configuration files to the correct location.
sudo mv lircd.conf hardware.conf lircrc lirc_options.conf /etc/lirc/
sudo mv modules /etc/
Run the following command to restart the lircd service:
sudo /etc/init.d/lircd restart
Edit the /boot/config.txt file and add the following line.
dtoverlay=lirc-rpi,gpio_in_pin=18,gpio_out_pin=25
Restart the Raspberry Pi to ensure the modified commands run properly.
sudo reboot
5. Enable I2C and configure accounts for each player.Run the following command to enable the I2C interface.
sudo raspi-config
And enable I2C in the “Interface Options”.
6. Configure player accounts and LTSERVER.

The game directory contains four files.i2c_lib.py, lcddriver.py, ltsounds.py, player.py.File information can be downloaded from the project repository.https://make.quwj.com/project/153
Finally, assign a CLIENT account to each Raspberry Pi and add the server location. Configure by modifying the “player.py” code file on each Raspberry Pi. Label them with different player accounts, CLIENT accounts are assigned on the third line of player.py. Label the first Raspberry Pi as CLIENT “1”, the second as CLIENT “2”, and the third as CLIENT “3”.The LTSERVER line should be changed to the server’s IP address.Enter ‘ifconfig | grep “inet addr”’ in the computer server terminal.
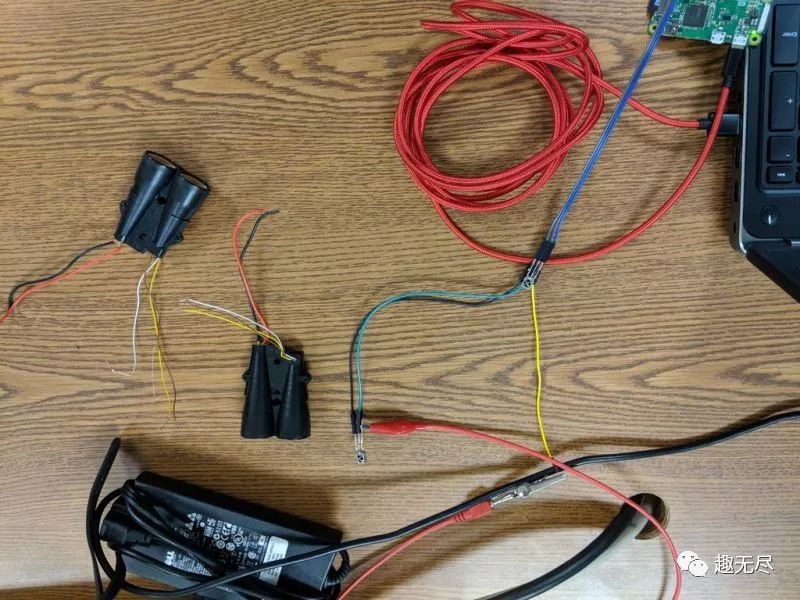
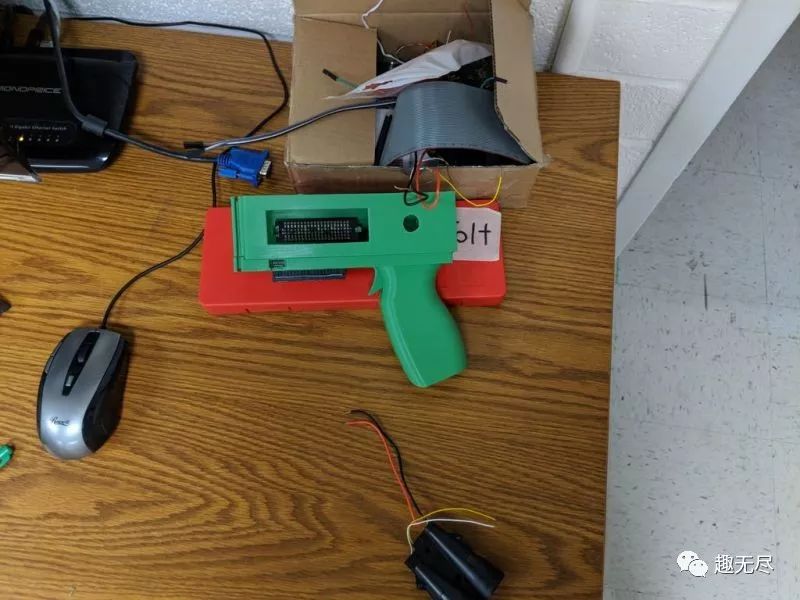
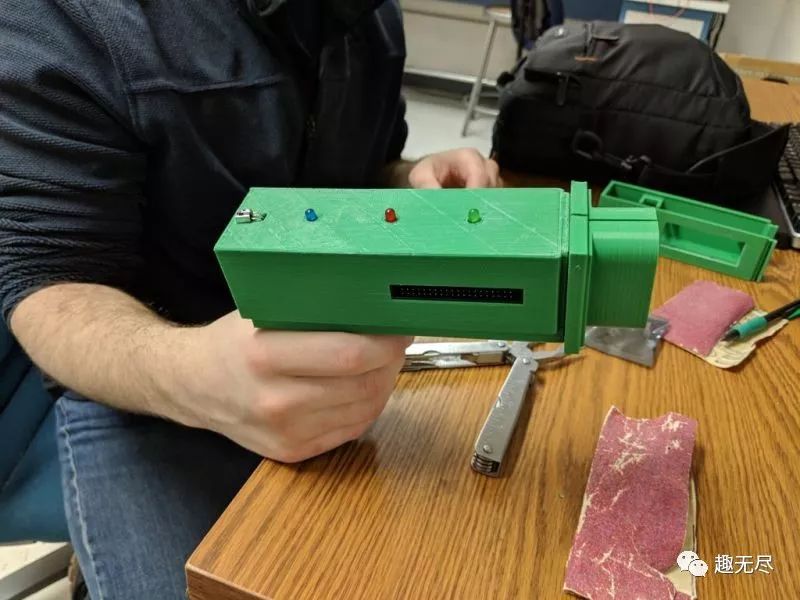
Assembling the Gun Body

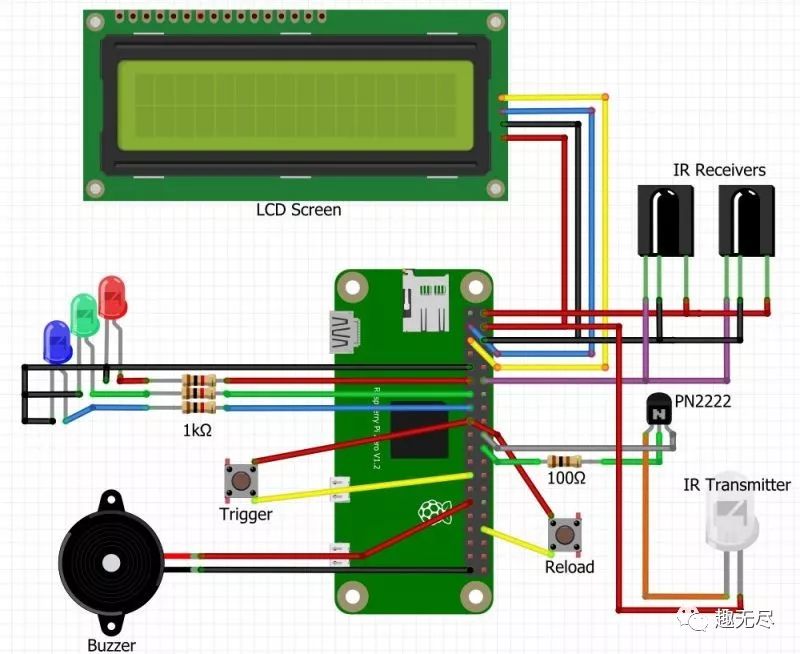
Wire according to the schematic.Each device connects to the GPIO pins on the Raspberry Pi Zero as follows:Buzzer: GPIO5Trigger: GPIO26Reload: GPIO12IR Transmitter: GPIO25IR Receivers: GPIO18Red LED: GPIO17Green LED: GPIO27Blue LED: GPIO22I2C_SDA: GPIO2I2C_SCL: GPIO3
The gun body 3D printing files can be downloaded from the project repository.https://make.quwj.com/project/153Note that you must print two “front1STL.STL” files.
Running the Game
The game is started by running the “ltag.py” program on the server. Once started, each player can connect to the server by running their respective “player.py” program.Note: After inserting the battery pack, the Raspberry Pi may take up to a minute to boot.
Once the Raspberry Pi is powered on, you can add a cron job to automatically run the player.py program by adding a line to the “/etc/rc.local” file on each Raspberry Pi to run the “player.py” file. This way, the game can start without needing to connect to the Raspberry Pi via SSH to run the player script.
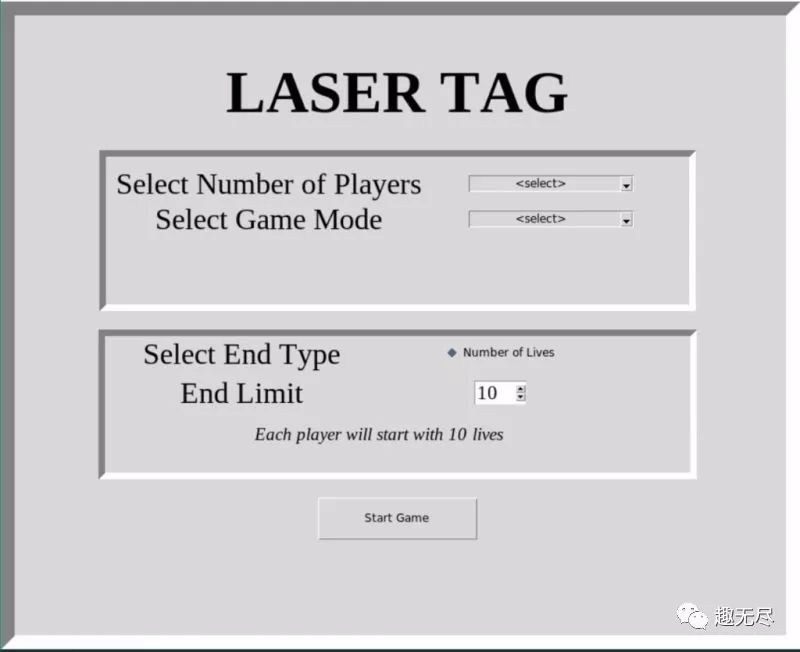
When players are ready to start the game, a graphical interface will appear, allowing configuration of some game settings. Pressing the start button will begin the game.
After each game ends, a graphical interface will appear again, displaying the statistics of the previous game, including hit data and game duration.

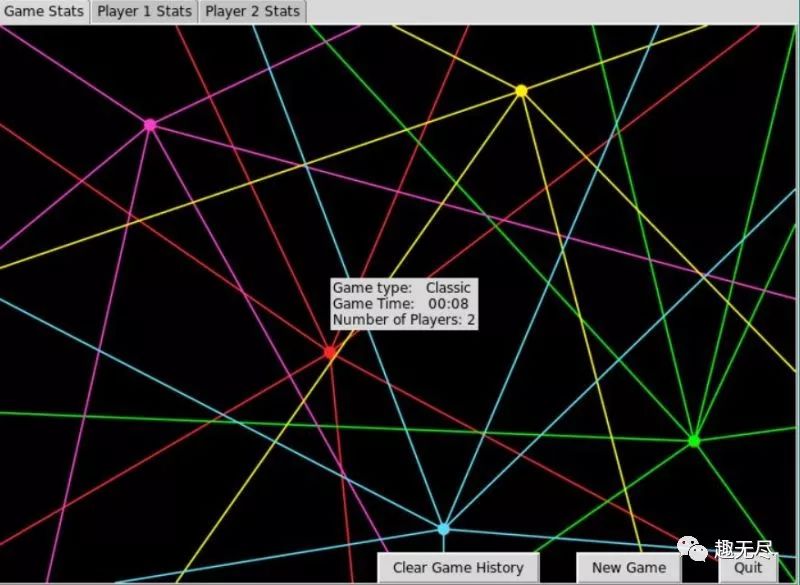
Note: Due to limitations in the software library, the marked point positions in the report do not represent actual laser marks. In the current version, the player report images are just for aesthetics, and we hope to implement actual tag positions in future versions.
Areas for Improvement
Other features that could be added in the future include:1. 3D printing a more robust trigger.2. Installing more infrared receivers on the player vests.3. Adding other game modes in the Pregame GUI selection.4. Achieving a more accurate tag positioning algorithm for the player statistics page.
Project repository link:
http://make.quwj.com/project/153
via instructables.com/id/Infrared-Laser-Tag-With-Raspberry-Pi-Zero/
Links in the article can be clicked to read the original text at the end
3D Printing a Simple Automatic Fish Feeder
Raspberry Pi Making a Low-Cost Interactive Microscope
Elegantly Adding Power On/Off Button to Raspberry Pi
Raspberry Pi + Hat = Wearable Video Recorder
Arduino Making Smart Water Usage Monitoring Device
Cheating Experience: Cat Whiskers Sensory Enhancement Gear
Arduino + 3D Printing DIY Electronic Watch

