
☞ Essential Resources for Programmers to Advance to Architects, Free Giveaway ☜
The Raspberry Pi does not come with a display by default. If you want to view some system information, you need to log into the Raspberry Pi from a computer or connect an external monitor via HDMI. This can be a bit cumbersome, so we can connect an OLED screen to display some key parameters or images. This article will detail the operation method.
Introduction to OLED Modules
There are mainly two types of OLED screens: 128×32 and 128×64, with primary colors being white, yellow, and blue. The characteristics of OLED screens are low power consumption and low cost, connecting to the host via I2C interface. The screen used in this article is 128×64 in size, as shown below:
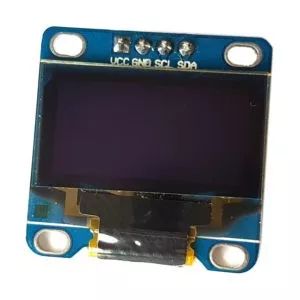
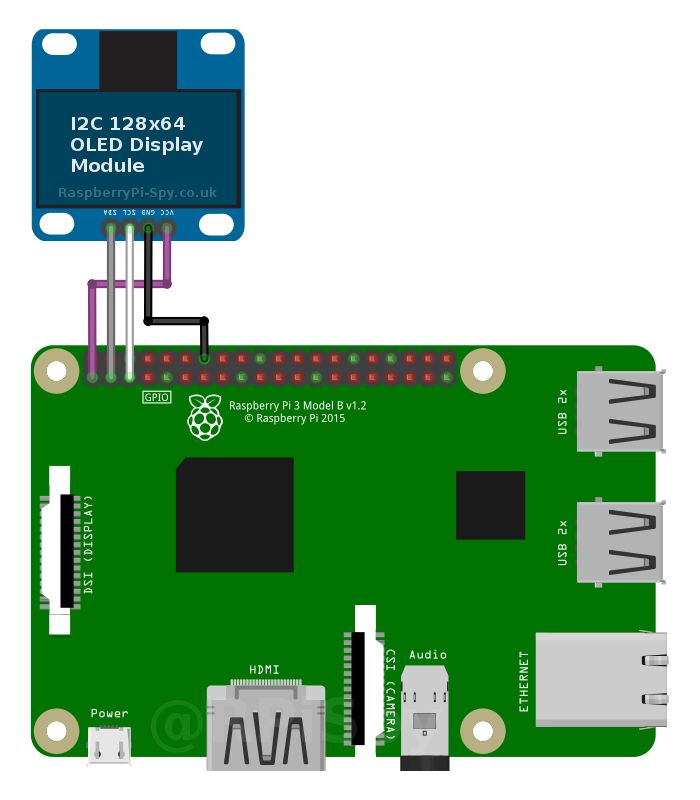
Its interface is very simple, with only 4 pins: VCC, GND, SDA, SCL, so the connection with the Raspberry Pi is also straightforward, as shown in the image below (this article uses Raspberry Pi 3B):
Enabling the I2C Interface
The Raspberry Pi does not enable the I2C interface by default, so we need to enable it manually. Execute the following commands:
$ sudo apt-get install -y python-smbus
$ sudo apt-get install -y i2c-tools
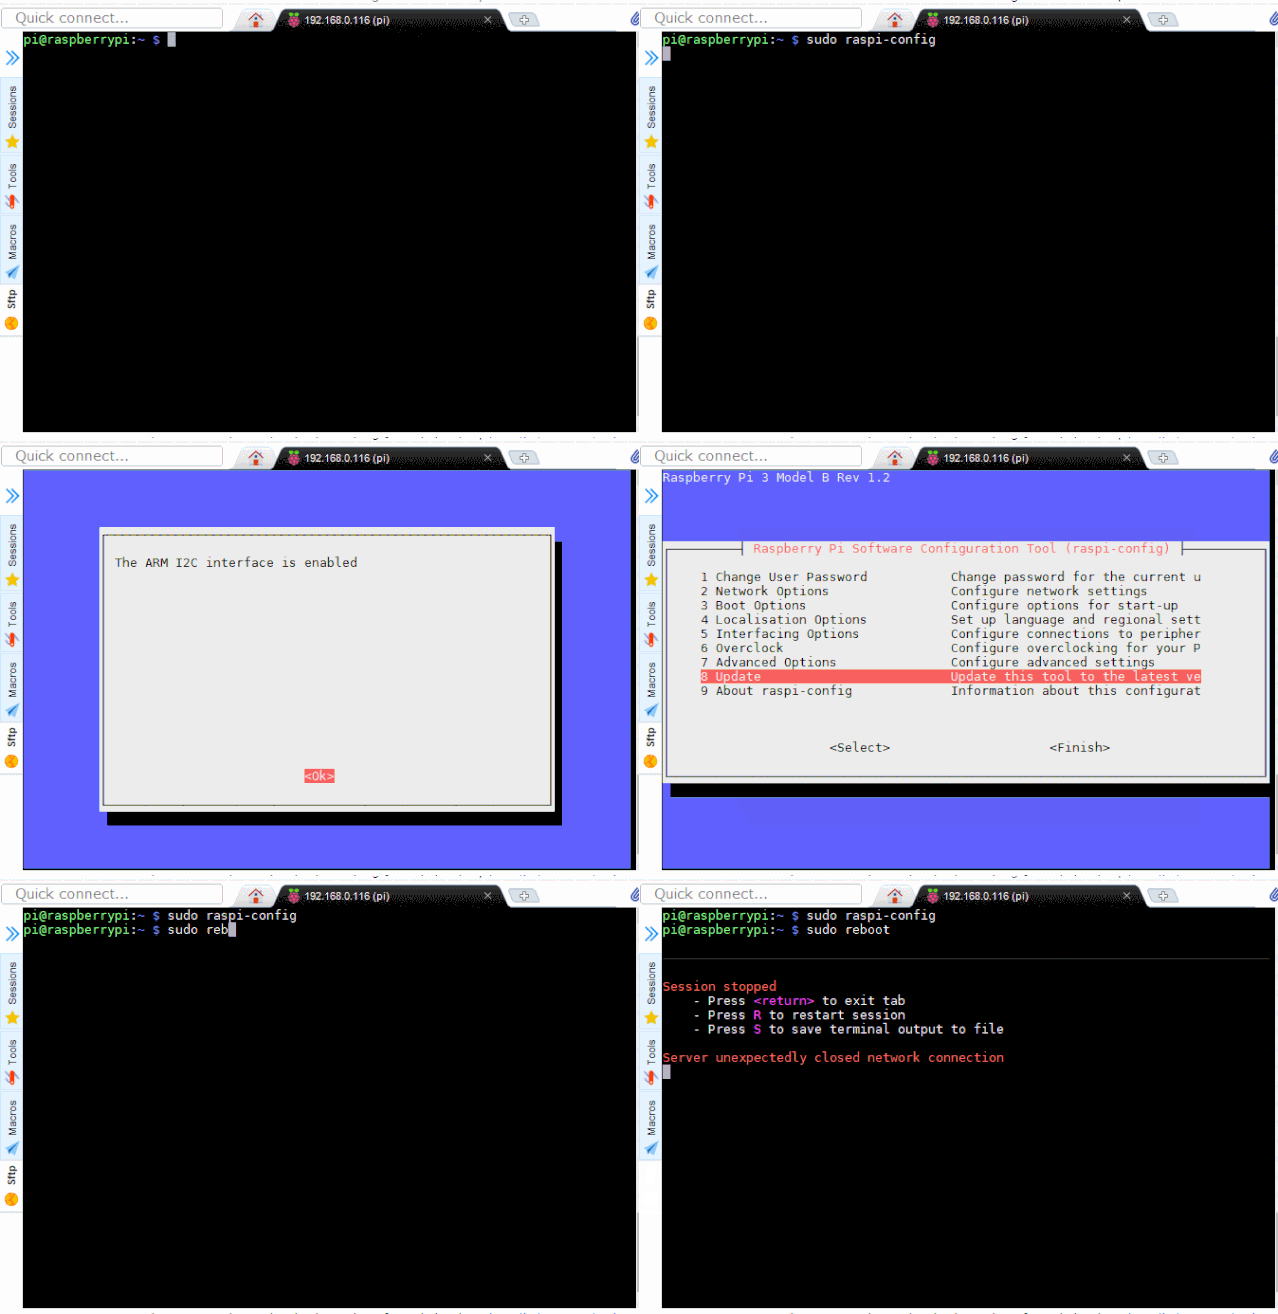
$ sudo raspi-config
Then press the buttons as shown in the animated image to enable the I2C function.
Installing the OLED Screen Python Library
To display text or images on the OLED screen, we need to use Adafruit’s Python library, which supports all SSD1306 related displays, including 128×32 and 128×64 screens.
First, we need to download this library:
$ git clone https://github.com/adafruit/Adafruit_Python_SSD1306.git
Then navigate to the directory and install:
$ cd Adafruit_Python_SSD1306
$ sudo python3 setup.py install    # Use the corresponding command if using Python2
Finding the OLED Module Address
After installing the Python library, we can use the i2cdetect command to find the physical address of the OLED screen:
$ i2cdetect -y 1
We will get an output similar to this:
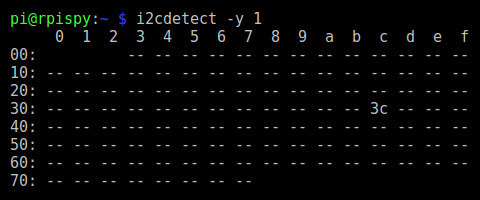
Different modules may produce different outputs. Here our I2C address is 0x3C. If you are using the original Raspberry Pi (256MB Raspberry Pi 1 Model B), then you need to use the following command:
$ i2cdetect -y 0
Using the OLED Screen to Display Images and Text
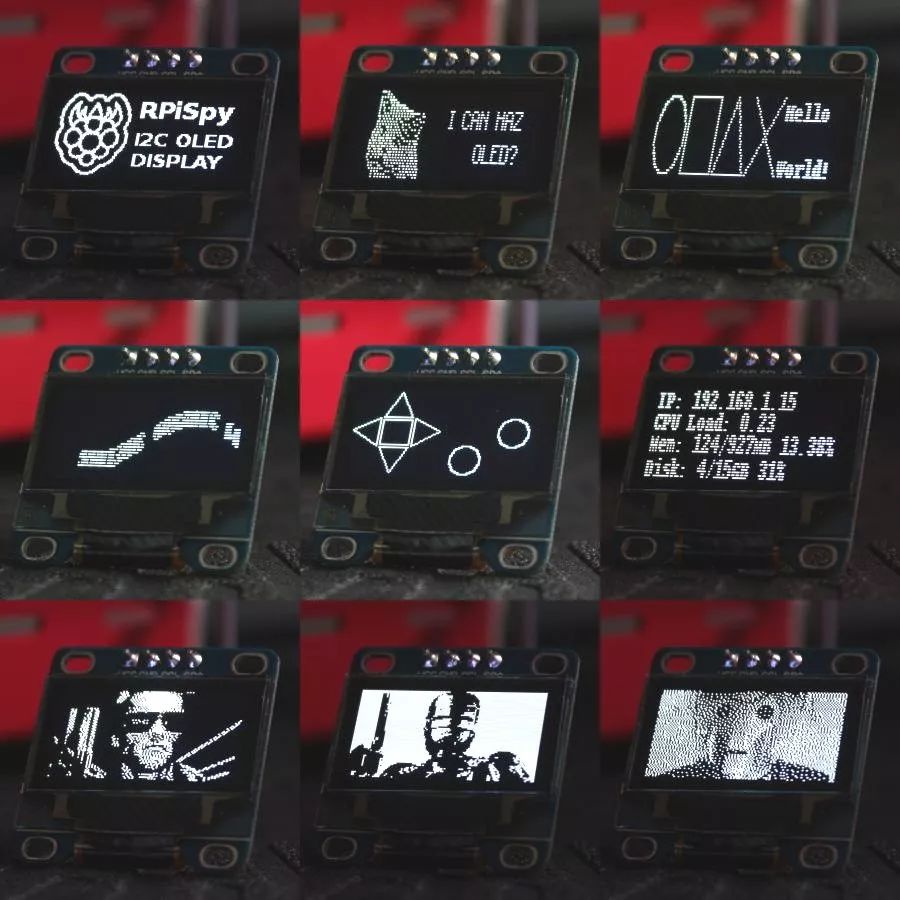
In the library folder we just downloaded, there is an examples directory, where we can see the following files:
-
animate.py
-
buttons.py
-
image.py
-
shapes.py
-
stats.py
We can run these files directly, for example:
$ python3 shapes.py
The results of running these files are shown in the image below:
Screen Size Adaptation
In the above example files, they all assume that your screen size is 128×32, but they can still run on a 128×64 screen. If we want to make it look a bit better, we can adapt the size.
In each Python file, there is a segment of code like this:

It is clearly stated here, the two lines of code represent the 128×32 and 128×64 screens respectively. To use the corresponding screen size, just uncomment the corresponding line of code.

Event: As long as you persist, I will give away books, everyone gets one!
What books? Please click the lower left corner to read the original text to find out!
Long press to recognize the following QR code to participate in the sign-in↓↓↓↓↓

Pin this account to the top/star it,
Don’t forget to sign in!

All articles in this public account have been organized into a directory. Please reply “m” in the public account to get it!
Recommended Reading:
24 Essential Shell Script Interview Questions You Must Know
3 Ways to Generate Strong Passwords
First Father’s Day in Life!
5T Technical Resources Giveaway! Including but not limited to: C/C++, Linux, Python, Java, PHP, Artificial Intelligence, Microcontrollers, Raspberry Pi, etc. Reply “1024” in the public account to get it for free!!
