01
The Yocto file system supports QT by default. So how do we run our QT programs on the Yocto file system? In this chapter, we will learn how to develop QT programs in a Yocto file system + Ubuntu environment.
Note that the development environment is based on “qtcreator-3.5.1” (Ubuntu 16.04.6), and the library files are Qt 5.5.1.
02 QT Installation (1) First, we will transfer “qt-opensource-linux-x64-5.5.1.run” to the /root directory on Ubuntu using an SSH tool, as shown in the figure below.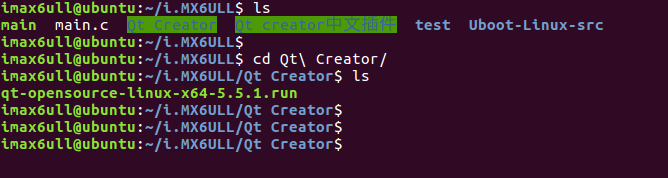 (2) Then we open the terminal in Ubuntu, switch to the root user, and use the command “cd /root/” to enter the root directory. (3) Next, we use the command “chmod 777 qt-opensource-linux-x64-5.5.1.run” to modify the installation package permissions.
(4) Then use the command “./qt-opensource-linux-x64-5.5.1.run” to execute the installation.
(5) Click “next” on the welcome screen to continue. (6) Then on the account password input screen, click “skip” to bypass. (7) Continue clicking “next” for the next step. (8) Then select the installation path; we do not need to modify it (we will use this path in many places later, so try not to change it), and click “next” for the next step. (9) Next, we select the components to install; the default options are fine, as shown in the figure below:
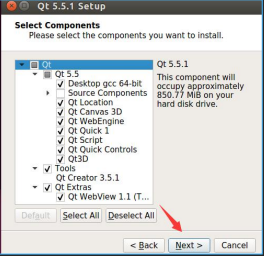 (10) Then select the first item to agree and read the terms. Click next. (11) Then click “install” to start the installation. (12) Wait for the installation to complete, and click “finish” to end the installation. (13) After the installation is complete, we can search for QT by using “search your computer”. (14) Enter QT, and you will see it; click to open it.
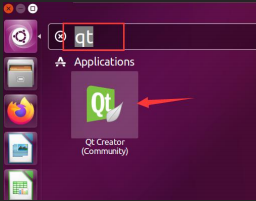 (15) As the root user, we will install some necessary library files using the following commands.
apt-get install libqt4-dev
apt-get install libgstreamer0.10-dev
apt-get install libgstreamer-plugins-base0.10-dev
(16) This way, we can directly open it when developing applications later.03
QT Application Development on Ubuntu
In this section, we will take the helloworld program as an example to briefly explain how to compile a QT program that runs on a PC. Later, I will detail the process of porting the program to ARM.
(1) First, use the command “/opt/Qt5.5.1/Tools/QtCreator/bin/qtcreator.sh &” to open the QT Creator software. As shown in the figure below: (2) Create a new project
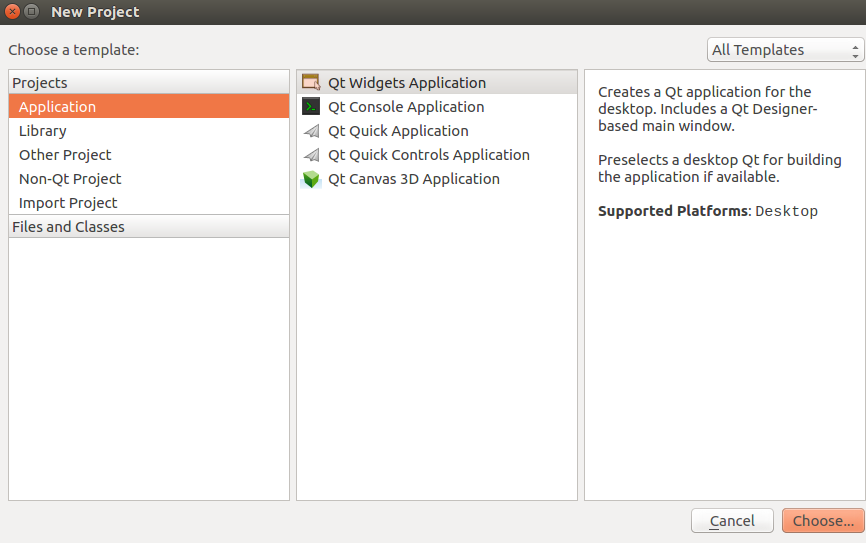 (3) As shown in the figure below, name the project “helloworld” and redefine the project storage directory (users can set the project directory according to personal habits; the new directory needs to have permissions changed to 777). Then click “Next” to continue.
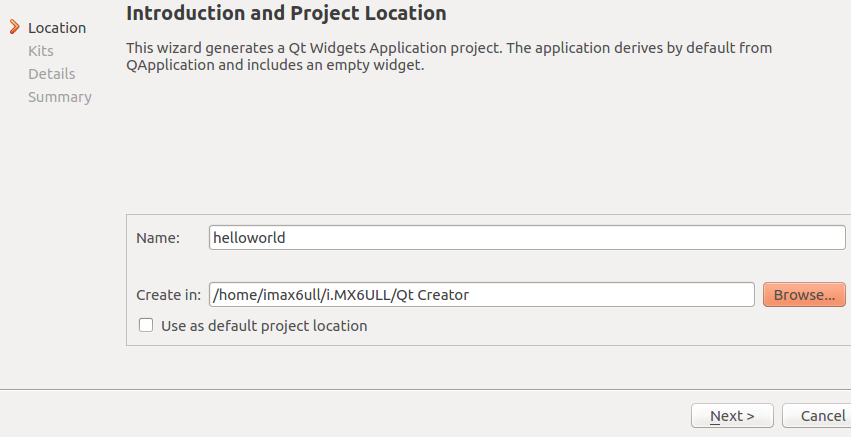 (4) As shown in the figure, select the GCC 64-bit compiler that supports Ubuntu, which can compile applications that run on Ubuntu, because when installing QT Creator, the “gcc 64-bit” plugin under Qt5.5 was selected. Click “Next” to continue.
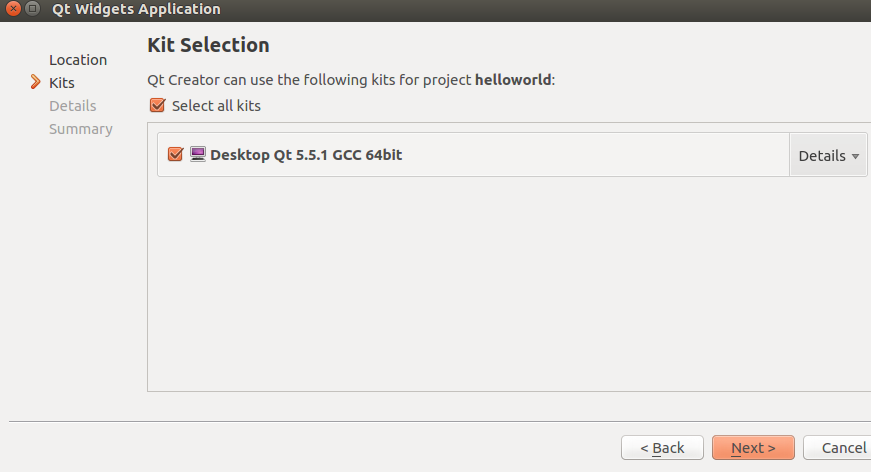 (6) As shown in the figure, the default options are fine. Click “Next” to continue.
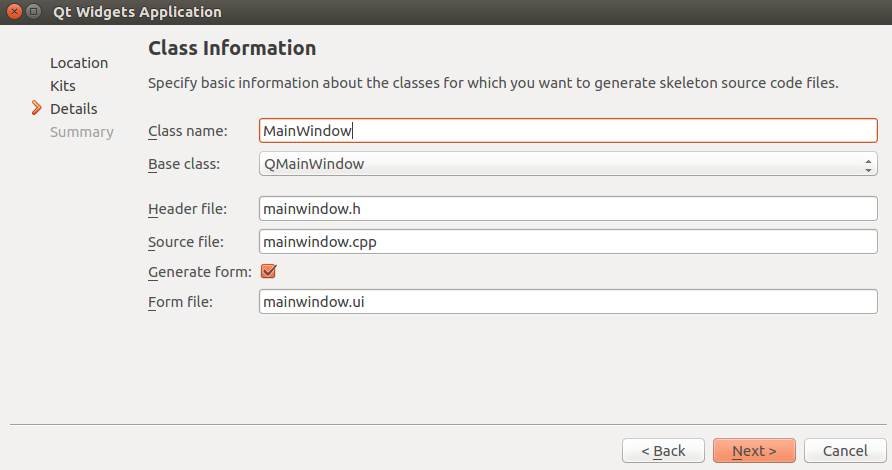 Double-click .ui to write hello world
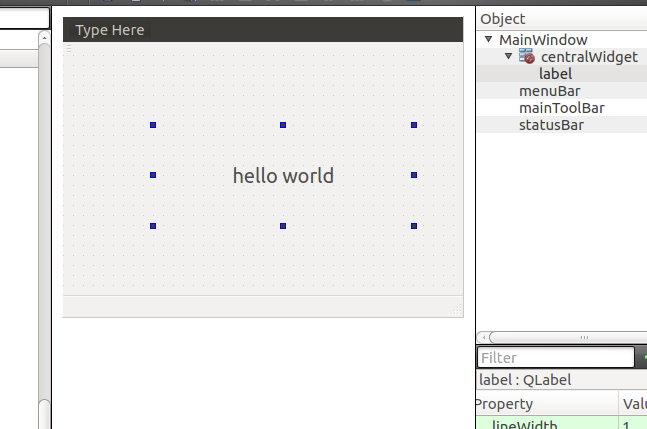 The display is only on the Ubuntu platform; we will use cross-compilation to deploy on the I.MX6ULL development board.04
Installing Cross-Compilation Tools and QT
Our development board’s QT development relies on the Yocto system or a self-ported QT system. The cross-compiler required for the ported QT system is the compiler we use to compile QT: gcc-linaro-4.9.4-2017.01-x86_64_arm-linux-gnueabihf. Refer to the previous chapter on setting up cross-compilation tools for the installation process. We will not elaborate on it here. The cross-compiler for the Yocto environment was obtained through Yocto.
| Linux | Installation and Use of Cross-Compiler (ARM) |
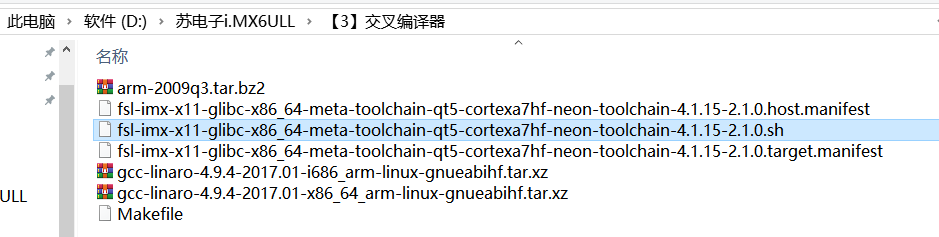 When we talked about obtaining the SDK through Yocto, we mentioned that the final generated compiler is used for QT development. As shown in the figure below, in the corresponding directory, use the command “chmod 777 fsl-imx-x11-glibc-x86_64-meta-toolchain-qt5-cortexa7hf-neon-toolchain-4.1.15-2.1.0.sh” to modify the script permissions.
We use the command “./fsl-imx-x11-glibc-x86_64-meta-toolchain-qt5-cortexa7hf-neon-toolchain-4.1.15-2.1.0.sh”
to run the script, and the script will automatically install the SDK package. The installation directory is the default installation directory specified by the script, which is
“/opt/fsl-imx-x11/4.1.15-2.1.0”. We recommend not modifying this, as we will use this path later. As shown in the figure below:
At this point, we have completed the installation of the compiler and QT library used by the board.05
Setting Up the IMX6Ul/ULL QT Creator Cross-Compilation Environment
In the first section of this chapter, we compiled the helloworld that runs in the Ubuntu environment. The supporting environment required for this helloworld compilation is what was selected when installing QT. We can check this by selecting the options under tools. As shown in the figure below:
| Linux | I.MX6ULL Uboot Compilation (Day 11) |
| Linux | I.MX6ULL Kernel Compilation (Day 12) |
Then we click on the left side “build & run”, then click on “kits”, and double-click “Desktop Qt 5.5.1GCC 64bit” to see it. As shown in the figure: Next, we add the imx6ul/ull compilation environment.
(1) First, click on compilers and click add to add, then click gcc, as shown in the figure:
(2) Then click, and a new gcc will appear in the manual section, as shown in the figure:
(3) Then we click on the compilers path and click browse as shown in the figure:
(4) Next, we click the pencil icon in the upper left corner to paste the path
” /opt/fsl-imx-x11/4.1.15-2.1.0/sysroots/x86_64-pokysdk-linux/usr/bin/arm-poky-linux-gnueabi/arm-poky-linux-gnueabi-g++” into the location text box, press enter to confirm. This is generated by the SDK we installed from Yocto.
(5) Then we change the name to imx6ulgcc, and then click apply. As shown in the figure:
(6) After modification, we can see that the name under manual has changed. As shown in the figure.
(7) Then we click on qt versions, and then click add. Add qmake, which is used to generate Makefile files. As shown in the figure:
(8) Then we click the pencil icon in the upper left corner to paste the path
“/opt/fsl-imx-x11/4.1.15-2.1.0/sysroots/x86_64-pokysdk-linux/usr/bin/qt5/qmake” into the location text box, press enter to confirm. As shown in the figure:
(11) Next, click on debuggers, click add, and prepare to add the gdb debugger. The gdb debugger does not need to be configured, it is for debugging. As shown in the figure:
(13) Then we click the pencil icon in the upper left corner to paste the path
” /opt/fsl-imx-x11/4.1.15-2.1.0/sysroots/x86_64-pokysdk-linux/usr/bin/arm-poky-linux-gnueabi/arm-poky-linux-gnueabi-gdb” into the location text box, press enter to confirm. As shown in the figure:
(14) Then click apply. As shown in the figure:
(15) Next, we click on kits to configure, click add to add a kit. Change the name to imx6, select the compilers to the one we just added imx6ulgcc, select the debugger to the one we just added imx6gdb, select the qt version to the one we just added Qt 5.6.2(imx6), and fill in the qt mkspec with “linux-oe-g++“, which is used to specify the qmake build instructions. Click apply to apply. Click ok to exit. As shown in the figure:
Here, I would like to explain why we need to fill in linux-oe-g++ in the QT mkspec. Essentially, this specifies the qmake.conf file under …/mkspesc/linux-oe-g++ to be used when executing qmake to generate Makefile.
To correctly use the installed toolchain, we also need to add environment variables to QT Creator. Enable the environment variables in the startup script of QT Creator by inserting the command to enable the cross-compilation toolchain in the first line of /opt/Qt5.5.1/Tools/QtCreator/bin/qtcreator.sh.
(16) Then we close the QT interface we just opened. We use the command “vi /opt/Qt5.5.1/Tools/QtCreator/bin/qtcreator.sh” to modify the program startup script. As shown in the figure:
(17) We add the line “source /opt/fsl-imx-x11/4.1.15-2.1.0/environment-setup-cortexa7hf-neon-poky-linux-gnueabi” before the first line (“#! /bin/sh”). As shown in the figure:
(18) After modification, save and exit. At this point, the QT application compilation environment under Yocto has been set up.
06
QT Creator Directly Compiling ARM Architecture Programs
(1) First, we use the command “/opt/Qt5.5.1/Tools/QtCreator/bin/qtcreator.sh” to open QT Creator. As shown in the figure:
/opt/Qt5.6.2/Tools/QtCreator/bin/qtcreator.sh &
(2) Then we click on the upper left corner file, and then click open file or project. As shown in the figure:
(3) Next, we select the previously created helloworld project. Double-click to open the .pro file. As shown in the figure:
(4) The first time we open the project, we need to select the kits, which is the imx6 we added in the previous section, and click configure project. As shown in the figure:
(5) Then we enter the project. As shown in the figure:
(6) At this point, the project is loaded. We right-click on the helloworld project and click build to build the project. As shown in the figure:
(7) Wait for the progress bar in the lower right corner to complete the build. As shown in the figure:
Check QT Compilation Environment:
root@ubuntu:/home/imax6ull/build-666-imx6-Debug# /opt/fsl-imx-x11/4.1.15-2.1.0/sysroots/x86_64-pokysdk-linux/usr/bin/qt5/qmake -v
QMake version 3.0
Using Qt version 5.6.2 in /opt/fsl-imx-x11/4.1.15-2.1.0/sysroots/cortexa7hf-neon-poky-linux-gnueabi/usr/lib
Modify QT Configuration File:
sudo vi /opt/fsl-imx-x11/4.1.15-2.1.0/sysroots/cortexa9hf-neon-poky-linux-gnueabi/usr/lib/qt5/mkspecs/linux-oe-g++/qmake.conf<span><span>Delete include(…/oe-device-extra.pri)</span></span>
Save and exit.
Problems Encountered During the Process
Error: Failed to load module “canberra-gtk-module”

Error: No tool chain set from kit “Desktop Qt 5.6.2 GCC 64bit”.
After opening QT, select the project, build, and in the lower right corner, the red
shows that after qmake, the make operation cannot be performed.
sudo apt-get install build-essential
sudo apt-get install libglu1-mesa-dev
After installation, it can be built normally.
08
Command Line Compilation of QT Programs
(1) First, we use the command “cd /opt/Qtworkspace/helloworld/” to enter the project directory. As shown below:
(2) Then we use the command
“source /opt/fsl-imx-x11/4.1.15-2.1.0/environment-setup-cortexa7hf-neon-poky-linux-gnueabi” to add compiler and other environment variables. As shown in the figure:
source /opt/fsl-imx-x11/4.1.15-2.1.0/environment-setup-cortexa7hf-neon-poky-linux-gnueabi
(3) Then we use the command “arm-poky-linux-gnueabi-g++ –version” to see the added compiler. As shown in the figure:
(4) Next, we use the command “qmake” to generate the Makefile file. As shown in the figure:
(5) Then we use the command “make” to compile the program. As shown in the figure:
(6) Wait for the compilation to complete, and use the command “ls” to see the generated QT program helloworld. As shown in the figure:
ARM Version09 Running Helloworld on the Development Board We connect the USB drive to the computer, and at this time, the USB drive will automatically mount to the directory “/media/topeet” (the folder below is the author’s USB drive mount directory; note that different devices will have different mount points), as shown in the figure below:
Then we use the command “cp helloworld /media/topeet/disk” to copy the program to the USB drive, as shown in the figure below:
Next, click “eject” on the left taskbar to safely remove the USB drive device. As shown in the figure:
Then we start the development board, the login name is root, no password, and insert the USB drive into the device’s USB port; the USB drive will automatically mount. As shown in the figure:
Press “Ctrl + C” to exit the program.
Therefore, I am here
Click the card below to follow me
↓↓↓

If you find it interesting, please click
to collect
like
to view
+1
❤❤❤