The shoulder joint is a highly specialized area in orthopedic practice, and its examination methods are also quite specific. Similar to traditional orthopedic physical examination procedures, the examination of shoulder joint disorders is conducted through “inspection, palpation, movement, and measurement (including special tests)”.
Inspection
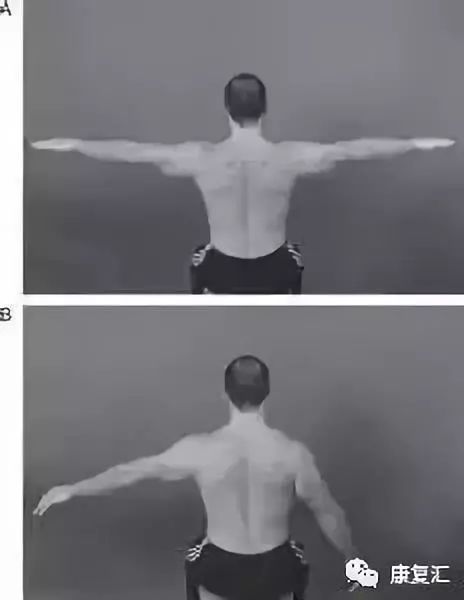
The patient’s shoulders should be fully exposed to observe the contour of the shoulder joint, checking for any trauma, surgical changes, muscle atrophy, deformities, or masses.
Palpation
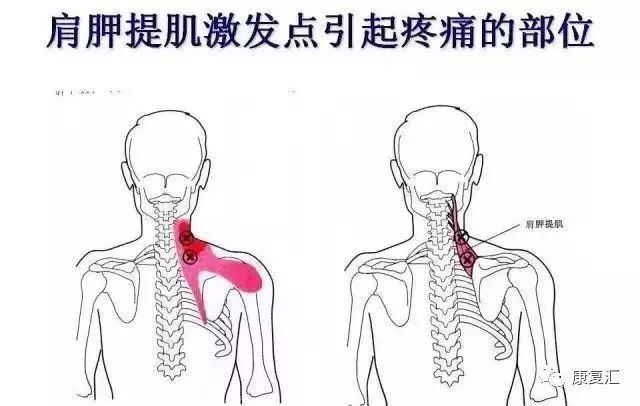
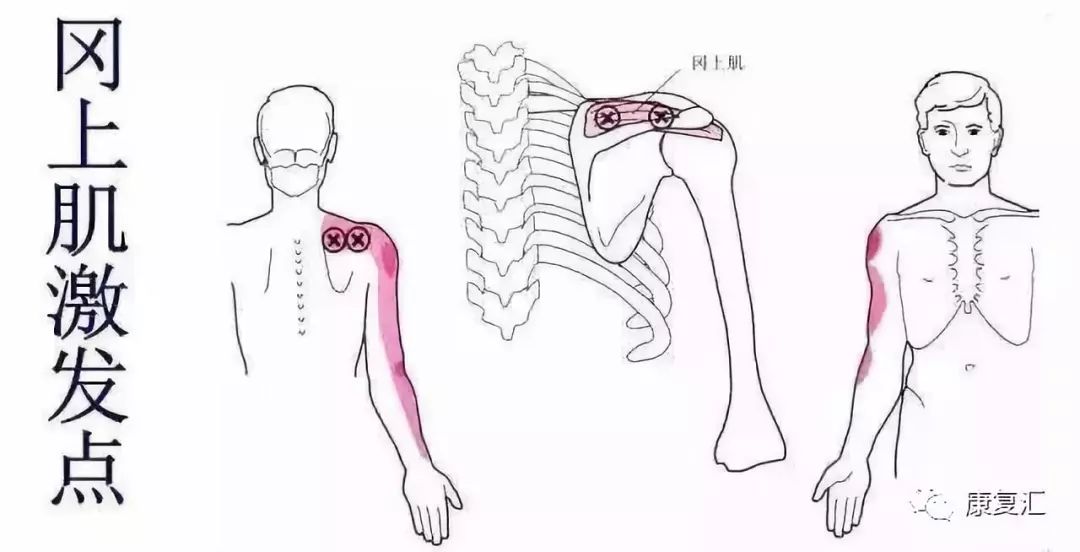
Palpation should be performed at the acromioclavicular joint, coracoid process, coracohumeral ligament, greater tubercle of the humerus, long head of the biceps tendon, and the Bankart point (midpoint of the labrum anterior edge) to check for tenderness. To differentiate from cervical spondylosis, it is also necessary to assess for tenderness in the cervical spine.
Shoulder Joint Mobility
The primary focus is to observe both active and passive range of motion (ROM) of the shoulder joint. The main movements to check include flexion, abduction, external rotation, and internal rotation. The external rotation needs to be checked in both the adducted position and at 90 degrees of abduction.
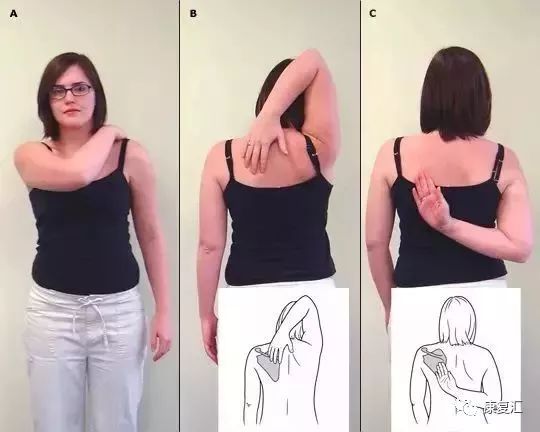
Additionally, one examination method, the Apley Scratch Test, can roughly estimate the normalcy of shoulder external and internal rotation mobility.
The internal rotation mobility is assessed by having the patient place their palm backward and move their hand from the lower back upwards, extending the thumb to touch the most distal spinal spinous process reachable, which serves as a marker for measuring internal rotation. For instance, if the tip of the thumb can reach the spinous process of the eighth thoracic vertebra, it is recorded as T8.

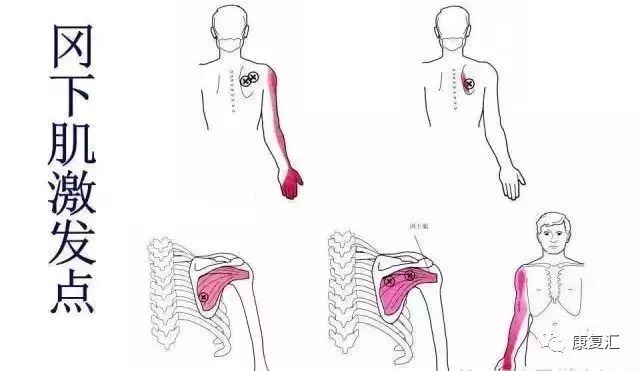
To differentiate from diseases such as cervical spondylosis, it is necessary to examine the sensation and muscle strength of the affected side’s hand. Additionally, it is crucial to assess the rotator cuff muscle strength, impingement tests, and stability of the glenohumeral joint.
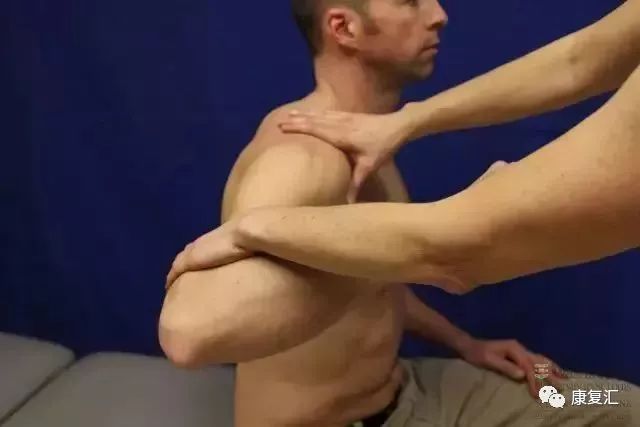
Special Tests
1. Shoulder Joint Mobility Examination
1) Apley Scratch Test
The patient uses their hand to reach from the same side shoulder backward to touch the opposite shoulder’s upper edge or from the same side shoulder below to touch the opposite shoulder’s lower edge.
This assesses the internal and external rotation functions of the shoulder joint.
2) External Rotation Mobility
(1) External rotation in the adducted position;
(2) External rotation at 90 degrees of abduction.
3) Internal Rotation Mobility
2. Rotator Cuff Injury Muscle Strength Examination
1) Abduction Muscle Strength:
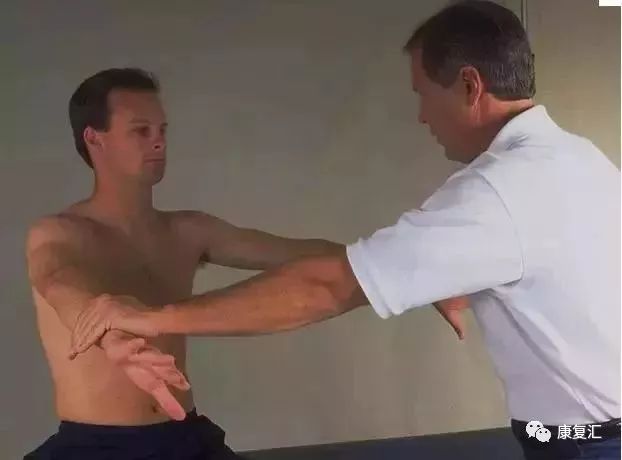
(1) Jobe Test (Empty Can Test)
The arm is abducted to 90° and flexed forward 30° with the thumb pointing down. The examiner applies downward pressure on the upper limb, and if the patient resists, any weakness compared to the opposite side indicates rotator cuff pathology or supraspinatus tendon injury or tear.
(2) Drop Arm Test
The examiner raises the patient’s shoulder joint to above 90 degrees, flexes it 30°, and with the thumb pointing down, if the affected shoulder cannot maintain this position and falls, it is considered positive. This test has high specificity for diagnosing supraspinatus injury but low positivity rates, often seen in cases of complete supraspinatus tears.
2) External Rotation Muscle Strength:
(1) External Rotation Resistance Strength Test (ERRS);
(2) Drop Test;
(3) External Rotation Lag Sign.
3) Internal Rotation Muscle Strength:
(1) Lift-Off Test
The Lift-Off test is used to assess subscapularis muscle injury. The patient places the back of their hand on the lower back with the palm facing backward and is asked to lift their hand off the back (resistance may be applied if necessary); failure to perform the action is positive, indicating subscapularis muscle injury.
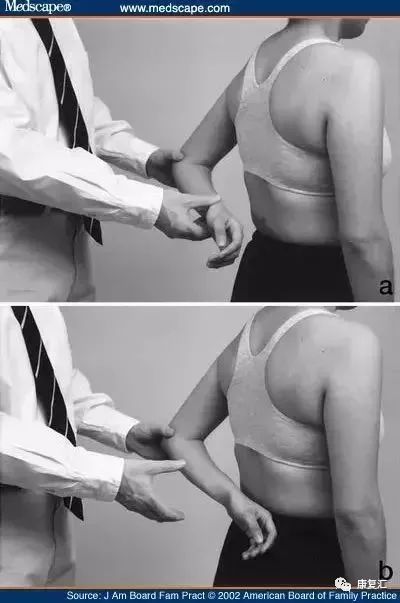
(2) Napoleon Test
The patient places their hand on their abdomen with the back of the hand facing forward and the elbow flexed at 90 degrees, ensuring the elbow does not touch the body. The examiner pulls forward, and the patient is asked to resist by pressing against the abdomen. A positive result indicates weakness and is named for the typical pose resembling Napoleon.
Comparison of both sides, positive indicates weakness. A positive result suggests subscapularis (internal rotator) muscle injury.

(3) Internal Rotation Resistance Test
(4) Internal Rotation Lag Sign
3. Impingement Provocation Tests
1) Subacromial Impingement:
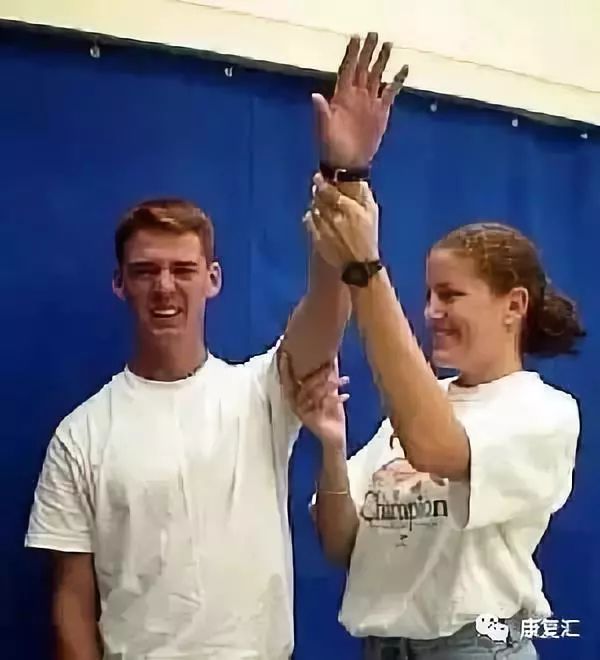
(1) Neer Test
The examiner stands behind the patient, stabilizing the scapula with one hand while the other hand holds the shoulder joint in an internally rotated position, with the patient’s thumb pointing down. The examiner then elevates the affected shoulder over the head; if this provokes pain, it is considered positive. The mechanism is to artificially cause the greater tubercle to collide with the anterior inferior edge of the acromion, thus inducing pain.
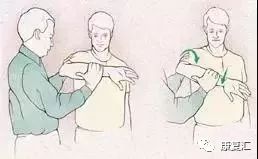
(2) Hawkins Test
The examiner stands behind the patient, with the shoulder joint flexed at 90° and elbow at 90°, maintaining the forearm level. Pain during internal rotation indicates a positive result, where the greater tubercle and supraspinatus tendon collide with the coracoacromial ligament forming the coracoacromial arch.
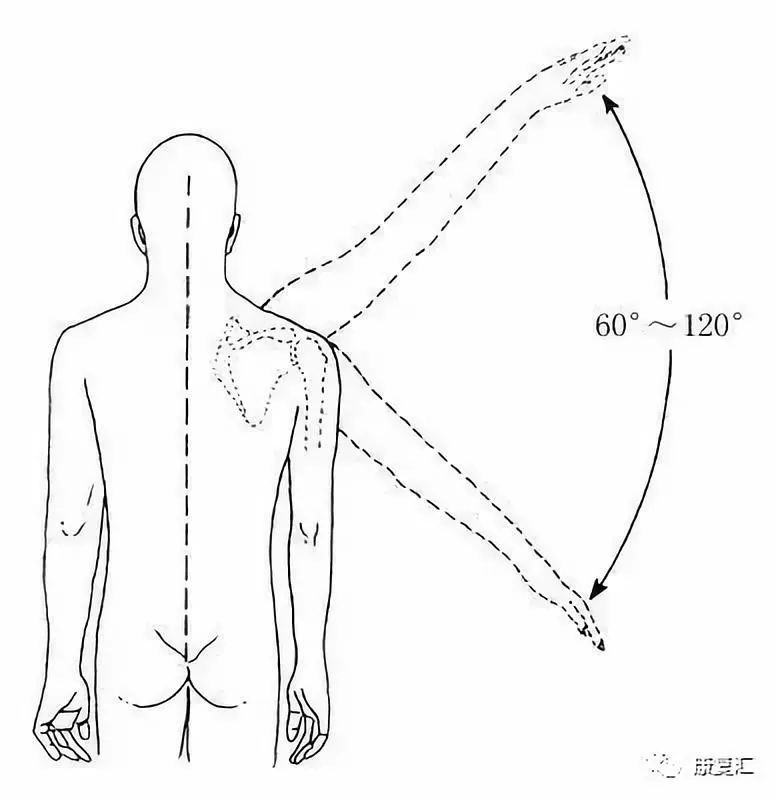
(3) Pain Arc
When the affected shoulder is abducted less than 60 degrees, the pain is mild; when passively abducted to the range of 60-120 degrees, the pain intensifies; and when raised above 120 degrees, the pain alleviates, allowing for continued elevation. Therefore, the range of 60-120 degrees is termed the “pain arc”. A positive pain arc test suggests supraspinatus tendinitis.
2) Coracoid Impingement Test
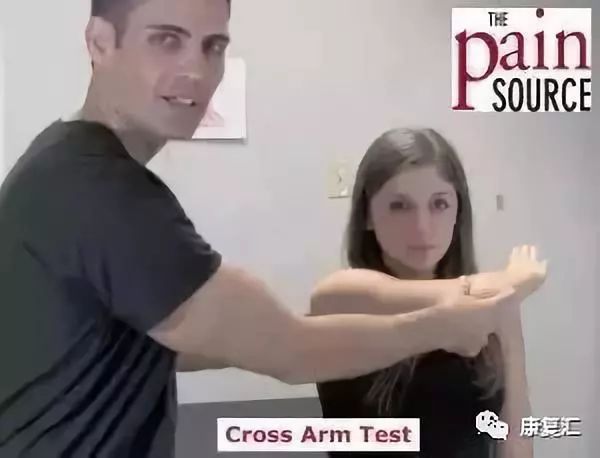
3) Acromioclavicular Joint Impingement: Cross-arm Test
4. Glenohumeral Joint Stability Tests
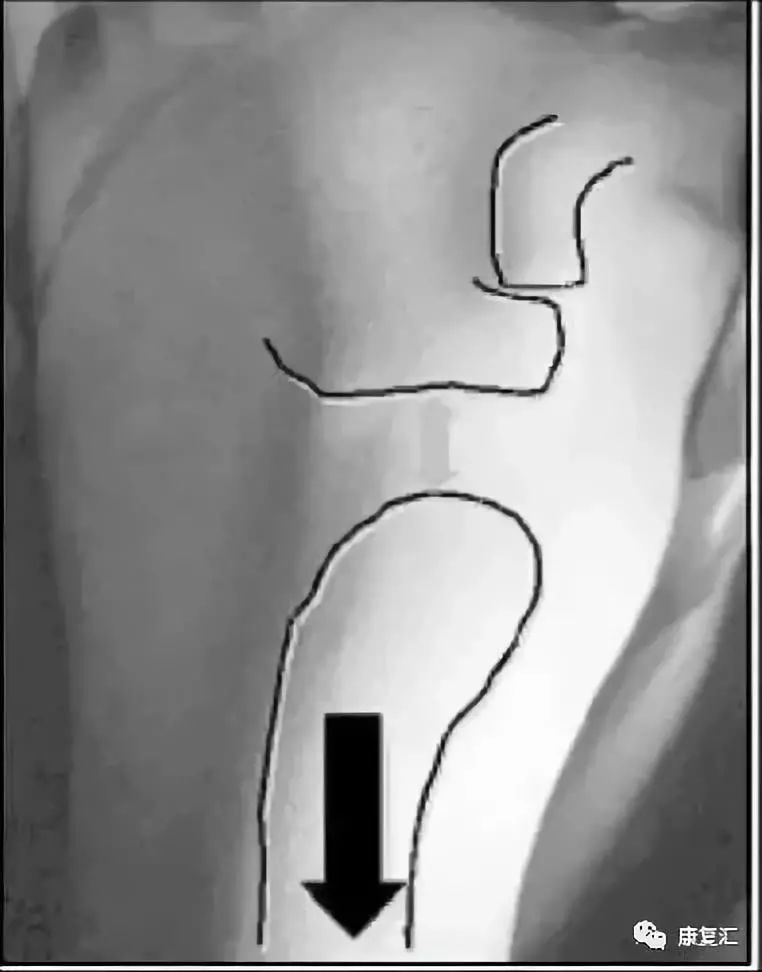
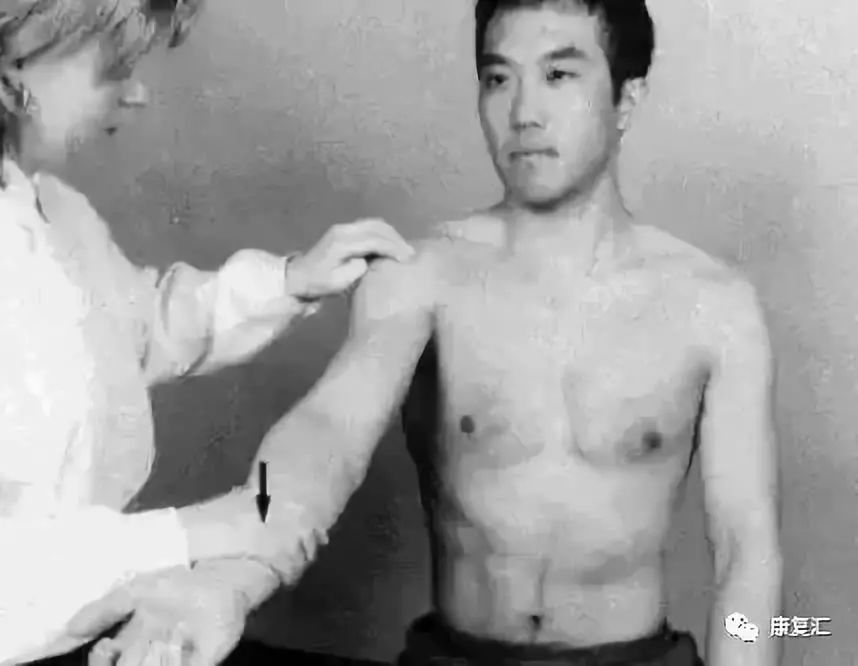
1) Inferior Instability: Sulcus Sign
The patient sits relaxed, and the examiner stabilizes the scapula with one hand while applying a downward force on the patient’s elbow with the other hand. If a horizontal groove appears below the acromion greater than 2 cm, it is considered positive.
A positive result indicates inferior instability, generally suggesting multidirectional instability.
2) Anterior Instability:
(1) Fear and Relocation Test
This is primarily used to assess anterior instability. The patient lies supine, with the examiner holding the patient’s forearm with one hand and supporting the upper arm from behind with the other hand. The examiner gently and slowly abducts and externally rotates the arm. When the patient feels posterior shoulder pain and a sense of impending dislocation, causing fear and refusal to continue external rotation, the fear test is positive.
During shoulder abduction and external rotation, applying anterior stress to the humeral head can further provoke fear or pain, reinforcing the positive test.
After performing the fear test, applying posterior stress to the humeral head, if the patient’s fear decreases or disappears, the relocation test is positive.
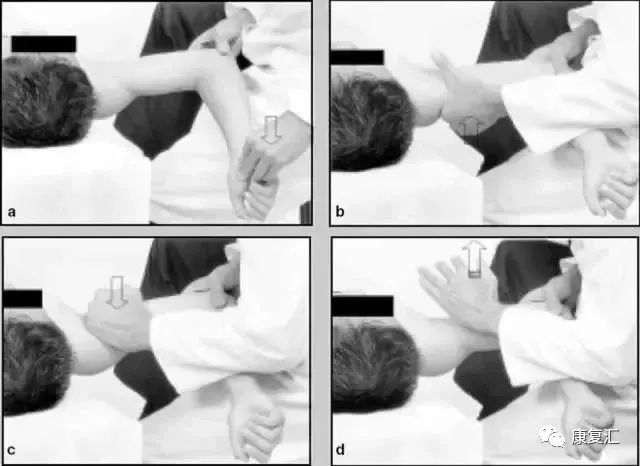
a. Fear Test;
b. Fear Test Reinforcement Test;
c. Relocation Test;
d. Relocation Test Reinforcement Test
(2) Load and Shift Test
The patient lies supine, with the examiner holding the affected limb’s forearm near the elbow with one hand and placing the other hand under the humeral head. The hand holding the forearm applies pressure to compress the humeral head into the glenoid cavity, and the other hand moves the humeral head forward and backward to assess the degree of displacement.
The most commonly used grading system is the modified Hawkins score: Grade 0 indicates no or slight displacement of the humeral head; Grade 1 indicates the humeral head is displaced and rides over the labrum edge; Grade 2 indicates the humeral head dislocates but can reduce itself; Grade 3 indicates the humeral head dislocates and cannot reduce itself.
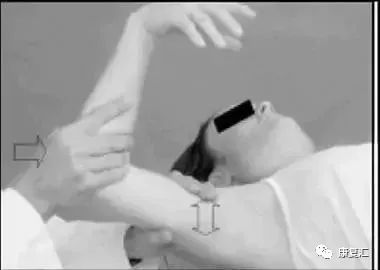
3) Posterior Instability: Load and Shift Test
5. Long Head of Biceps Tendon and SLAP Lesion Assessment
1) Yergason Test
Also known as the biceps resistance test. This test is mainly used to diagnose long head of biceps tendon or biceps tendonitis.
During the examination, the patient is instructed to flex the elbow at 90°, with the examiner stabilizing the patient’s elbow with one hand and the wrist with the other hand, asking the patient to flex, abduct, and externally rotate while the examiner provides resistance. If the biceps tendon dislocates or pain occurs in the intertubercular groove, it is positive; the former indicates dislocation of the long head of biceps tendon, and the latter indicates biceps tendonitis.
2) Speed Test
The patient extends the elbow and externally rotates the forearm, while the examiner applies resistance against the patient’s shoulder flexion.
3) O’Brien Test
The affected arm is extended forward at 90 degrees with the thumb pointing down and adducted to the chest while resisting upward; anterior shoulder pain may occur; repeating the same test with the palm facing up should relieve the pain, indicating a positive result.
 △ The lump on the neck is the “deadly lump”; if not taken seriously, it will be too late!△ Sleeping on a hard board bed is good for lumbar spine rehabilitation? Be careful not to sleep wrong and end up paralyzed in bed!△ Neck pain and stiffness can be treated with one move, and it can also lower blood pressure!△ Acupuncture and massage caused his demise; pay attention to these high-risk groups!△ The 2018 Global Cancer Annual Report is out! How dire is the situation in China? See for yourself!△ Do you know the 6 major signs, 3 stages, and 8 rehabilitation methods for Alzheimer’s disease?