
Introduction
The previous article introduced how to deploy an openEuler learning environment on the Hi168 cloud platform. Since we can deploy openEuler, various other learning environments can naturally be deployed as well.
Introduction to Ansible
Ansible is an automation tool for IT operations that can manage remote hosts via SSH protocol, performing batch operations on remote hosts, including: file copying, package installation, service start/restart, etc.
Ansible solves the problem of how to automate system configuration, application deployment, command, and service operations on a large scale. Its scripts are flexible and reentrant, significantly reducing repetitive work for operations personnel and improving operational efficiency.
Architecture
Ansible connects to remote hosts via SSH protocol. The managed hosts need to have SSH service configured and started; no other software is required.
Ansible can manage different distributions of Linux operating systems as well as Windows systems simultaneously.
Some Technical Terms Involved
Control node: The host where Ansible service is installed, primarily used to publish tasks, invoke functional modules, and perform batch operations on other nodes.
Managed nodes: The hosts managed by Ansible service, which are the targets of module commands.
Inventory: The host list of managed nodes, which can be IP addresses, hostnames, or domain names.
Modules: Specific functional code, with thousands of functional modules available by default.
Task: The operation to be executed on the Ansible managed nodes.
Playbook: A repeatable task list written in YAML language, also known as a script, where commonly used operations are written into the playbook file for repeated execution later.
Roles: Used to structurally organize Playbooks, achieving a series of functions by invoking roles.
Network Setup
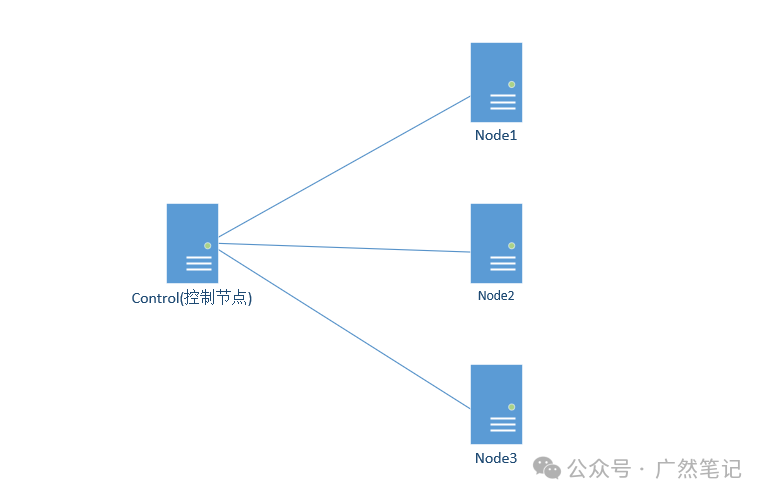
The Ansible learning environment requires at least two or more hosts to be deployed, one as the control node and the rest as managed nodes. The more managed nodes there are, the more learning projects can be completed. Here, we take one control node and three managed nodes as an example.
It is important to note that on the Hi168 platform, these nodes need to be deployed in the same namespace.
Starting Operations
For installing the openEuler environment, please refer to the article below; I will not elaborate further here.

Creating Applications
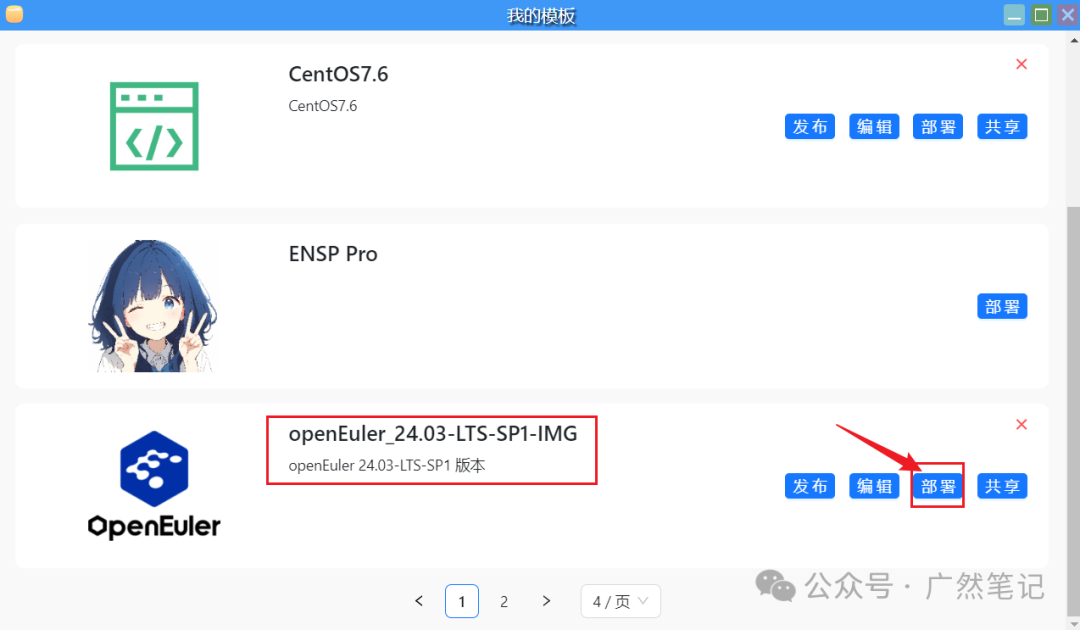
Double-click to open the desktop icon “My Templates”.

In My Templates, find the previously created openEuler template and click “Deploy”.
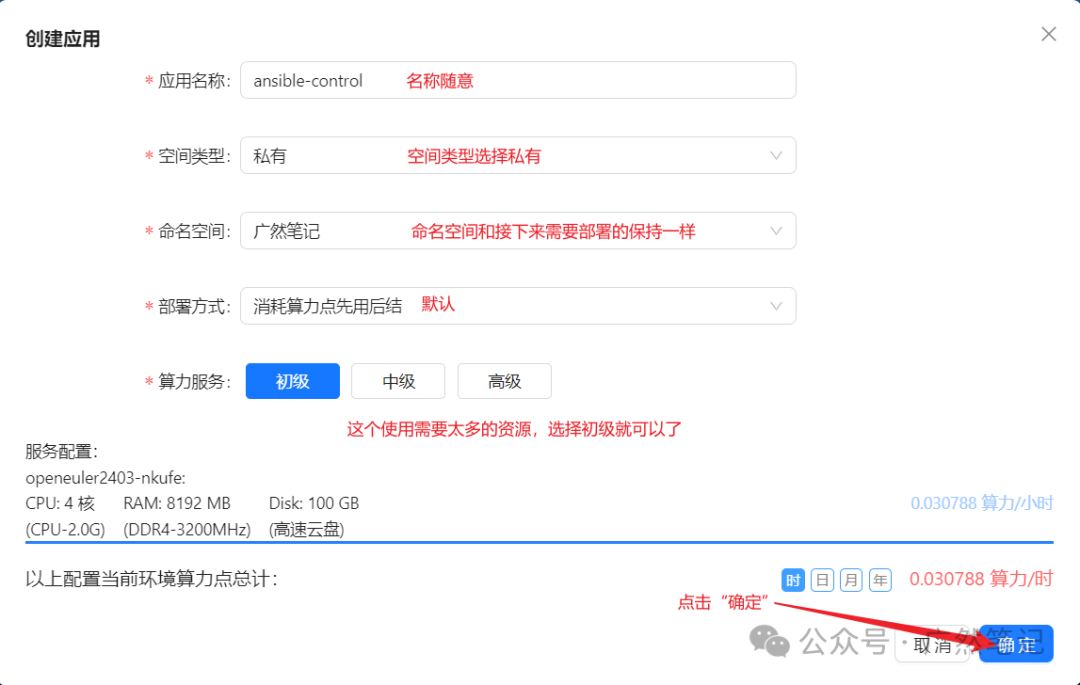
Fill in the relevant information.
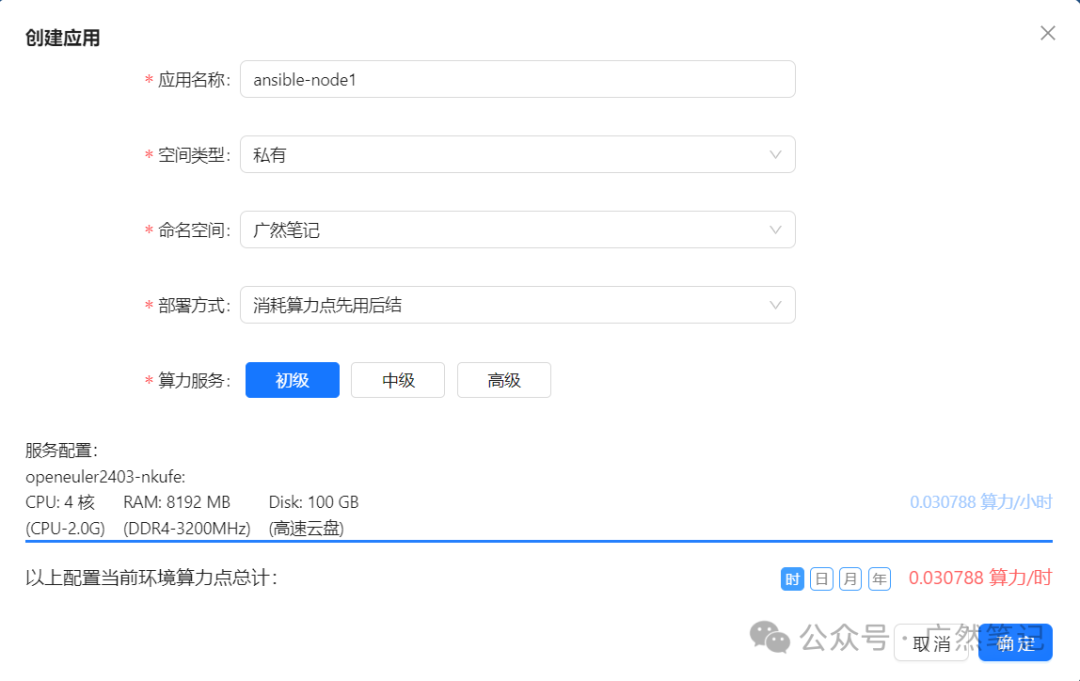
Repeat the above two steps to create three more applications.
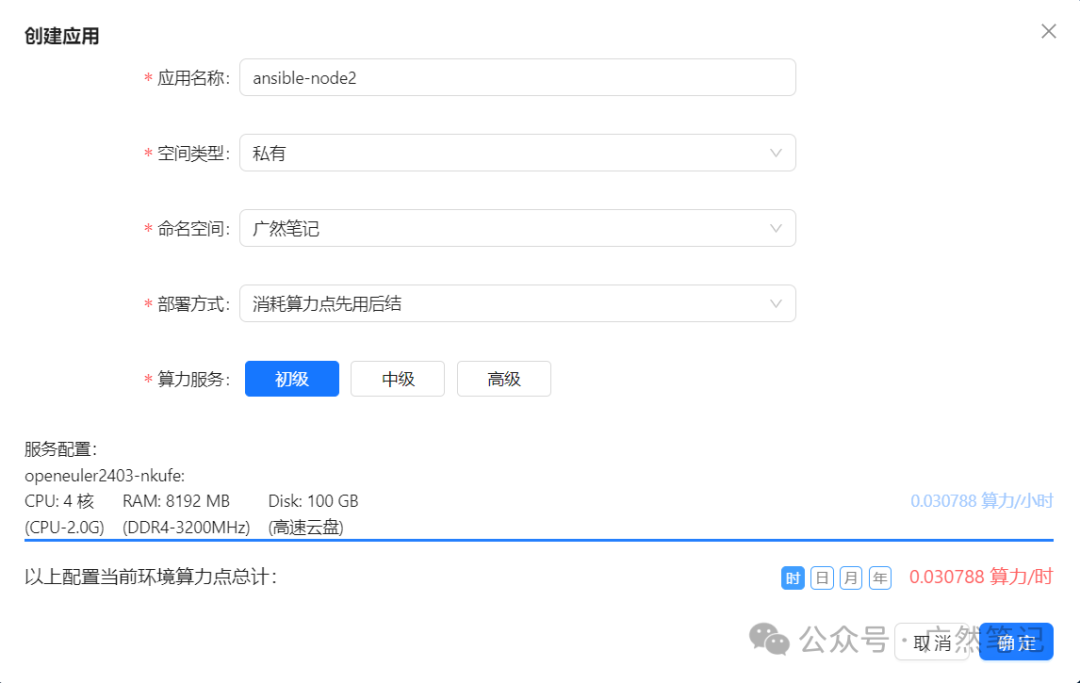
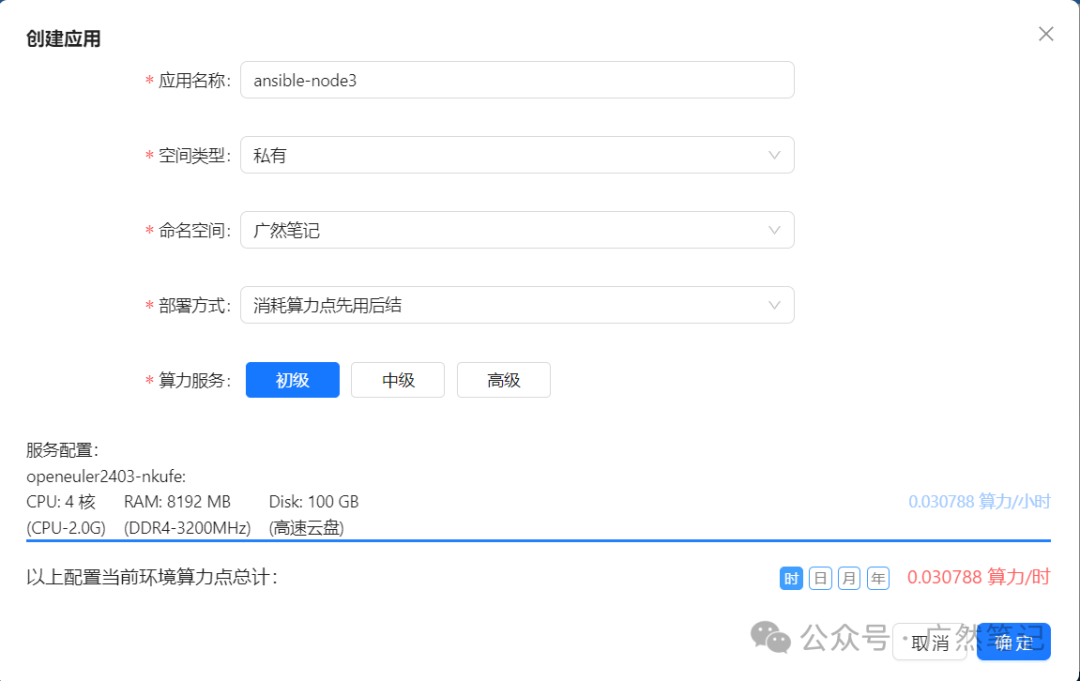
At this point, you can see the four created application icons on the desktop.

Configuring Managed Nodes
Click to open the application named “ansible-node1” to complete the following configuration. The remaining “ansible-node2” and “ansible-node3” can be configured in the same way; here we take “ansible-node1” as an example.
Changing Hostname
Double-click the desktop icon “ansible-node1”.

Enter the username and password to log in to the openEuler operating system.
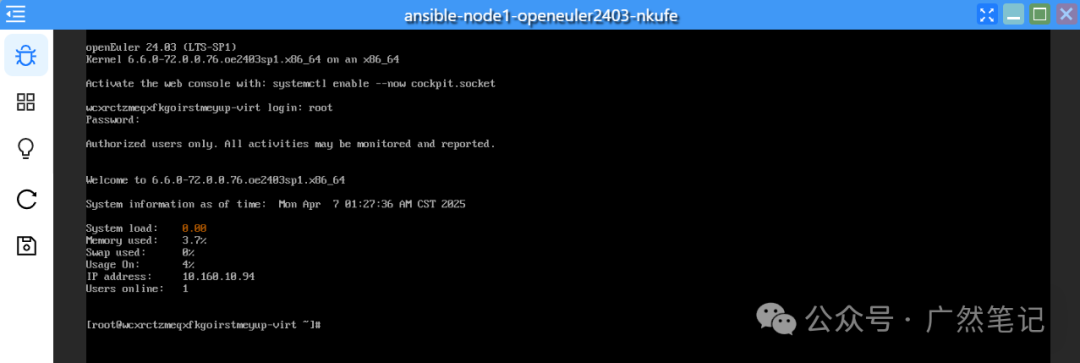
Execute the command to change the hostname. After changing the hostname, you need to log out and log back in for it to take effect.
hostnamectl set-hostname node1

Configuring Network
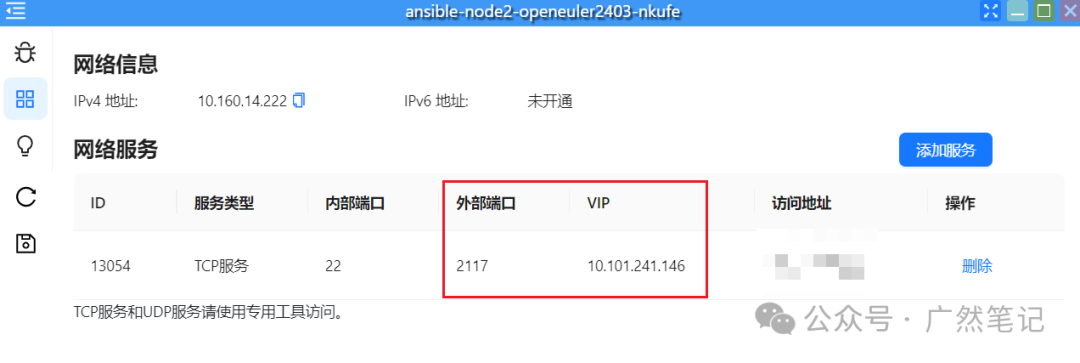
The network is automatically assigned by the Hi168 platform and does not need to be modified. However, once the application restarts, the IP address will change, so a “service port” needs to be created to obtain a fixed VIP address.
Click the “Service Port” icon and then click “Add Service”.

Fill in the relevant information as shown in the figure below.
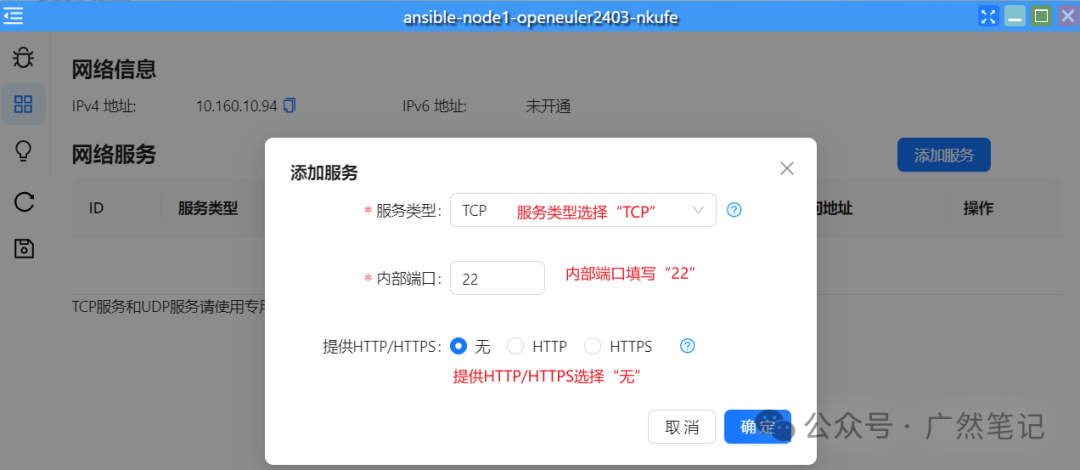
At this point, you can see the VIP address and external port, which can be recorded for future use.

Disabling SELinux
Temporarily disable it.
setenforce 0

Modify the configuration file to permanently disable it.
vi /etc/selinux/config
# Change the value of “SELinux” to “disabled”.

Stop the firewall and set it to not start on boot.
systemctl stop firewalld
systemctl disable firewalld

Start the SSH service and allow root user remote login. This feature is enabled by default in the openEuler operating system and does not require modification.
❝
All the above configurations need to be performed on nodes node1 to node3. The operations to disable the firewall and SELinux can be done when creating the application template. For the learning environment, you can enable them again after learning these two functions.
❞
Configuring node2

Configuring node3


Configuring Control Node
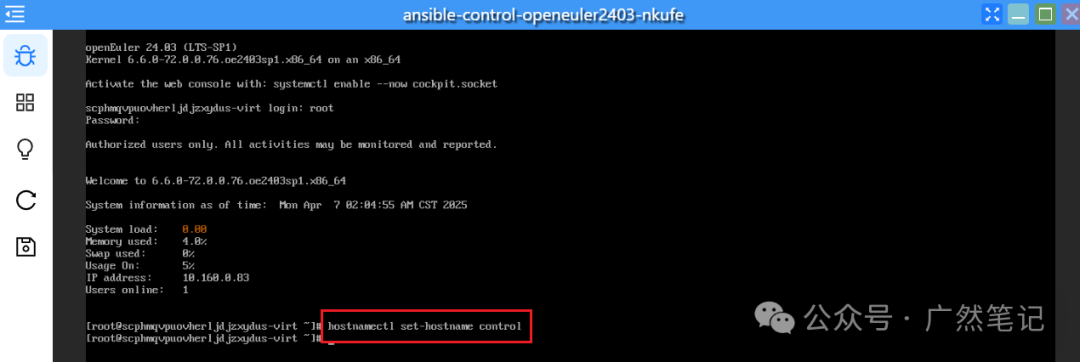
Changing Hostname
hostnamectl set-hostname control
Configuring Network
Follow the same configuration steps as for the managed nodes.

Modifying Software Sources (Optional)
The default openEuler source is the official online source. If you find the software installation speed slow, you can change it to Huawei Cloud or Alibaba Cloud software source addresses.
sed -i "s@http://repo.openeuler.org/openEuler-24.03-LTS-SP1/@https://mirrors.aliyun.com/openeuler/openEuler-24.03-LTS-SP1/@g" /etc/yum.repos.d/openEuler.repo
dnf clean all
dnf makecache
Installing Ansible Service
dnf install -y ansible
After installation, the Ansible service is started by default. You can execute <span>ansible --version</span> to check the version and configuration information of the Ansible service.

Configuring the <span>hosts </span> File
Use the vim editor to edit the <span>/etc/hosts</span> file.
vim /etc/hosts
Write the following content, where the IP addresses are the VIP addresses of the three applications.
10.106.49.158   node1
10.101.241.146  node2
10.100.163.224  node3

Configuring Connection Between Control Node and Managed Nodes
Generate an SSH key pair, pressing enter for all prompts.
ssh-keygen

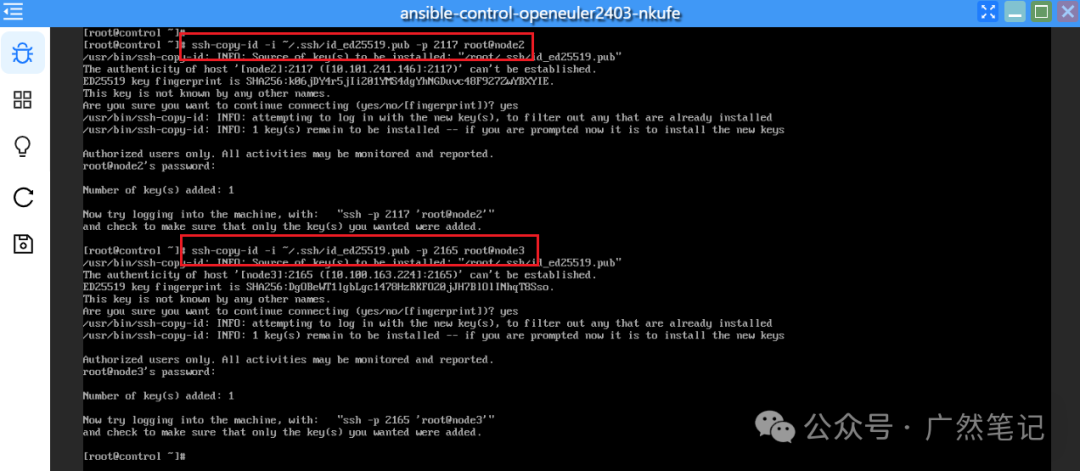
Copy the public key to each managed node, entering the password for the managed node.
❝
The port number specified after -p should be changed to the “external port” from the network configuration step.
❞
ssh-copy-id -i ~/.ssh/id_rsa.pub -p 2163 root@node1
ssh-copy-id -i ~/.ssh/id_rsa.pub -p 2117 root@node2
ssh-copy-id -i ~/.ssh/id_rsa.pub -p 2165 root@node3

Configuring Managed Host Inventory
Write the IP addresses of the managed nodes into the inventory file, allowing the control node to manage the hosts based on the inventory. You can also categorize the hosts in the inventory.
I will categorize node1 and node2 into the <span>[web]</span> group, and node3 into the <span>[db]</span> group, to better reflect actual business scenarios. The category names can be customized.
Use the vim editor to edit the inventory configuration file <span>/etc/ansible/hosts</span>.
vim /etc/ansible/hosts
Write the following content; the file may contain some example configurations that can be deleted or retained and added to the end of the file.
[web]
node1 ansible_port=2163
node2 ansible_port=2117
[db]
node3 ansible_port=2165

Use the <span>ansible-inventory --graph</span> command to view the information of the managed nodes.

Thus, a basic Ansible environment suitable for learning has been set up.
Testing
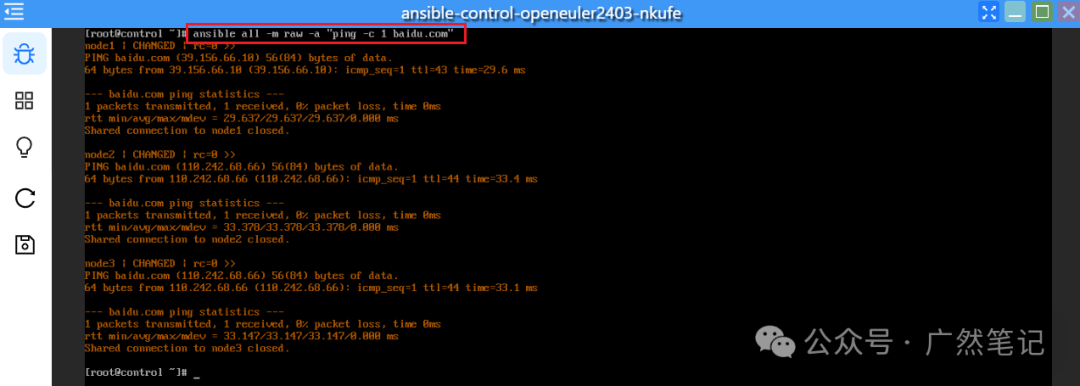
Check if all managed nodes can access Baidu; you can see that each node can access Baidu.
ansible all -m raw -a "ping -c 1 baidu.com"
Write “Hello Ansible” into the <span>/root/hello.txt</span> file on all managed nodes.
ansible all -m shell -a "echo 'Hello Ansible' > /root/hello.txt"

❝
Warning messages can be temporarily ignored, as Ansible detects that the target host’s Python interpreter path is
<span>/usr/bin/python3</span>, but the interpreter path is not explicitly specified, hence the warning 「Ansible execution may fail in the future due to changes in the system environment (such as installing other Python versions)」.❞
Check if the file was created successfully.

Delete the “hello.txt” file created in the “[web]” group.
ansible web -m file -a "path=/root/hello.txt state=absent"

Check the files in the “/root” directory of all managed hosts and find that the hello.txt file is missing in node1 and node2.
ansible all -m shell -a "ls /root/"


Previous Recommendations
● How to Elegantly Use eNSP on Windows 11 24H2
● Basic Experiments with OSPF Routing Protocol
● Using Hi168 Cloud Platform to Build openEuler Learning Environment
● What is the Experience of Deploying eNSP-Pro on Hi168 Cloud Platform for Free