To help users quickly grasp the ability to connect the northbound to various IoT platforms, this article expands on the practical operation of connecting to ThingsPanel.
0. Effect Display

1. Introduction to ThingsPanel
<span>ThingsPanel</span> is an excellent open-source IoT platform based on <span>Go</span> programming language.
2. Installing ThingsPanel
-
Download the
<span>docker-compose.yml</span>file from https://github.com/ThingsPanel/thingspanel-docker/blob/main/docker-compose.yml -
Start the container
docker-compose up -d-
Access port
<span>8080</span>, and log in using the tenant administratorUsername
<span>[email protected]</span>Password
<span>123456</span>
3. Device Access Documentation and Specifications
<span>http://thingspanel.io/zh-Hans/docs/device-connect/gateway</span>
<span>https://docs.qq.com/doc/DZXlnb25scnZRc1dK</span>
4. Creating Gateway Device Configuration Template

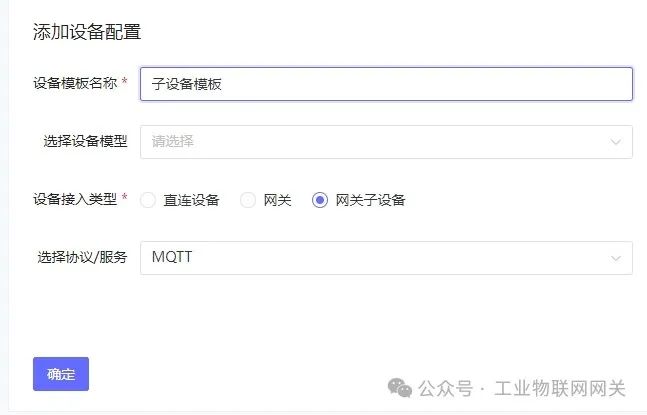
5. Creating Sub-device Configuration Template

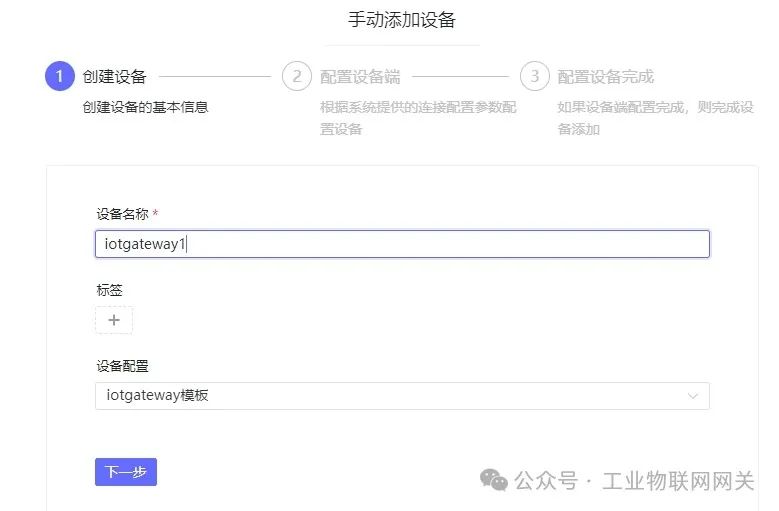
6. Creating Gateway Device
In the <span>Device Connection tab</span>, view and record the <span>MQTT Username</span> and <span>MQTT ClientID</span>
7. Creating Sub-device

8. Gateway Associated Sub-device
After association, record the <span>Sub-device Address</span>


9. Adding ThingsPanel Platform Type
<span>iotgateway\IoTGateway.Model\SystemConfig.cs\IoTPlatformType</span>
[Display(Name = "ThingsPanel")]
ThingsPanel = 9
10. Adding ThingsPanelHandler
Reference other <span>Handlers</span>, and add <span>ThingsPanelHandler</span>
<span>iotgateway\Plugins\Plugin\PlatformHandler\ThingsPanelHandler.cs</span>
public async Task PublishTelemetryAsync(string deviceName, Device device, Dictionary<string, List<PayLoad>> sendModel)
{
    foreach (var payload in sendModel[deviceName])
    {
        if (payload.Values != null)
        {
            var telemetryData = new Dictionary<string, Dictionary<string, object>>()
            {
                {
                    "sub_device_data", new Dictionary<string, object>()
                    {
                        { deviceName, payload.Values }
                    }
                }

            };
            await MqttClient.EnqueueAsync(new MqttApplicationMessageBuilder().WithTopic($"gateway/telemetry")
                .WithPayload(JsonConvert.SerializeObject(telemetryData)).Build());
        }
    }
}
11. Modifying PlatformHandlerFactory
<span>iotgateway\Plugins\Plugin\PlatformHandler\PlatformHandlerFactory.cs\PlatformHandlerFactor</span>
case IoTPlatformType.ThingsPanel:
    return new ThingsPanelHandler(mqttClient, logger, onExcRpc);
12. Adding Sub-device on Gateway Side
After modification, run<span>iotgateway</span> project, add device, and note that the device name uses the Sub-device Address from <span>Step 8</span>

13. Gateway Side Device Communication Configuration

14. Adding Device Variables on Gateway Side

15. Gateway Side Transmission Configuration
Select the output platform as ThingsPanel, and use the <span>MQTT Username</span> and <span>MQTT ClientID</span> from Step 6, with password as empty

16. Data Viewing

17. Others
For other uses of IoTGatway, see other tutorials at the project homepage: http://iotgateway.net/
Open-source Repository:
-
https://gitee.com/iioter/iotgateway
-
https://github.com/iioter/iotgateway