1.No Filament Extrusion After Starting Print
This is a common issue for 3D printing beginners. Fortunately, this problem is relatively easy to solve. There are four possible reasons for the extruder not pushing out filament.
1.1Filament not loaded into the extruder before printing starts
1.2Nozzle too close to the bed
1.3Filament slipping on the extruder gear (filament shaving)
1.4 Extruder clogged

2.Filament Not Sticking to the Bed
The first layer of the print must adhere tightly to the bed. Only then can the subsequent layers be built upon it. If the first layer does not stick to the bed, it will cause problems for the layers that follow. There are many methods to address the issue of the first layer not adhering. Therefore, we will only investigate a few common situations below.
2.1Build platform not level
2.2Nozzle too far from the bed
2.3First layer printing too fast
2.4Temperature or cooling settings are incorrect
2.5Bed surface treatment (tape, glue, and material)
2.6If none of the above methods work:Overhang and base
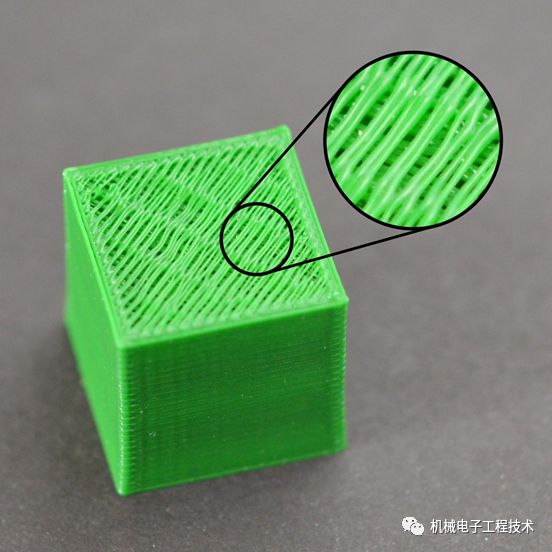
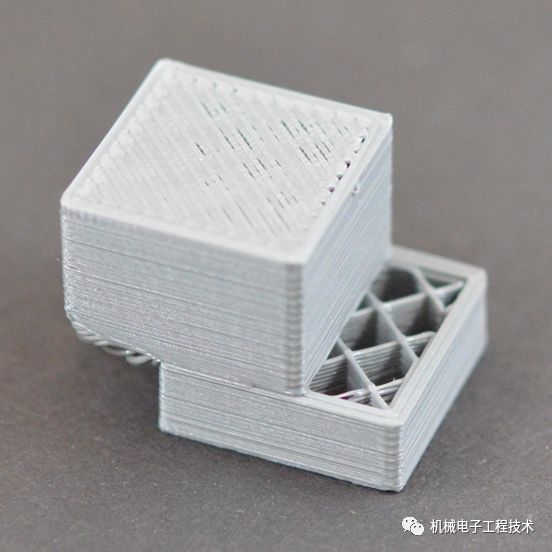
3.Insufficient Material Output
If this occurs, you may notice gaps between adjacent layers. A method to test if your printer is extruding enough material is to print a simple 20mm cube, setting it to print at least 3 perimeter layers. Check if the 3 perimeter lines at the top of the cube are tightly bonded together. If there are gaps between the 3 lines, then you are facing an insufficient material output issue. If the 3 lines are closely packed together with no gaps, you may be encountering a different problem. If you are sure you are facing insufficient output, here are a few feasible methods.
3.1Incorrect filament diameter
The first thing you need to confirm is that the software knows the diameter of the filament you are using.
3.2Increase extrusion multiplier
If your filament diameter is correct, but you still see insufficient output, then you need to adjust the extrusion multiplier.
4.Excessive Material Output
The software works with your printer, so please ensure that the correct amount of plastic is being extruded from the nozzle. Accurate extrusion is a key factor in achieving high-quality prints. However, most 3D printers have no way to monitor exactly how much plastic is extruded. If your extruder settings are incorrect, the printer may extrude more plastic than the software expects. Excessive output will lead to issues with the outer dimensions of the print.
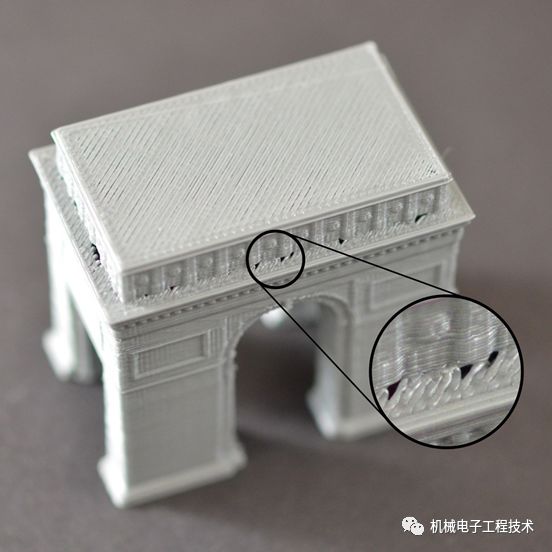
5.Holes or Gaps in the Top Layer
To save plastic, most 3D printed parts consist of a solid shell and a porous hollow core. For example: If the fill rate of the core of the printed part is only 30%, it means that only 30% of the core is plastic, while the rest is air. Although the core of the printed part is partially hollow, we want the surface to be solid.
5.1Insufficient number of solid top layers
5.2Fill rate too low
5.3Insufficient material output
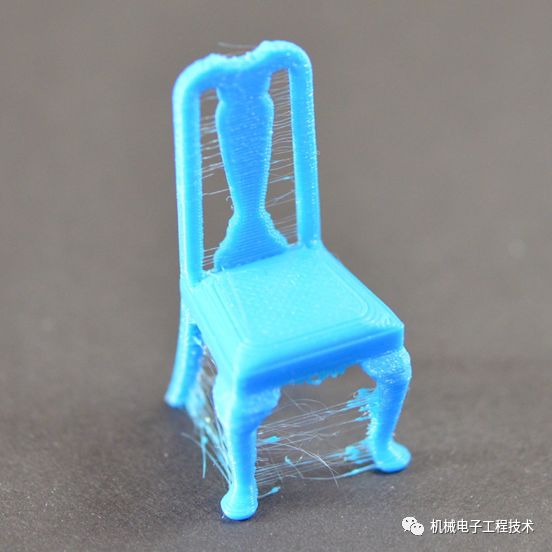
6.Stringing or Oozing
Stringing occurs when fine strands of plastic remain on the printed part. This is usually because plastic oozes out of the nozzle when it moves to a new position.
6.1Retraction distance
6.2Retraction speed
6.3Temperature too high
6.4Overhang travel distance too long
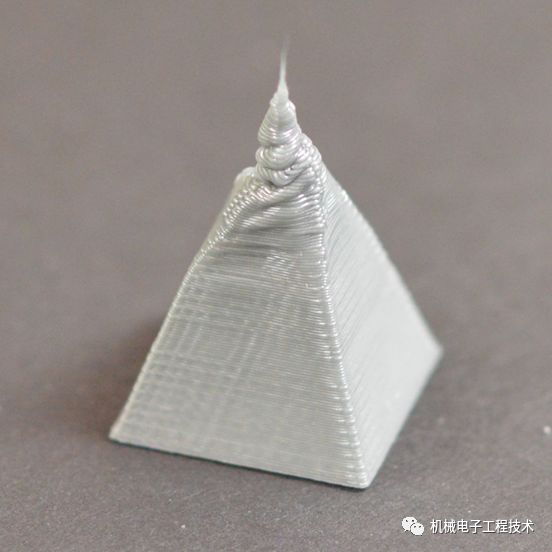
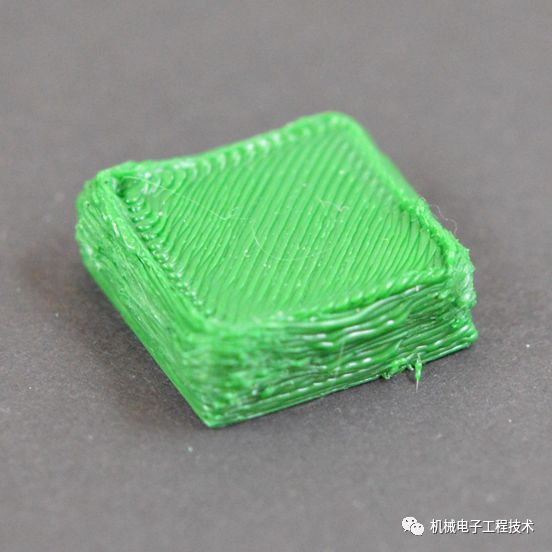
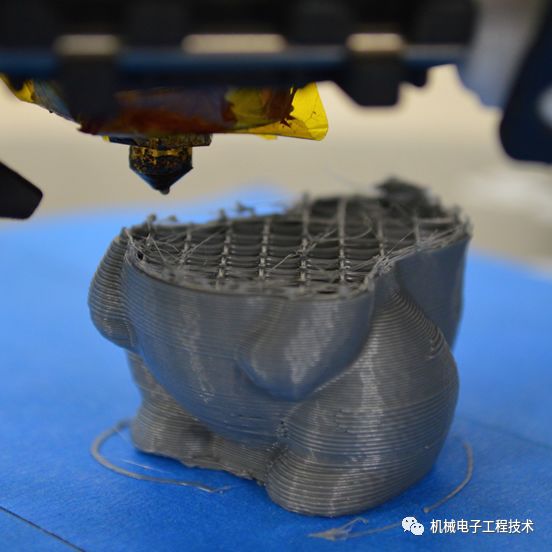
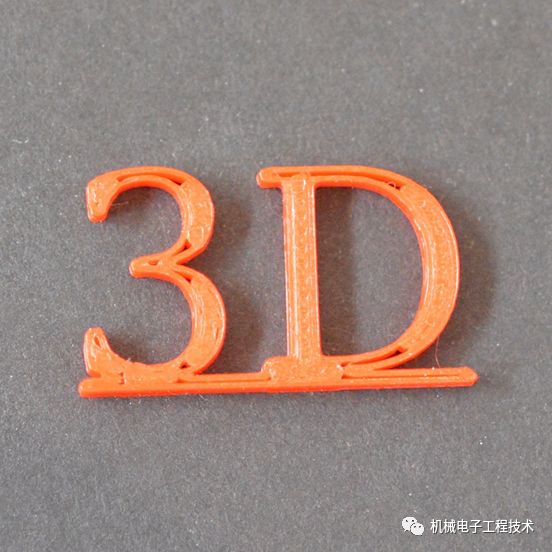
7.Overheating
The plastic extruded from the extruder is typically between 190 and 240 degrees Celsius. When the plastic is still hot, it remains soft and can easily be shaped into different forms. Then, when it cools, it quickly solidifies and retains its shape. You need to achieve a normal balance between temperature and cooling, so that the plastic can smoothly flow from the nozzle but also quickly solidify to maintain the accuracy of the print dimensions. Failure to achieve this balance can lead to various print quality issues, and the appearance of the printed piece may not match your expectations. As shown in the image, the filament extruded at the top of the pyramid did not cool and solidify quickly enough.
7.1Insufficient cooling
The most common cause of overheating is that the plastic does not cool in time. When cooling is slow, the plastic can easily deform. For many plastics, rapidly cooling the layers that have been printed is beneficial to prevent them from deforming. If your printer has a cooling fan, try increasing the fan’s power to cool the plastic more quickly.
7.2Printing temperature too high
If you have already used a cooling fan but still have issues, you may need to try lowering the printing temperature. If the plastic is extruded from the nozzle at a lower temperature, it may solidify more quickly. Try lowering the printing temperature by 5 to 10 degrees to see the effect.
7.3Printing too fast
If you print each layer very quickly, it may not allow enough time for the layer to cool properly before starting to print a new layer on top. This is particularly important when printing small models, as there is very little time for each layer to print. Even with a cooling fan, for these tiny layers, you still need to reduce the printing speed to ensure there is enough time for the layer to solidify.
8.Layer Misalignment
Most 3D printers use an open-loop control system. Simply put, they do not have feedback on the actual position of the print head. The printer simply tries to move the print head to a certain position and hopes it reaches there. Most of the time, this works because the stepper motors driving the printer are very powerful and there is no significant load preventing the print head from moving. However, if a problem occurs, the printer has no way to detect it. For example, if you accidentally bump your printer while printing, you might cause the print head to move to a new position. The machine has no feedback to recognize this situation. Therefore, it will continue printing as if nothing has happened. If you find that the layers in your printer are misaligned, it could be due to one of the reasons listed below.
8.1Print head moving too fast
8.2Mechanical or electronic issues

9.Layer Cracking or Separation
3D printing builds models by printing one layer at a time. Each subsequent layer is printed on top of the previous one, ultimately forming the desired 3D shape. Therefore, to ensure the final printed part is strong and reliable, you need to ensure that each layer bonds well with the layer beneath it. If the layers do not bond well, the final printed part may crack or separate.
9.1Layer height too high
9.2Printing temperature too low
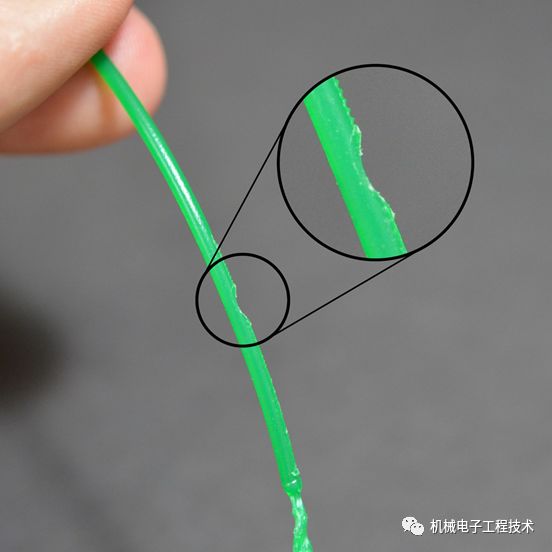
10.Filament Shaving
Most 3D printers use a small gear combined with another bearing to grip the filament, allowing the gear to bite into the filament and push it back and forth based on the direction of the gear’s rotation. If the filament cannot move but the gear continues to turn, the gear may shave off some plastic from the filament, leading to the gear having nothing to grip. Many people refer to this situation as “filament shaving”. Because too much plastic is shaved off, it leads to malfunction of the extrusion function. If this occurs on your printer, you will typically see many plastic shavings scattered around. You will also see that the extruder is turning, but the filament is not being pushed into the extruder.
10.1Increase extruder temperature
10.2Printing speed too fast
10.3Check if the nozzle is clogged
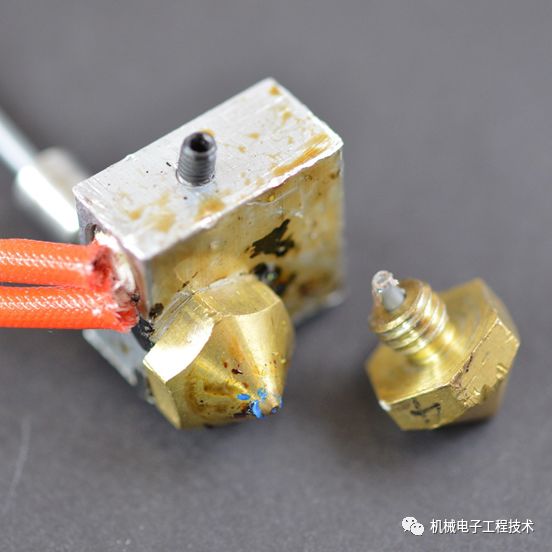
11Nozzle Clogging
Your 3D printer needs to melt and extrude several kilograms of plastic over its lifetime. All the plastic must be extruded through a hole the size of a grain of sand, which complicates matters. Inevitably, during this process, there are times when the extruder cannot push the plastic through the nozzle. This clogging often occurs because something is obstructing the normal extrusion of plastic through the nozzle. The first time this problem arises, it can be a bit overwhelming, but next, we will introduce a few simple steps to fix a clogged nozzle.
11.1Manually push filament into the extruder
11.2Reinstall the filament
11.3Clean the nozzle
12.Extrusion Stops Mid-Print
If your printer starts extruding normally but suddenly stops, there are usually several factors that may cause this problem.
12.1Filament run out
12.2Filament slipping against the drive gear
12.3Extruder clogged
12.4Extruder motor overheating

13.Poor Fill
The fill portion in a 3D printed part plays a very important role in increasing the model’s strength. In 3D printing, fill is responsible for connecting the outer shell while also supporting the outer surface that will be printed on top.
13.1Try changing the fill pattern
13.2Reduce printing speed
13.3Increase fill extrusion width
14.Spots and Scars
During the 3D printing process, when the extruder moves to different positions, it must continuously stop and start extruding. Most extruders can produce consistent extrusion lines while running. However, each time the extruder shuts off and turns back on, it produces noticeable changes. For example, when observing the outer shell of your 3D printed part, you may notice some small marks appearing in the area where extrusion starts. The extruder must start printing from a certain point on the outer shell of your 3D model, and when the entire shell is printed, the nozzle will return to that position. This is commonly referred to as spots or scars.
14.1Retraction and oozing
14.2Avoid unnecessary retractions
14.3Non-fixed retraction
14.4Select starting point

15.Gap Between Fill and Perimeter
Reconstructed printed parts consist of perimeters along the edges and fill. The perimeter’s outer edge path creates a solid and precise outer surface for the printed part. The fill is printed inside along the edges to fill the remaining space of the layers. Typically, fill uses a fast back-and-forth pattern, making the printing speed faster. It is important that the fill and perimeter of the printed part bond solidly together.
15.1Insufficient perimeter overlap
15.2Printing too fast
16Corner Curling and Roughness
If curling issues are found in the later stages of printing, it indicates an overheating problem. The plastic is extruded from the nozzle at a very high temperature and fails to cool in time, which may lead to deformation over time. Curling can be resolved by quickly cooling each layer so that it has no chance to deform before solidifying.

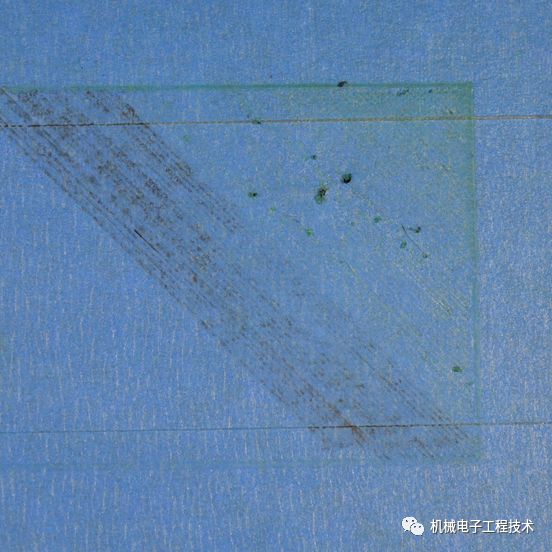
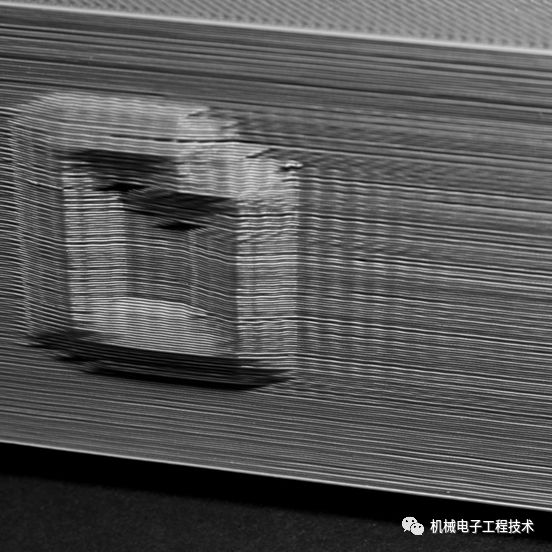
17.Scars on the Top Surface
The benefit of 3D printing is that each printed part is built one layer at a time. This means that each layer is independent, and the nozzle can freely move to any position on the bed while the printed part is still being built below. This provides many opportunities where you may see the nozzle leaving marks as it moves across the surface of the previous layer, which is most easily seen on the upper surface of the printed part.
17.1Excessive plastic extrusion
17.2Vertical lift (Z lift)
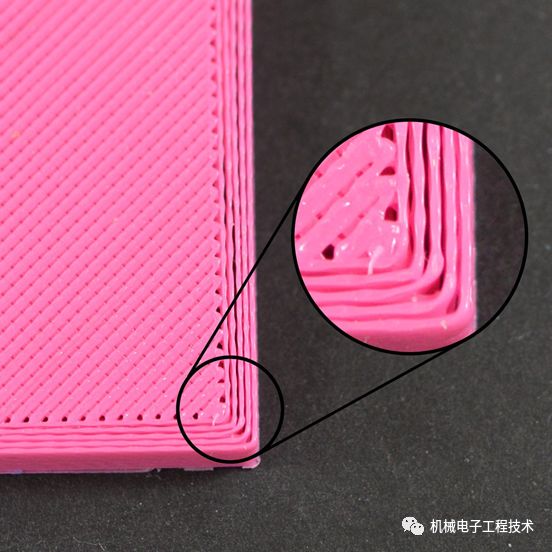
18.Holes and Gaps on the Bottom Edges
During 3D printing, each layer is built upon the previous layer. However, the amount of plastic used for printing is also a factor, so there needs to be a balance between the strength of the base and the amount of plastic used. If the base is not strong enough, holes and gaps will appear between the layers, especially at corners where there are size changes (for example, when printing a 20cm cube on top of a 40cm square). When the print transitions to a smaller size, you need to ensure there is enough base to support the walls of the 20mm cube.
18.1Insufficient number of perimeters
18.2Insufficient number of solid top layers
18.3Fill rate too low
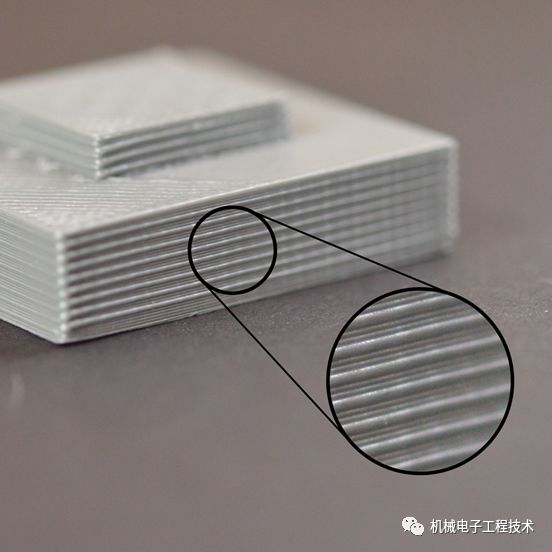
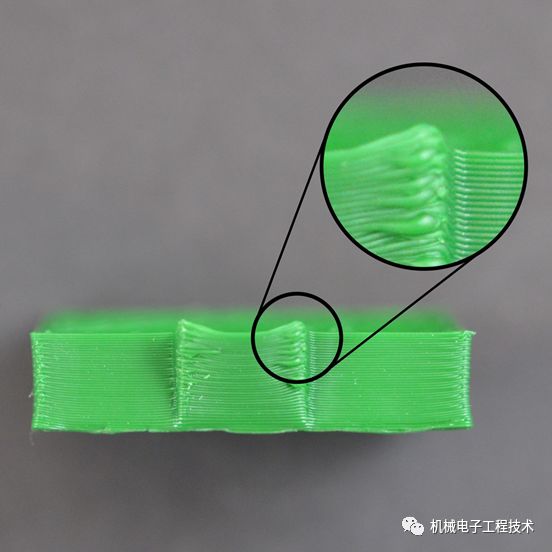
19.Side Linear Texture
The exterior of a 3D printed part consists of hundreds or thousands of layers, and if everything is functioning correctly, these layers should appear as a smooth surface. However, if just one layer has an issue, it can be clearly detected on the surface of the printed part. These incorrect layers can cause the surface of the printed part to look like a linear texture. Typically, this defect occurs periodically, meaning the lines appear in a regular pattern (for example, every 15 layers). Next, we will discuss several common causes.
19.1Unstable extrusion
19.2Temperature fluctuations
19.3Mechanical issues
20.Vibration and Ripple Texture
Ripples are wavy textures appearing on the surface of printed parts due to vibrations from the printer. Typically, you will see this texture when the extruder suddenly changes direction, such as at sharp corners. For example, when printing a 20mm cube, each time the extruder goes to print another face of the cube, it needs to change direction. During sudden directional changes, the inertia of the extruder will cause vibrations, which will be reflected in the printed part. Next, we will discuss the most common causes of ripples and explain why they occur.
20.1Printing too fast
20.2Firmware acceleration
20.3Mechanical failures
21.Gaps in Thin Walls
Your printer has a nozzle of fixed size. When printing thin walls that are only a few times larger than the nozzle diameter, you may encounter issues. For example, if you use a 0.4mm nozzle to print a 1.0mm thick wall, you will need to make some adjustments to ensure your printer produces completely solid walls without leaving gaps.
21.1Adjust thin wall behavior
21.2Modify extrusion width for better fit
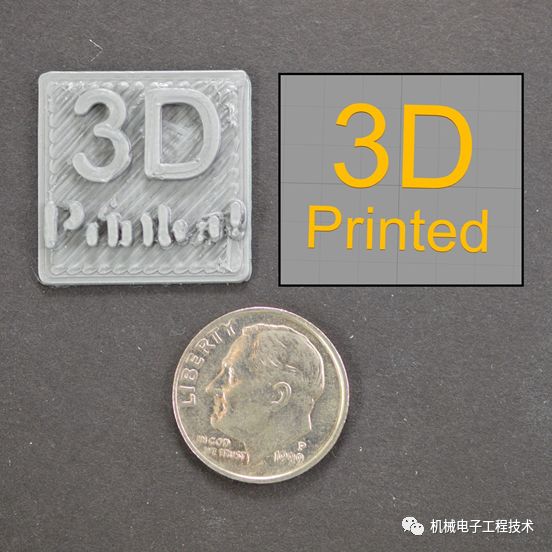
22.Details Not Printing
Your printer has a fixed-size nozzle that allows you to print very fine details accurately. For example, many printers are equipped with nozzles that have a diameter of 0.4mm. This is sufficient for printing many parts, but when printing extremely fine details that are smaller than the nozzle diameter, you will encounter problems. For instance, if you try to print a 0.2mm thin wall using a 0.4mm nozzle, you will find that you cannot accurately produce a 0.2mm extrusion width from a 0.4mm extruder. The extrusion width must always be greater than or equal to the nozzle diameter.
22.1Redesign models with thin walls
22.2Install a nozzle with a smaller diameter
22.3As a last resort, force the software to print smaller details
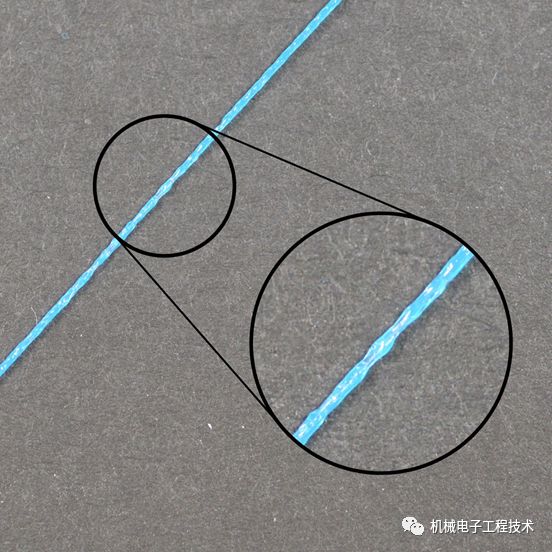
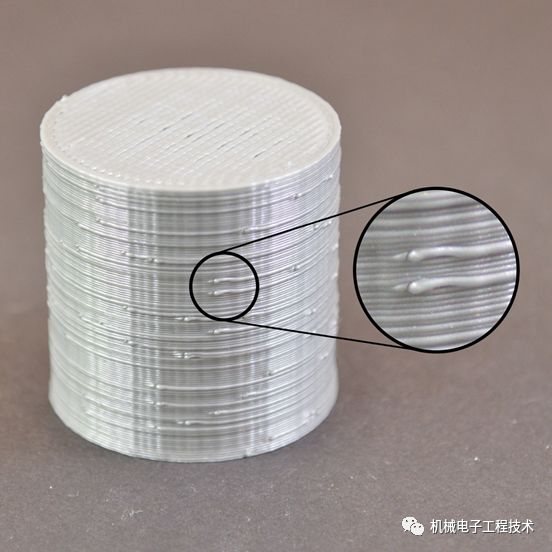
23Unstable Extrusion
To enable your printer to produce high-precision prints, stable extrusion is essential. Variations in extrusion width across different parts of the print will affect the final print quality. By carefully observing the printing process, you can identify extrusion instability issues. For example, if the printer is printing a long 20mm line, but you notice that the extrusion width appears uneven or that the dimensions seem to fluctuate, you may be experiencing this issue. We have compiled several common causes of unstable extrusion.
23.1Filament getting stuck or tangled
23.2Clogged nozzle
23.3Layer height too small
23.4Incorrect extrusion width
23.5Poor quality filament
23.6Mechanical failure of the extruder

To learn more
Quickly scan the code to follow us