The main text contains: 8888 words and 145 images,Estimated reading time: 12 minutes
 Table of Contents
Chapter 1 of the Network Path: Networking in Windows Systems
0. Preface 1. Networking in Windows Systems 1.1. Network Interface Cards in Desktop 1.2. Network Interface Cards in Command Line 1.3. Routing Table 1.4. Home RouterChapter 2 of the Network Path: Understanding Enterprise Devices
2. Understanding Enterprise Devices 2.1. Appearance of MSR810-W 2.2. Logging into the MSR810-W Management Page 2.3. Quick Internet Setup 2.4. WLAN Configuration 2.5. LTE Module Configuration 2.6. Advanced Settings of MSR810-WChapter 3 of the Network Path: Understanding Device Command Line
3. Understanding Device Command Line 3.1. Logging into the Device via Console Interface 3.2. Remote Login to the Device 3.3. Basic Commands of Comware System 3.4. Interpretation of MSR810-W Configuration 3.5. Initialization Configuration of MSR810-WChapter 4 of the Network Path (Part 1): Understanding Network Simulators
4. Understanding Network Simulators 4.1. HCL H3C Cloud Laboratory 4.2. eNSP Enterprise Network Simulation Platform 4.3. Cisco Packet Tracer 4.4. EVE-NG 4.4.1. Importing OVF to Deploy on ESXi 4.4.2. Installing from ISO to Workstation 4.4.3. Importing IOL Images into EVE-NG 4.4.4. Importing QEMU Images into EVE-NG4.5. Virtualization Environment VMware ESXi
When introducing EVE-NG earlier, we used two VMware products, namely VMware ESXi 6.7 and VMware Workstation 16. For ordinary users, Workstation is likely used more; while for enterprise users, ESXi is more common. To enhance the learning effect, we will mainly use ESXi for this introduction.
VMware vSphere is VMware’s server virtualization solution, which includes two heavyweight products: VMware ESXi and VMware vCenter. This article mainly introduces content related to ESXi, while vCenter belongs to a higher level of content. Interested readers can refer to the article (Deployment Record of vCenter Server Appliance), which will not be elaborated on in this article.
So far, we have learned about the customization methods for VMware ESXi installation images (How to Customize VMware ESXi 6.7 and 7.0 Installation Images?), deployment methods in servers (HP VMware ESXi 6.7 Customized Deployment), deployment methods on personal PCs (VMware ESXi 6.7 Successfully Recognizes Mechanical Hard Drives), upgrade methods (How to Upgrade VMware ESXi 6.7 to 7.0?), and vCenter management (vCenter 7.0 Data Center Cluster Configuration Guide). This article will introduce how to customize, deploy, and upgrade ESXi servers based on a server environment.
4.5.1. Customizing ESXi 6.7 Installation Image
I am currently using an HPE ProLiant DL360 Gen9 server (Unboxing HP DL 360 GEN9 Server), and the corresponding ESXi installation package can be found on the HPE or VMware official websites, or it can be downloaded directly.
However, not all servers can find customized installation images on the official website. For example, the H3C R390X G2 server I used previously could not be used directly due to the lack of corresponding network card drivers and RAID card drivers. Customizing ESXi is mainly to solve the problem of not recognizing storage devices (RAID cards) and network cards during installation.
Does everyone need drivers? Not necessarily. For instance, the HPE ESXi virtual machine we deployed in the virtual machine had customized drivers added, which caused issues during version upgrades due to missing drivers.
Therefore, to meet different needs, we need to adjust according to the actual situation.
VMware image customization tools have two generations of products. The first generation is ESXi-Customizer, which mainly supports versions 6.5 and earlier. Since ESXi 6.5 is quite old, we will not elaborate on the use of the ESXi-Customizer tool; those in need can refer to previous articles (VMware ESXi Deployment Image Customization). Later, developers created a tool called ESXi-Customizer-PS based on VMware’s official tool, which can support almost all versions of image customization, including installation images for laptops.
Taking the H3C R390X G2 server as an example, we first need to download the corresponding storage controller and network card driver files from the H3C official website.
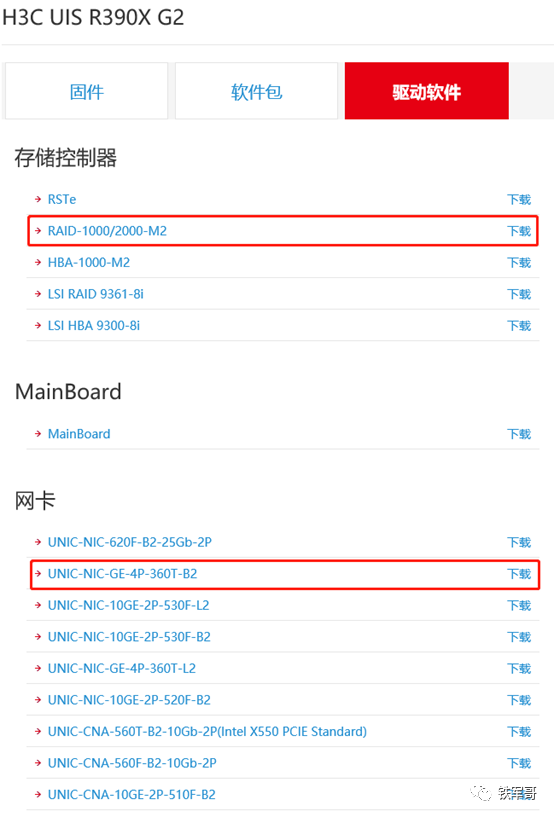
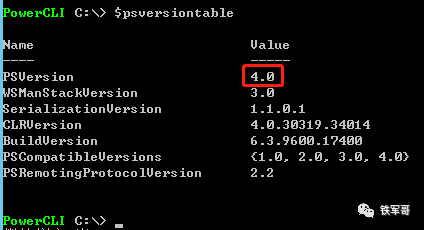
Then we can start customizing ESXi 6.7. The tool we will use is ESXi-Customizer-PS. The ESXi system uses VMware PowerCLI for driver integration. The PowerShell version used must be 3.0 or higher (Windows Server 2008 R2 version is 2.0, which does not meet the requirements; Windows Server 2012 comes with version 4.0, and Windows Server 2016 comes with version 5.1, both of which meet the requirements). I am using Windows Server 2012 R2, and I can check the PowerShell version (PSVersion) in the Windows PowerShell view using the $psversiontable command.
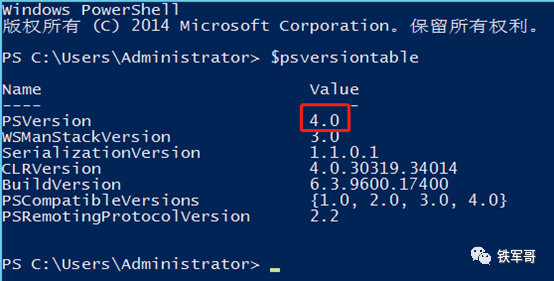
First, install the VMware PowerCLI tool, download link as follows:
http://down.whsir.com/downloads/VMware-PowerCLI-6.5.0-4624819.exeThen download the customization tool ESXi-Customizer-PS-v2.6.0.ps1 file, link as follows:
https://www.v-front.de/p/esxi-customizer-ps.htmlNext, prepare the ESXi image. You can use the downloaded ESXi670-202207001.zip file. Place the downloaded ESXi system depot package, ESXi-Customizer-PS-v2.6.0.ps1 file, and RAID card driver (create a folder named driver and put it in) in the root directory of the C drive.
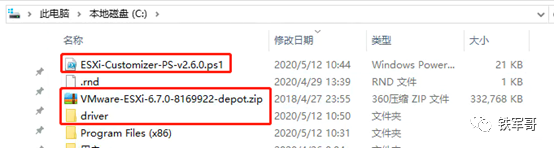
Next, run VMware PowerCLI as an administrator, and it will ask whether to enter the program; just press Enter.
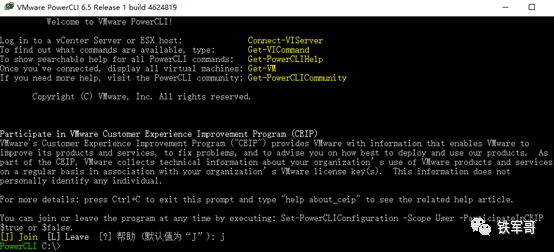
Check the PowerShell version again to confirm that it meets the requirements.
Execute the following command and wait for it to finish.
.\