Click the blue text
Follow us
Teacher Introduction

Yu Cheng, Master of Education, Senior Teacher, Senior Science Instructor, Top Ten Outstanding Science Instructors in the Country, Backbone Teacher in Minhang District, teaches at the Science Education Department of the Shanghai Minhang District Youth Activity Center. Responsible for teaching and research in projects and courses such as invention, future engineers, and makers. He has guided students to achieve excellent results in activities such as Tomorrow’s Technology Star and Innovation Competitions.

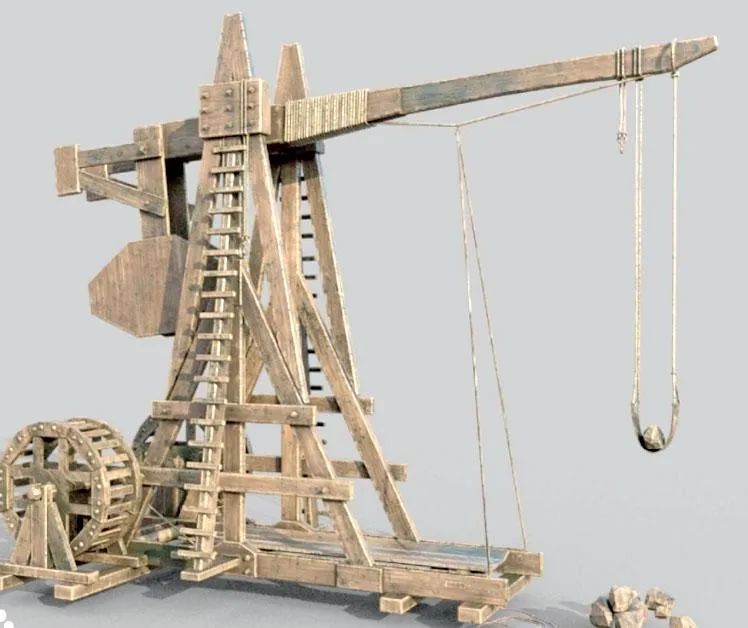
The catapult is an ancient siege weapon, operated by human power. Now, in the information age, let’s travel through time and space, combining modern technology with mechanics and electronics to transform the catapult and experience the charm of the fusion of electronics and mechanics. Let’s make an electric catapult together.

Catapult Structure
We choose the winch-type catapult as our research object.

The winch catapult uses a winch to pull the rope, achieving control over the lever of the catapult.

Let’s analyze the structure of the entire catapult, which can be roughly divided into the following parts:
-
Main structural part
-
Electronic control part
-
Power structure part

Materials Preparation

1. Main Structure Manufacturing Part:
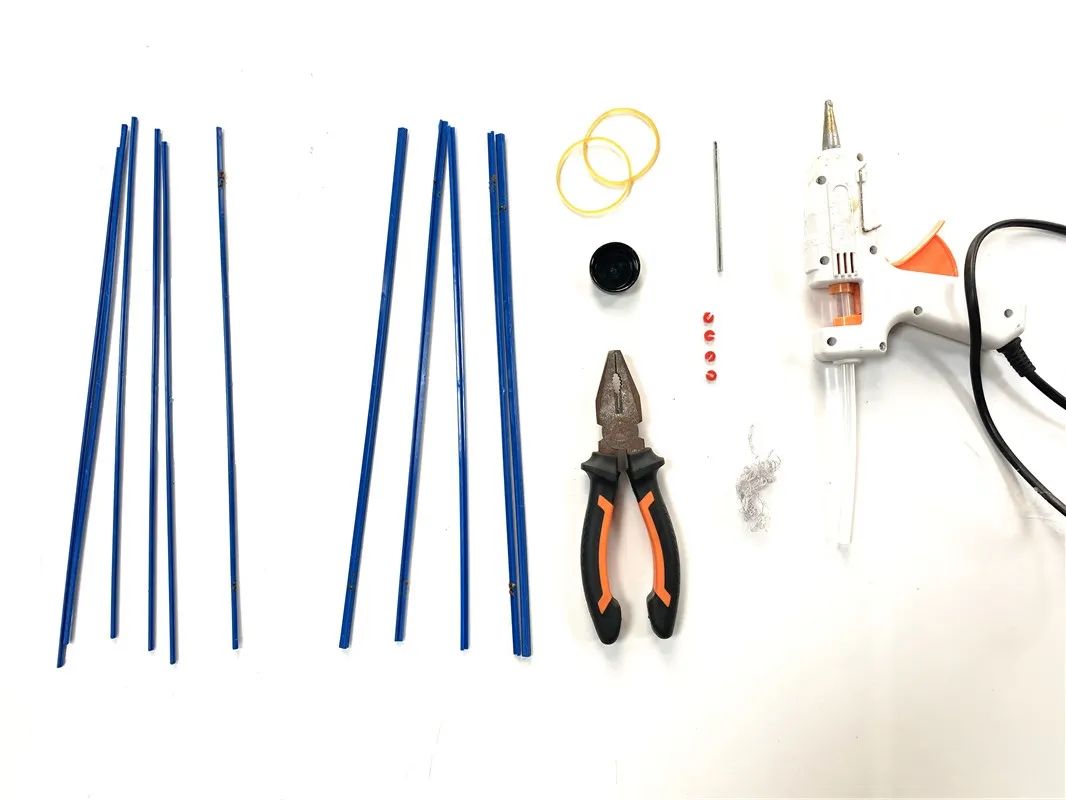
The main structure is made using plastic strips or paulownia wood strips, bonded with hot melt glue.
The materials needed are: several 30cm long plastic strips or paulownia wood strips, several rubber bands, 50cm of cotton thread, one 10cm long metal axle (bicycle spokes or hard iron rods can be used), one plastic bottle cap, several plastic clips (can be replaced with hot melt glue), hot melt glue gun and several glue sticks.

2. Electronic Control Part:
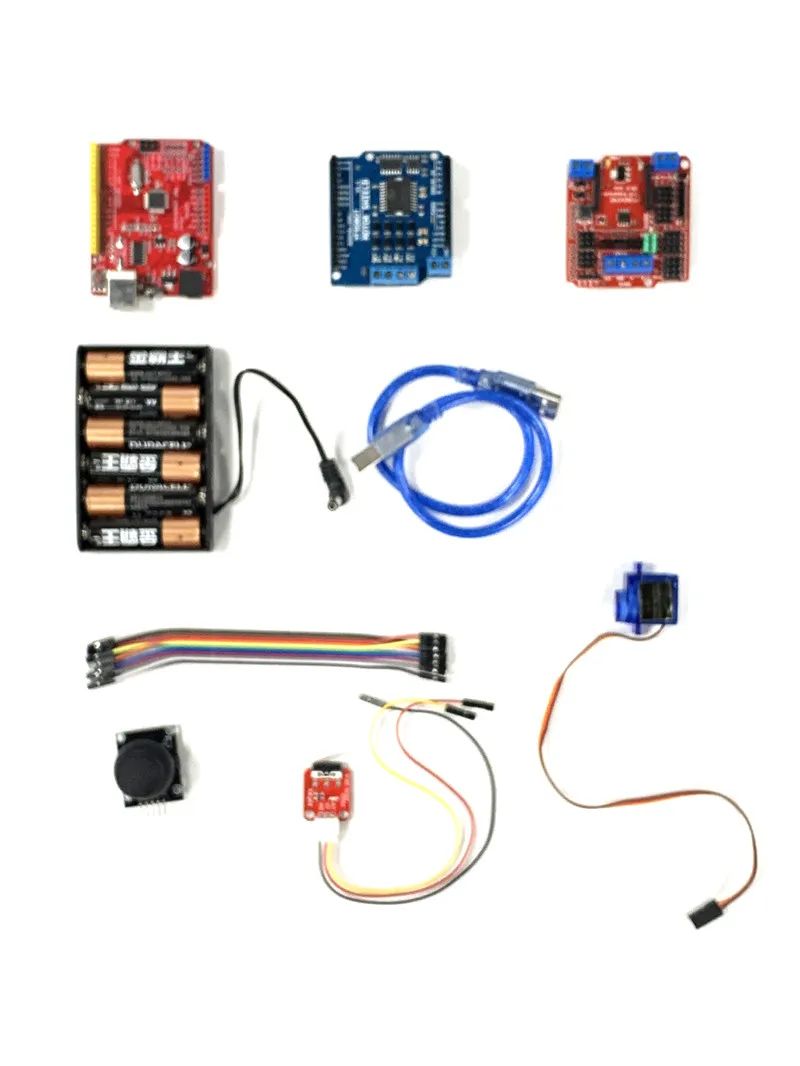
The following components are needed: 1 Arduino main board, 1 Arduino expansion board, 1 Arduino motor driver board, 1 battery holder for 6 batteries, several Dupont wires, 1 PS joystick, 1 micro switch, 1 servo, 1 Arduino USB connection cable.
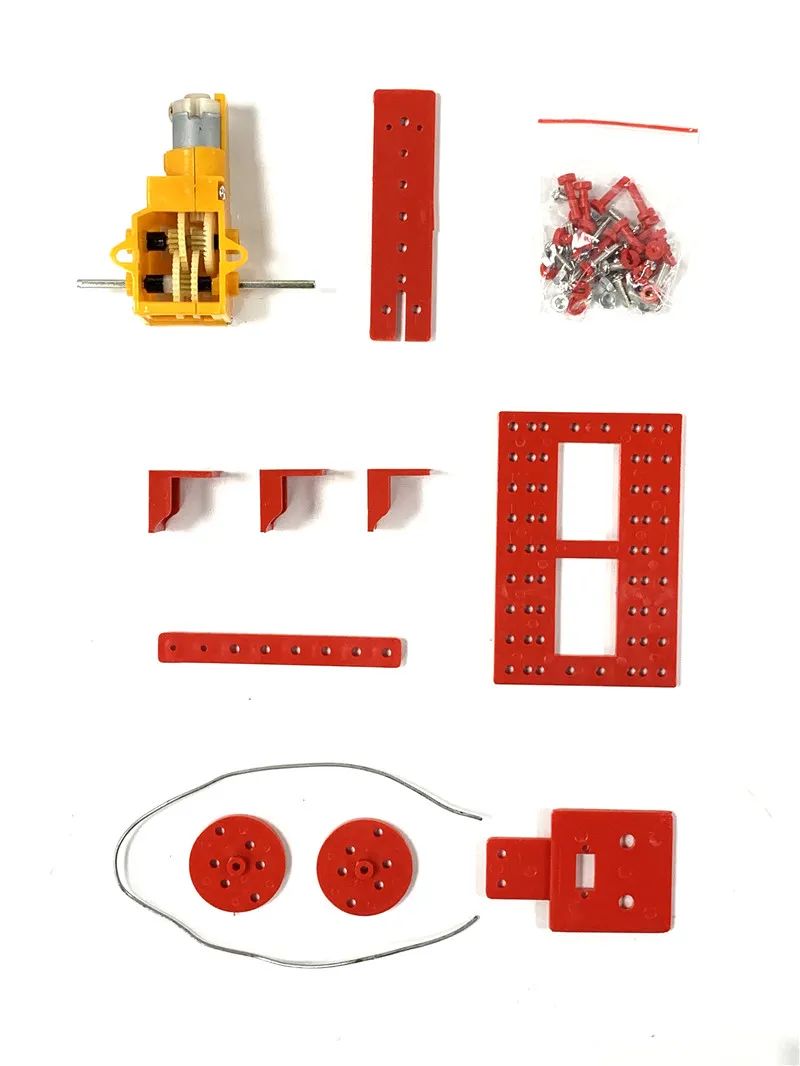

3. Power Structure Part:
1 reduction motor, 1 hard iron wire, several plastic structural parts of various shapes (various plastic building blocks can be used as substitutes).
What points should be considered for the main structure?
The throwing arm of the catapult needs a stable support structure. Ancient large catapults extensively used triangular structures to support and reinforce from multiple directions. Therefore, we will also use this method for design and production, which can achieve stability and save a lot of materials.

Production Process

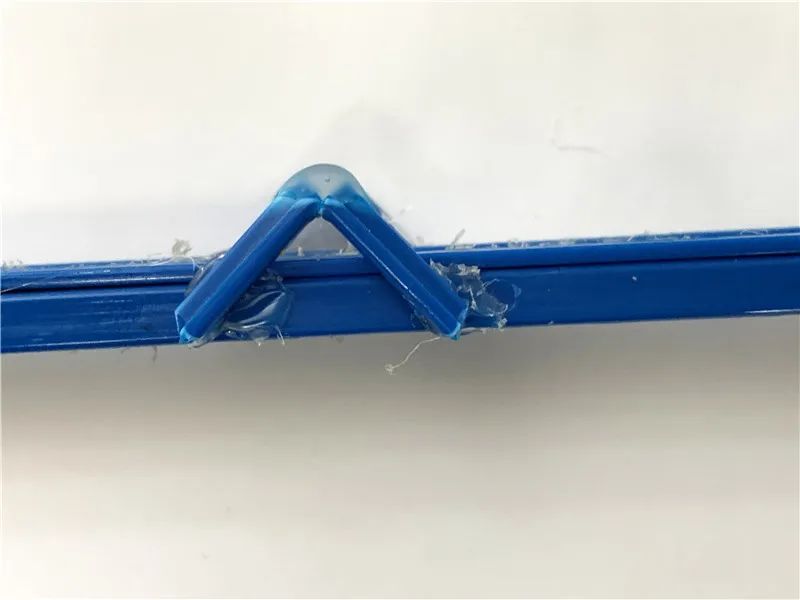
First, make two narrow isosceles triangles, about 12cm high, fixed with hot melt glue between the plastic strips.
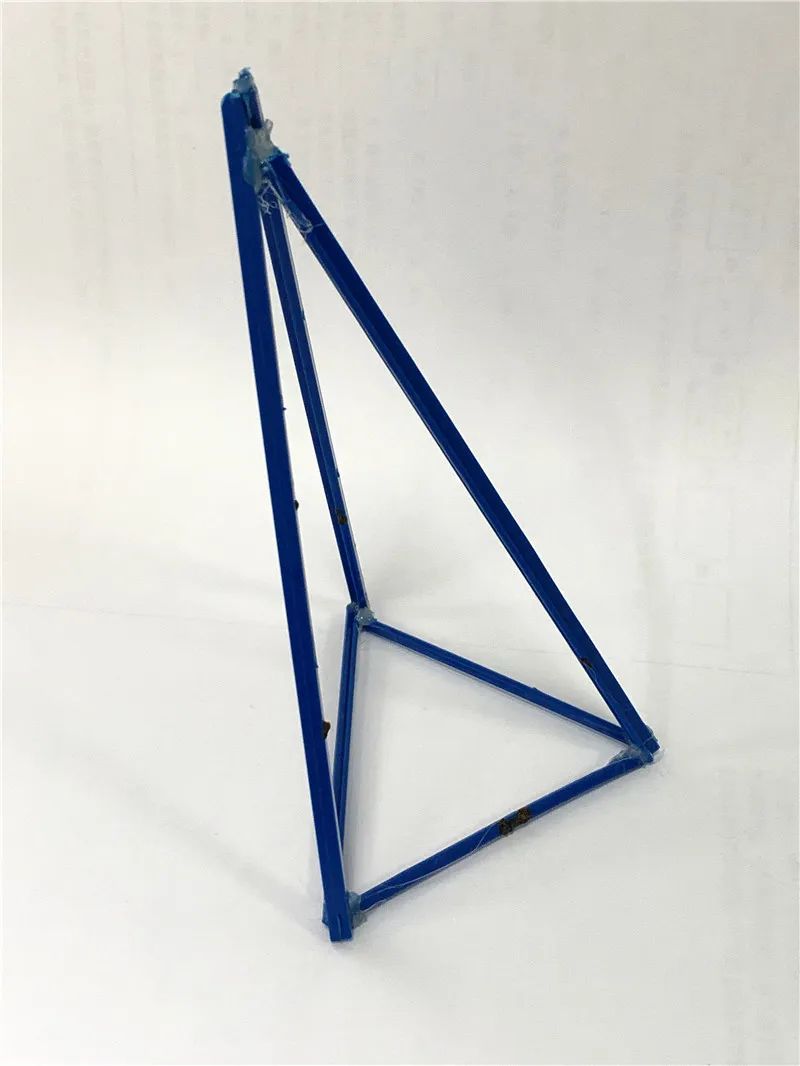
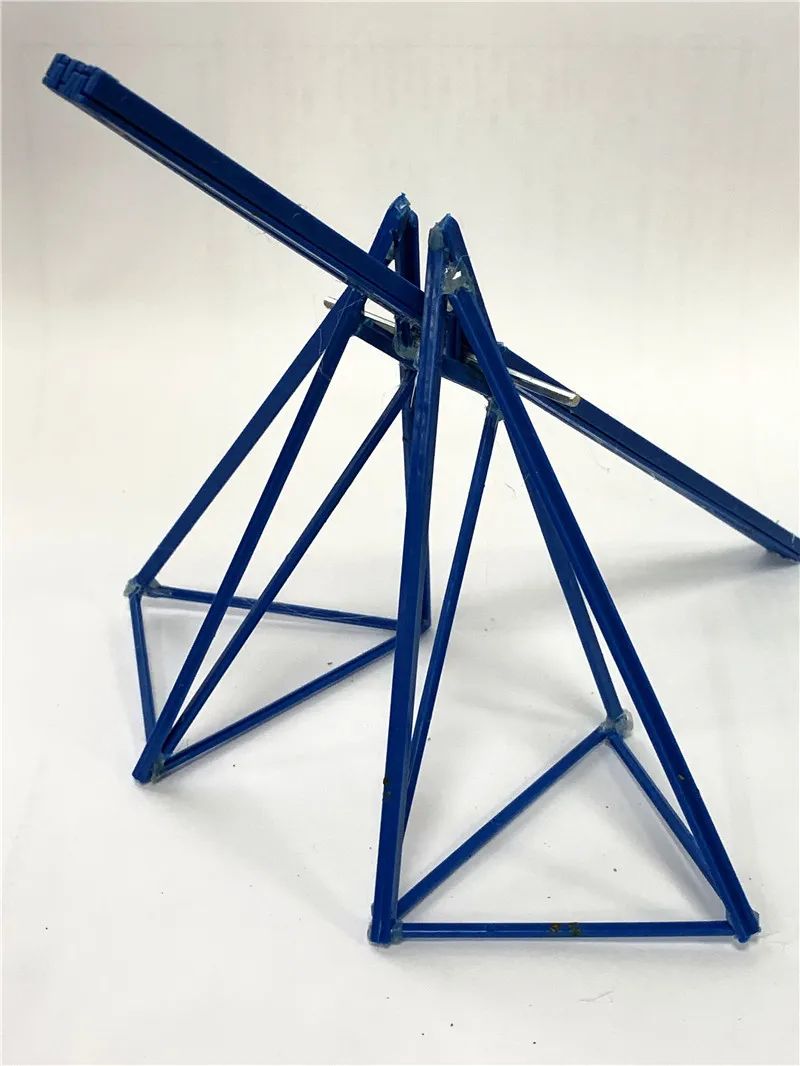
Expand the triangular structure into a tetrahedron.
Note: Tilt slightly towards the side of the previously made triangle.
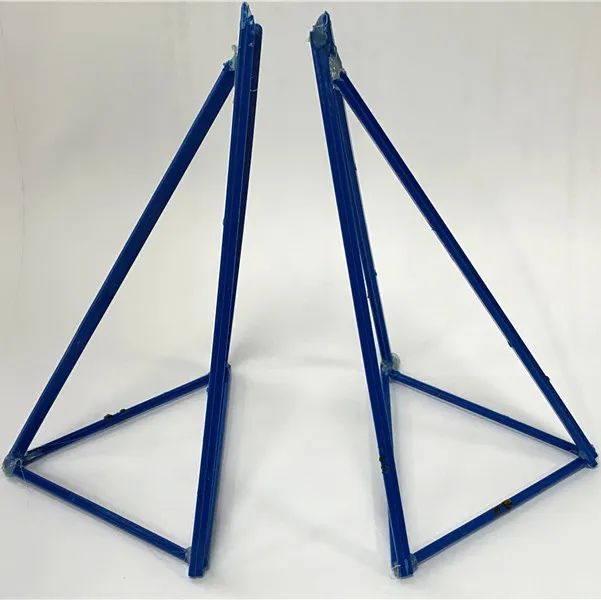
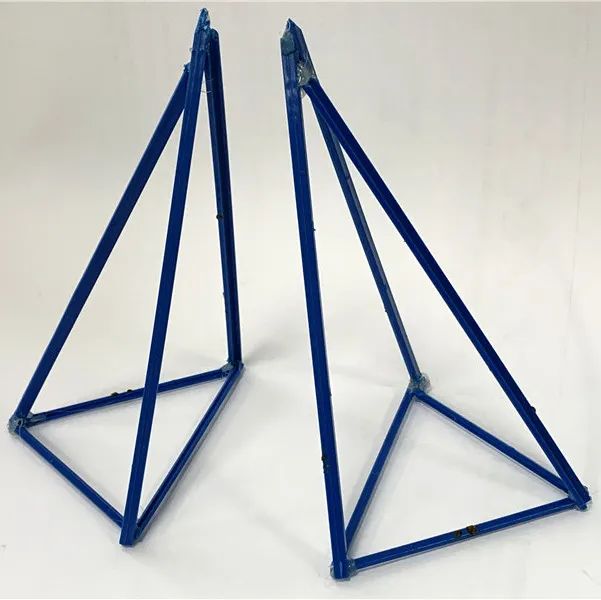
Then make a symmetrical tetrahedral structure, tilted slightly inward relative to each other.
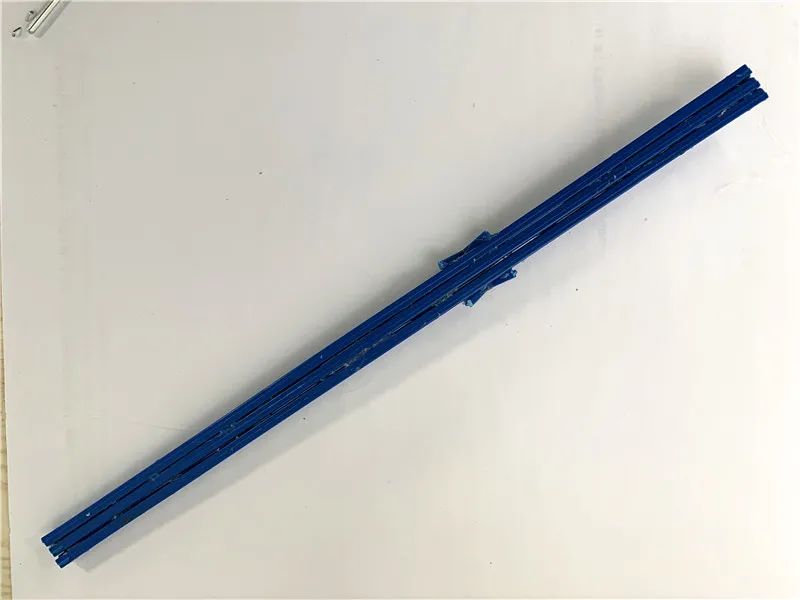
Bond several plastic strips in parallel.
At about the 4:6 position in the middle, glue on the ear for the axle, which can be reinforced by folding a thinner strip at a 90-degree angle and gluing it on.
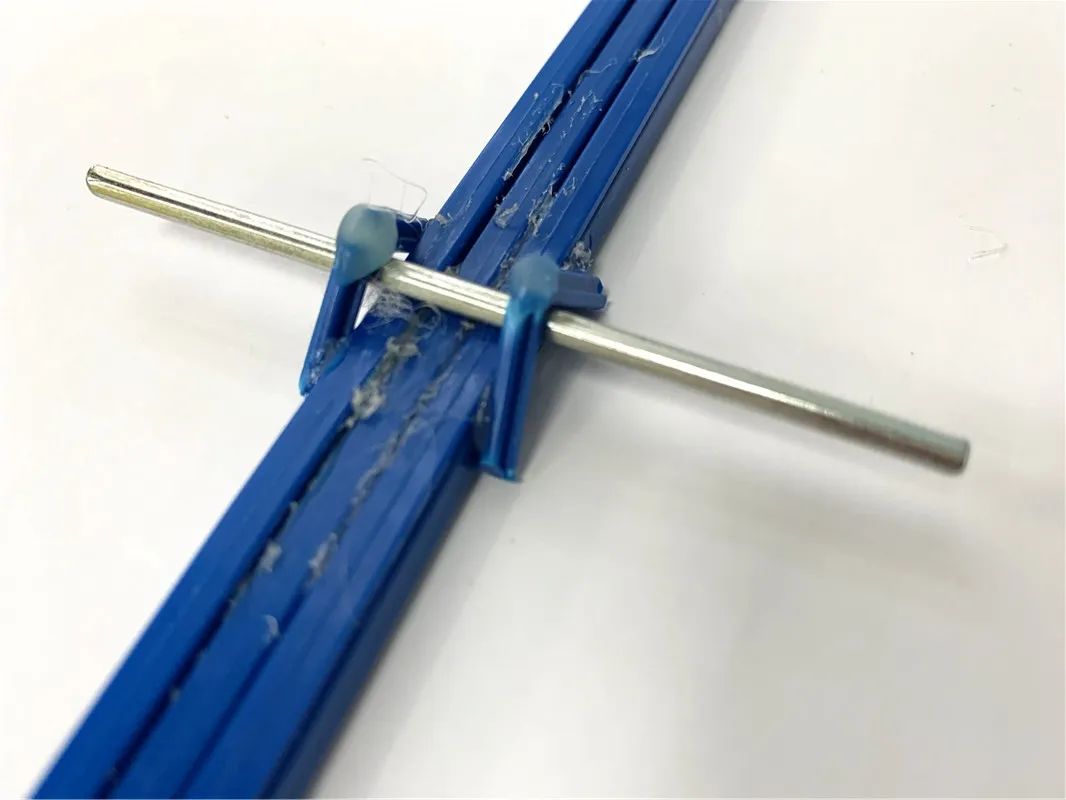
Test whether the axle can be inserted.
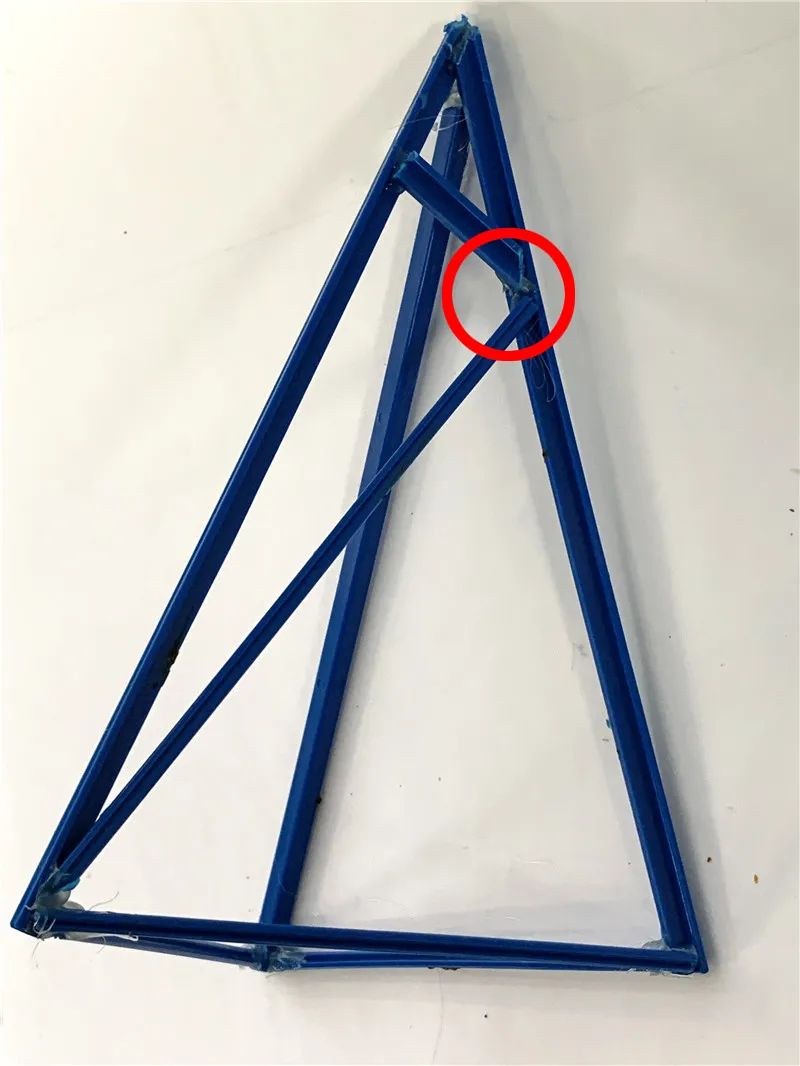
On the adjacent support, create a diagonal reinforcement structure, which can also provide an angle for the axle to rest (see the red circle).
Insert the axle.
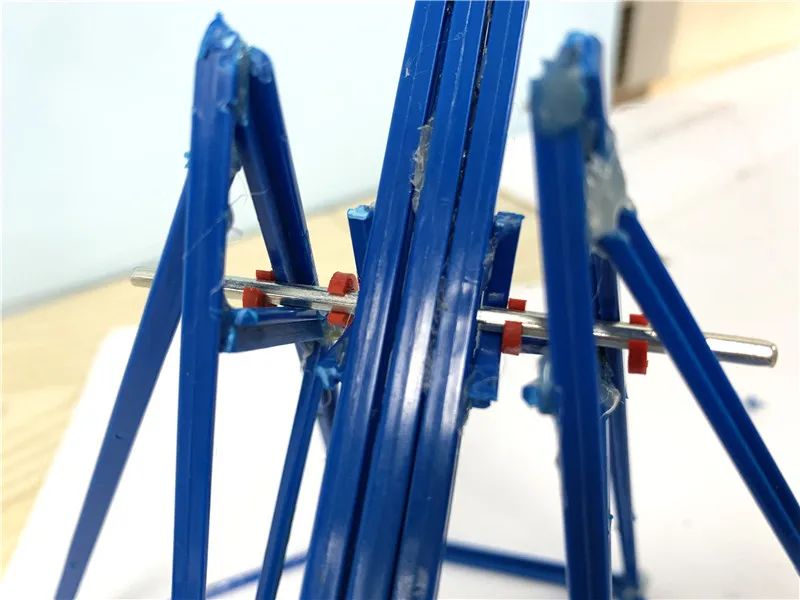
Use plastic clips to restrict the axle, preventing it from wobbling freely.
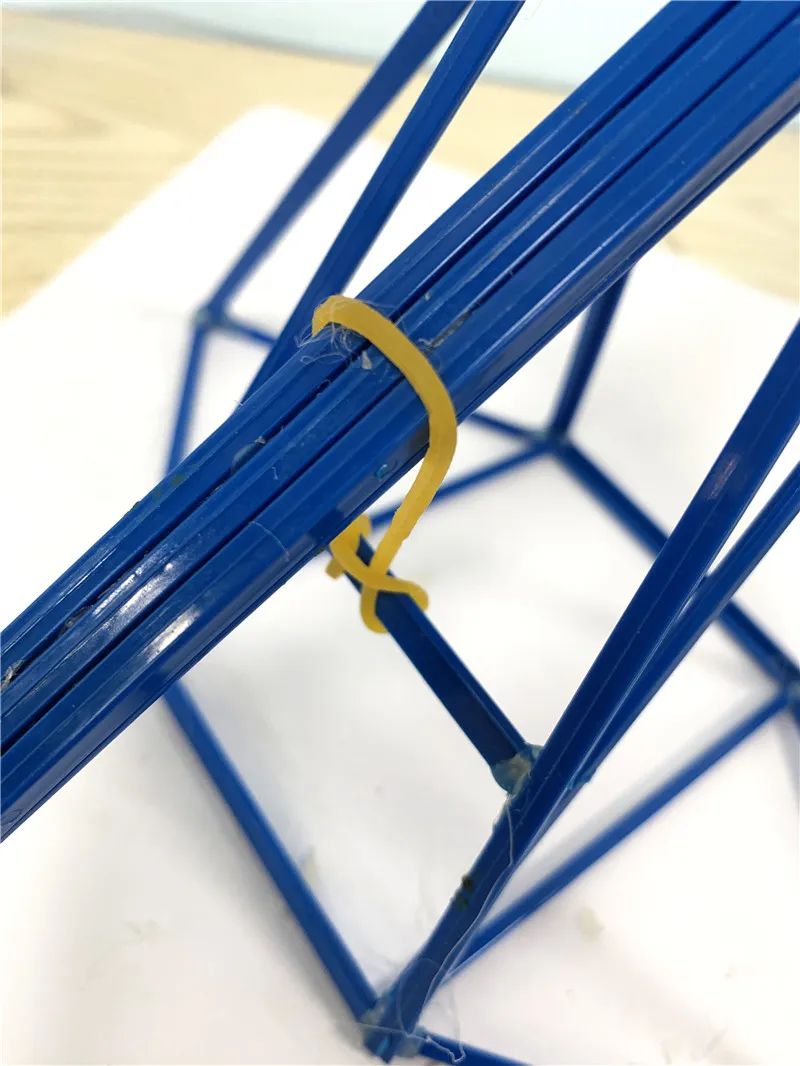
Connect the two tetrahedral supports with a transverse beam, one of which can also be used to secure the rubber bands. Attach the rubber bands to the front end of the throwing arm (the shorter side of the throwing arm faces forward).
Extend to the back side as well to ensure stability during the throwing process.
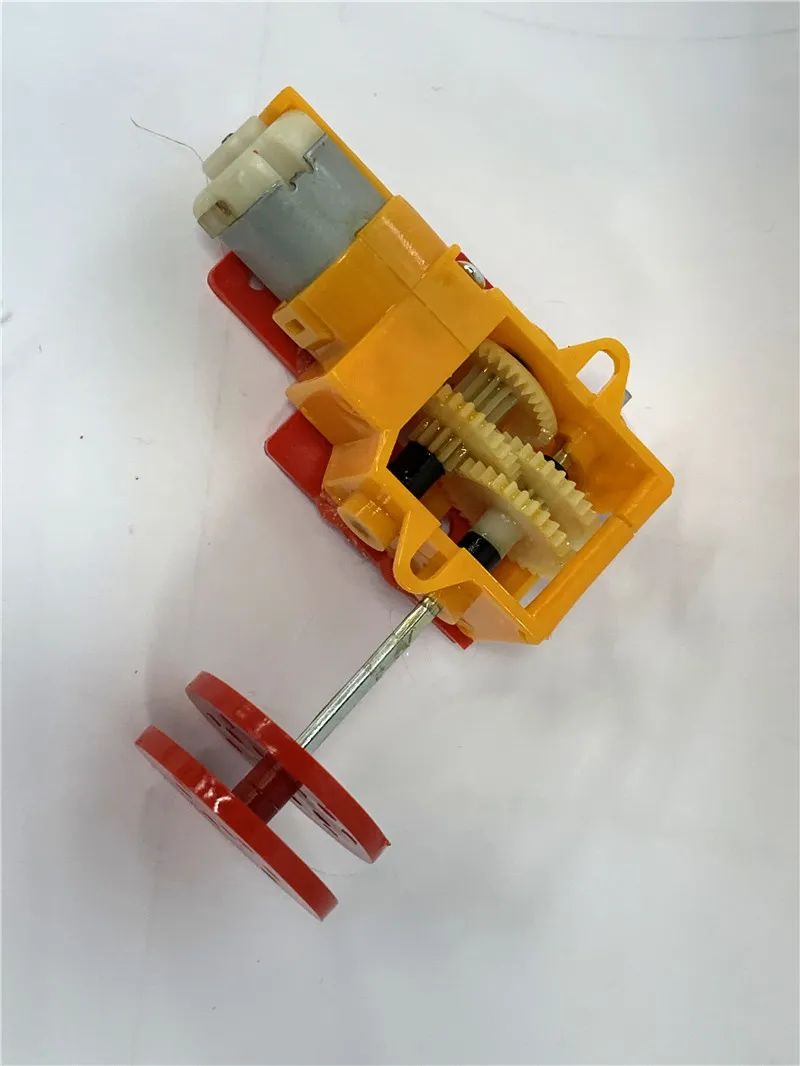
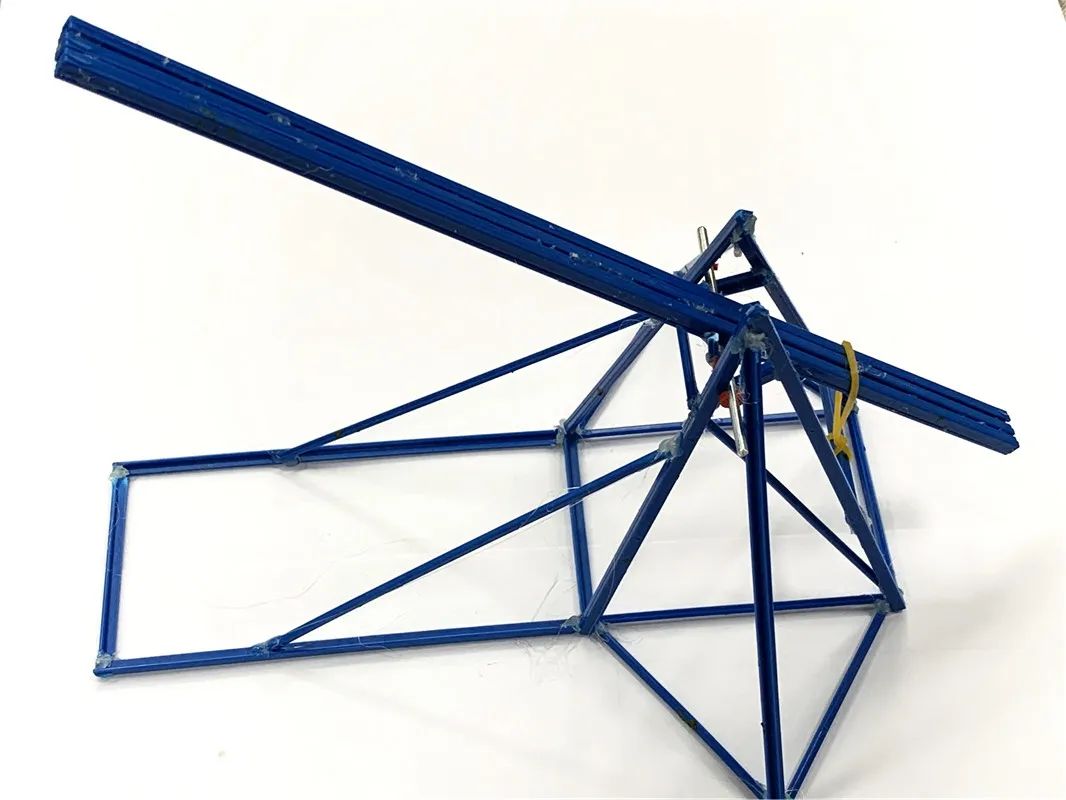
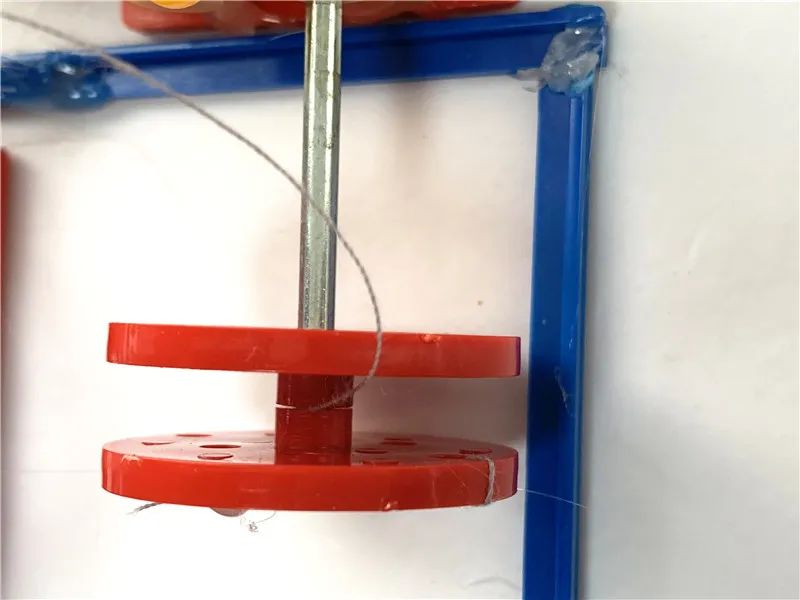
Make a winch on the side of the reduction motor (for winding the cotton thread).
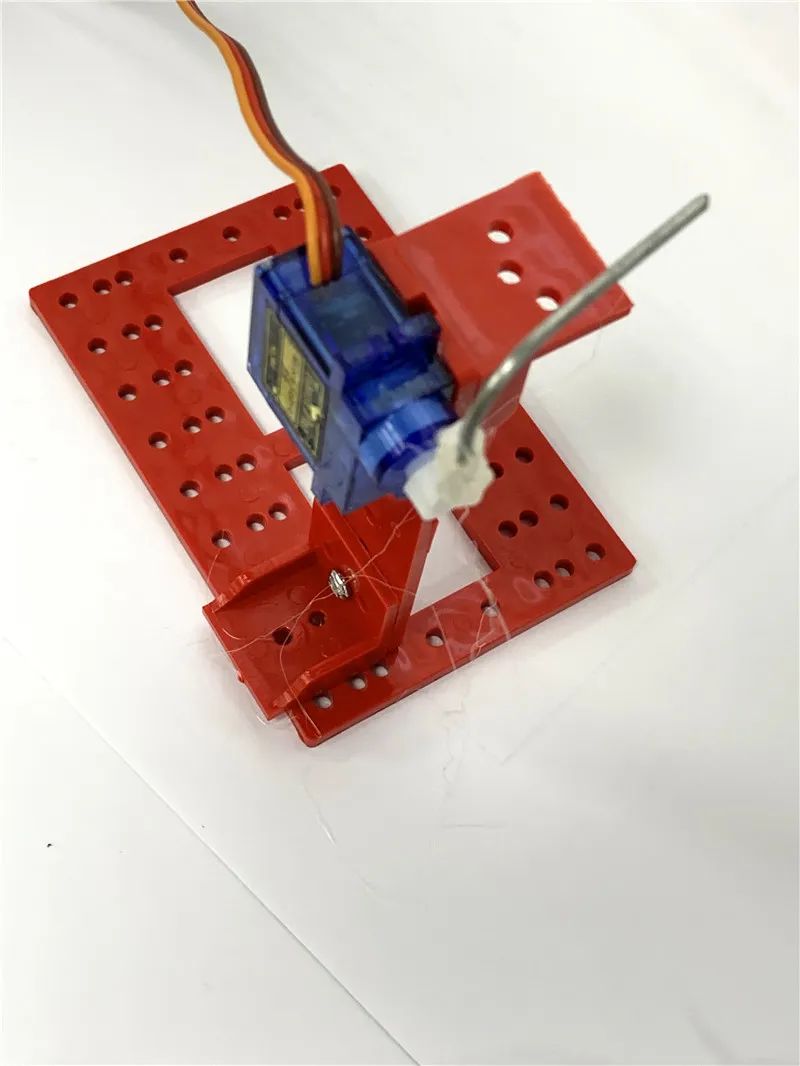
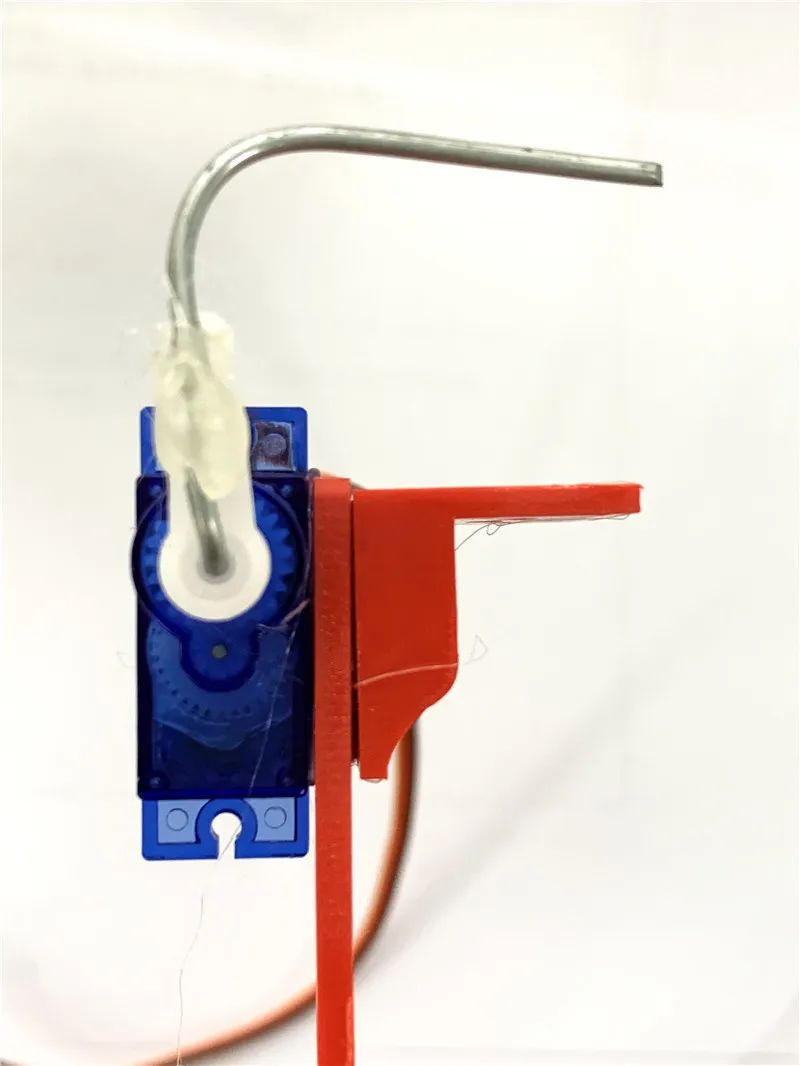
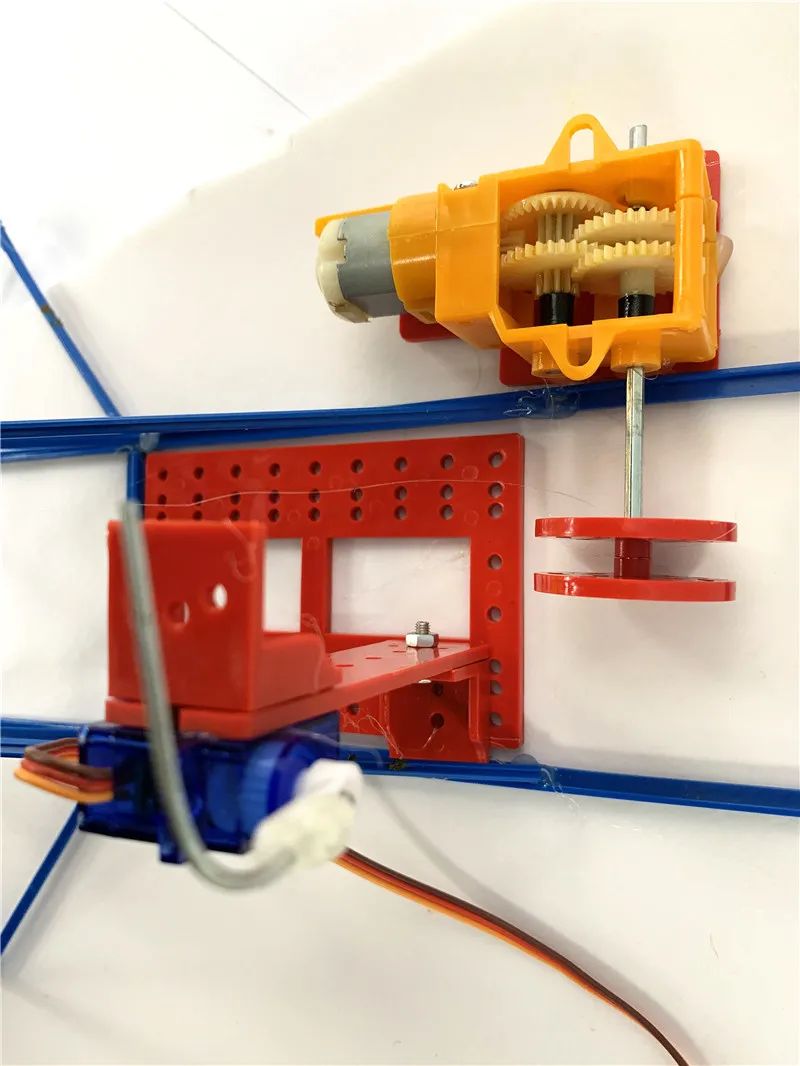
Make a raised structure at the back of the catapult, using hot glue to fix a servo, and attach an “L” shaped hard wire to the servo so it can hook the throwing arm. The winch is also placed at the back of the catapult.

Fix one end of the cotton thread to the back of the throwing arm and the other end to the winch.
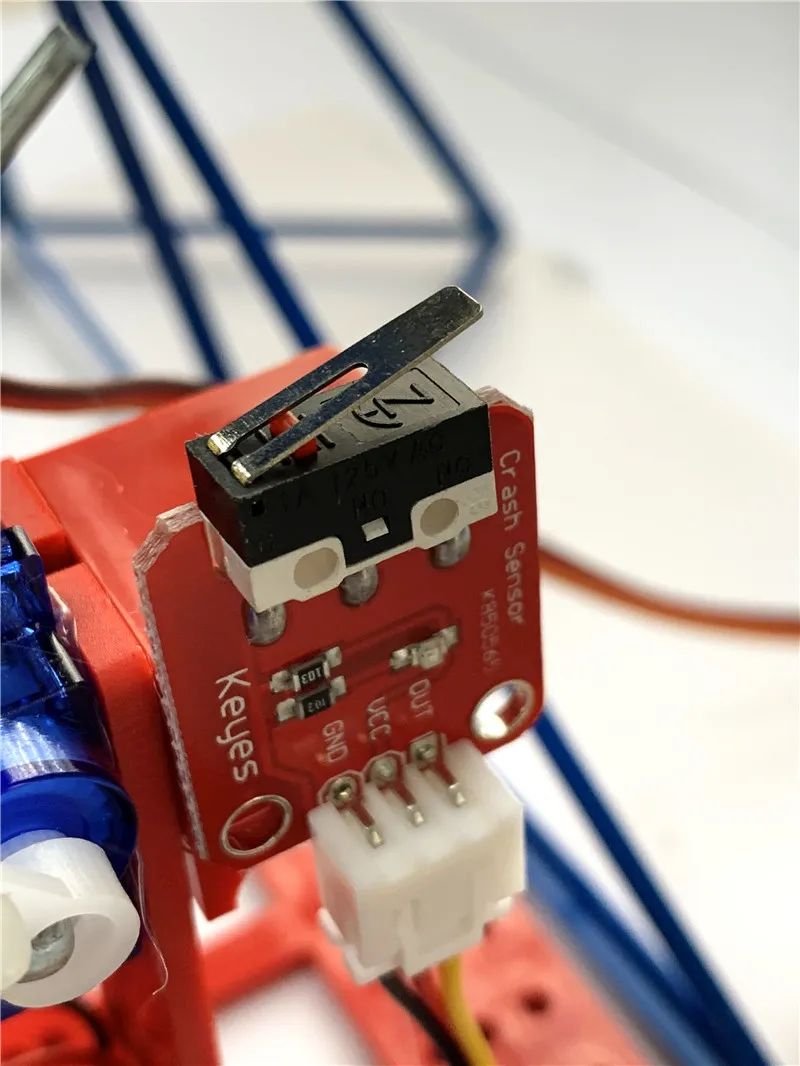
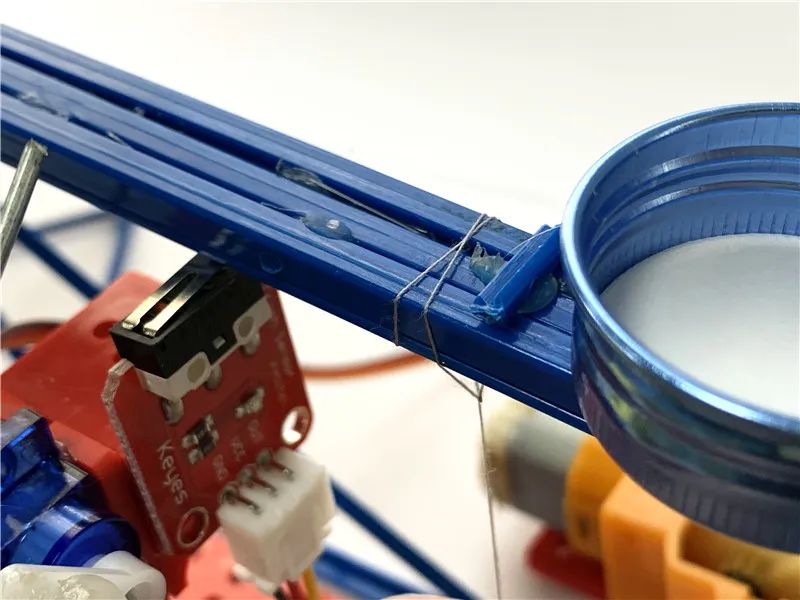
Fix a micro switch near the servo so that it can be pressed down by the throwing arm. Press the plastic bottle cap at the end of the throwing arm.
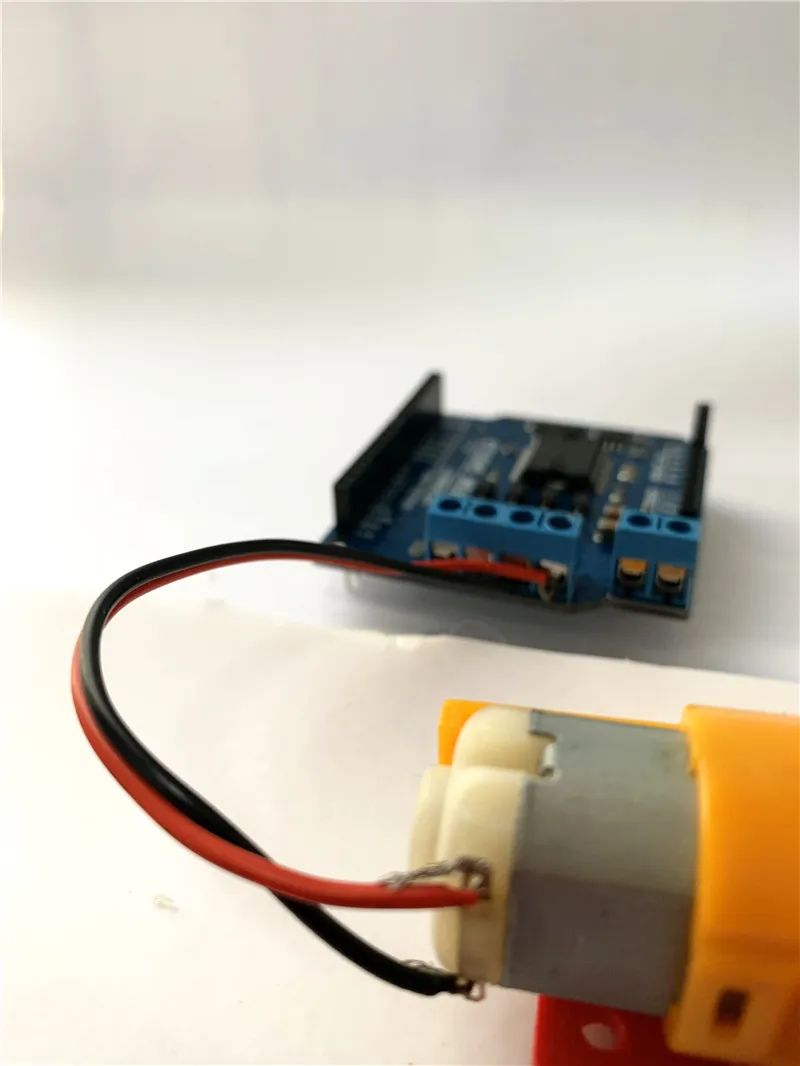
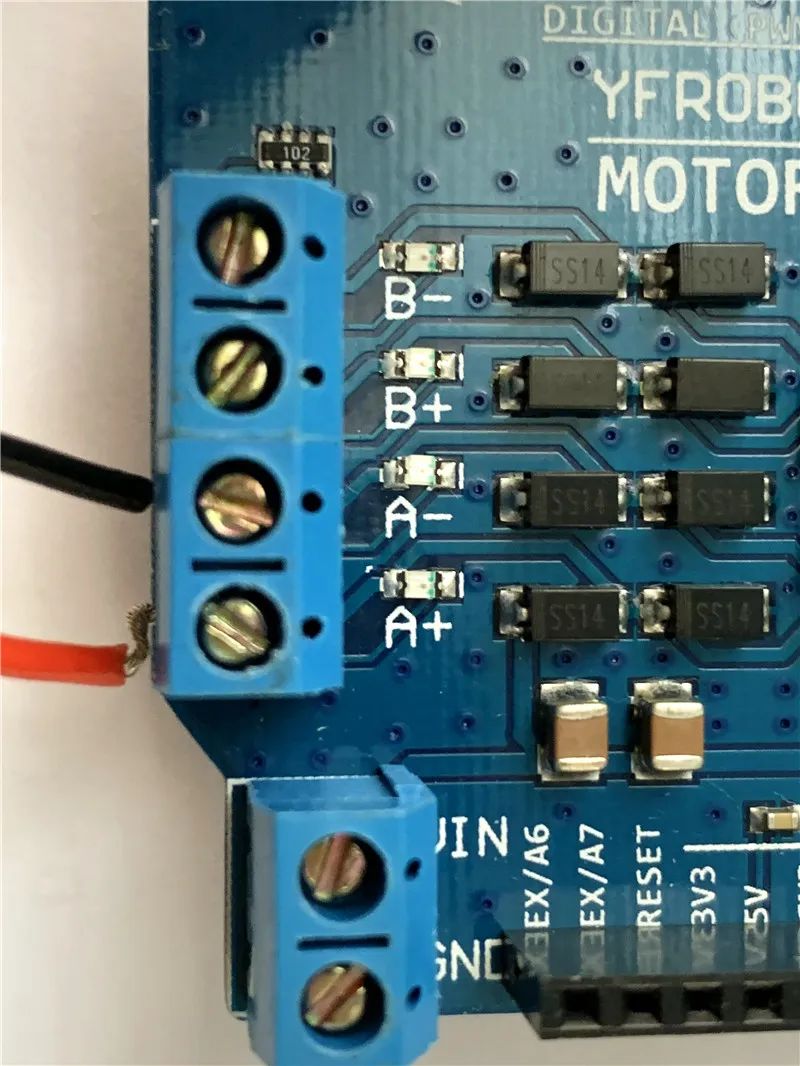
Connect the motor, linking it to the A motor output of the driver board, with the A motor controlled by digital pin 4 for direction and digital pin 5 for speed.
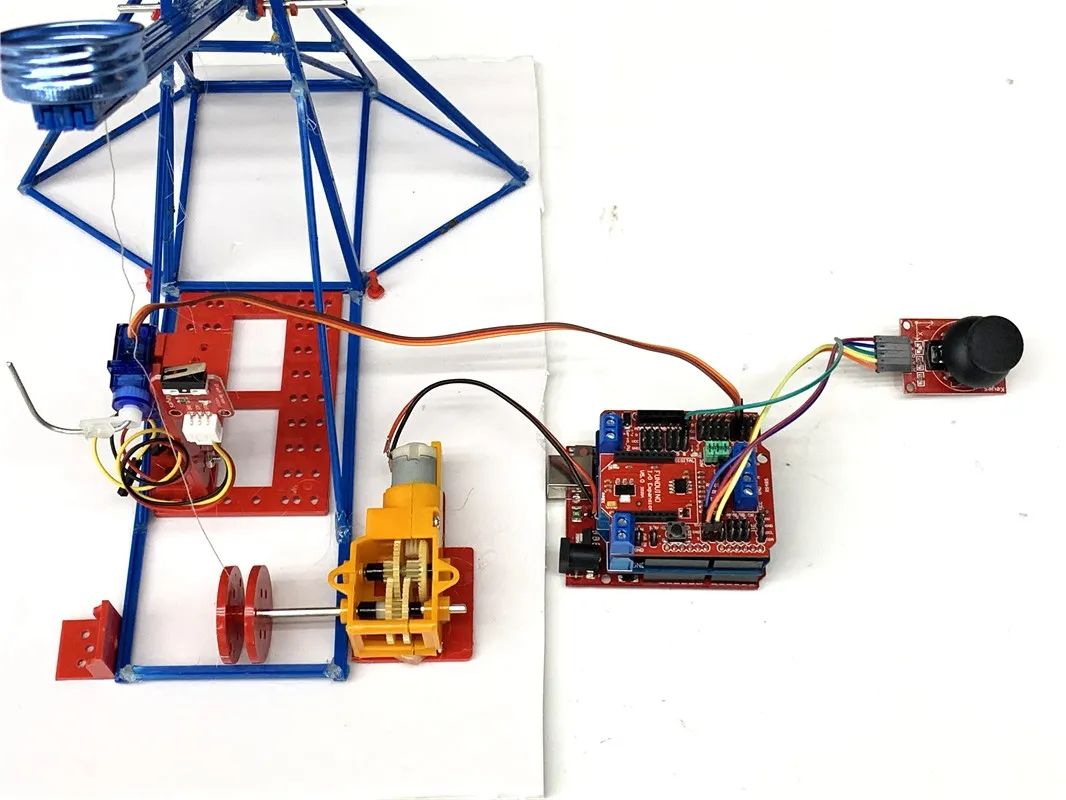
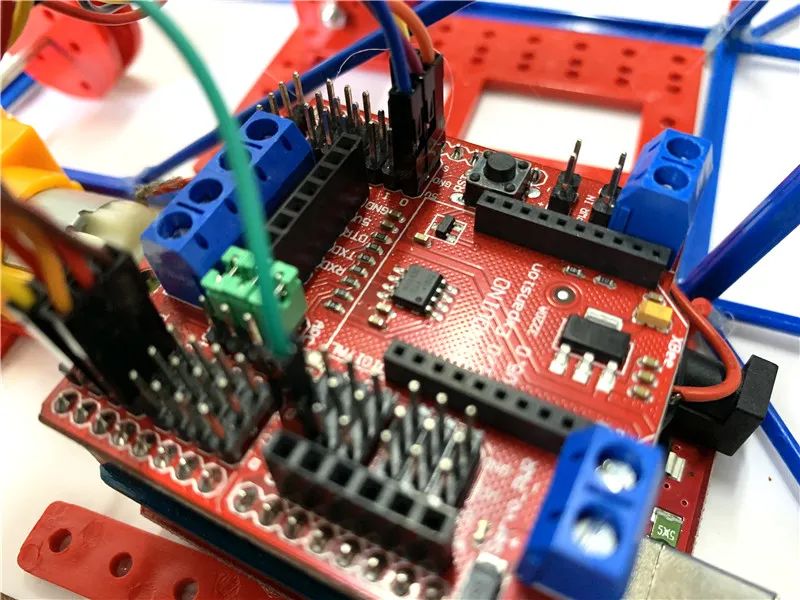
Stack the main board, motor driver board, and expansion board, with the main board at the bottom, the motor driver board in the middle, and the expansion board on top.
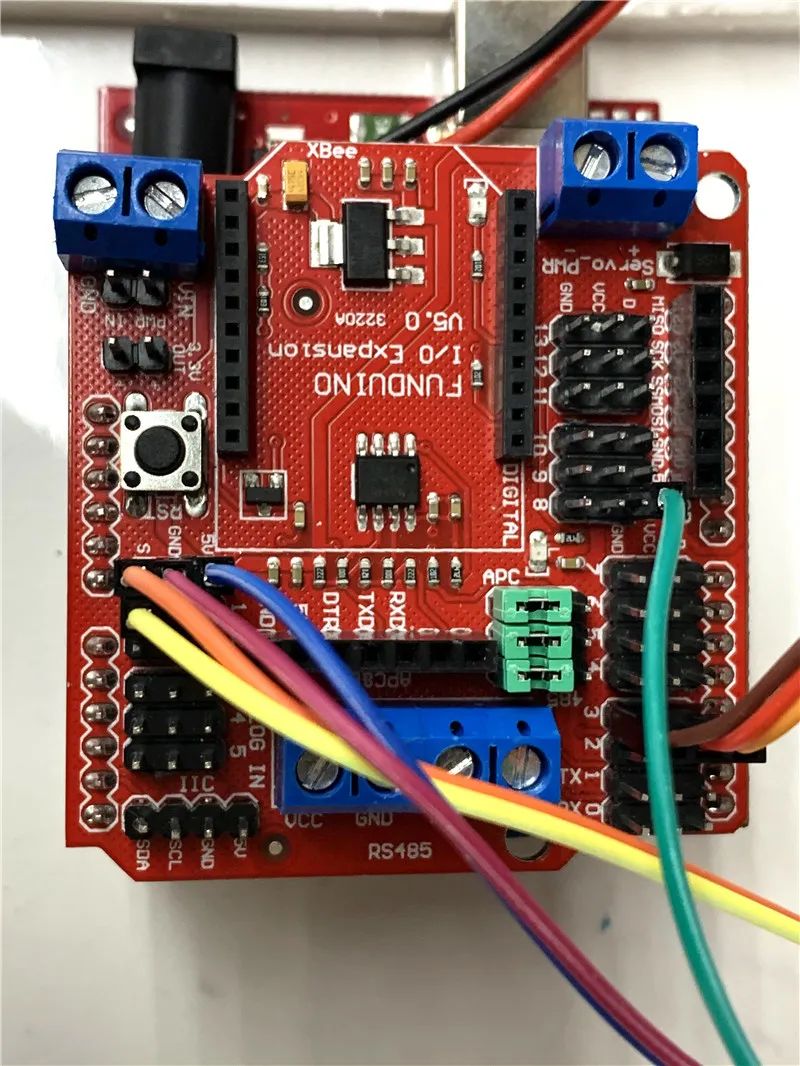
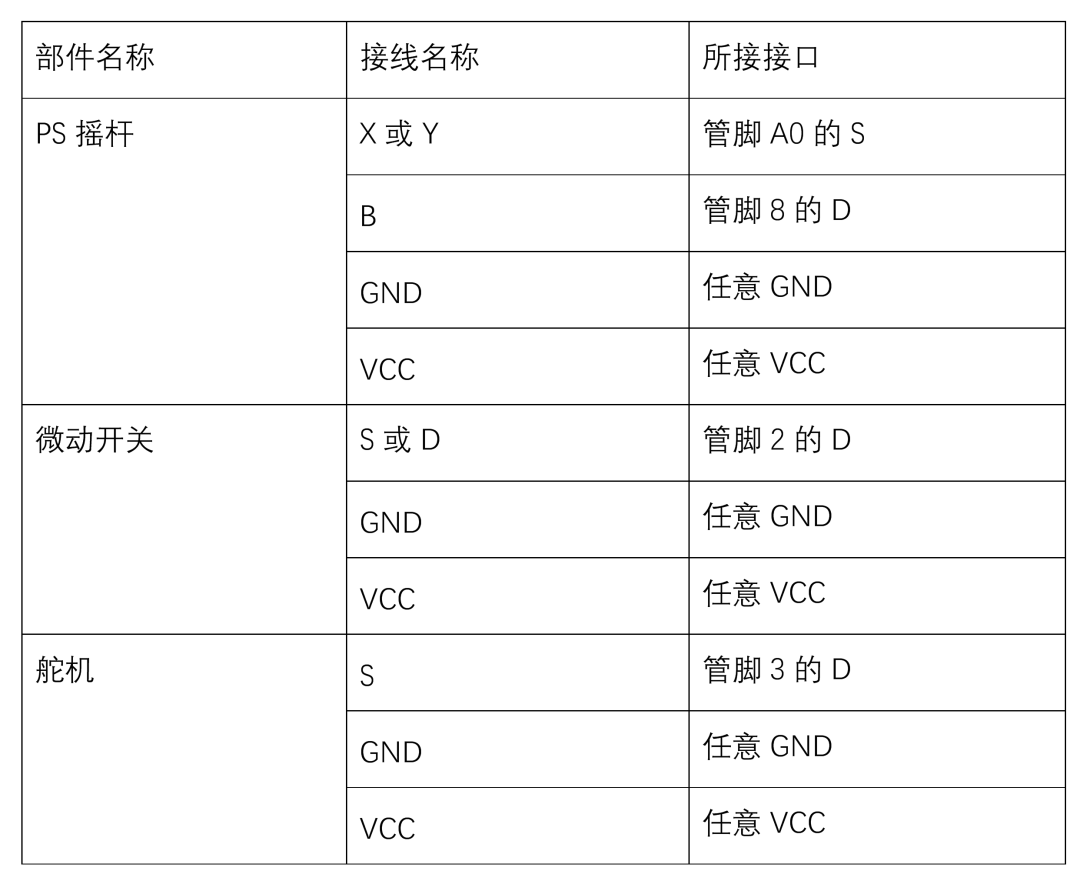
Wiring on the expansion board:
Servo connected to pin 3.
Use the PS joystick to control the motor direction, connecting either the X or Y axis to the analog interface A0.
The PS joystick can be pressed, connecting the button B to digital pin 8.
The micro switch is connected to digital pin 2.
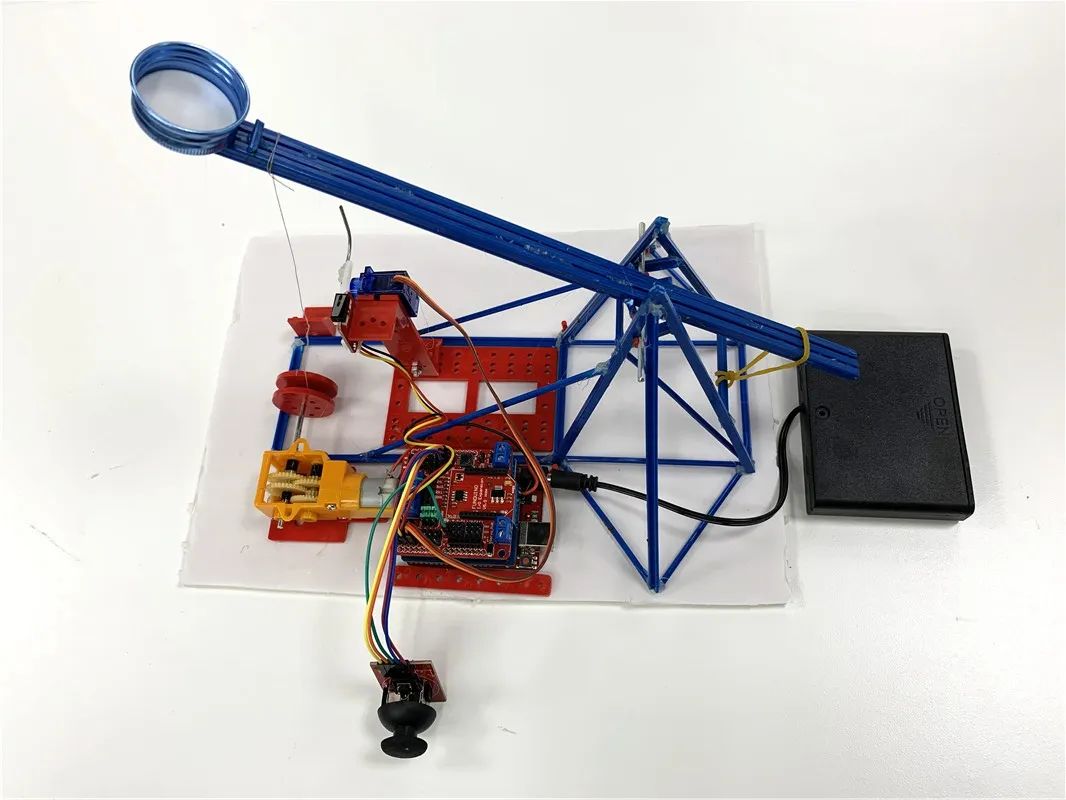
Connect the battery holder, and the completed hardware part is shown in the picture.

Open Mixly for programming.
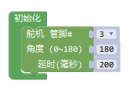
First, initialize the servo.
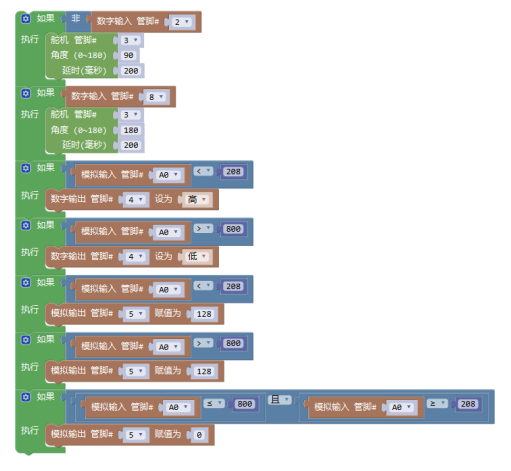

Write the main program:
When pin 2 (micro switch) inputs a low level (default is high level, so we need to add a “not”), it triggers the servo to rotate and hook the throwing arm.
When pin 8 (PS joystick pressed) inputs a high level, it triggers the servo to rotate and release the throwing arm.
If the PS joystick connected to A0 is less than 208 (threshold for reference), it triggers the motor to rotate forward (digital pin 4 high level), causing the motor to start rotating (analog pin 5 assigned value 128, value for reference, cannot exceed 255).
If the PS joystick connected to A0 is greater than 800 (threshold for reference), it triggers the motor to reverse (digital pin 4 high-low level), causing the motor to start rotating (analog pin 5 assigned value 128, value for reference, cannot exceed 255).
Release the PS joystick, and the motor will stop.

The entire operation process is as follows:
1. Push the PS joystick to one side, causing the winch to start winding, lowering the throwing arm.
2. When the throwing arm presses down on the micro switch, the servo automatically hooks the throwing arm, at which point release the PS joystick.
3. Push the PS joystick to the opposite side, allowing the winch to unwind, giving the throwing arm space to launch.
4. Press the PS joystick button, the servo releases the throwing arm, and the launch occurs.
Note
Of course, here the author is just throwing out a brick to attract jade, and I believe that those who can think and are hands-on will definitely be able to create a more innovative smart catapult!


Minhang District Youth Activity Center
Long press the QR code to identify us