CHH ID: yhgg
This time, we used a combination of Galax and ROG hardware along with Lian Li’s latest P28 modular fan and the Neon Line 3rd generation 12VHPWR ARGB extension cable to build a Lian Li O11Dynamic EVO REV2 full-view white case. The Lian Li P28 modular fan is the first fan focused on performance from Lian Li, featuring a thickness of 28mm, blades made from liquid crystal polymer (LCP), a fluid dynamic bearing motor, and three-speed modes designed for higher efficiency. Additionally, the fans can be connected together to create a fan group powered by a single cable, and can connect up to two sets of fans via extension cables. Furthermore, the P28 has a SIDE ARGB KIT available for purchase, allowing for a similar interconnection method without excessive wiring while maintaining the same RGB appearance as the modular fan SLV2 without sacrificing performance. The Neon Line 3rd generation 12VHPWR ARGB extension cable uses a new side diffusion plate to allow light to spill out from the sides of the RGB strip, creating a more dazzling lighting effect. The cable adheres to the ATX 3.0 power supply standard and uses a 16AWG power line capable of reaching 600W output, with better bending resistance and high-temperature tolerance. The case is also from Lian Li, a classic full-view white O11Dynamic EVO Rev2 with tempered glass front and side panels. This time, the pillars at the junction of the two front glass panels have been removed, making the case more transparent and aesthetically pleasing. Other hardware includes a CPU using the 13700K, a motherboard selected from Galax’s Z790 Metal Master D5 Wi-Fi Platinum version with 15 (12+2+1) power phases (90A Dr.MOS), covered with METALTOP metal cooling armor, which is also a perfect match for white builds; the graphics card is from Galax GeForce RTX 4070 Ti 12GB Star OC, featuring a 13+3 phase fully encapsulated digital power supply and a detachable crystal clear top cover that supports personalized DIY designs; the memory is paired with Galax Star DDR5 6400 32GB (16Gx2), supporting both Intel and AMD platforms, with personal warranty and lifetime warranty; the solid-state drive is also from Galax, the Hall of Fame Pro 30 PCIe 4.0 1TB, with a 5-year or 1000 TBW warranty; the all-in-one water cooler is the ROG RYUO III 360ARGB Dragon King 3rd generation white version, featuring the latest Asetek 8th generation pump for enhanced cooling performance, and a metallic cold plate with an Anime Matrix LED array display for various effects. The power supply is the ROG STRIX Thunder Eagle AURA 1000W Blizzard Edition Gold full modular, with an aluminum casing for better cooling, native PCIe 5.0 interface and accompanying cables, and a ten-year warranty. Now that we have introduced so much, let’s move on to the assembly phase. Hardware configuration list: CPU: Intel i7-13700K Motherboard: Galax Z790 Metal Master D5 Wi-Fi Platinum Graphics Card: Galax GeForce RTX 4070 Ti Star 12GB OC Memory: Galax Star DDR5 6400 32GB (16Gx2) SSD: Galax Hall of Fame Pro 30 PCIe 4.0 1TB Power Supply: ASUS ROG STRIX Thunder Eagle AURA 1000W Blizzard Edition Cooling: ASUS ROG RYUO III 360ARGB Dragon King 3rd generation White Case: Lian Li O11 Dynamic EVO Rev2 White Full View Fans: Lian Li UNI Fan P28 Modular Fan White x10 Accessories: Lian Li SIDE ARGB KIT White x12 Cables: Lian Li Strimer Plus V2 12VHPWR (Neon Line 3rd generation)
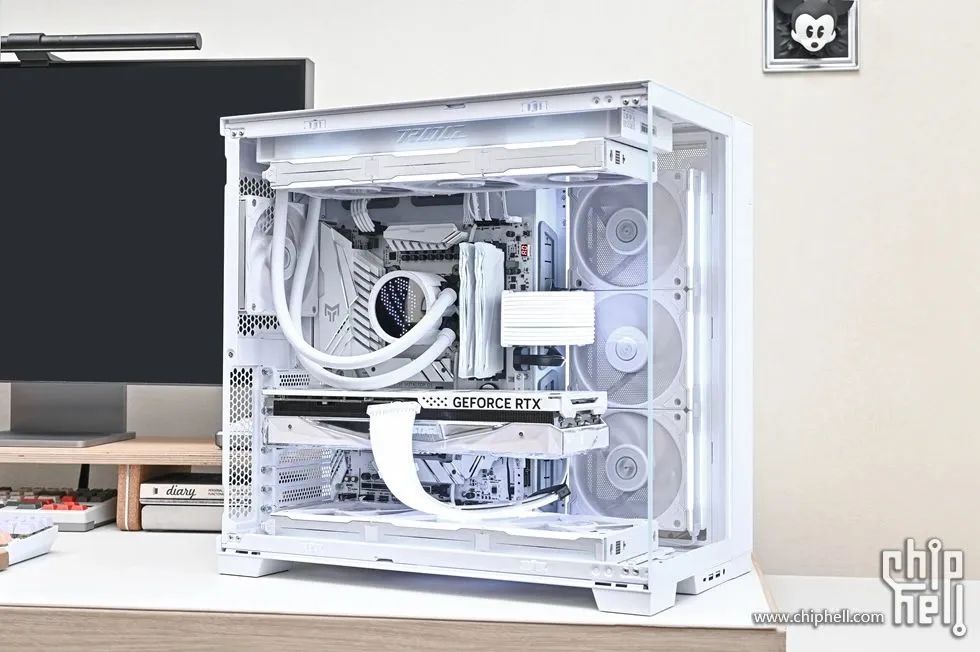
1. Complete machine display.The machine has a white tone, with white RGB lighting effects (R255, G255, B255) embellishing it.Below are the displays of the host from various angles.
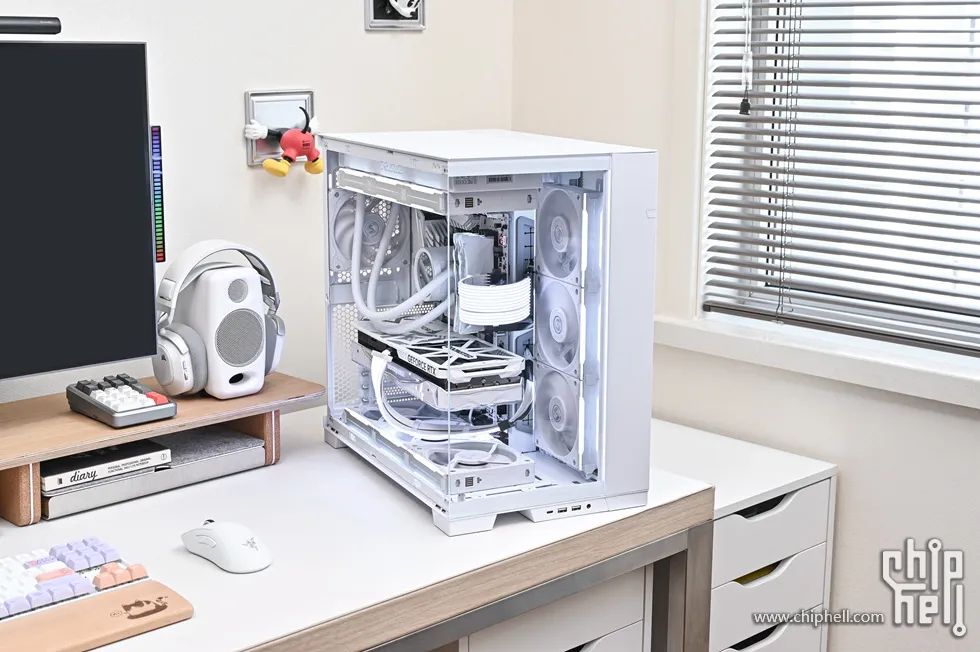
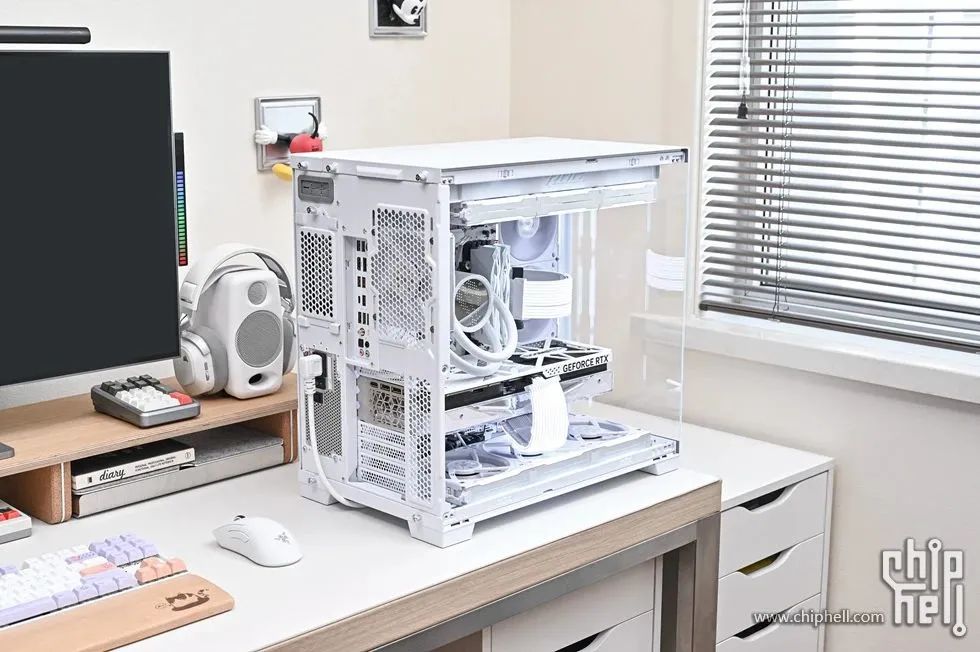
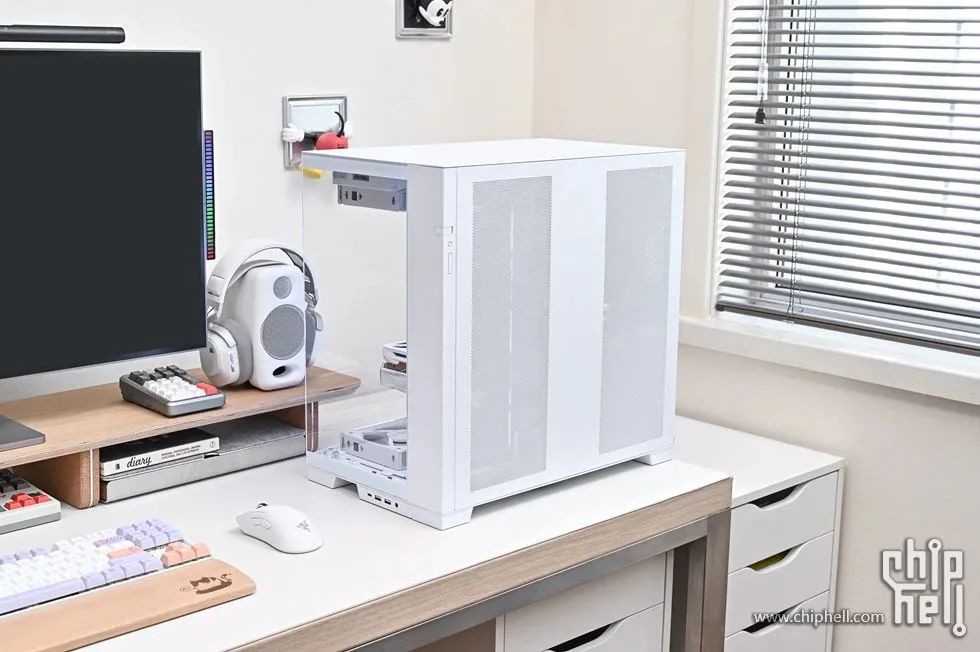
 The motherboard side display of the case.
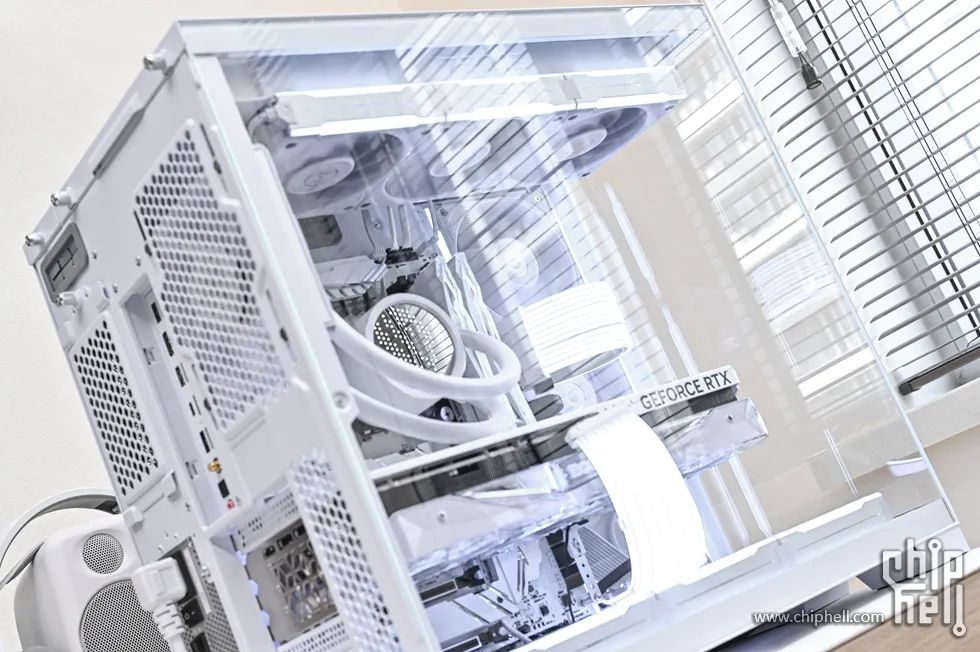
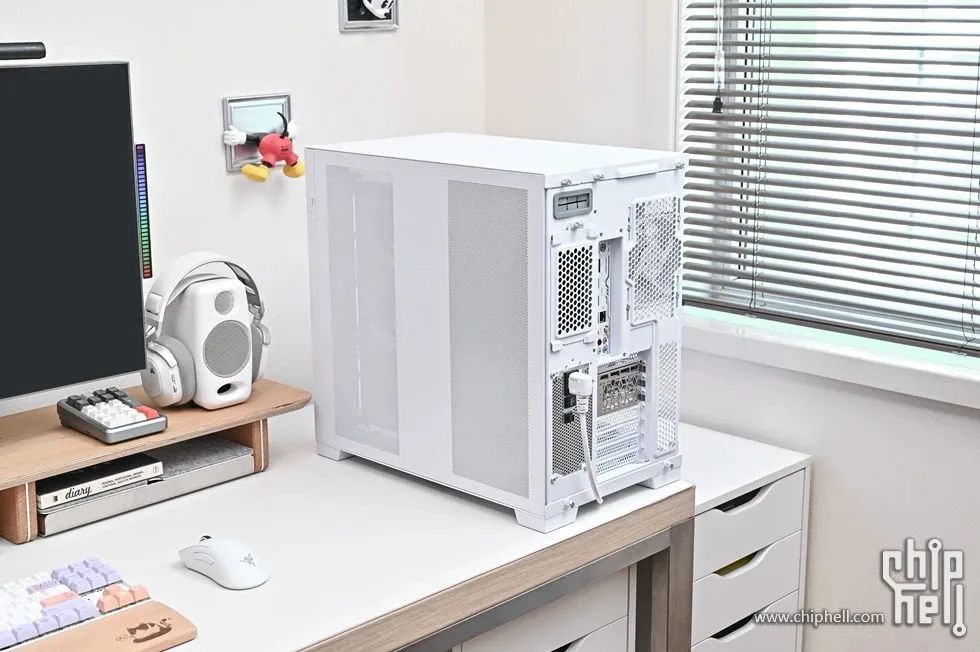
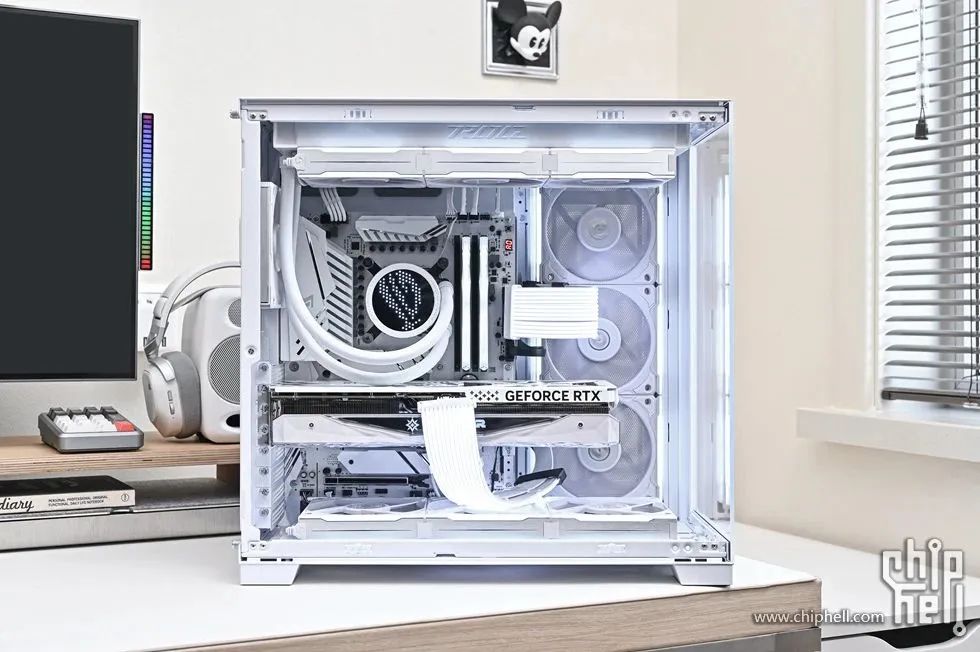 The back panel display of the case, with the side fan barely visible through the mesh panel.
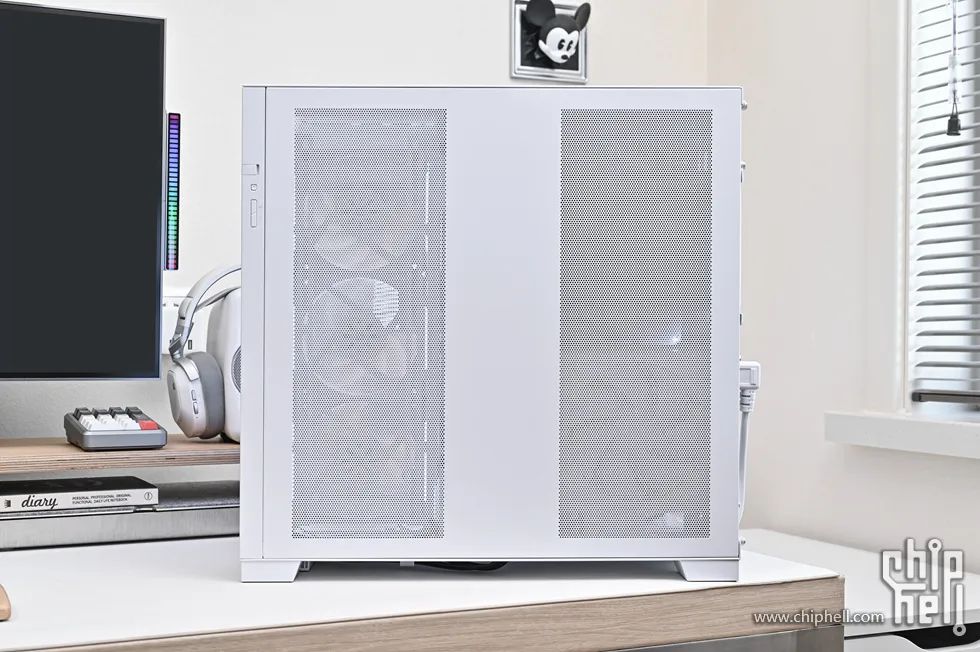 Removing the back panel to see the rear of the case.
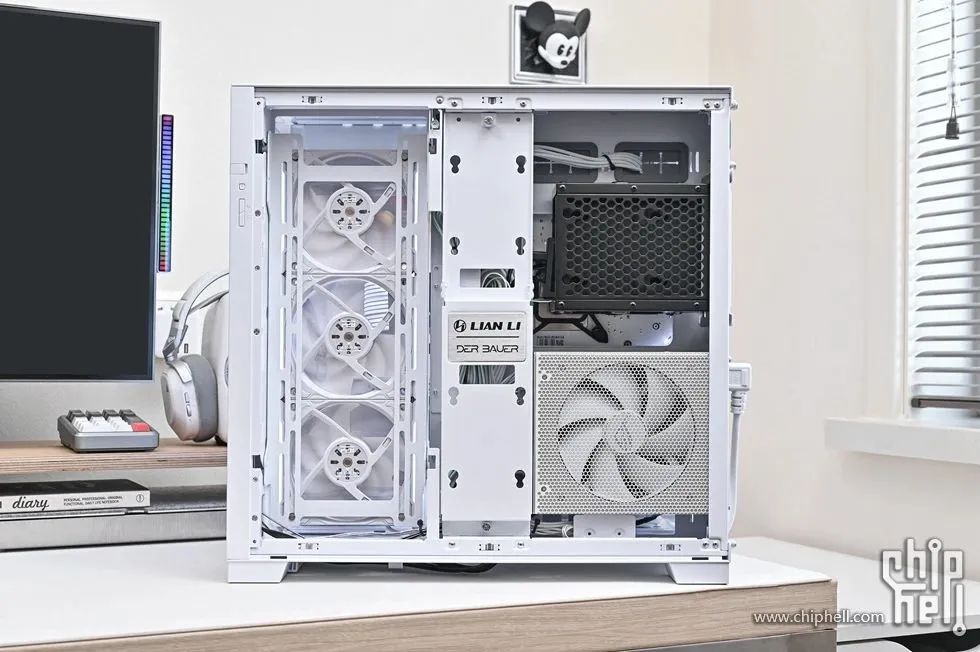 Front panel of the case. The left side has a tempered glass panel, the middle adds an RGB light strip, supporting Lian Li L-CONNECT 3 and motherboard synchronization, while the right side is a white spray-painted metal panel, with the power switch (the center of the switch has a white LED indicator).
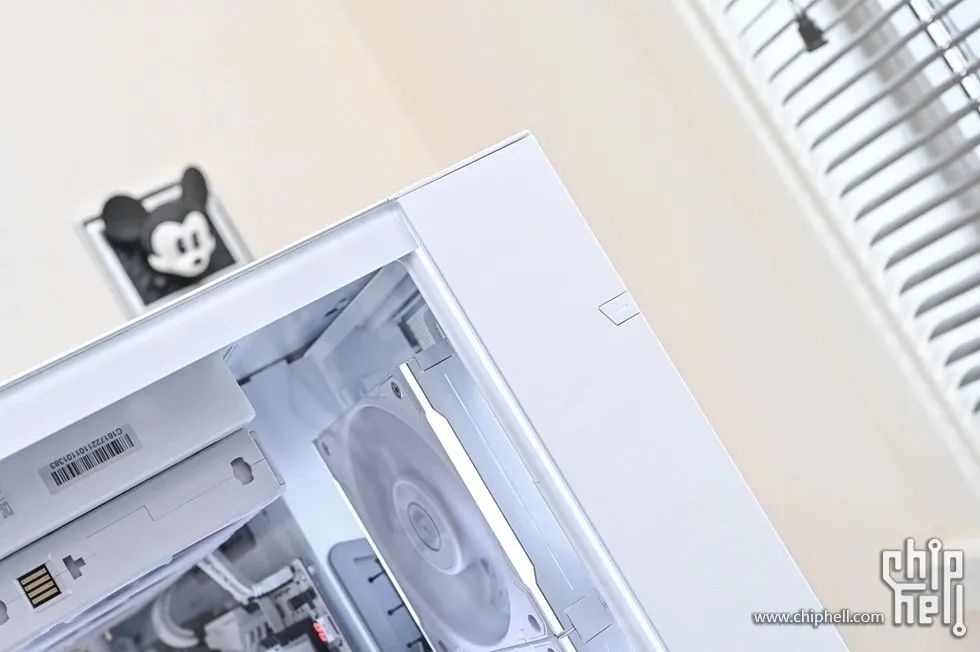 The angled design of the power button can be triggered from both directions. From top to bottom, there is the power button with LED indicator, the reset button, the lighting mode button, and the lighting color switch button.
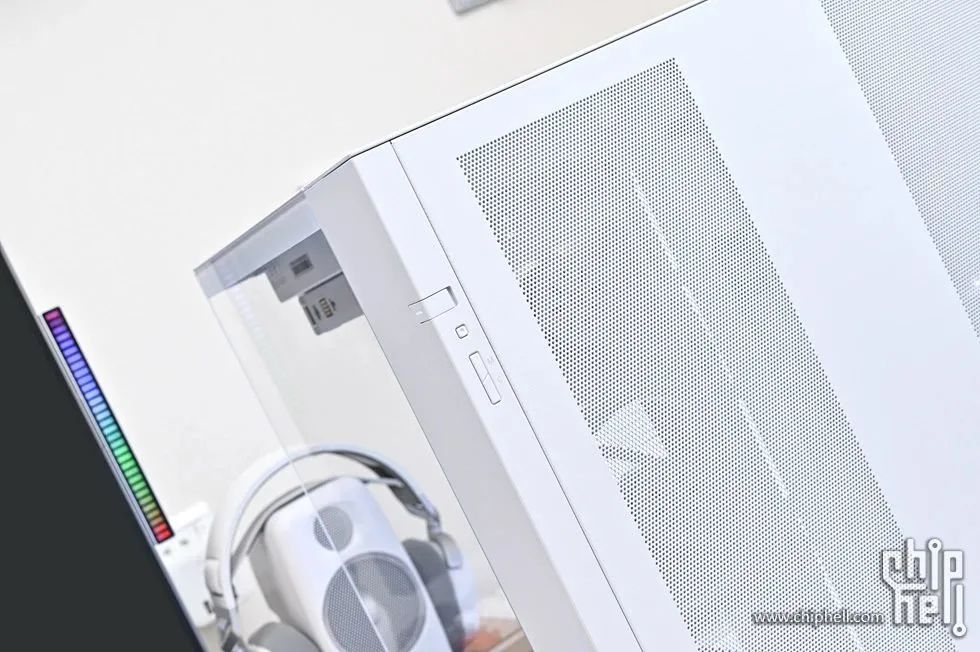 The front panel I/O interface is designed at the bottom of the case. From left to right, there is 1 x USB 3.1 Type-C, 2 x USB 3.0 Type-A, and an audio interface.
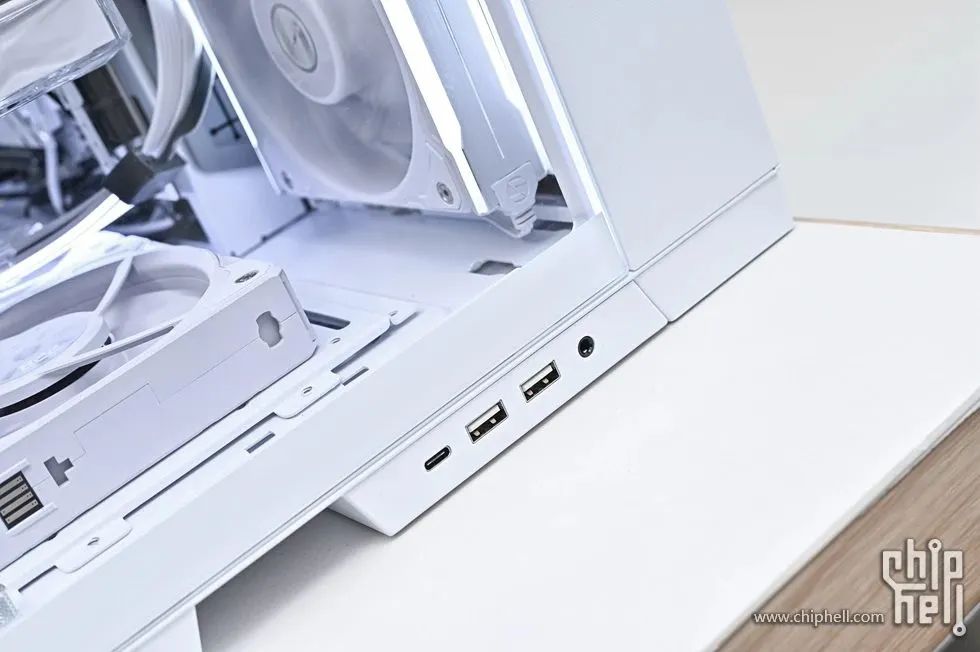 The top of the case has a mesh ventilation panel on the left side.
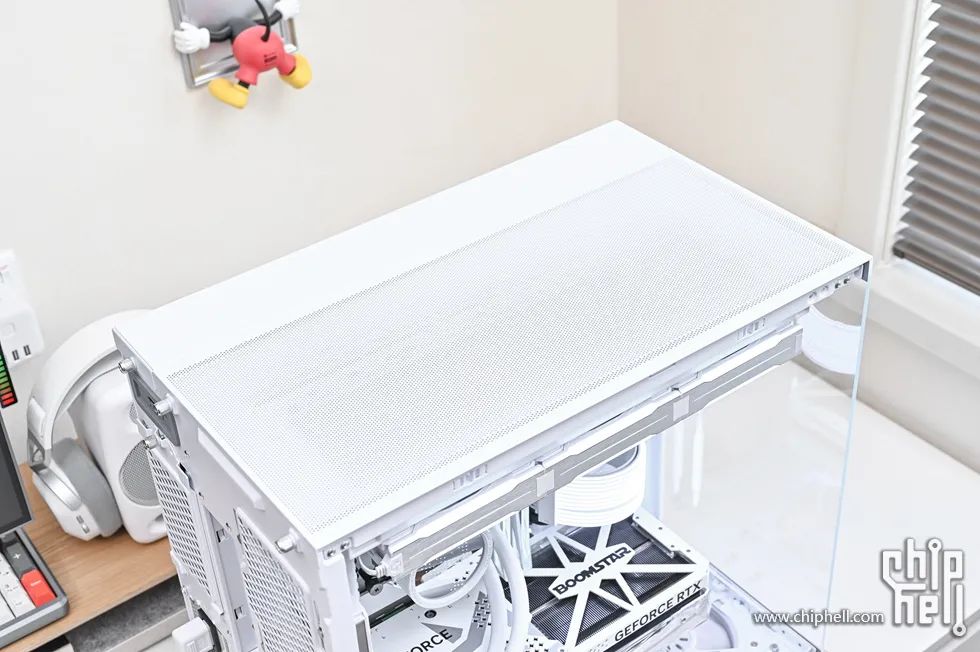 The top cover can be removed without tools by unscrewing the two hand screws at the back, supporting 360mm or 280mm radiators.
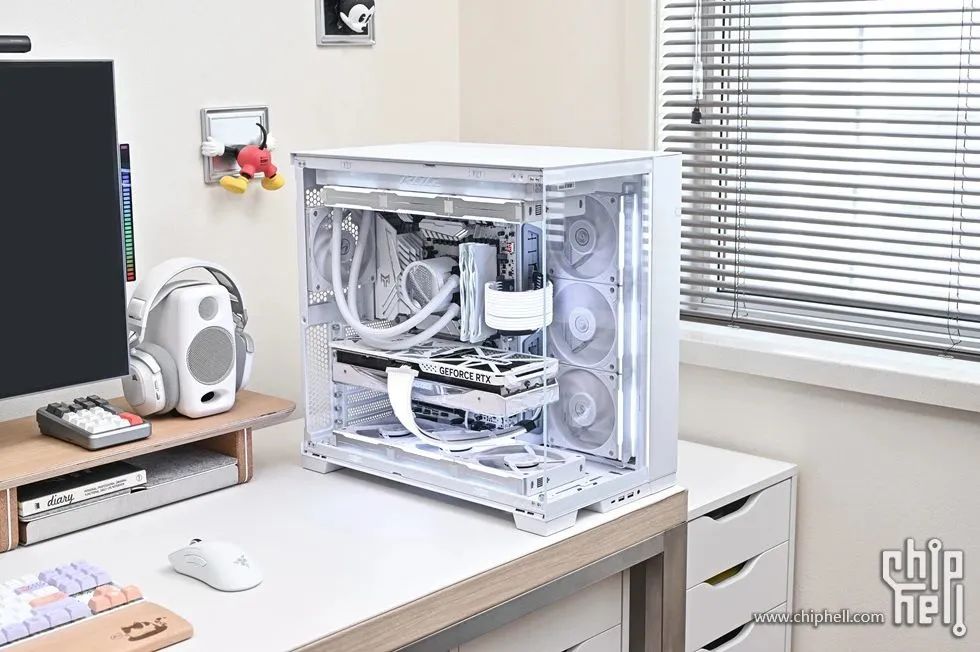
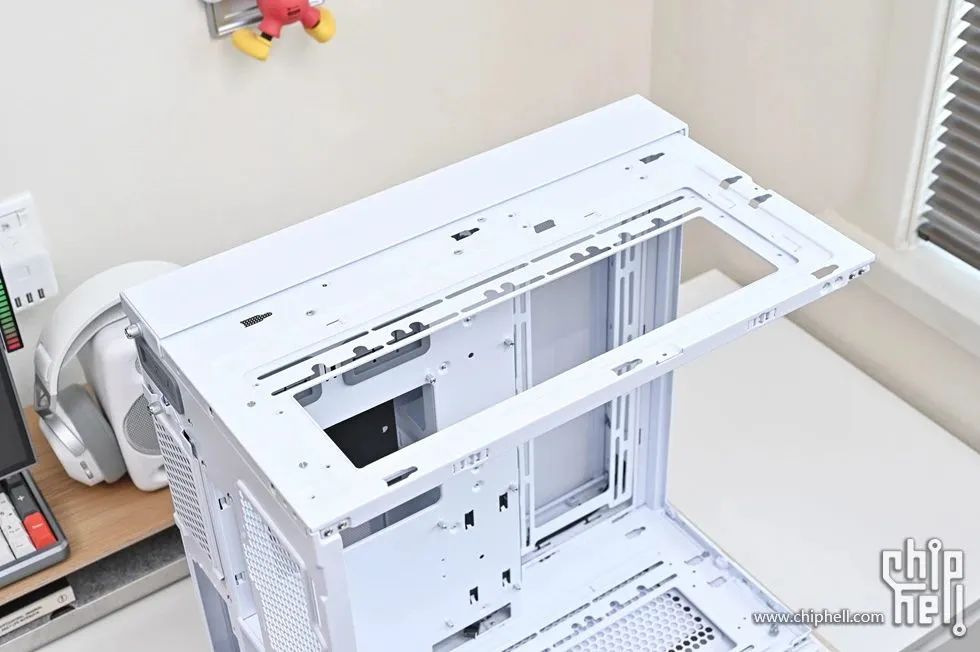 Removing the tempered glass side panel to see the internal situation.
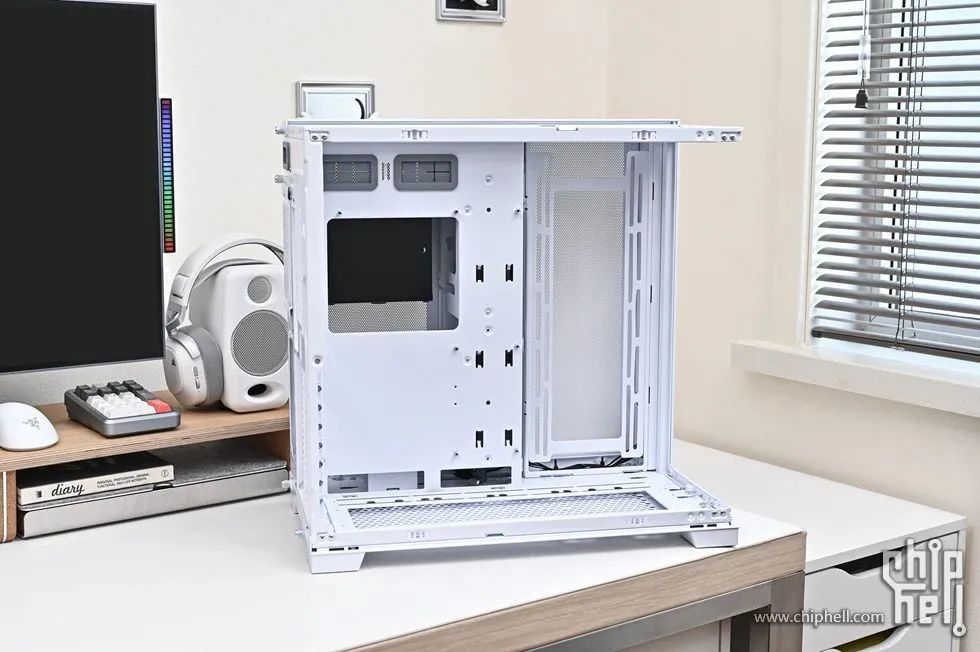 The motherboard installation area supports ITX to E-ATX form factors.
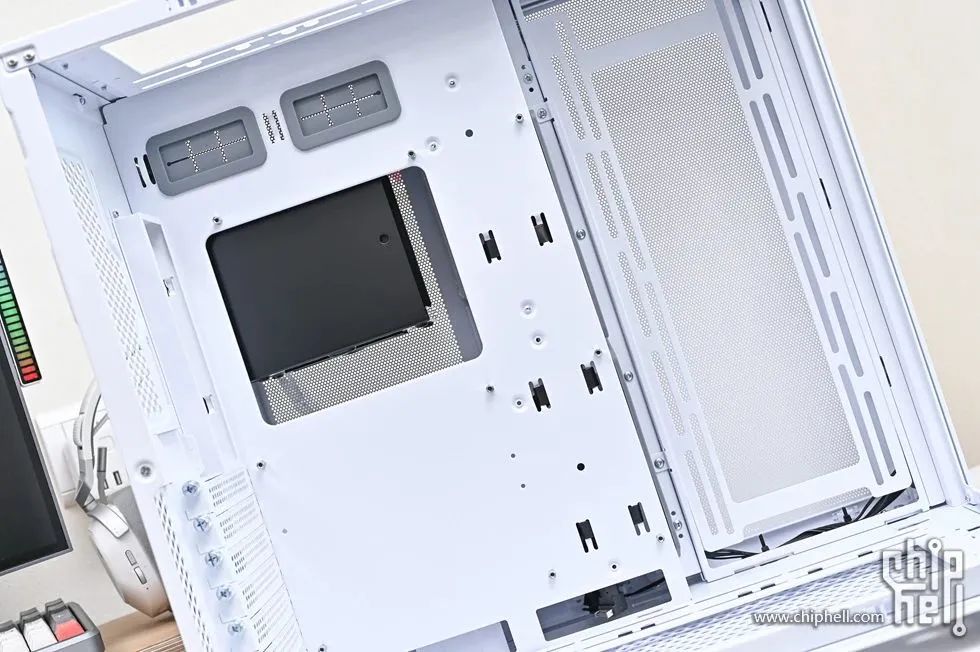 The side fan radiator installation area can accommodate 360mm or 280mm radiators, 3 x 120mm or 2 x 140mm fans.
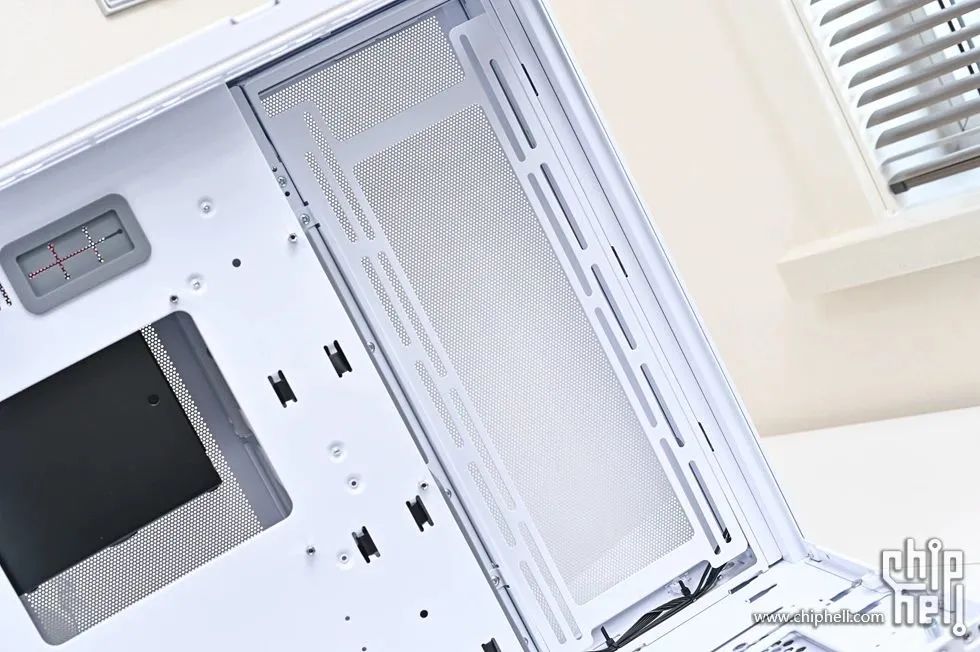 The motherboard output port is vertical to the motherboard, with wide openings for easier and more aesthetically pleasing cable management.
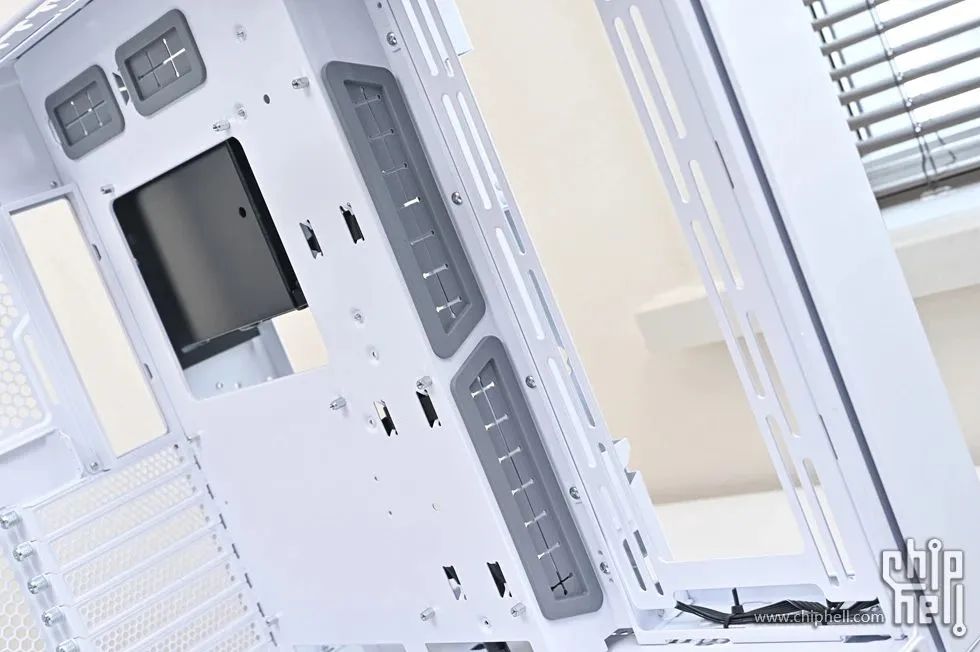 The bottom fan radiator support can accommodate 360mm or 280mm radiators, 3 x 120mm or 2 x 140mm fans.
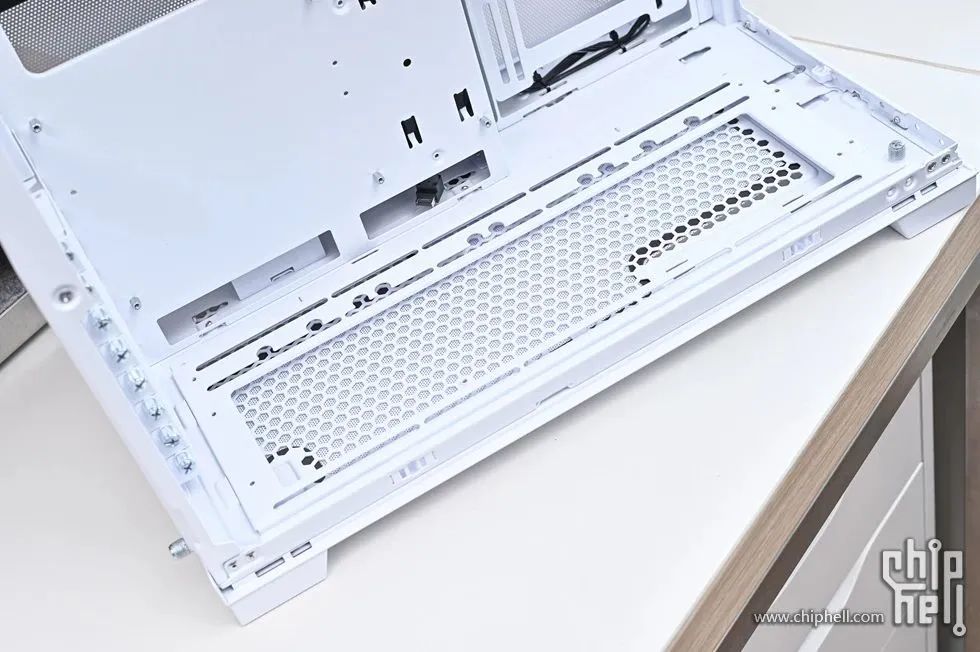 Back display of the case.
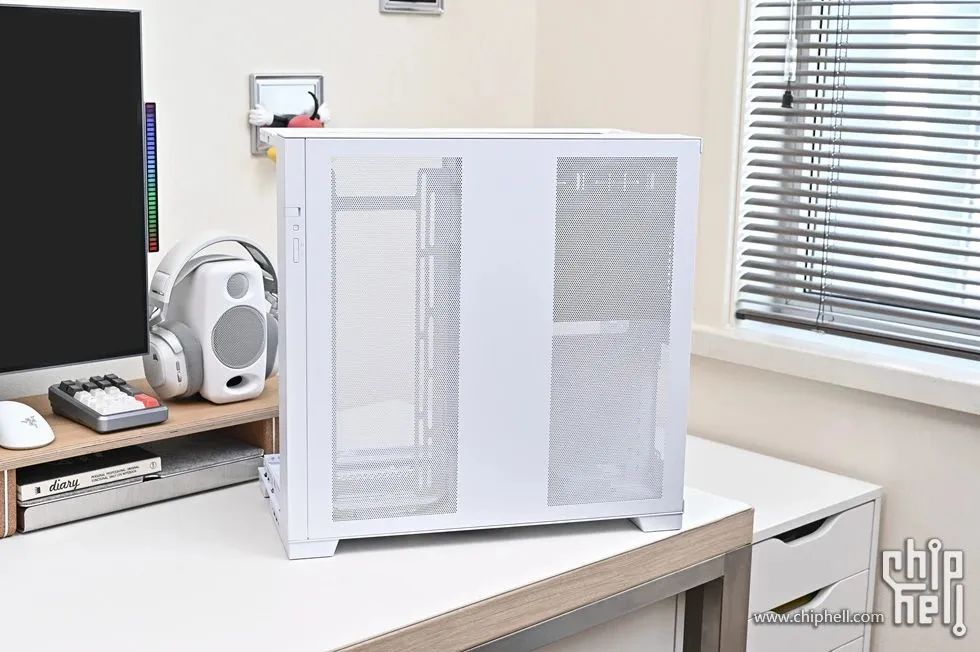 The back panel of the case is finely crafted, with mesh openings designed on both the left side for the radiator and the right side for the power supply and hard drive.
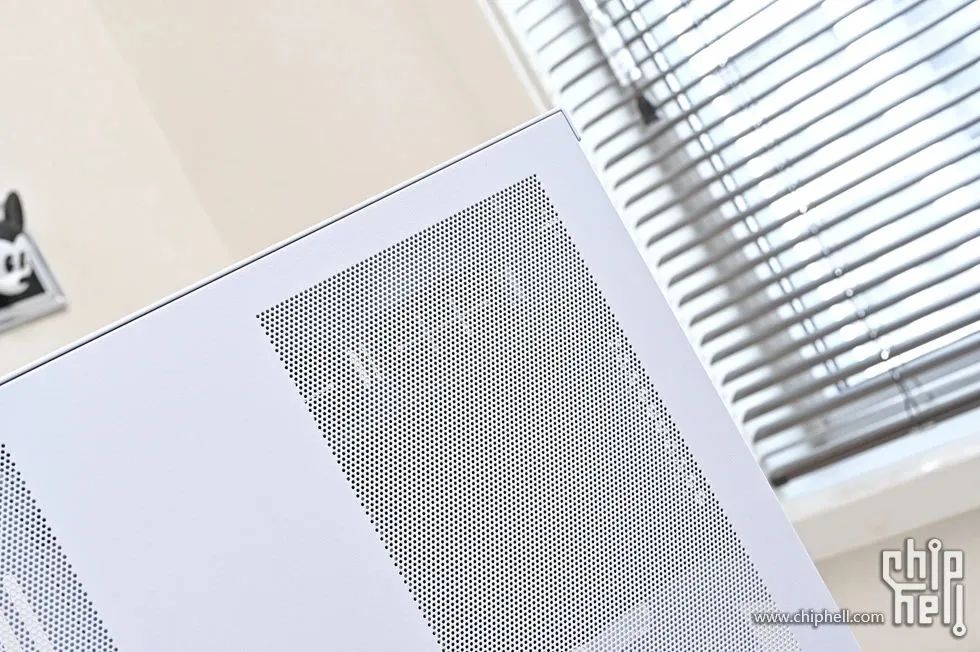 Opening the back panel, the left side is for 360/280mm radiator installation, the middle is for the hard drive mounting plate, which can mount two 2.5-inch hard drives, the right side top is for 3.5/2.5-inch hard drive installation, and the bottom is for the ATX power supply installation position.
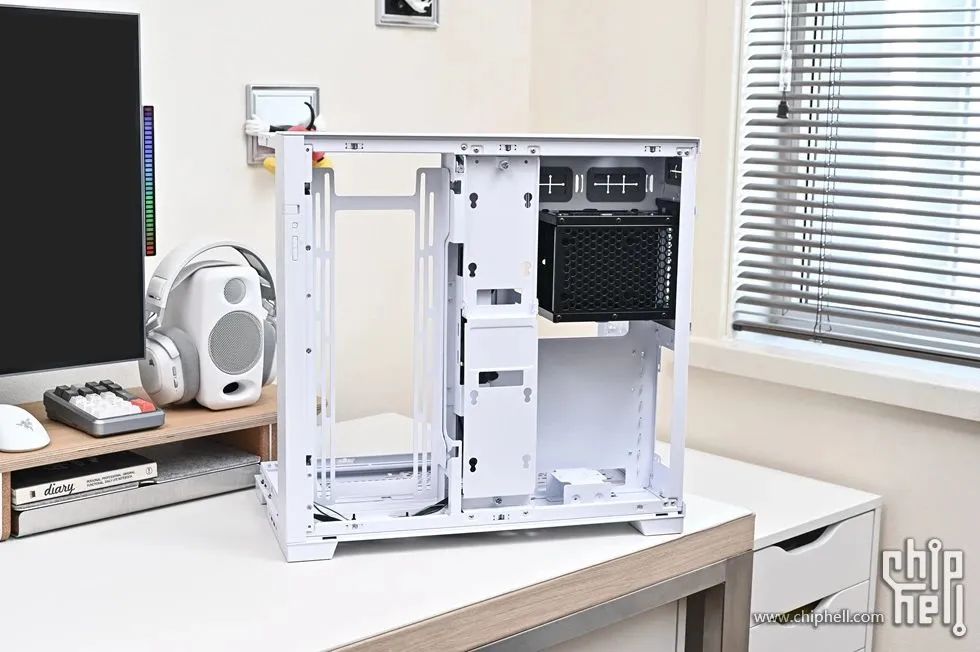 The side radiator position has a buckle design, making it very easy to remove.
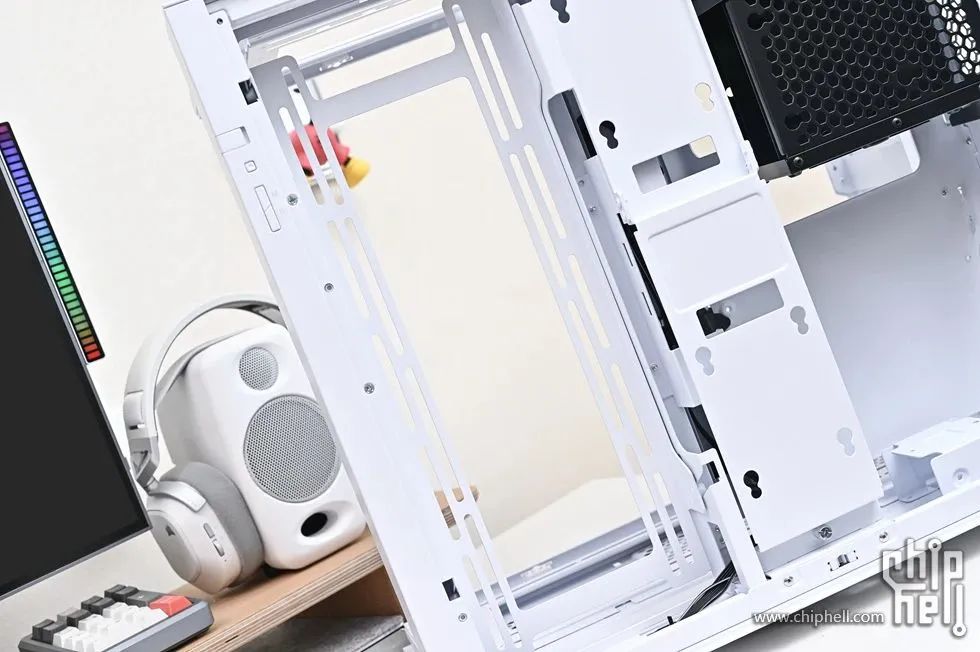 It can replace the hard drive mounting plate included in the box. It can mount 2.5″ SSDs ×4 or 3.5″ hard drives ×2.
 The middle is the hard drive mounting plate, which can mount two 2.5-inch hard drives.
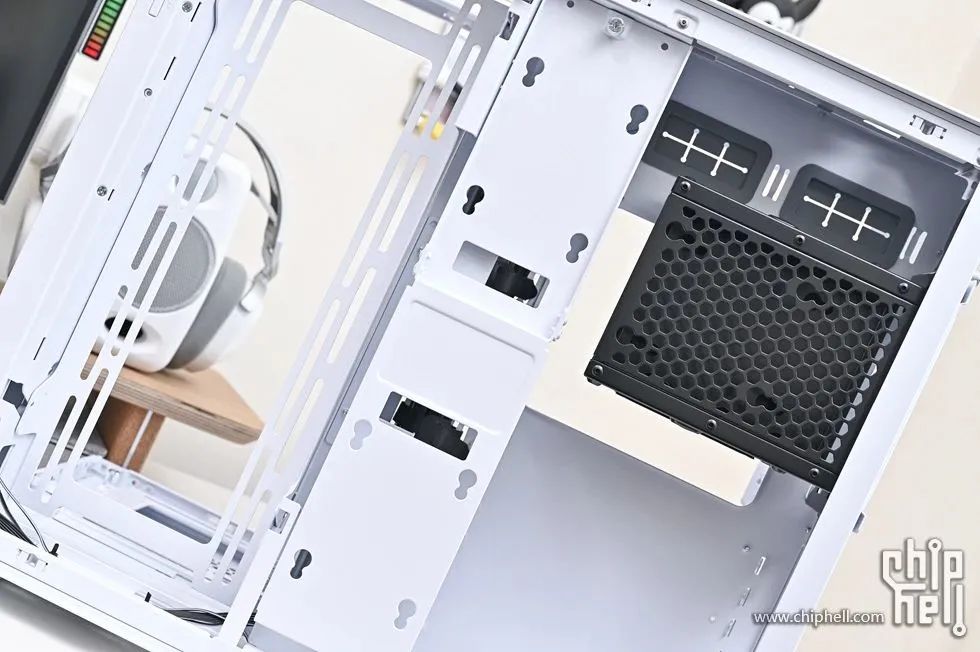 At the same time, the hard drive mounting plate also serves as a cable management bar, covering the cables of the case. The upper right side is the hard drive cage, which can be removed to increase the second power supply position, while the lower right side is the standard power supply installation position. The power supply position bracket is equipped with rubber blocks to provide cushioning and shock absorption for the power supply.
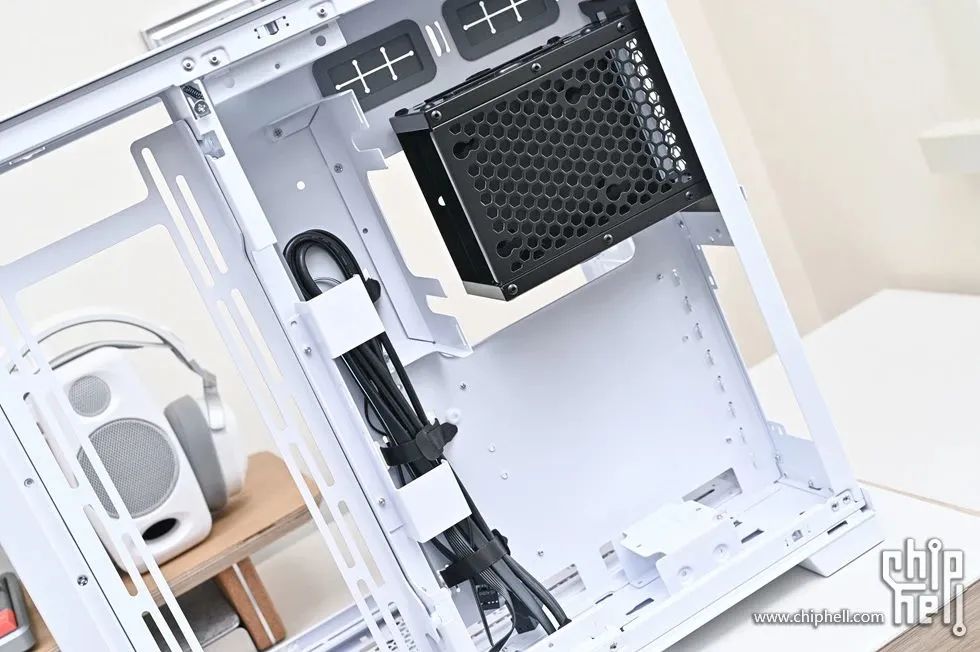 The default upper right side is the hard drive cage, which can mount 2.5″ SSDs ×3 or 3.5″ hard drives ×2 + 2.5″ SSDs ×1Cable.
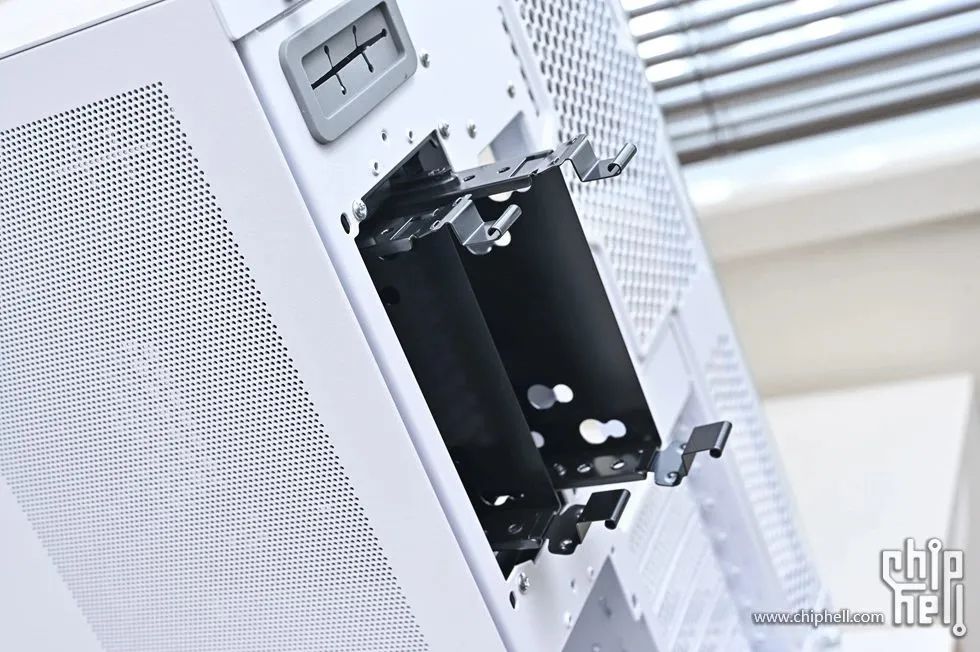 Back of the case. The upper left is the hard drive compartment, the middle is the motherboard I/O shield position, the upper right is the 12cm fan position, the lower left is the power supply compartment, and the lower right is the PCIe installation slot for the graphics card.
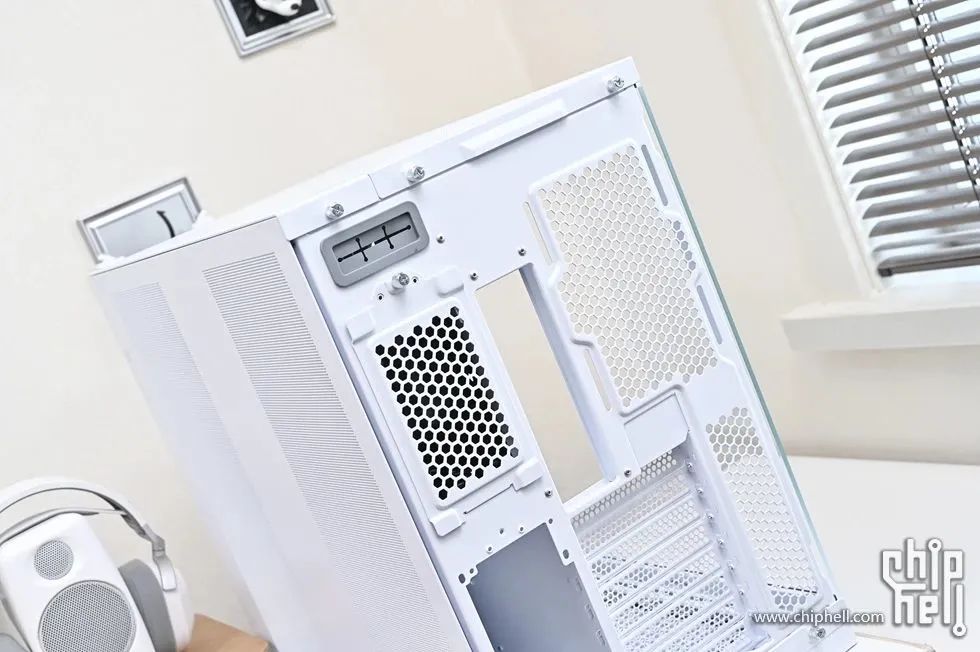 The lower power supply compartment and 8 PCIe slot covers.
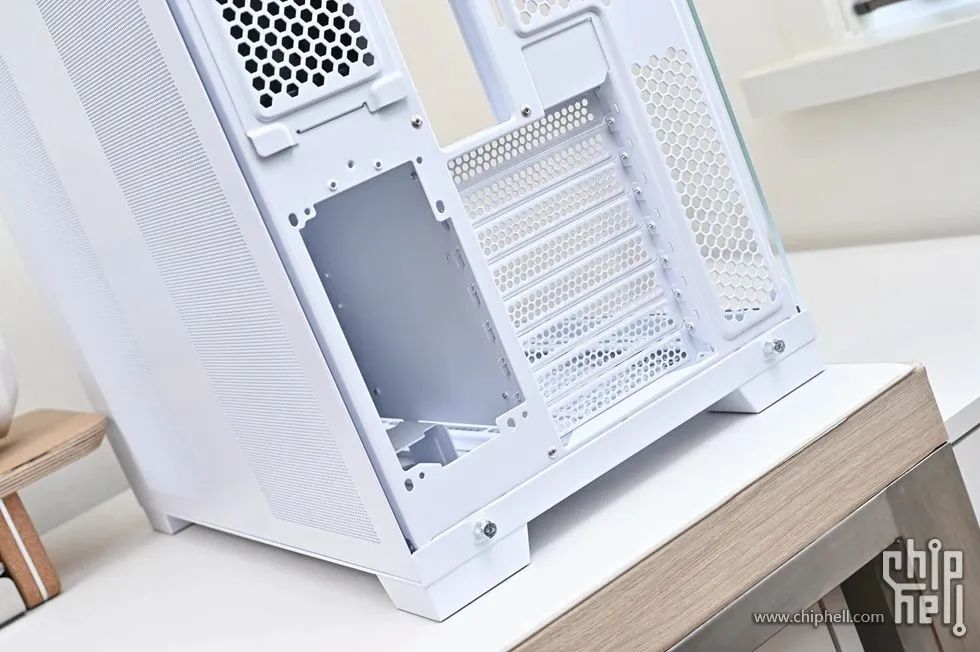 Now let’s take a look at the bottom of the case. The large rubber base at the four corners, and the middle filter is designed to be magnetic for easy removal and cleaning. The lower right side is the default installation position for the front I/O interface, which can be removed and installed to the lower left side or the upper right side.
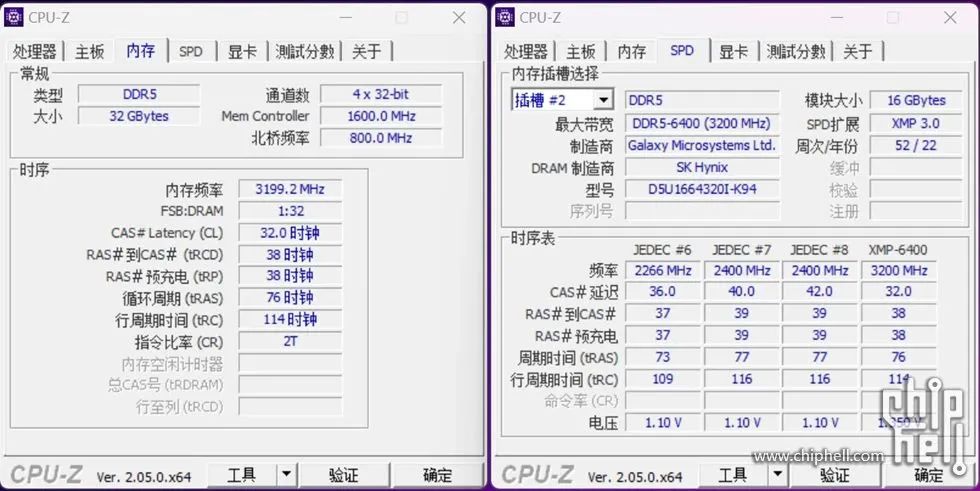
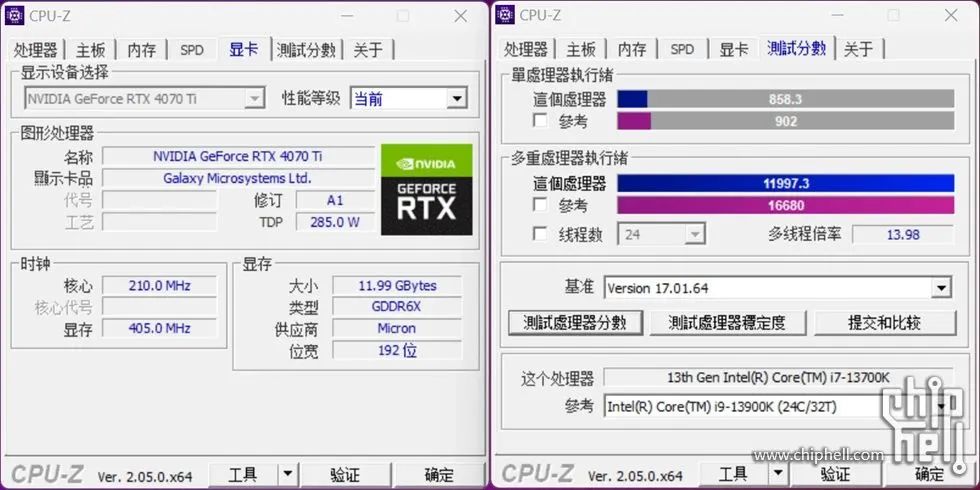
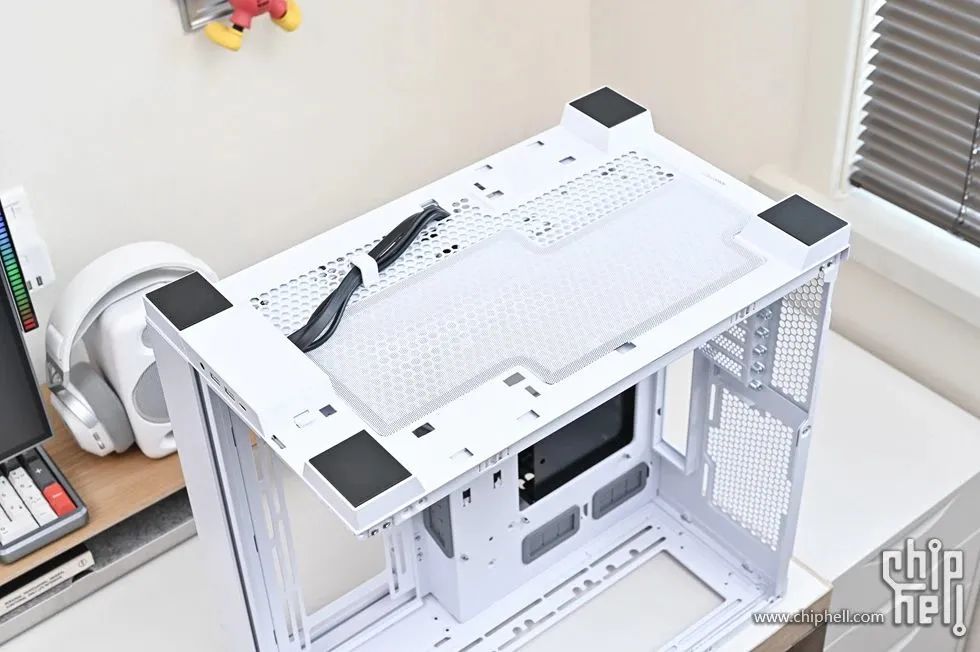 3. Testing phase.CPU-Z information and single-core multi-core scores.
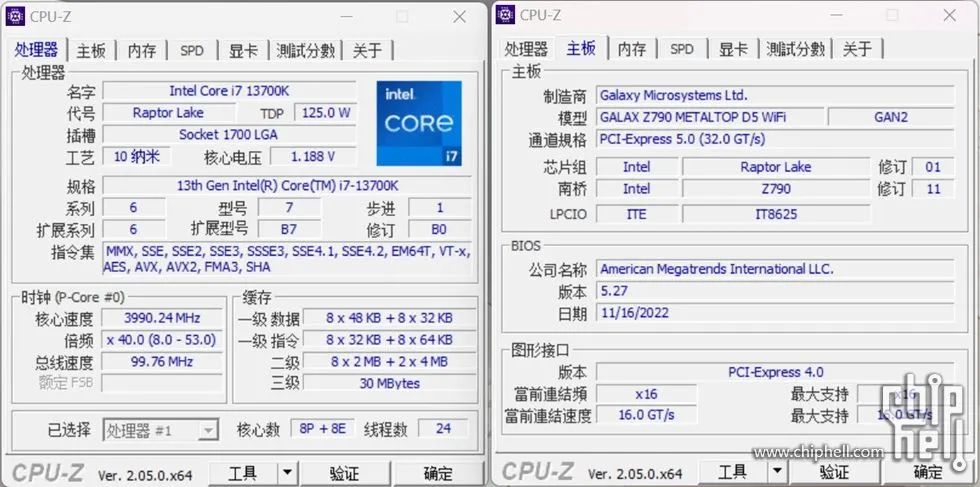
 GPU-Z information.
 AIDA64 GPU Benchmark test.
 CINEBENCH R23 test.
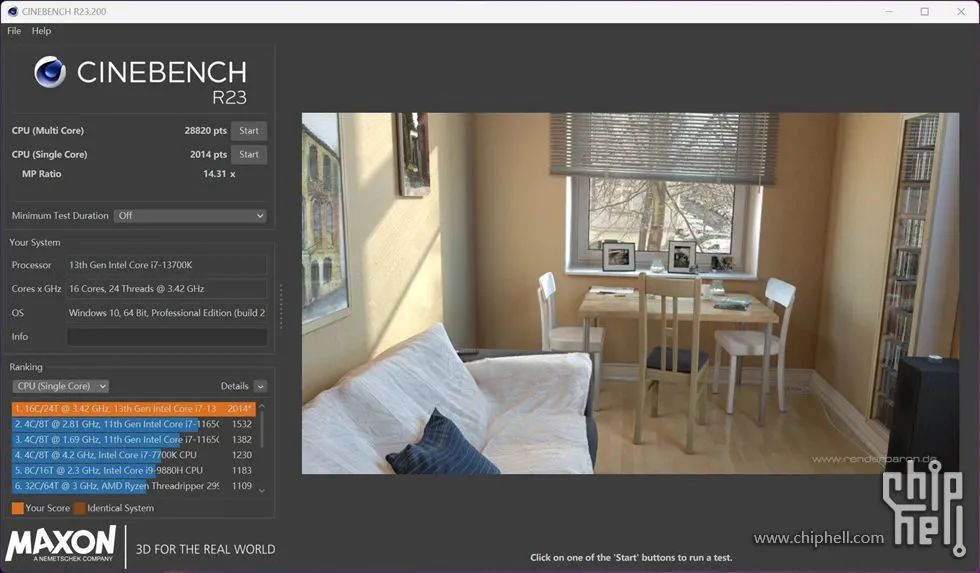 SPEED WAY test.
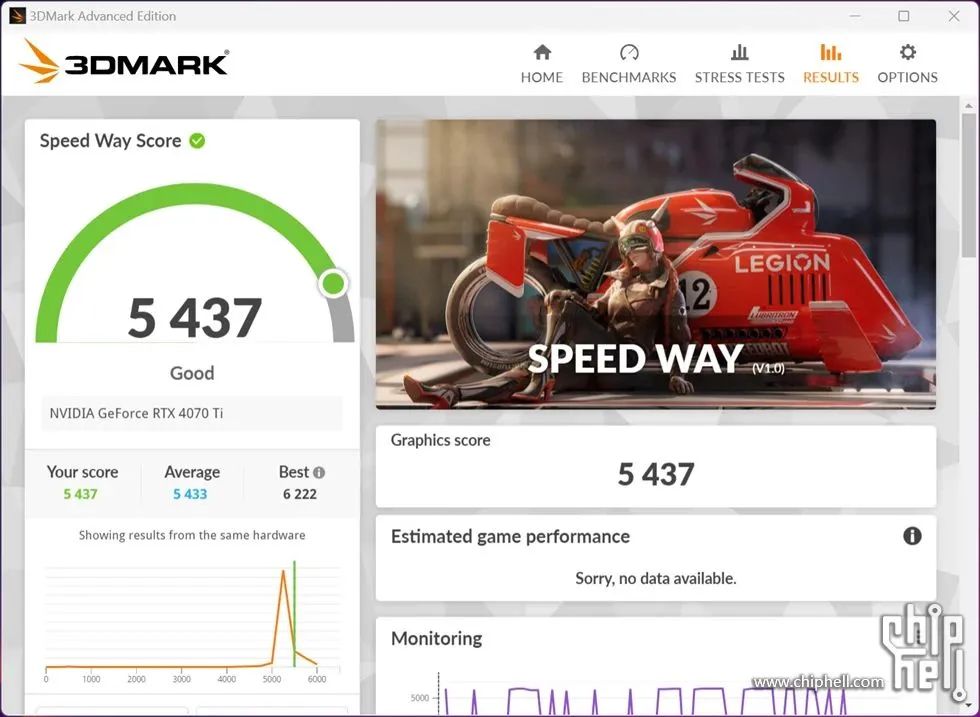 Port Royal test.
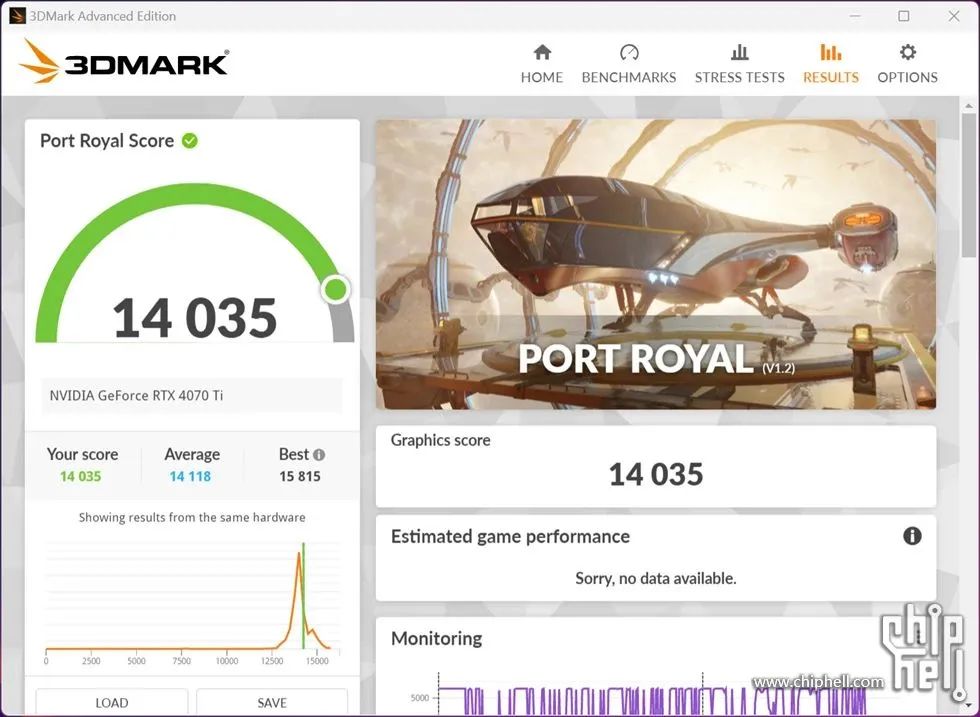 Time Spy Extreme benchmark test.
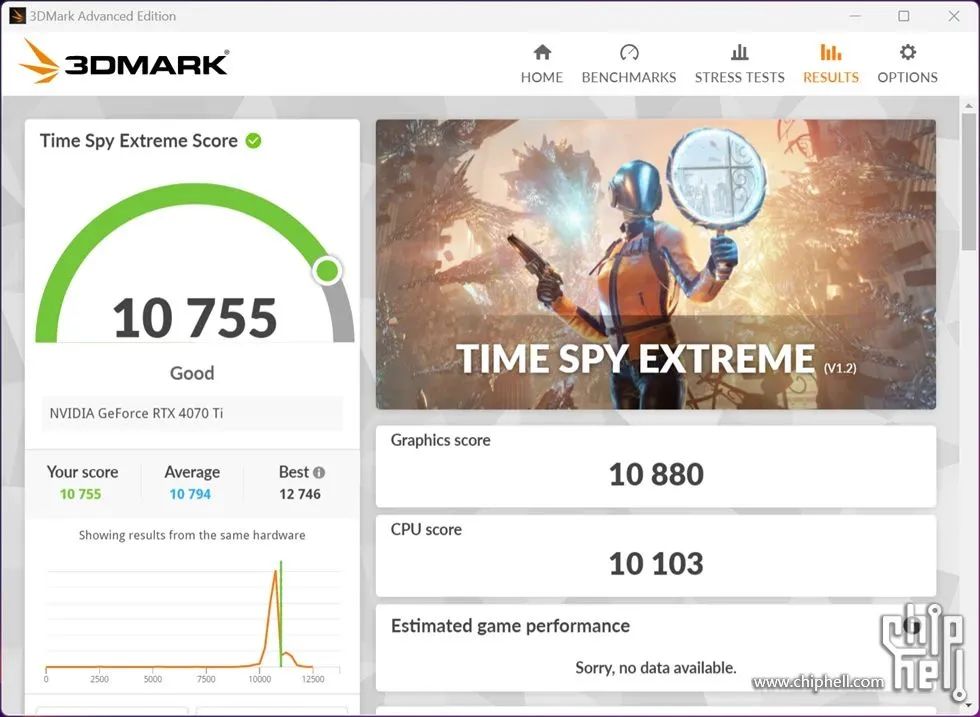 Fire Strike Ultra test.
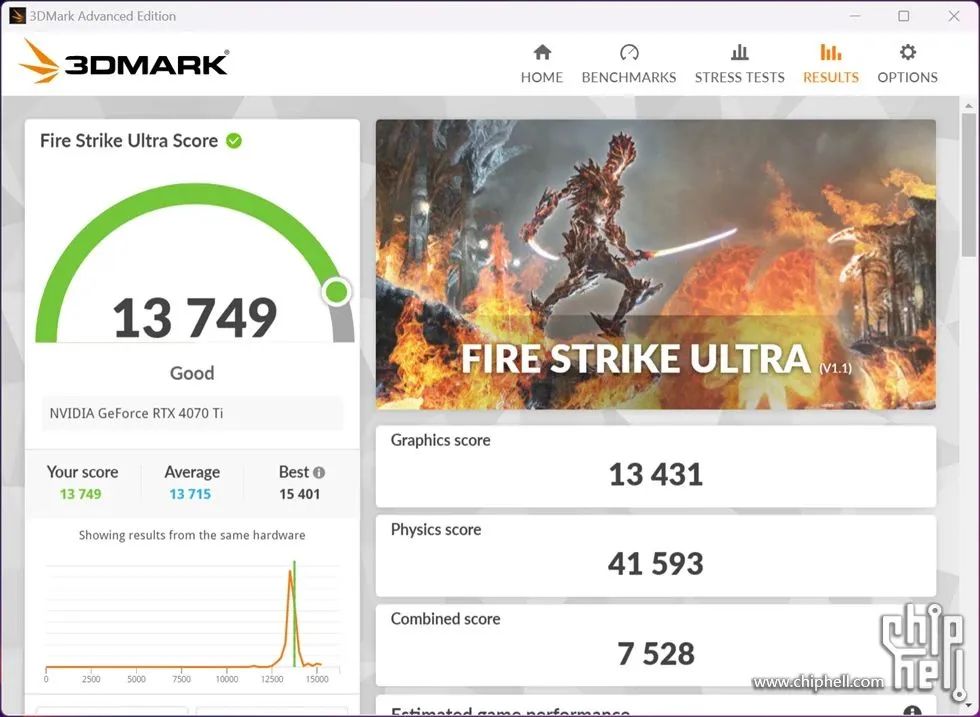 CPU PROFILE test.
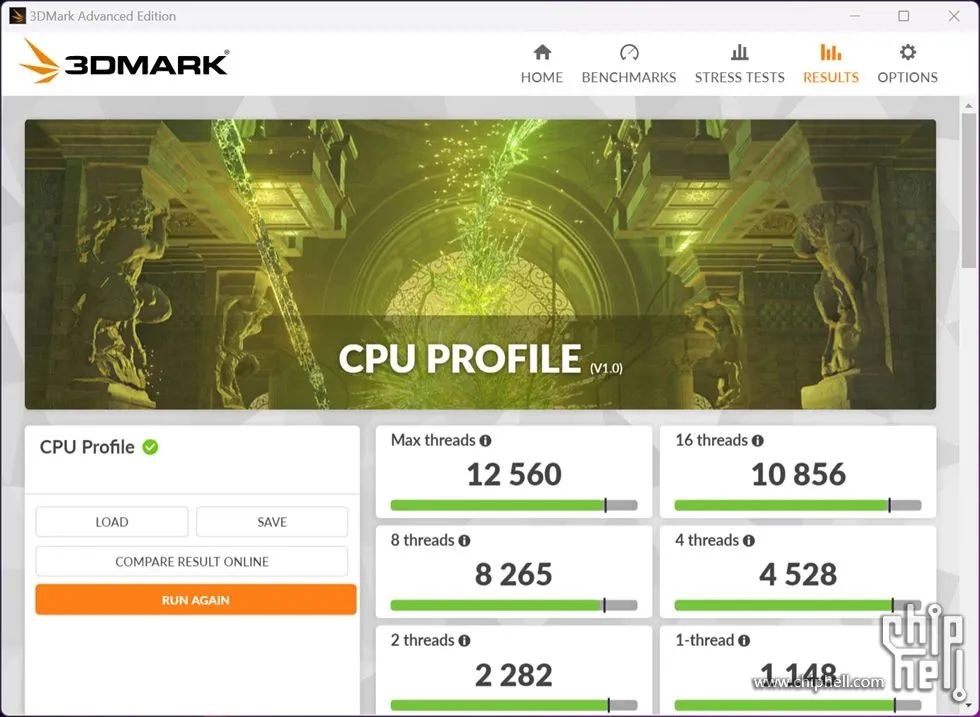 Ray tracing test 67.70 FPS.
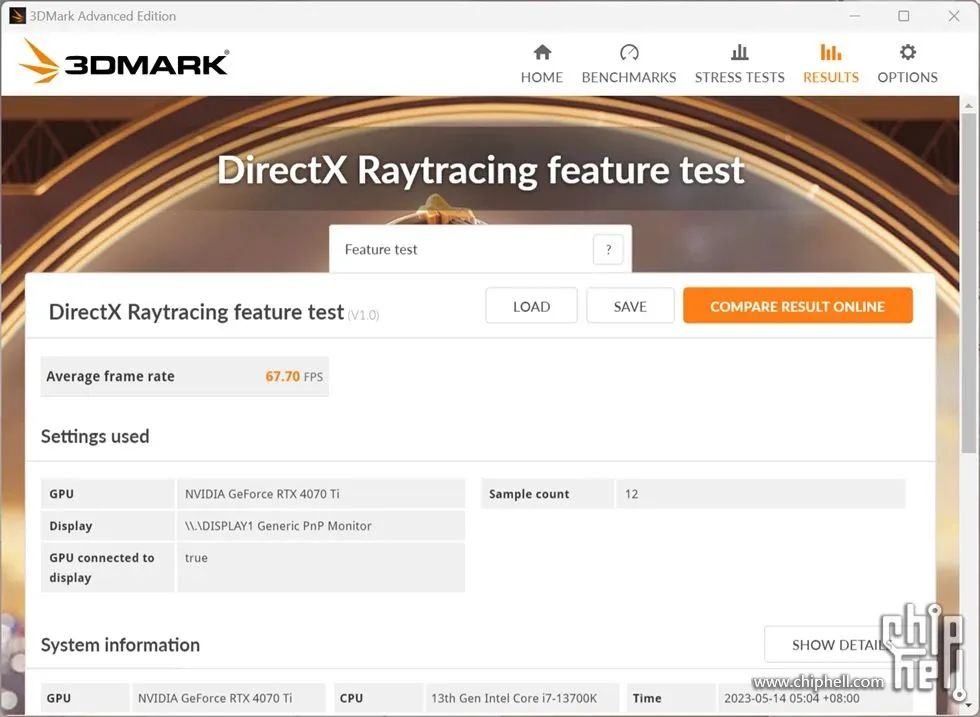 NVIDIA DLSS function test, DLSS off 29.67 FPS, DLSS on 104.76 FPS.
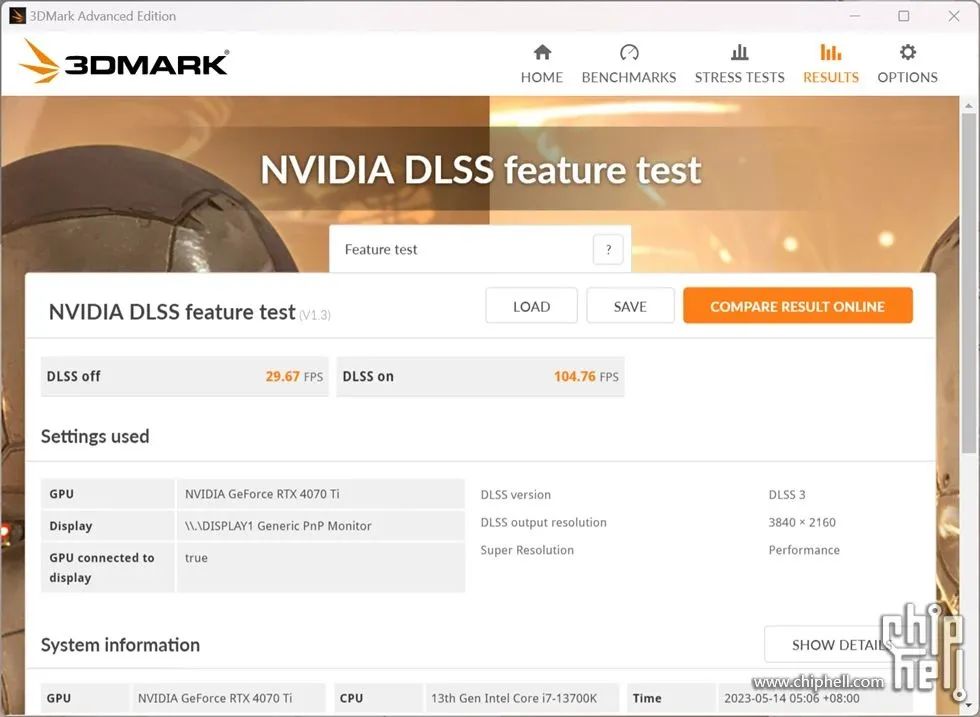 Room temperature 26°C, Offset mode, single burn Aida64 FPU for 10 minutes, the 13700K surface area is around 81°C, and the 4070Ti is around 34°C.
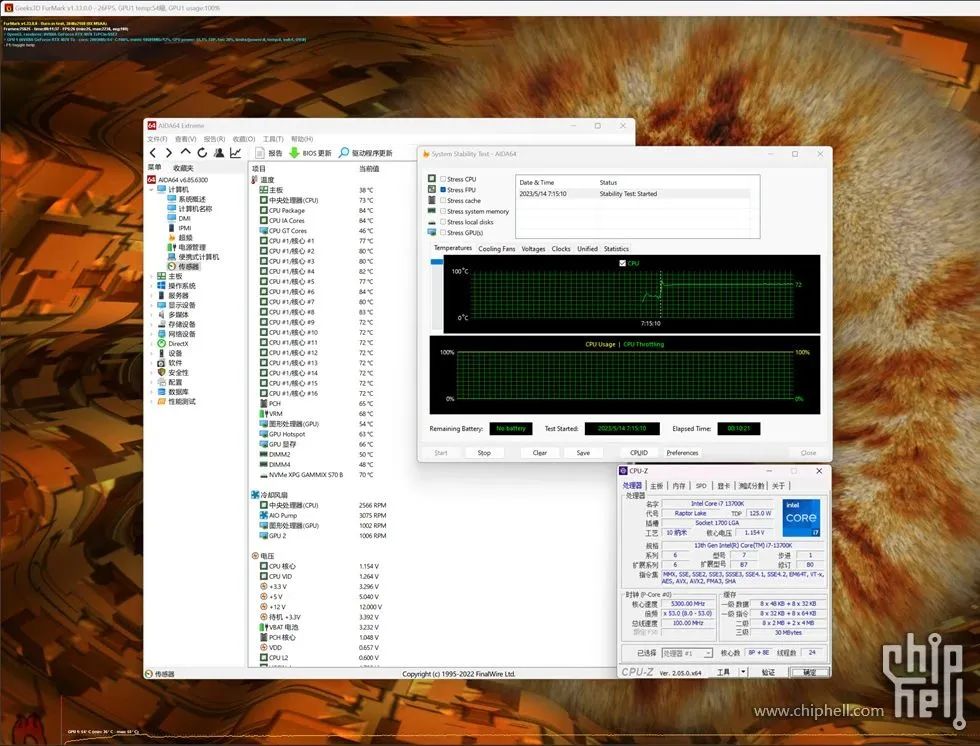 Room temperature 26°C, Offset mode, dual burn Aida64 FPU&Furmark 4K 8SMAA for 10 minutes, the 13700K surface area is around 84°C, and the 4070Ti is around 54°C.All assembly is now complete, the above only represents personal opinions, if you have any questions, feel free to leave a message for discussion, thank you for your patience in watching!