Getting Started with Proteus:
Before that, I will explain how to add the Arduino Uno Proteus model. First, please open your Proteus simulation software.
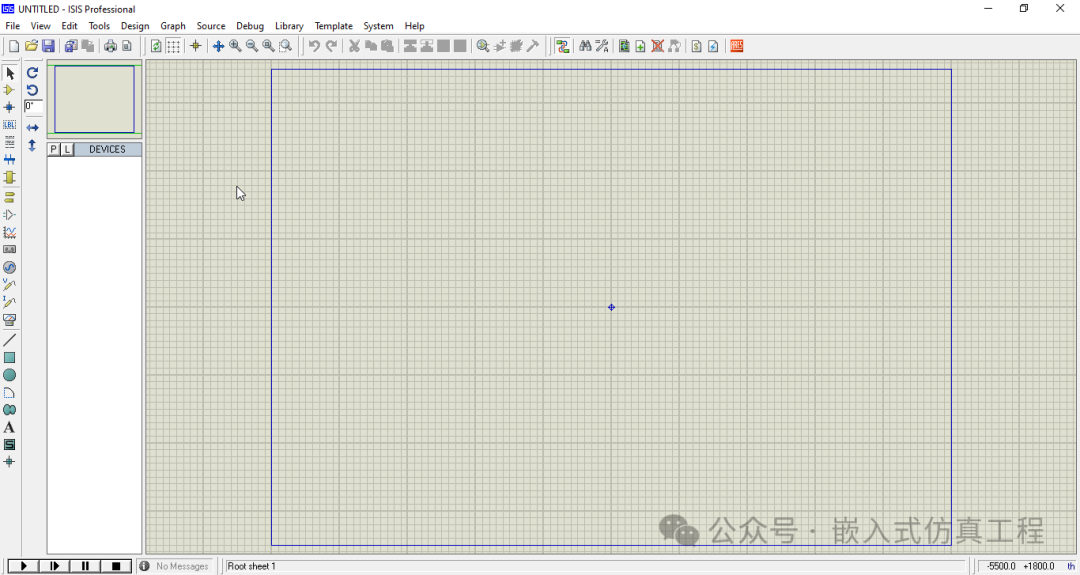 The first thing to learn is how to add components in Proteus software.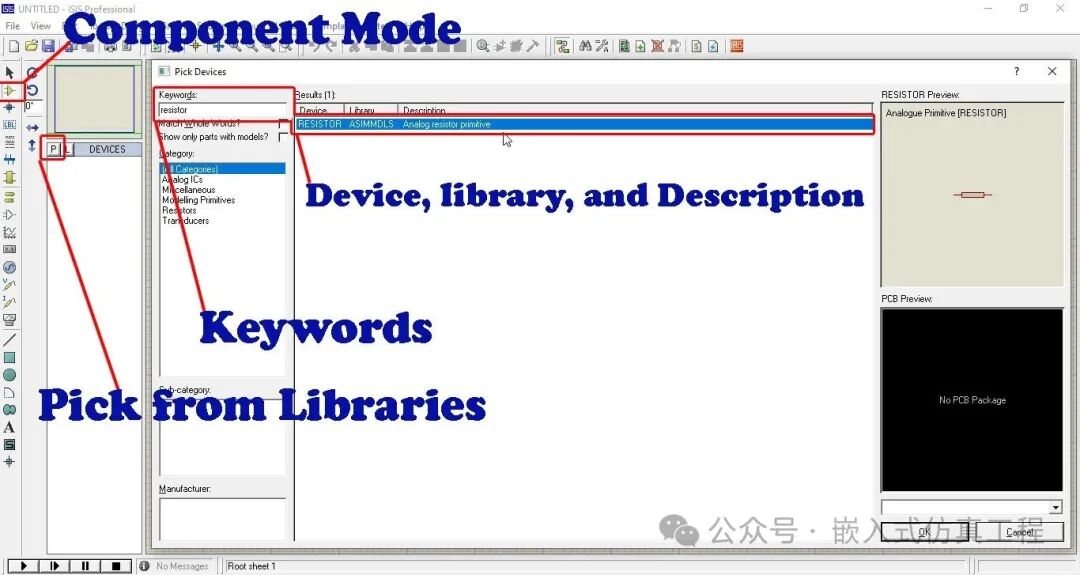
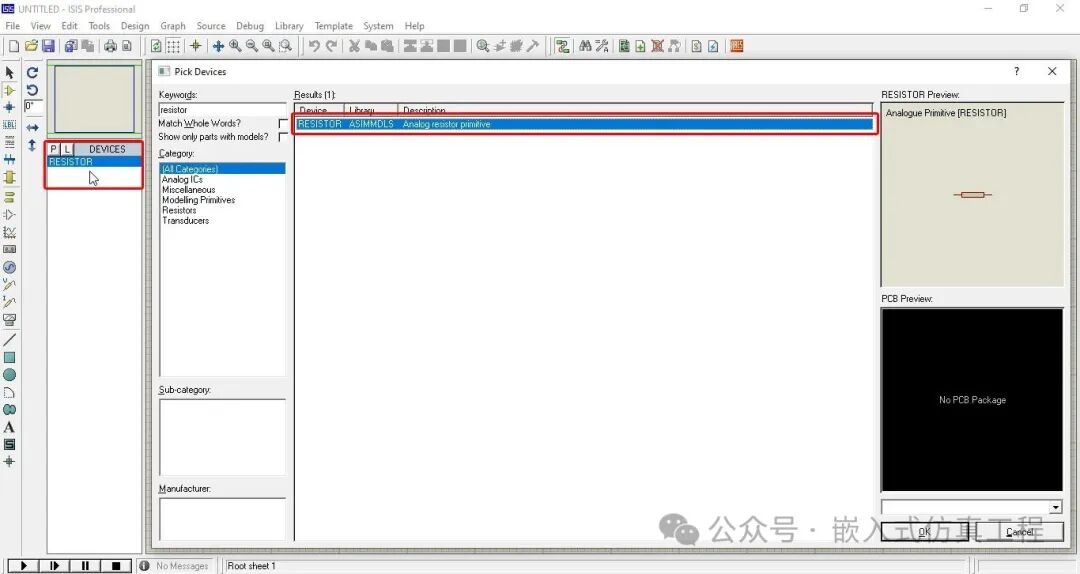
After opening the Proteus software, click the “Component Mode” button, then click the “Select from Library” button, which will open the “Select Device” window. In the “Keyword” box, type the name of the component you want to search for, and in the results section on the right, you will see components with device names, library information, and descriptions of the components. In this example, I am searching for resistor. Now double-click the resistor to add it to the list, as shown in the figure below.
Now, to add an LED, this time, type “leds” in the “Keyword” box. As you can see in the figure below, a long list will appear on the screen, and you can select any LED from the list; just double-click it to add it to the list.
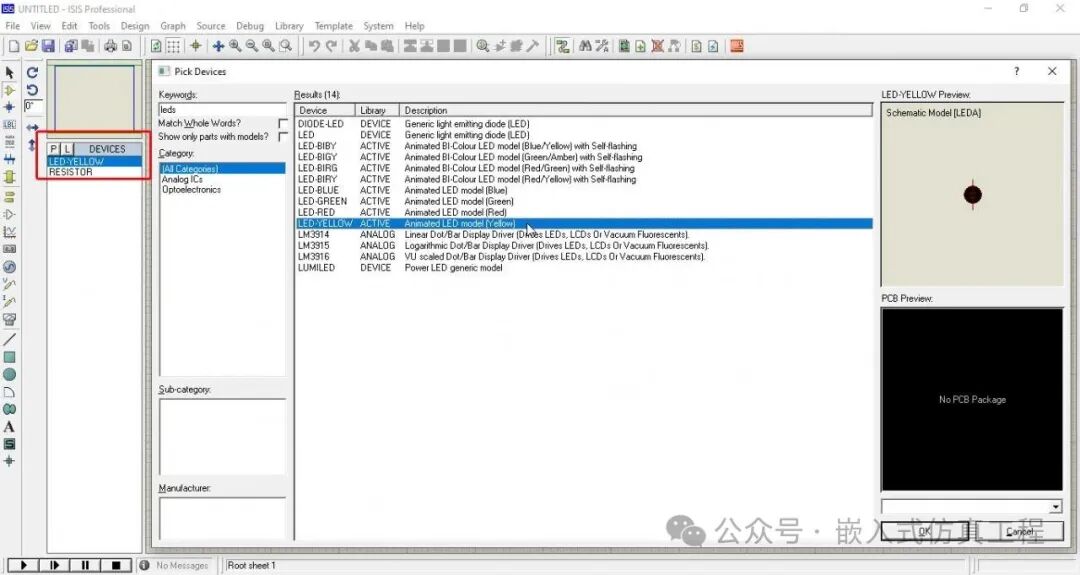
Currently, I only need these two components. Now, you can close the “Select Device” window. Next, we will add these components for simulation.
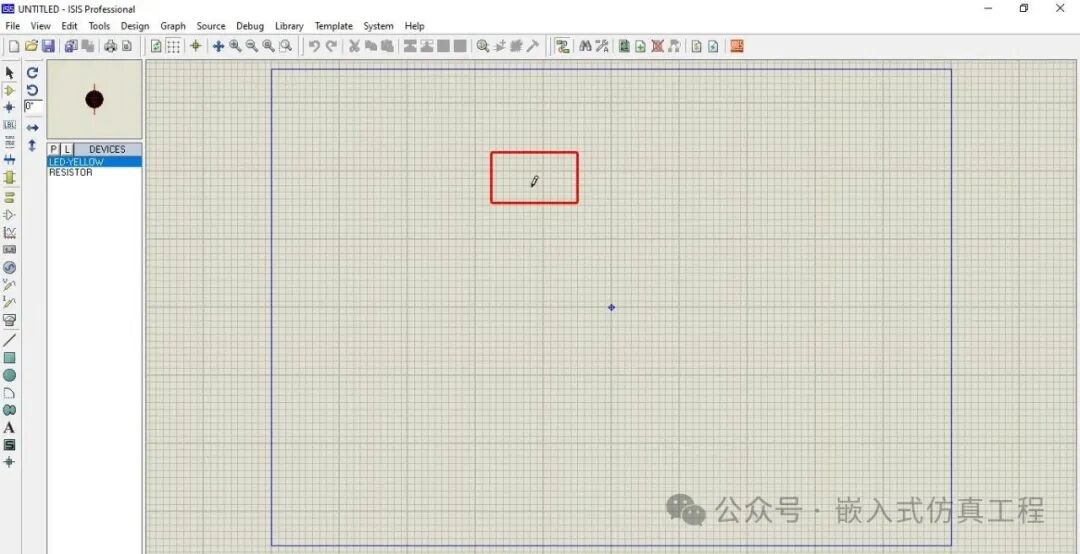
It can be clearly seen that there are two components in the list: one is LED-YELLOW, and the other is resistor. Now, simply click on one of the components to select it, and the mouse cursor will change to a pen shape. Now, you can click the left mouse button to add this LED.
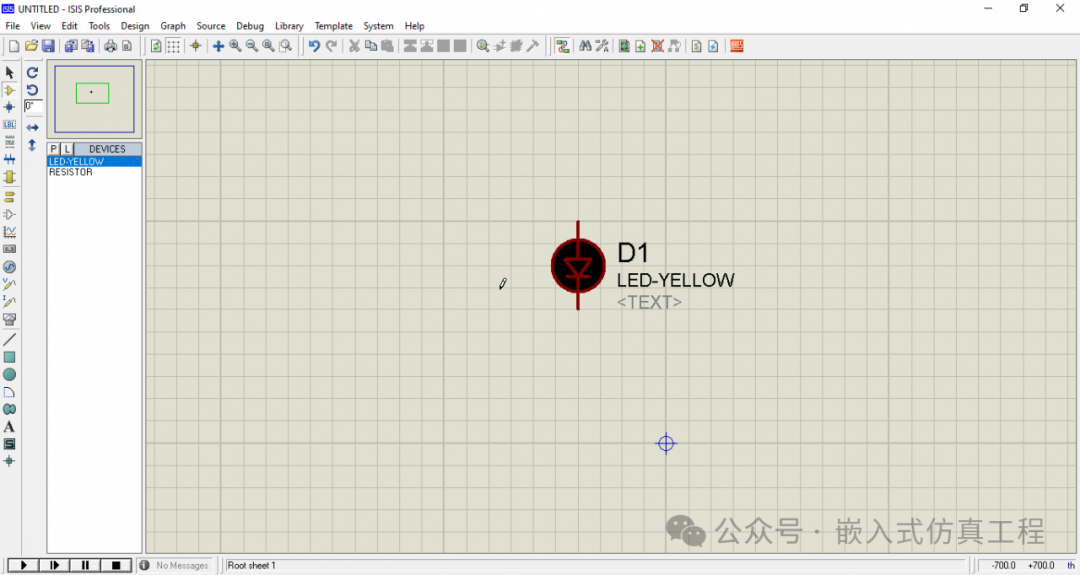
Now, you can see that the LED has been added. Now to add the resistor, just click on the resistor and add it.
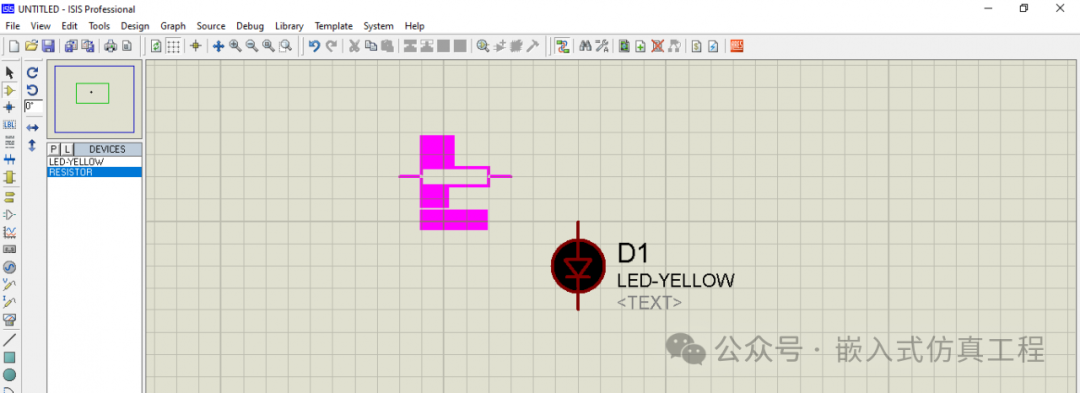
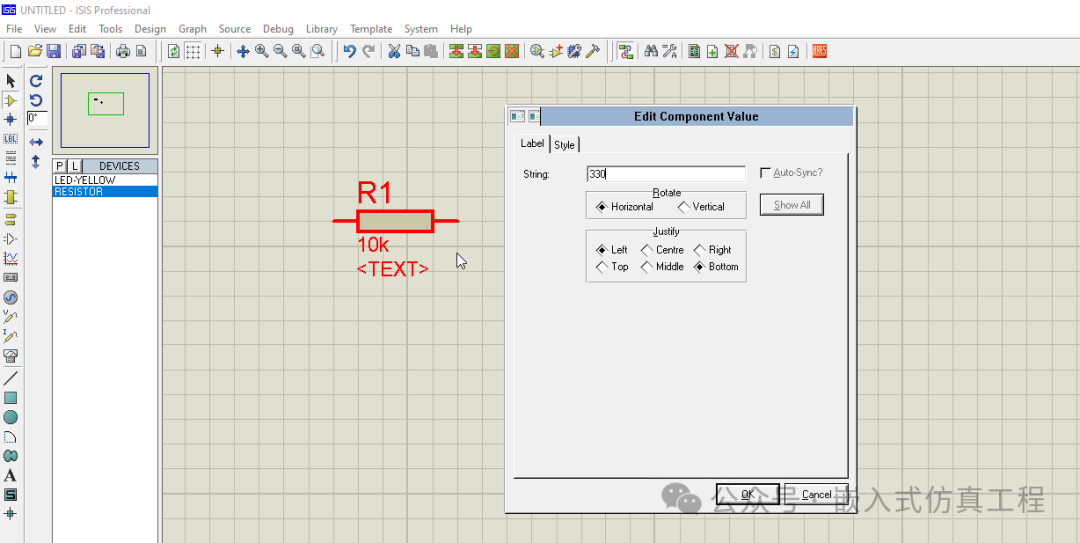
Just click the left mouse button to add the resistor. The added resistor is 10K ohms. To change the value of the resistor or any other component, you need to double-click the value. Just double-click 10K to open the “Edit Component Value” window. Enter the value of 330 and then click the “OK” button to close the window.
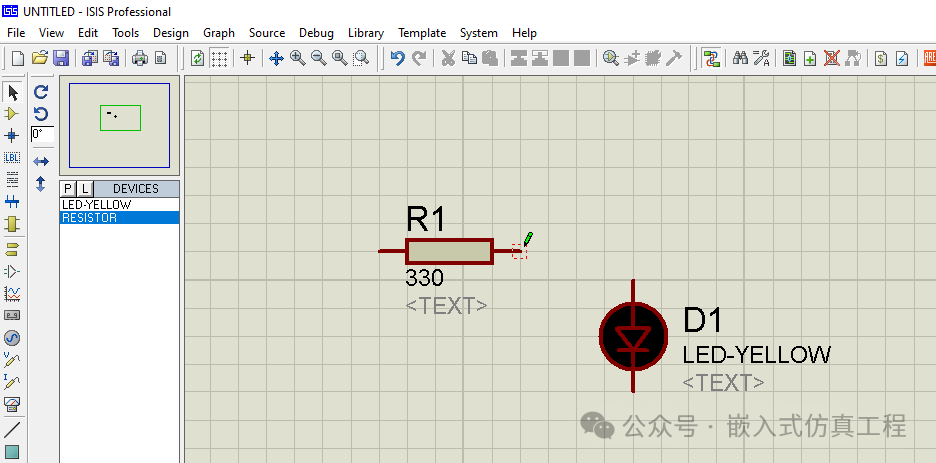 After changing the resistor value, it is now time to connect it to the LED. After selecting the arrow cursor, move the mouse cursor near the component pin, and the cursor shape will change to a pen shape, indicating that you can draw a line. Click the mouse, and a line will appear, then click the LED pin to connect the wire.
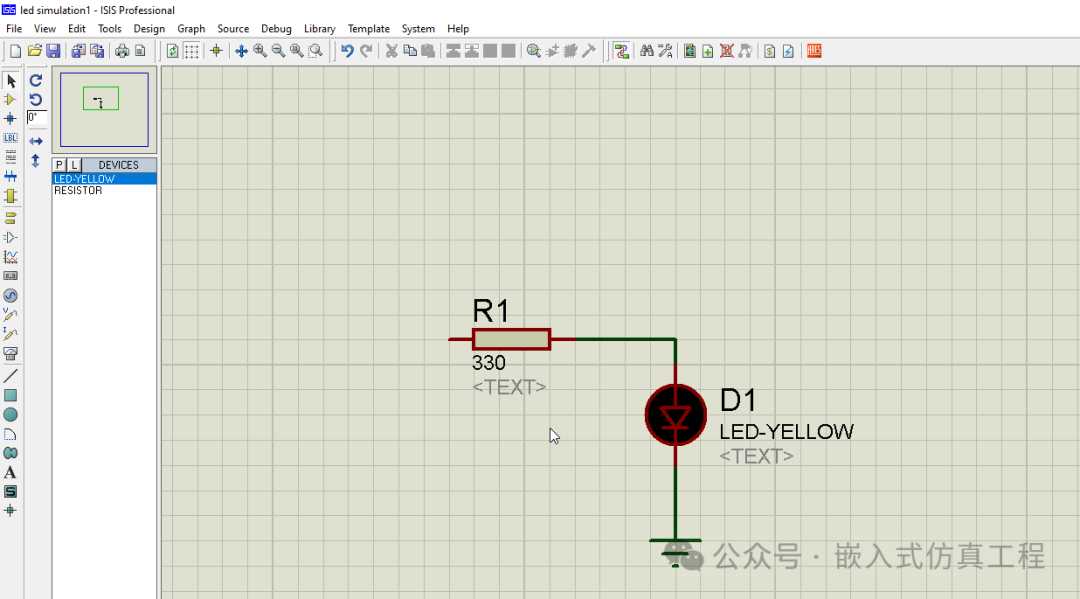 Now to light up this LED, we need voltage and ground connections.
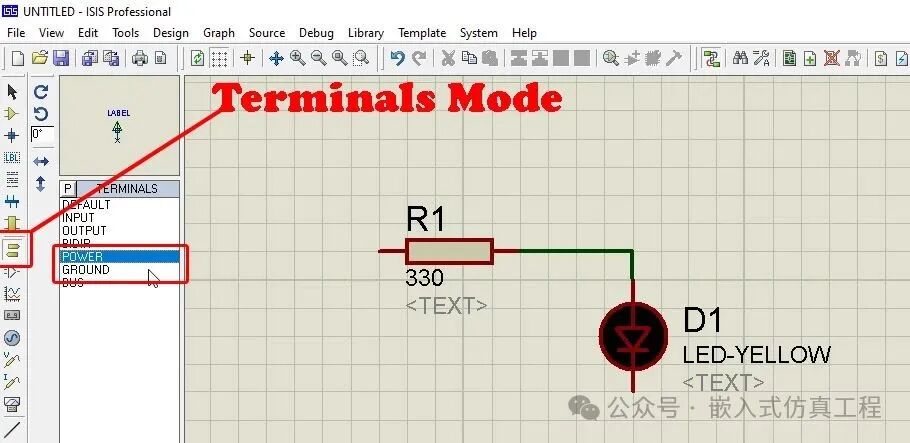 Click the “Terminal Mode” button, and a “Terminal” list will appear. From this list, you can select power and ground terminals. Select the power terminal, then click anywhere in the simulation window, and repeat the same operation for the ground terminal.
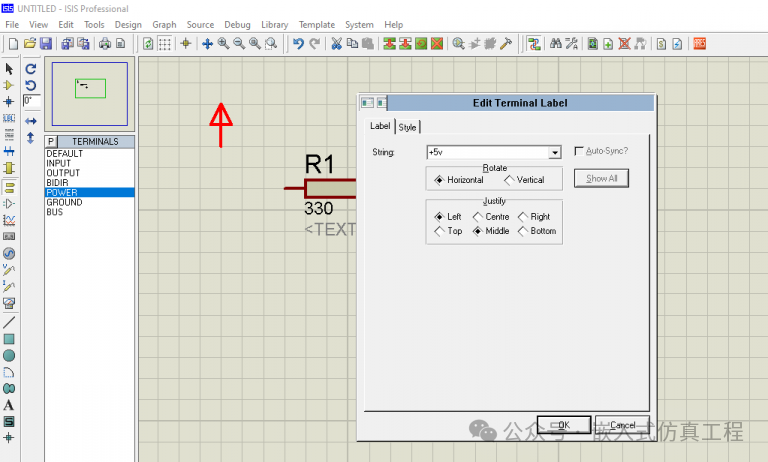 First, add the power terminal. After adding the power terminal, double-click the power terminal to change its value. Simply write +5v and then click the “OK” button.
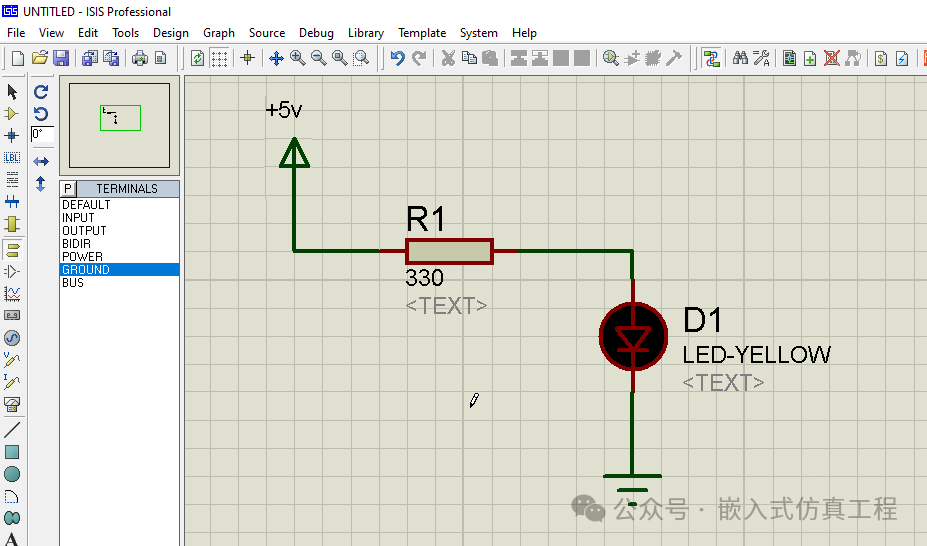 Finally, the wiring is done. The circuit is complete. Now you can click the “Run” button to run the simulation.
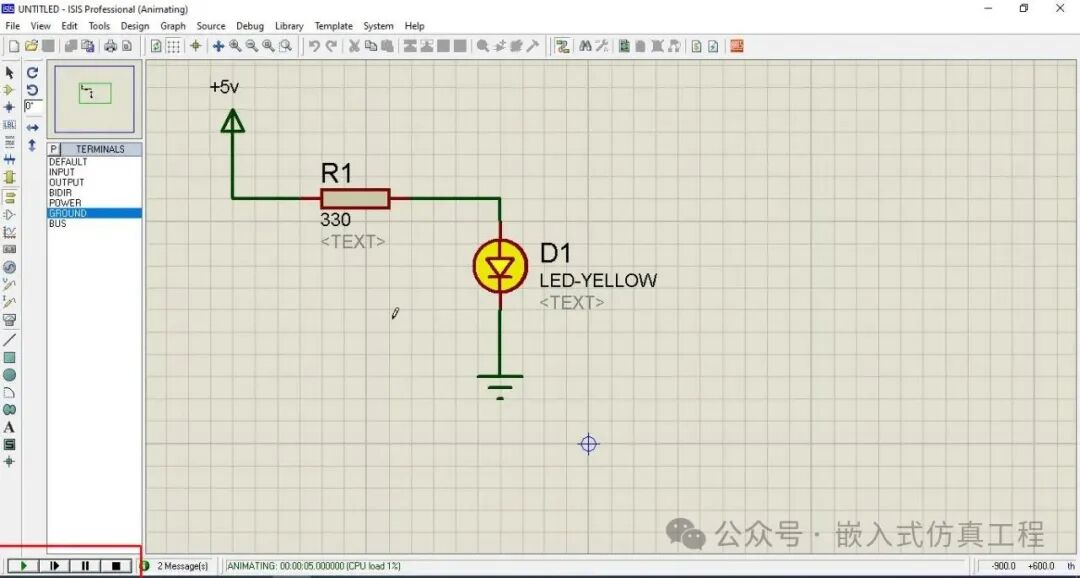 This is just a simple circuit, and it works perfectly. Through this circuit, you have learned how to create and run simulated circuits. This simulation is very simple because we have all these components in the Proteus component library. Now, suppose we want to control this LED with an Arduino development board, what should we do?Download the Arduino Uno Proteus model library. The downloaded folder is in RAR format, and you need to extract it. Then open the folder, copy all the files and folders inside, and paste them into the MODELS and LIBRARY folders to use the Arduino development board in Proteus for LED control simulation.. Now, you can repeat the exact same steps as before.
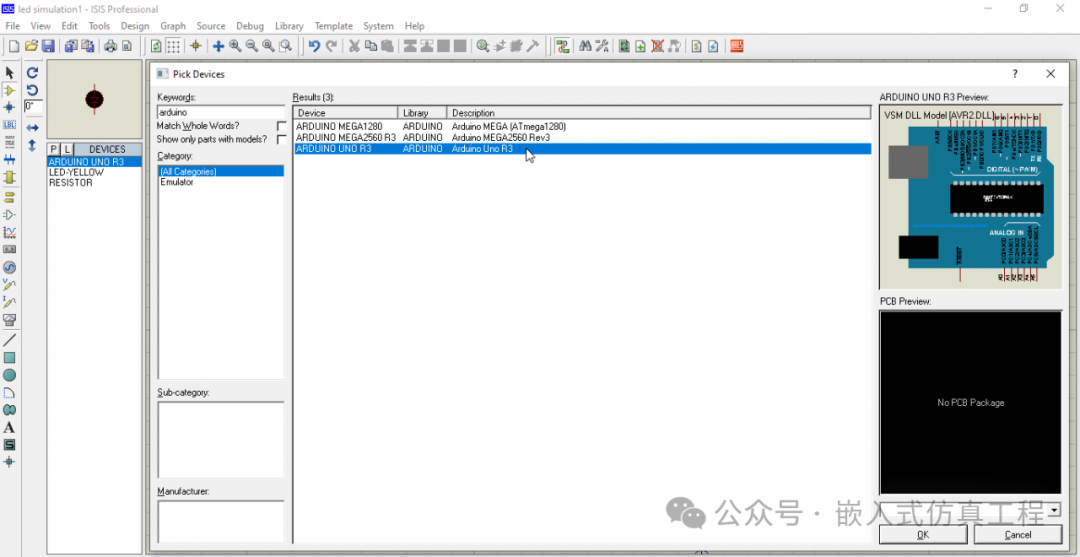 You can double-click on Arduino Uno R3, and it will be added to the list. Now you can see three components in the list on the left.
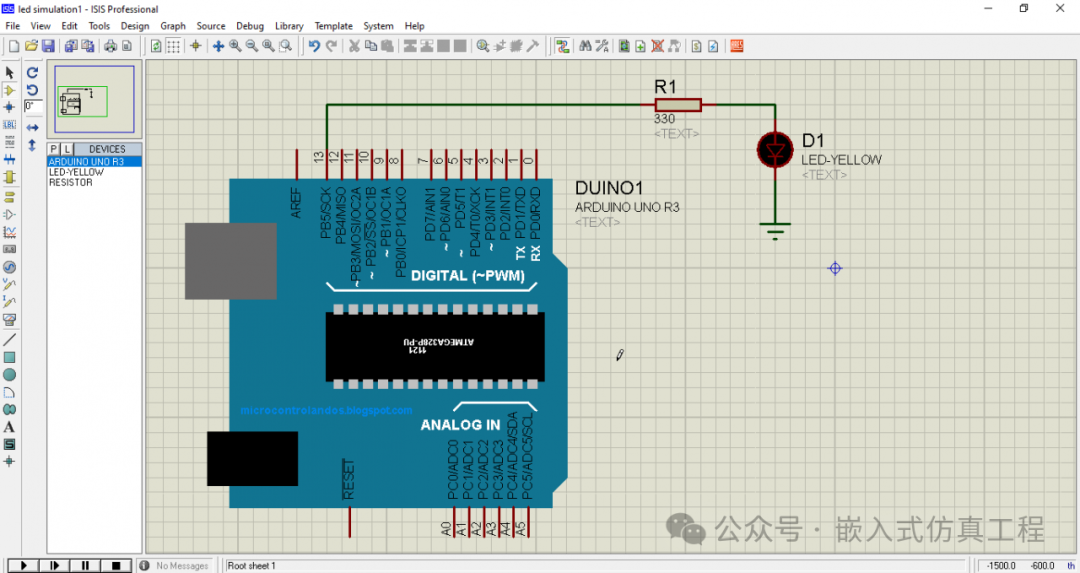 Arduino Uno development board has been added to Proteus, I will connect the resistor to Arduino Uno‘s digital pin 13. Now I will use this pin to control the LED. After the connection is complete, we can write the program and generate the hex file.
Arduino Program to Control LED:
// https://www.electroniclinic.com/
intLED=13;
voidsetup(){
// put your setup code here, to run once:
pinMode(LED,OUTPUT);
digitalWrite(LED,OUTPUT);
}
voidloop(){
// put your main code here, to run repeatedly:
digitalWrite(LED,HIGH);
delay(1000);
digitalWrite(LED,LOW);
delay(1000);
}
How to Generate Hex Code Using Arduino IDE
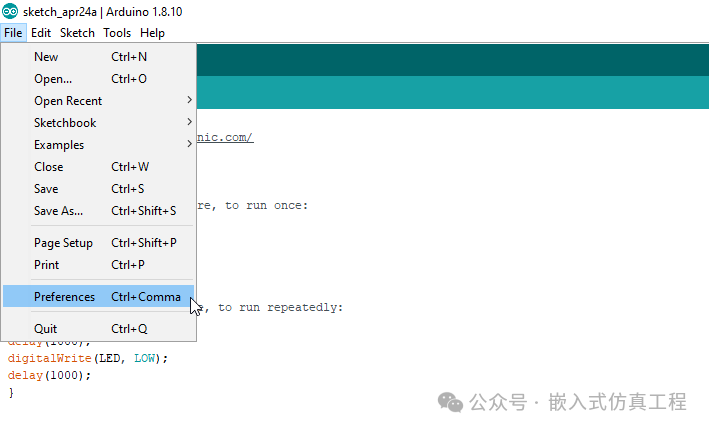 To generate hex code, click on File, then click on “Preferences”. This will open a new window.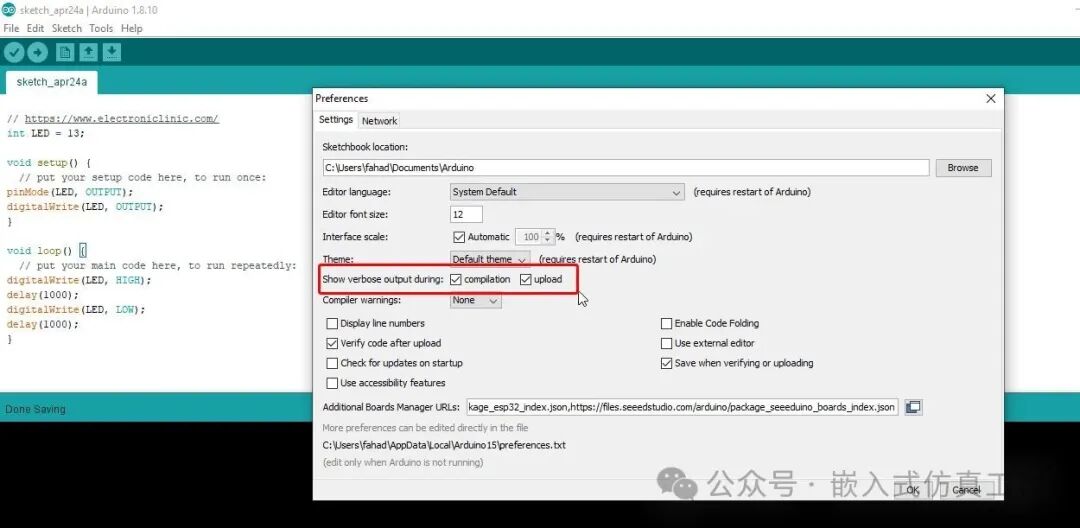
Select the Compile and Upload boxes, then click the “OK” button to close the “Preferences” window, and everything is ready.
Next, you can click the Verify/Compile button and wait for a while, then look for the hex code link, select it, and press Ctrl+C on your keyboard to copy the link.
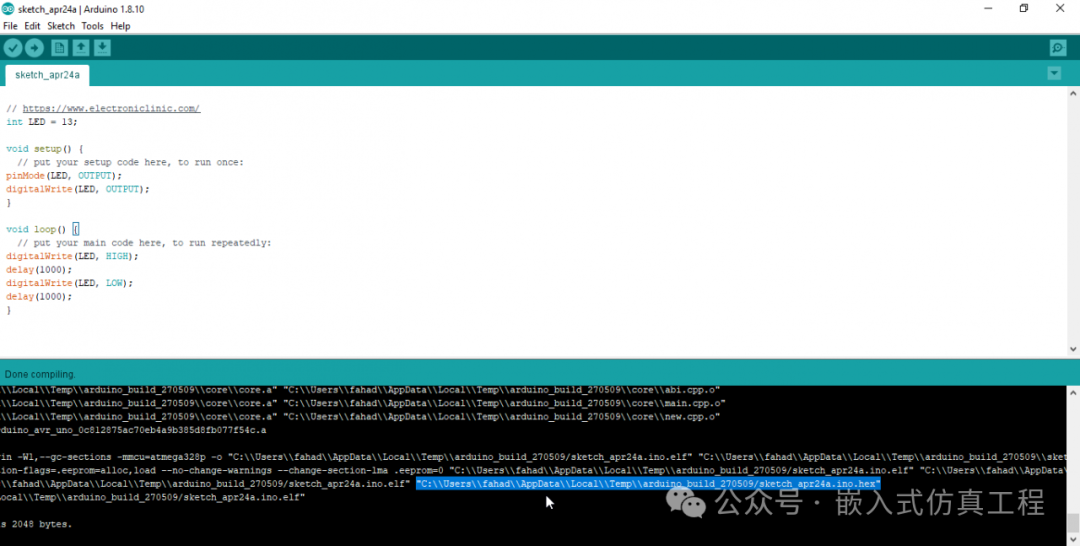 After clicking the compile or verify button, you will see multiple lines of code below, and you can scroll down to search for this link. Select it and follow the previous steps to copy. Finally, you will see it contains a .hex file.
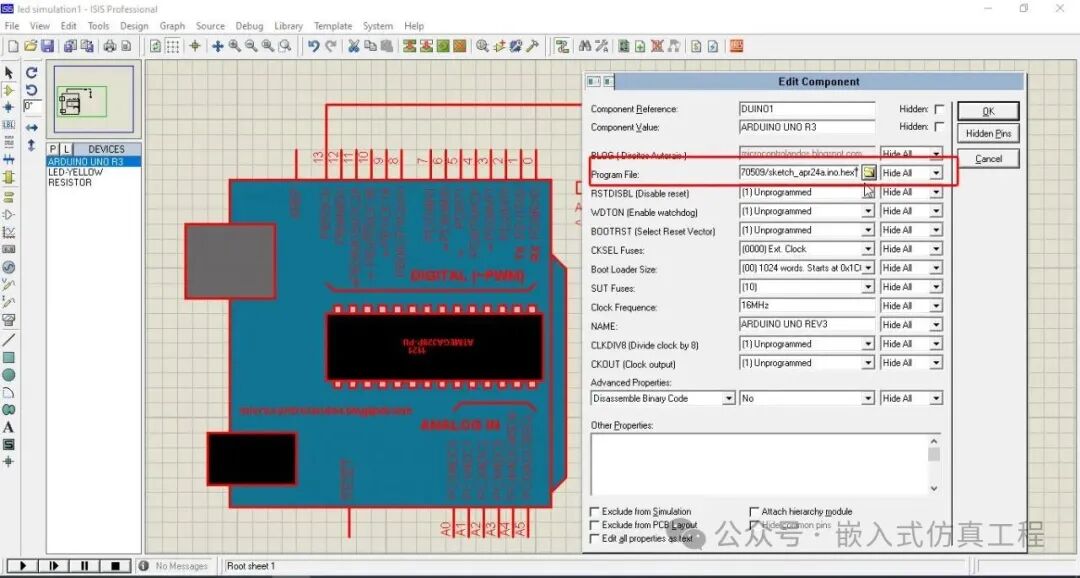 Paste the link in the box next to the program file, then press the “OK” button. Now you just need to click the “Run button” to run the Proteus simulation
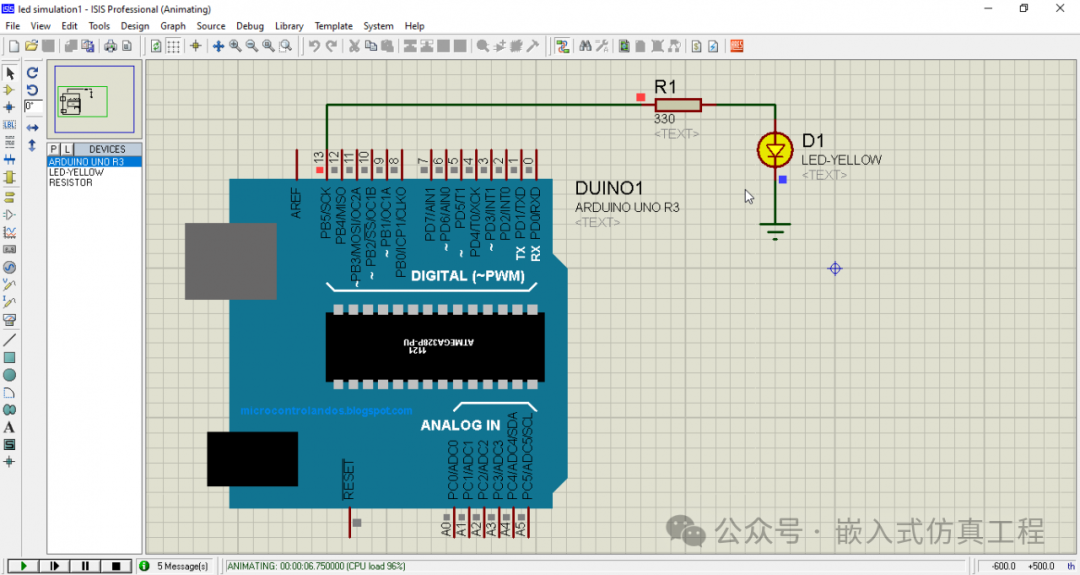 The LED is blinking. Proteus is a fantastic simulation software that allows you to test code and circuit connections before making hardware. So, if you are a beginner wanting to learn Arduino programming, then there is no need to wait for hardware; just download Proteus software to start learning.Welcome to follow, click the blue text at the top “Embedded Simulation Engineering” or long press to identify the QR code to follow