
“ Research · Persistence · Ultimate · Innovation ”
Arduino is a convenient, flexible, and easy-to-use open-source electronic prototyping platform. It includes hardware (various models of Arduino boards) and software (Arduino IDE).
②VS Code (Visual Studio Code)
is an open-source, lightweight, modern code editor developed by Microsoft, and according to Stackoverflow statistics, VS Code is currently the most popular development environment.
VS Code can achieve almost any functionality and configuration you want through extensions, such as code highlighting, code snippets, auto-completion, etc., and it can also support almost any programming language, including Arduino C.
③VS Code X Arduino (Configuring Arduino Development Environment in VS Code)
Due to the limited functionality of Arduino’s own IDE for coding, configuring the Arduino development environment in VS Code not only provides code completion, code format checking and other intelligent code editing features, but also offers automatic annotations for functions and variables, including definitions and explanations of functions in the standard library (triggered by mouse hover), providing an excellent coding service experience that reduces development time and learning difficulty.
— This article will guide you in configuring the Arduino development environment on VS Code and introduce the excellent editor features of VS Code.
④Configuration Environment Installation Steps
Step 1. Install Arduino IDE
Step 3. Install relevant plugins for VS Code
Step 4. Configure the plugins
2. Write programs and upload via USB
Step 1. Connect the Arduino board to the computer
Step 2. Write the program
Step 3. Configure the board information and upload
Step 1. Open the Serial Monitor
1. Configuration Process
Step 1. Install Arduino IDE
· Windows recommends installing a lower version of the IDE due to issues with output console garbled text in higher versions
Download link:
https://pan.baidu.com/s/1fgsOSHFfmQ4rsIJ4IyTQzg
· macOS just install the latest version
https://pan.baidu.com/s/1SKVDSotdI6bR2BtbeQC9Bg
Password:909x
Download link:https://code.visualstudio.com/
Step 3. Install relevant plugins for VS Code
3.1 First install the C/C++ plugin
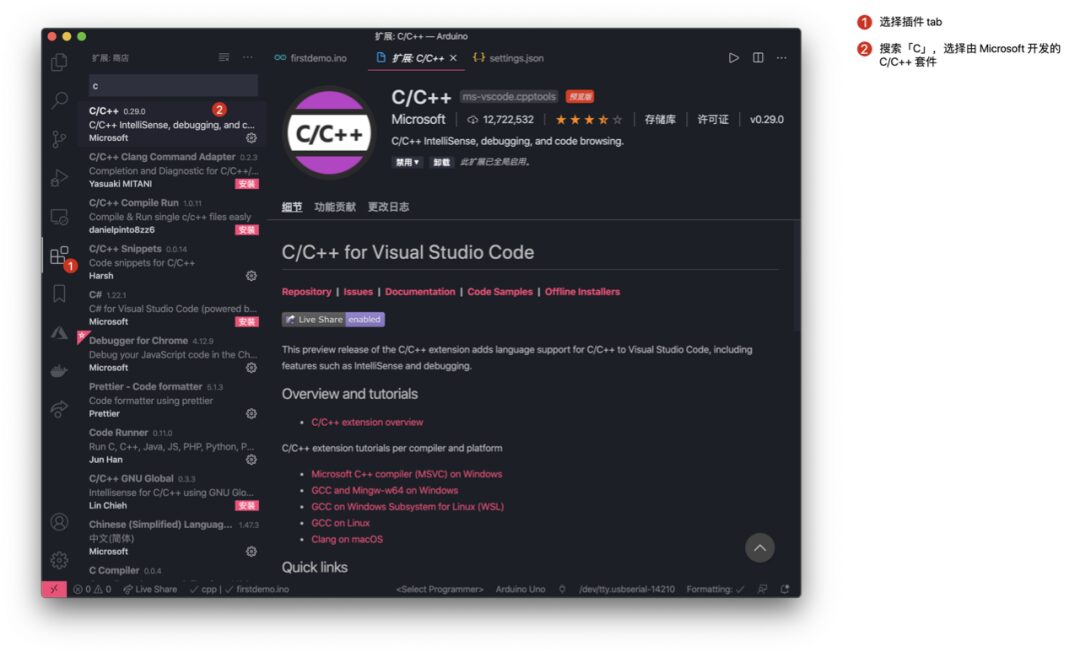
3.2 Then install the Arduino plugin
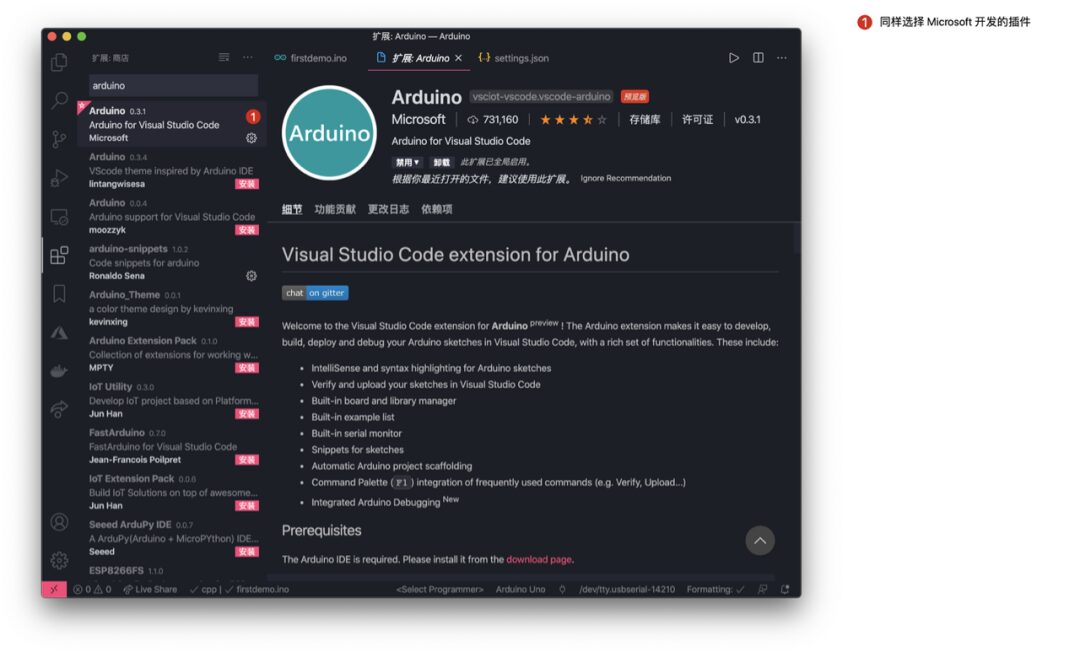
3.3 Finally, install the arduino-snippets plugin
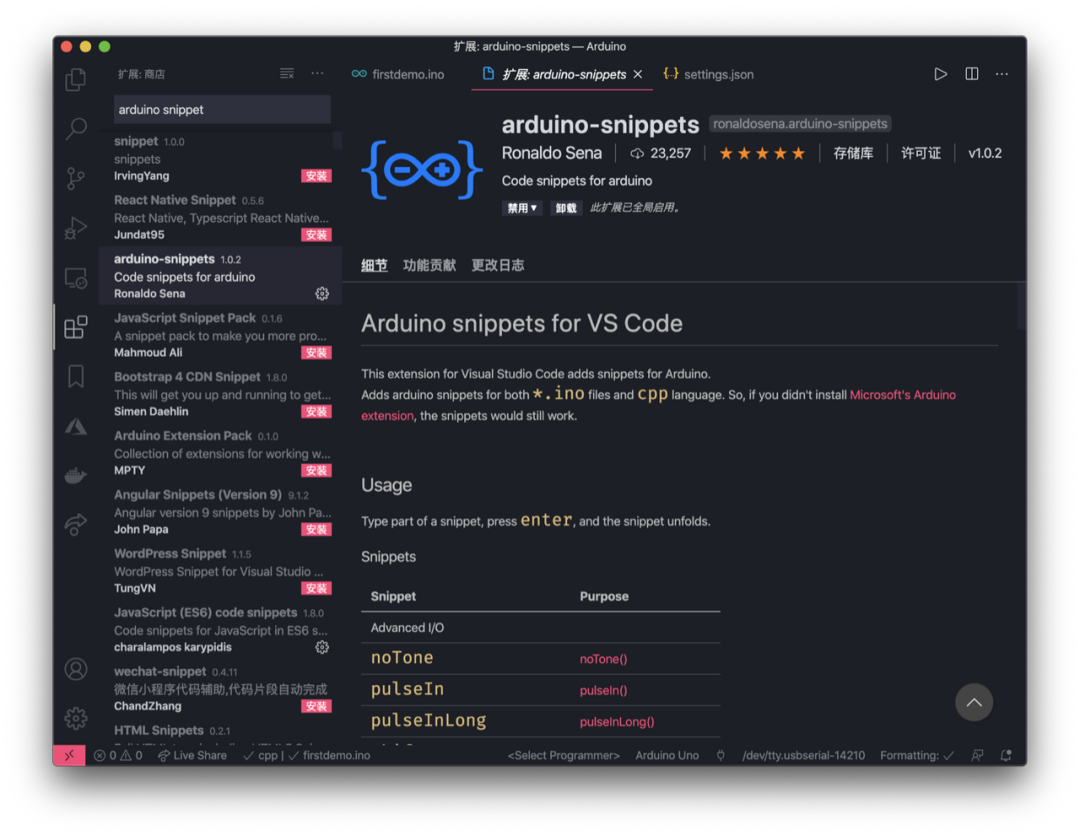
【💡Note】 VS Code also has many practical themes and plugins to choose from
Such as the “Chinese” localization plugin, “Prettier” code formatting plugin, etc. You can search for related keywords in the plugins to find these plugins.
VS Code beginner’s guide and plugin recommendations:https://zhuanlan.zhihu.com/p/99462672
Step 4. Configure the plugins
4.1 After installation, click the small gear icon next to the Arduino plugin and select “Extension Settings”
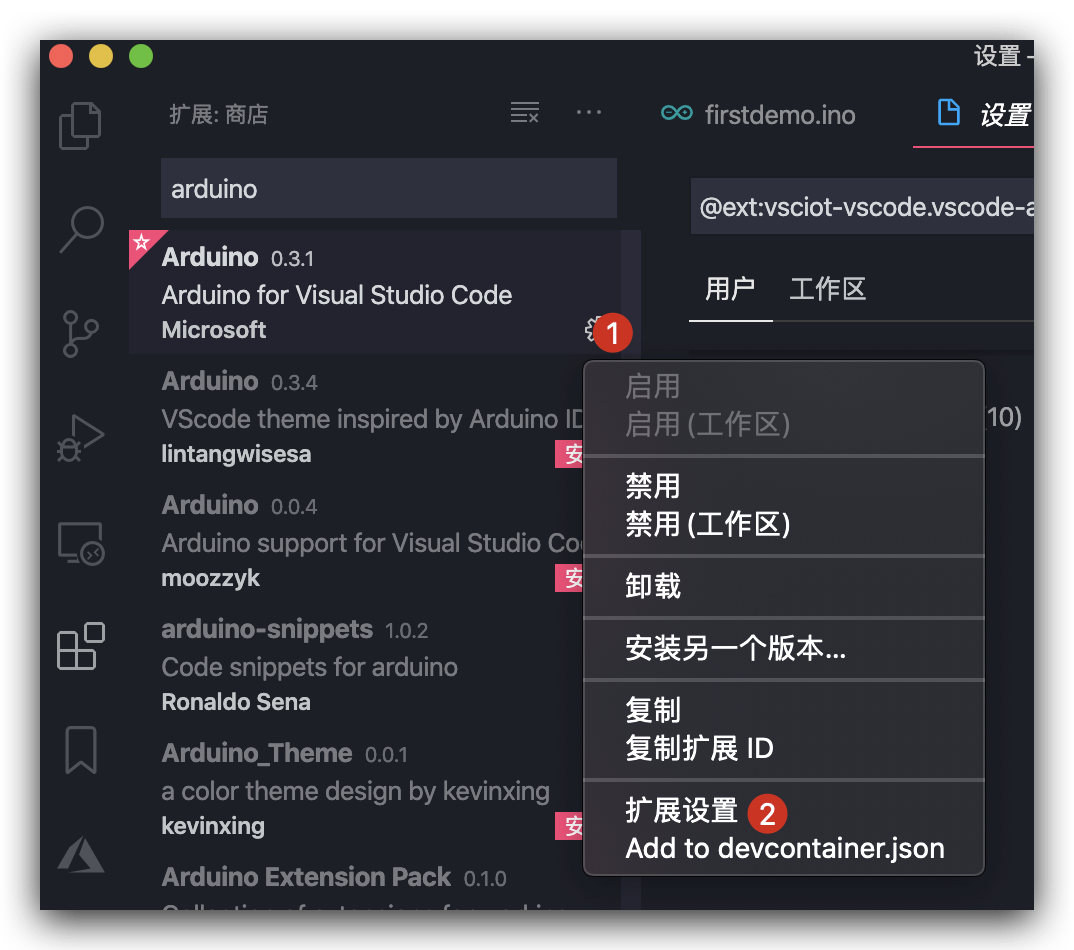
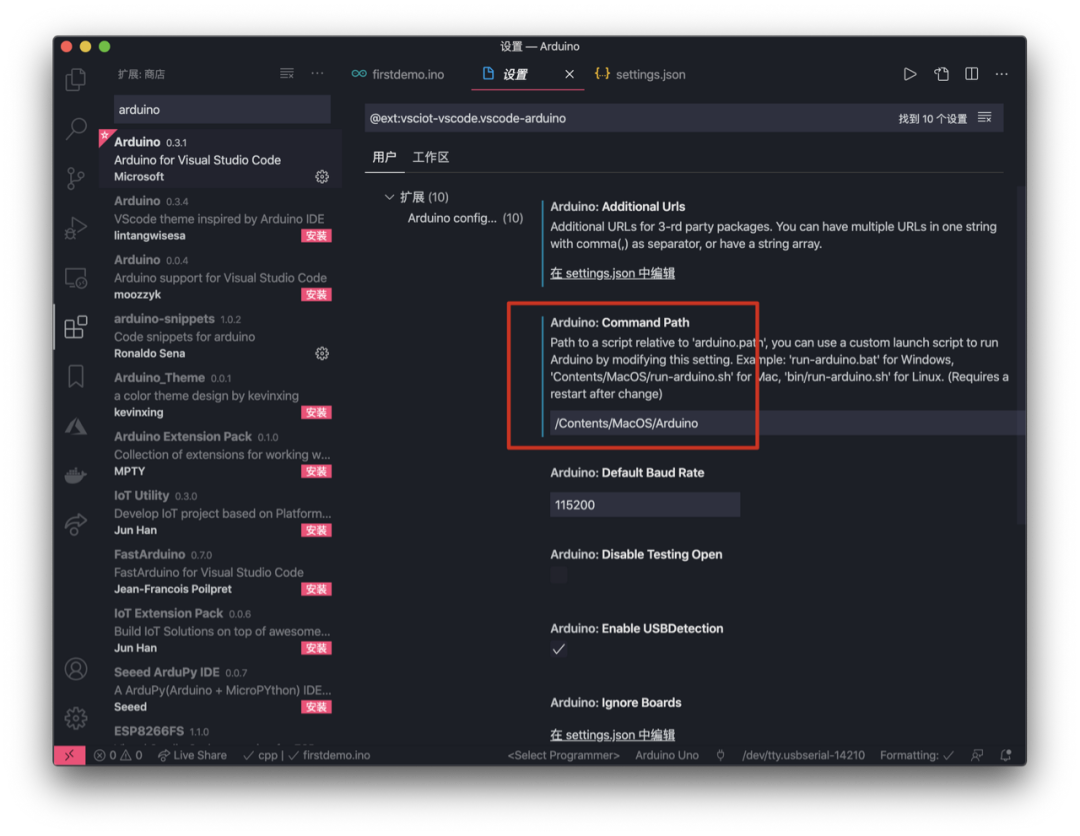
4.2【Field Setting 1: Command Path】Set the Command Path field as follows:
macOS platform——/Contents/MacOS/Arduino
Windows platform——arduino_debug.exe
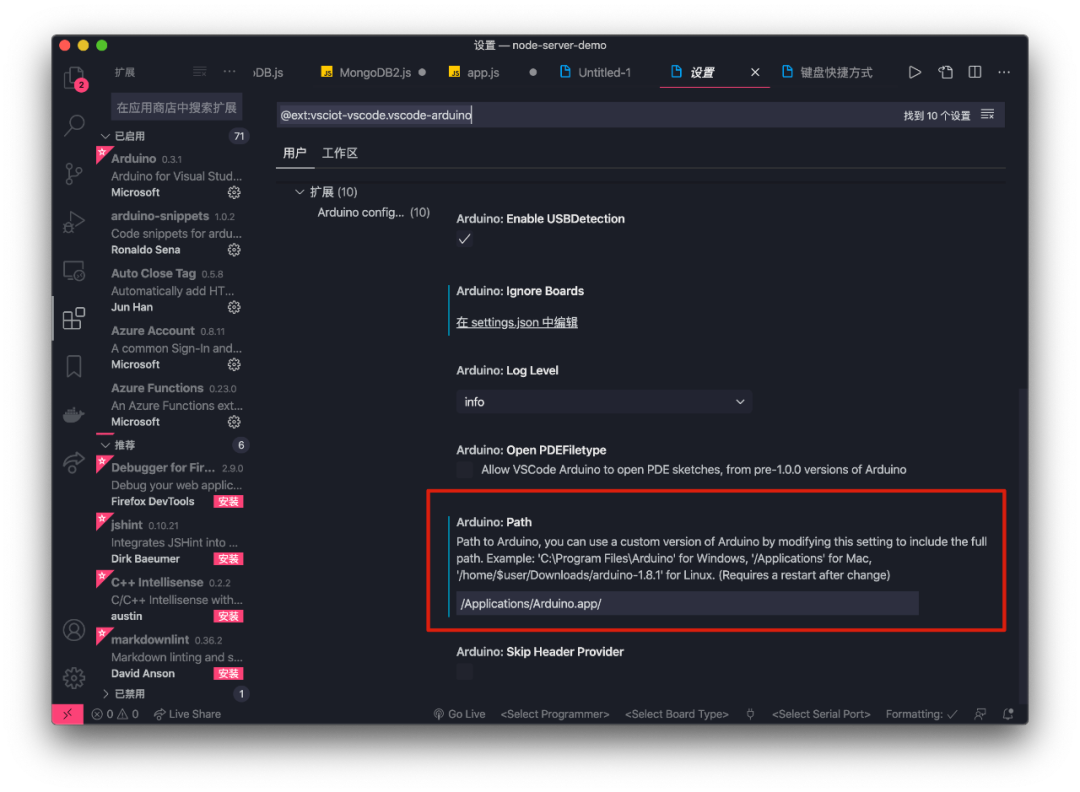
4.3【Field Setting 2: Path】Set the Path field as follows:
macOS——/Applications/Arduino.app/
Windows ——D:\Arduino\arduino-1.8.8\
Note: Each person’s installation path may differ, please enter your own installation path
4.4 Set Auto-completion on Startup
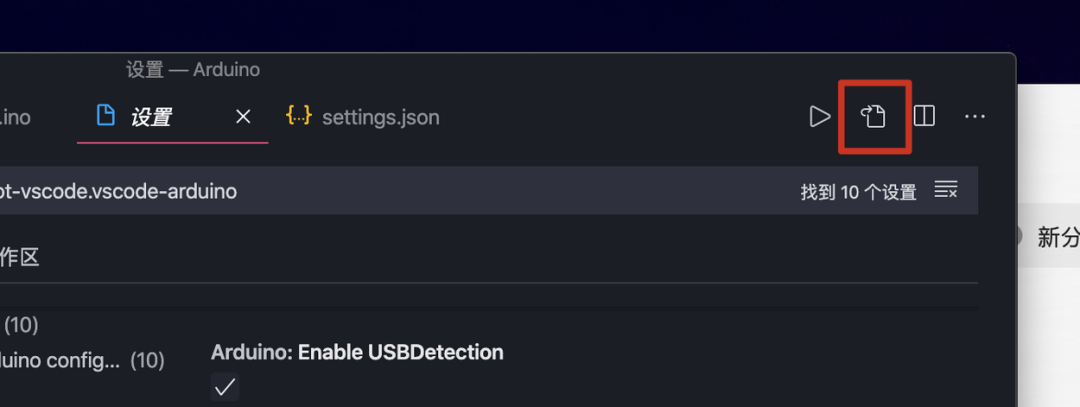
Finally, after clicking the file icon in the upper right corner of the image, you will enter an editing page, where you can insert the following code in the indicated position:“C_Cpp.intelliSenseEngine”: “Tag Parser”
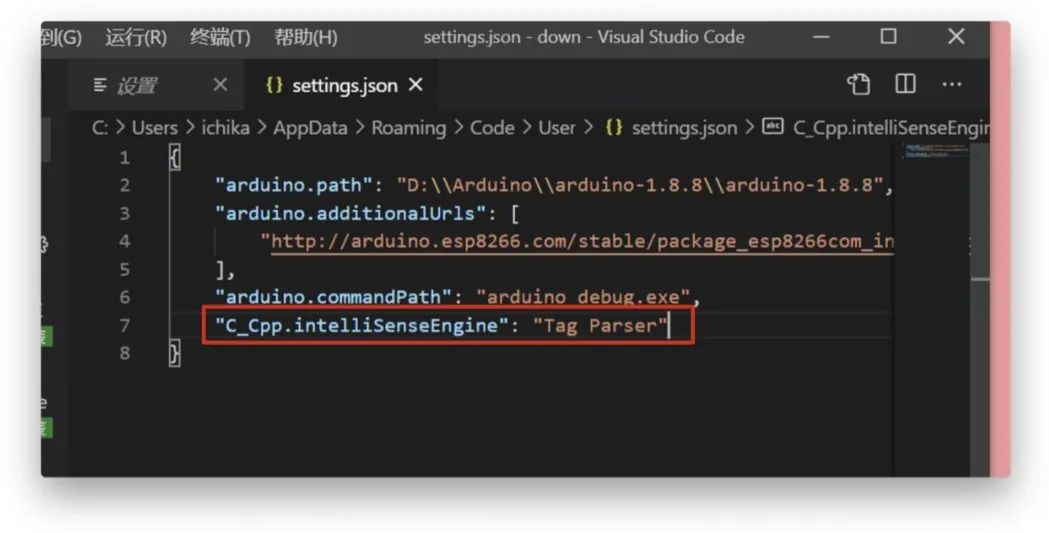
Finally, restart VS Code to complete the configuration.
2. Write programs and upload via USB
Step 1. Connect the Arduino board to the computer
Step 2. Write the program
Method 1: Create a text file with the .ino extension anywhere, open it with VS Code, and write the code.
Method 2 (commonly used): Create a project folder, drag it into VS Code to open, then create a text file with the .ino extension.
⚠️Note: The project folder and file names should be the same and cannot contain Chinese characters, otherwise, it cannot be compiled.
At this point, you will find that your code editor already has auto-formatting, syntax highlighting, and auto-completion, which is much better than the native IDE experience.
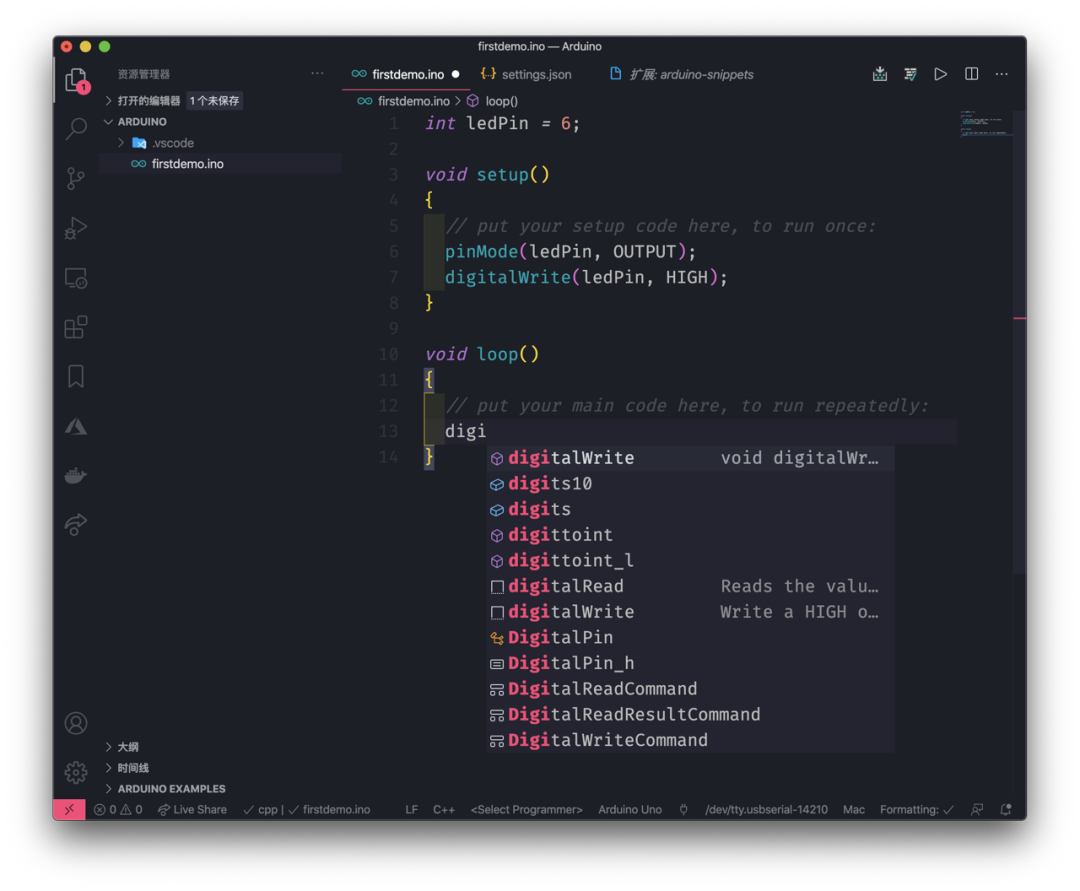
Step 3. Configure board information and upload
3.1 First configure the information of the board you are connecting:
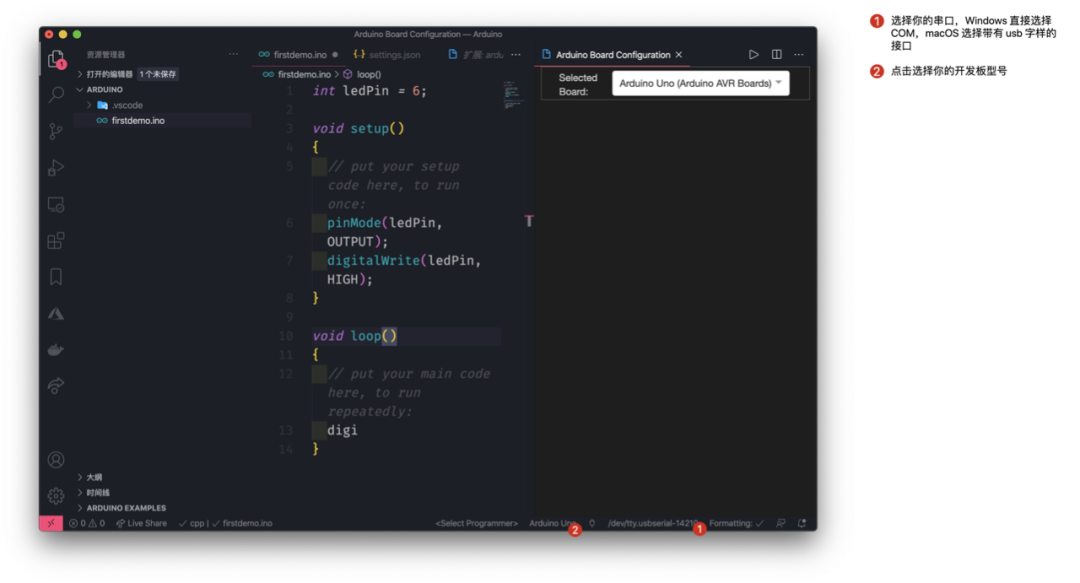
3.2 Then you can proceed with the upload operation:
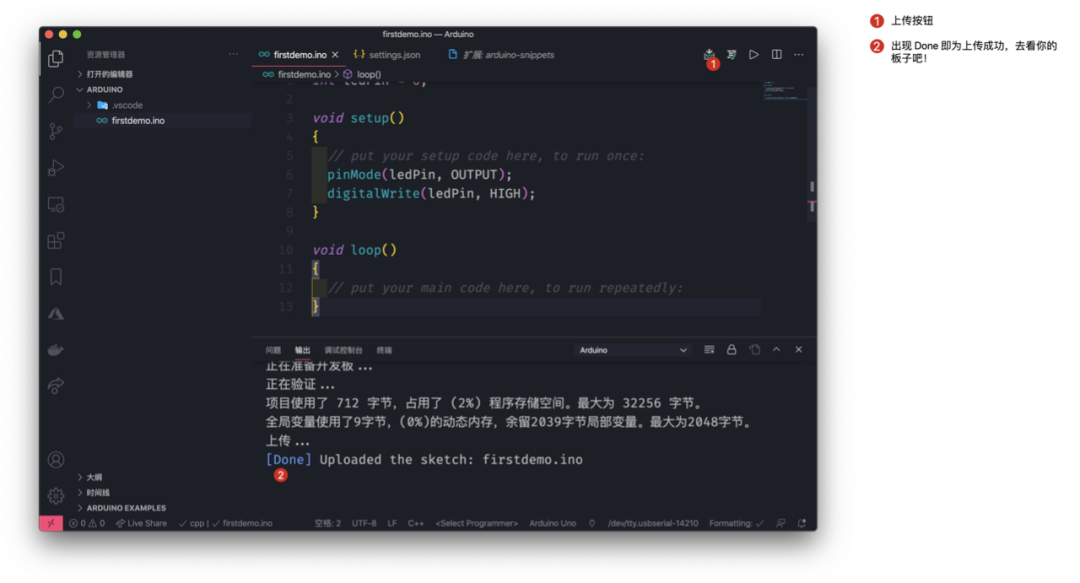
When you see the word Done, it means the upload was successful, and the Arduino board has started executing the code.
3. Other Operations
Step 1. Open the Serial Monitor
1. Click the socket-like icon in the lower right corner and set the baud rate to the same rate as in the code.
2. In the output window options, select “serial monitor”, and you can see the content of the monitor.
In the VS Code interface, press the shortcut Ctrl + Shift + P (Windows) or Command ⌘+ Shift ⇧+ P (macOS) to start the command input window, type「Arduino」 to view more advanced features.
【Zhuomu Design Center · Embrace Change ︳ Strategies for Coping with Zhejiang University Graduate Examination Reform】
▼

【 2020 National Day Intensive Research Course 】
▼

【 2020 Graduate Examination Quick Topic Class 】
▼

Discover – Nurture – Create From the Heart – Persistence – Ultimate
A place to convey design dreams


