01
02
// the setup function runs once when you press reset or power the board
void setup() {
  // initialize digital pin LED_BUILTIN as an output.
  pinMode(LED_BUILTIN, OUTPUT);
}

// the loop function runs over and over again forever
void loop() {
  digitalWrite(LED_BUILTIN, HIGH);   // turn the LED on (HIGH is the voltage level)
  delay(1000);                       // wait for a second
  digitalWrite(LED_BUILTIN, LOW);    // turn the LED off by making the voltage LOW
  delay(1000);                       // wait for a second
}

03
|
|
|
|
|
|
|
|
|
|
|
|
|
|
|
|
|
|
|
|
|
|
|
|
|
|
|
|
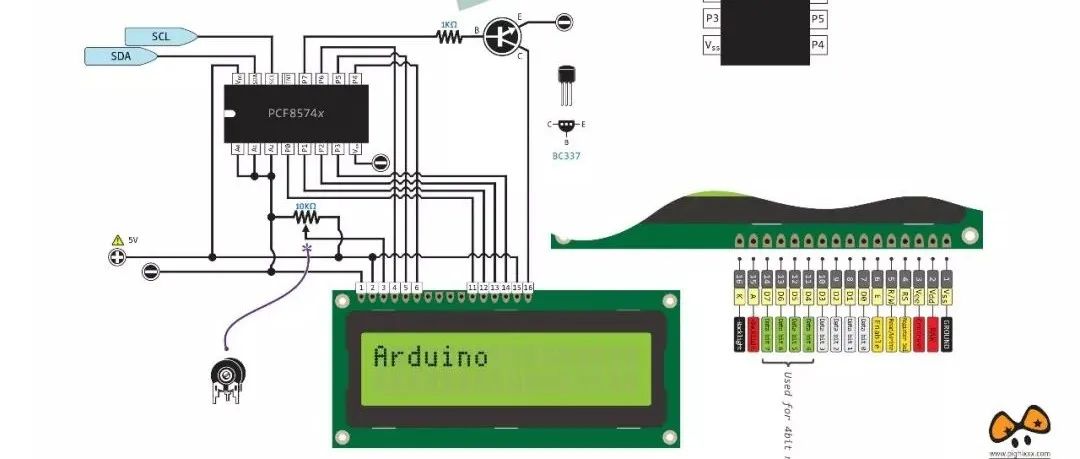
Before operating the IO ports in the AVR microcontroller, the corresponding initialization settings need to be made, as follows:
-
1 Set the corresponding port as input or output through the direction register DDRx.
-
2 If set to output, send the required output data to the data register PORTx. If set to input, read the external input value from the input register PINx, while the PORTx can be set to determine whether the corresponding pin needs a pull-up resistor.
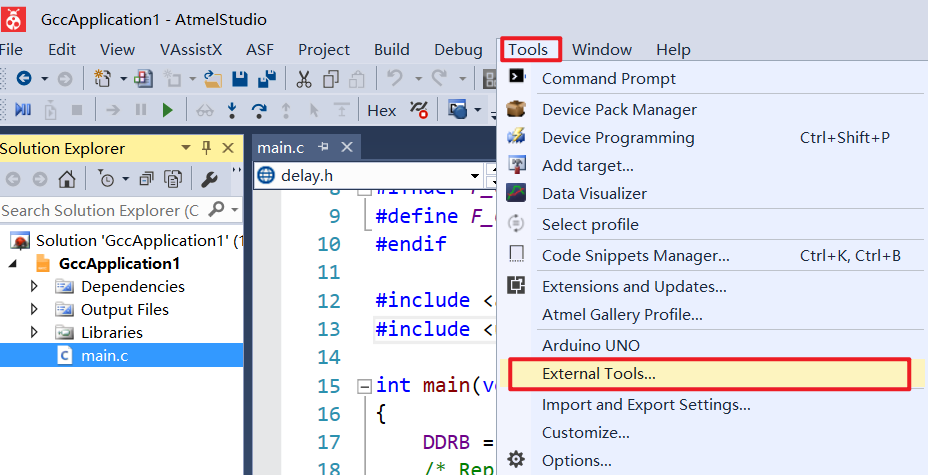
04
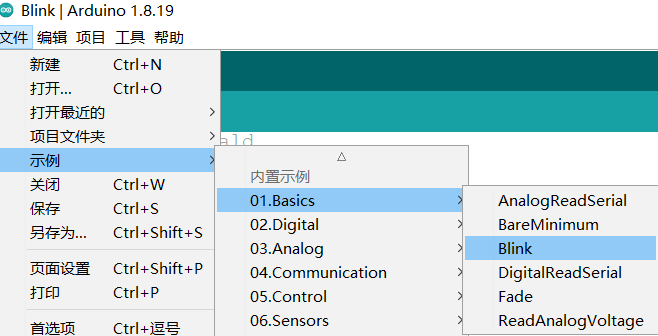
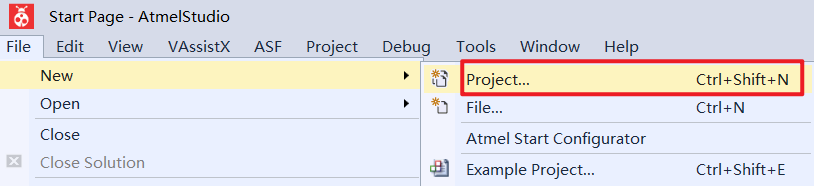
Using Atmel Studio to Turn on the Light


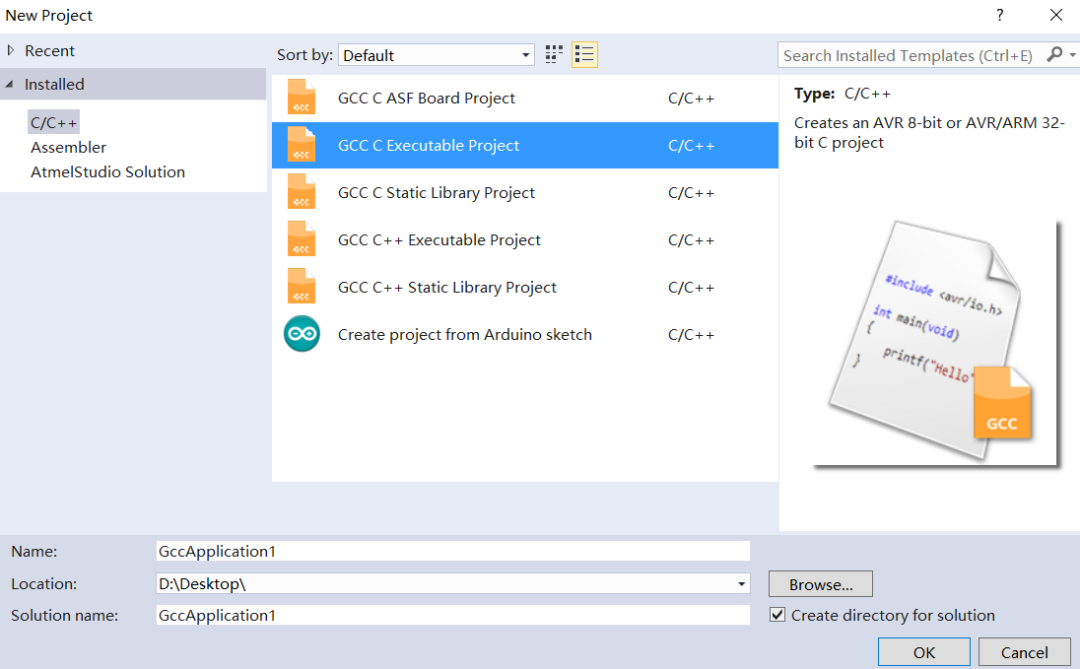
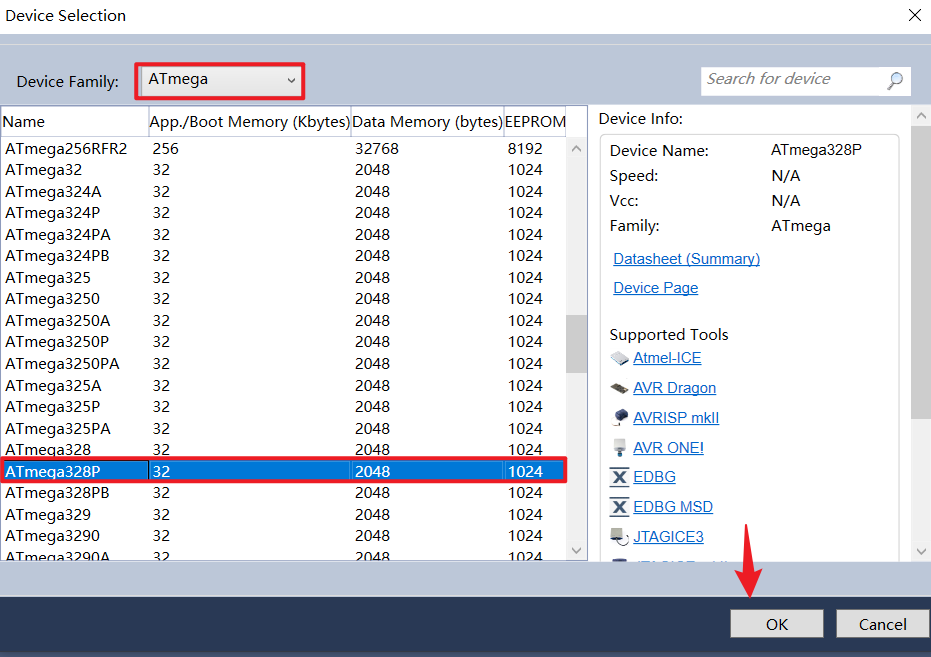
4.1 Creating a New Project
/*
 * GccApplication1.c
 *
 * Created: 2023/5/18/Wednesday 14:48:19
 * Author : LiuYao
 * Board  : Arduino Nano
 */
#ifndef F_CPU
#define F_CPU 10000000UL
#endif

#include <avr/io.h>
#include <util/delay.h>

int main(void)
{
 DDRB =(1<<DDB5);
 /* Replace with your application code */
 while (1)
 {
  PORTB |=(1<<PORTB5);
  _delay_ms(1000);
  PORTB &= !(1<<PORTB5);
  _delay_ms(1000);
 }
 return 0;
}
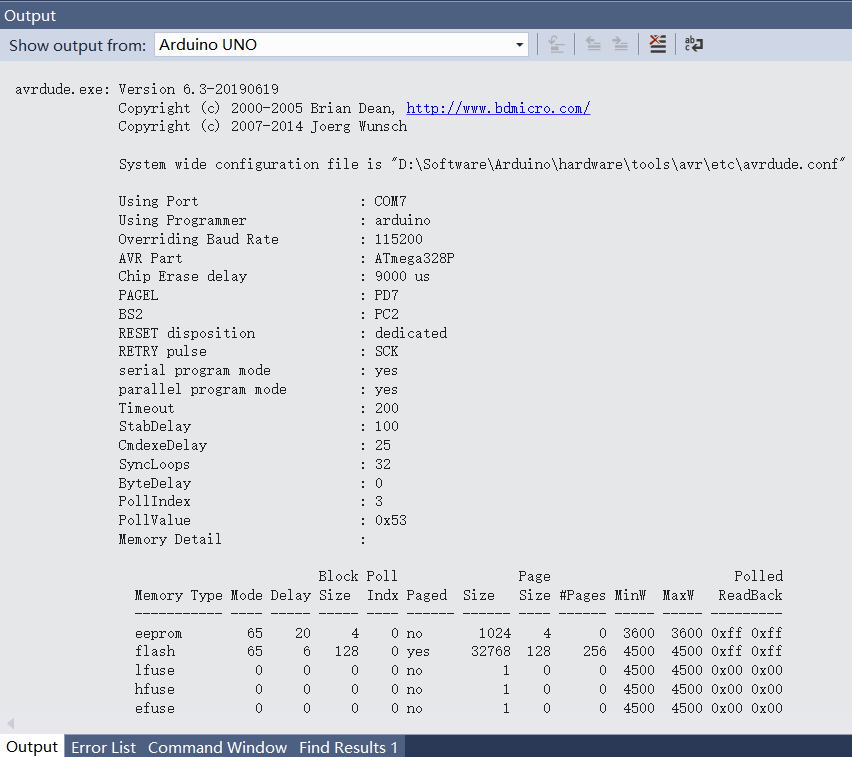
4.2 Tool Configuration
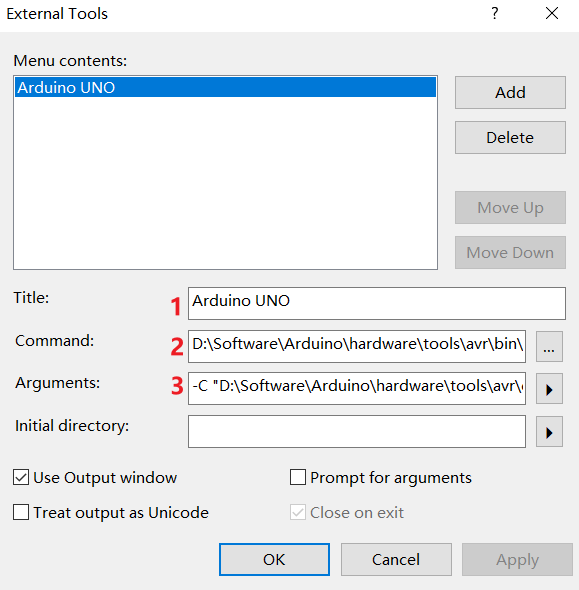
<span>Use Output window</span> option.-
Title: Arduino UNO (can be filled in arbitrarily) -
Command: D:\Software\Arduino\hardware\tools\avr\bin\avrdude.exe, this path is the path to avrdude.exe in Arduino IDE, fill in according to your own path. -
Arguments: Here, pay attention to the COM port number; mine is COM7, fill in the correct COM number according to your board recognition.
-C "D:\Software\Arduino\hardware\tools\avr\etc\avrdude.conf" -v -p atmega328p -c arduino -P COM7 -b 115200 -D -U flash:w:"$(ProjectDir)Debug\$(TargetName).hex":i
Usage: avrdude.exe [options]
Options:
  -p <partno>                Required. Specify AVR device.
  -b <baudrate>              Override RS-232 baud rate.
  -B <bitclock>              Specify JTAG/STK500v2 bit clock period (us).
  -C <config-file>           Specify location of configuration file.
  -c <programmer>            Specify programmer type.
  -D                         Disable auto erase for flash memory
  -i <delay>                 ISP Clock Delay [in microseconds]
  -P <port>                  Specify connection port.
  -F                         Override invalid signature check.
  -e                         Perform a chip erase.
  -O                         Perform RC oscillator calibration (see AVR053).
  -U <memtype>:r|w|v:<filename>[:format]
                             Memory operation specification.
                             Multiple -U options are allowed, each request
                             is performed in the order specified.
  -n                         Do not write anything to the device.
  -V                         Do not verify.
  -u                         Disable safemode, default when running from a script.
  -s                         Silent safemode operation, will not ask you if
                             fuses should be changed back.
  -t                         Enter terminal mode.
  -E <exitspec>[,<exitspec>] List programmer exit specifications.
  -x <extended_param>        Pass <extended_param> to programmer.
  -y                         Count # erase cycles in EEPROM.
  -Y <number>                Initialize erase cycle # in EEPROM.
  -v                         Verbose output. -v -v for more.
  -q                         Quell progress output. -q -q for less.
  -l logfile                 Use logfile rather than stderr for diagnostics.
  -?                         Display this usage.
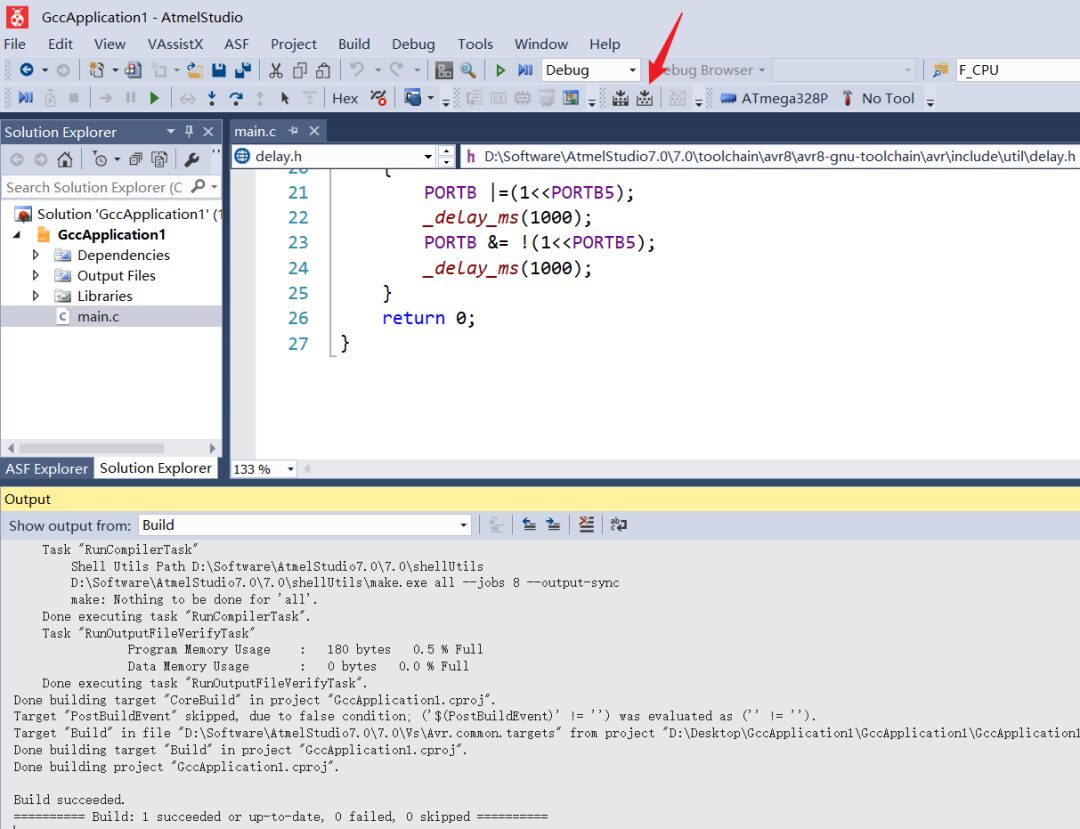
4.3 Compiling and Burning Programs
<span>Arduino UNO</span>.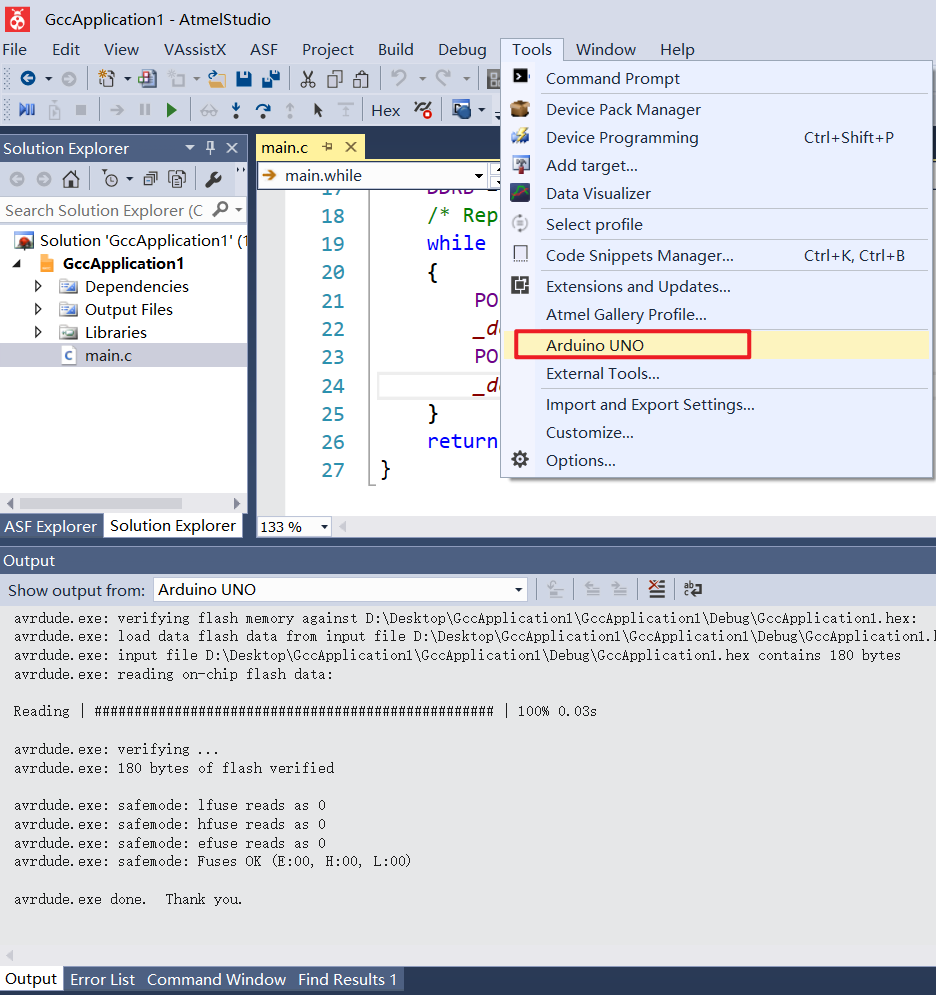
Experimental Phenomenon
-END-

Beginner Selection: Arduino or Raspberry Pi?

Comparison of STM32 and Arduino, who is more powerful?
Various Arduino peripherals usage, vividly illustrated, quite appealing!