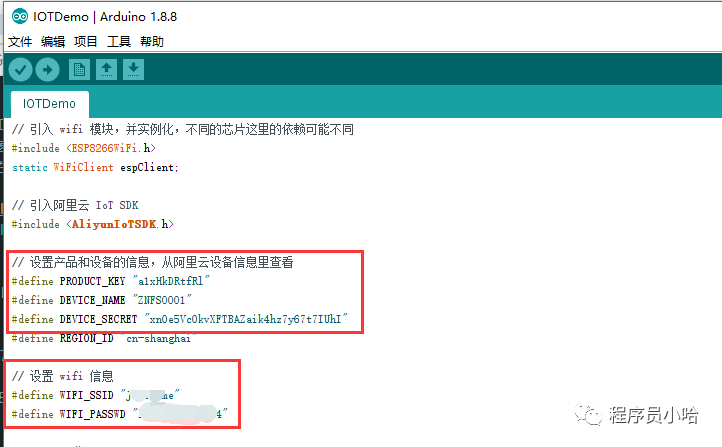
“product_key”: “a1xHkDRtfRl”,”device_name”: “ZNFS0001″,”device_secret”: “xnOe5VcOkvXFTBAZaik4hz7y67t7IUhI”
Quickly connect to the Alibaba Cloud IoT platform using Arduino.
The AliyunIoTSDK Arduino library mentioned in the article can be found in the Arduino Library Store (search for AliyunIoTSDK).
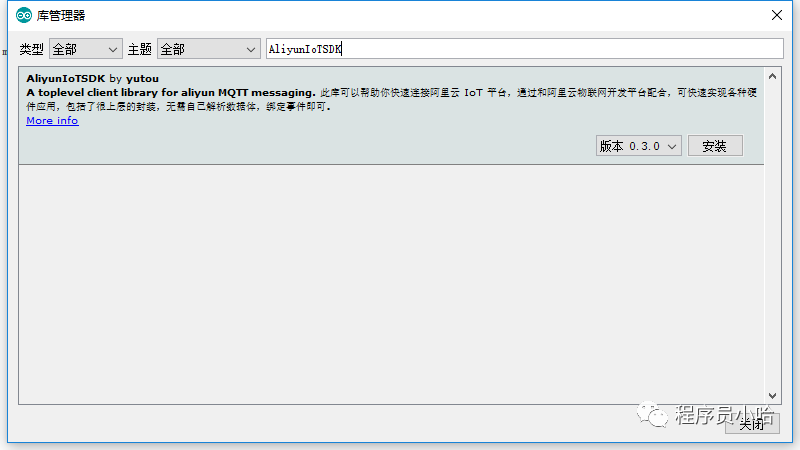
AliyunIoTSDK can help you quickly connect to the Alibaba Cloud IoT platform. By cooperating with the Alibaba Cloud IoT development platform, various hardware applications can be quickly realized, including high-level encapsulation, without the need to parse the data body, just bind events. It has been fully tested on the ESP8266 platform (NodeMCU 1.0).
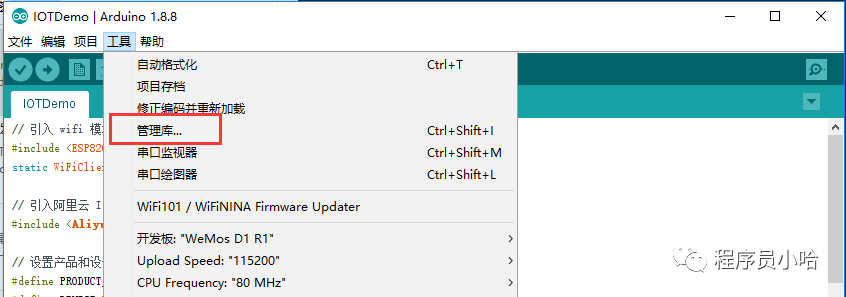
In addition to searching for the AliyunIoTSDK library directly in the Arduino Library Store, you can also manually clone the project from GitHub and place it in the Arduino library folder.
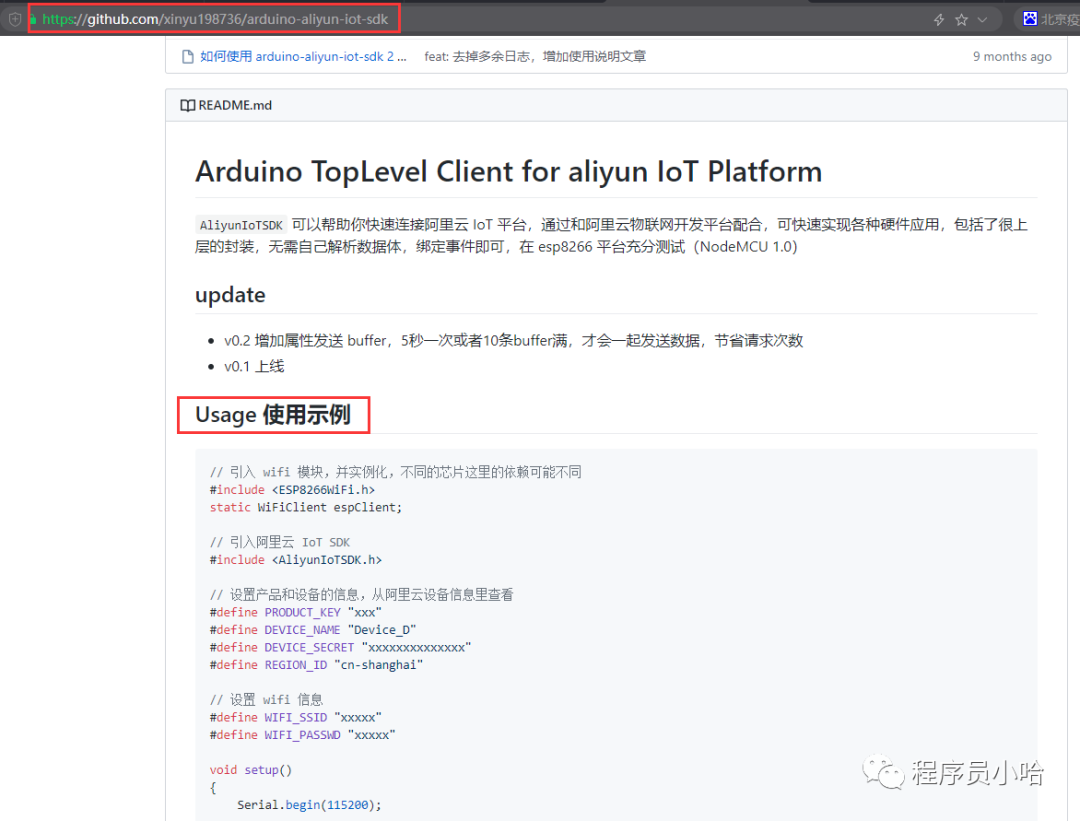
GitHub address: https://github.com/xinyu198736/arduino-aliyun-iot-sdk
Copy the test code from the above URL: Usage Example
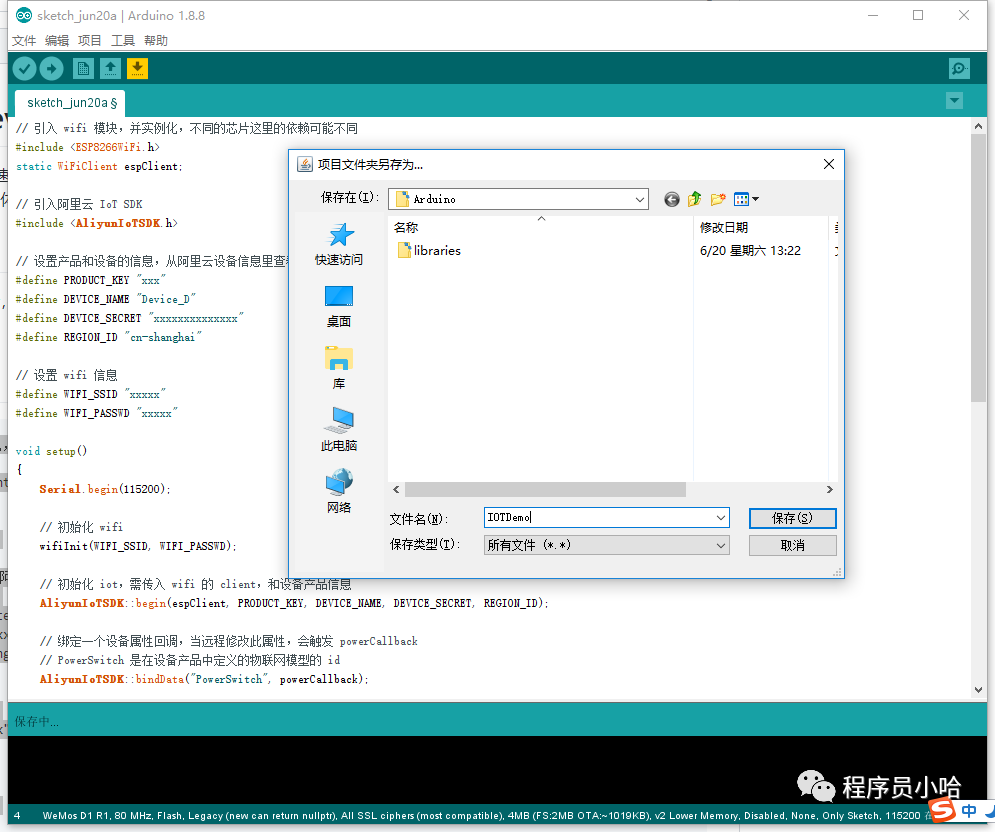
Arbitrarily name the file and save the code file:
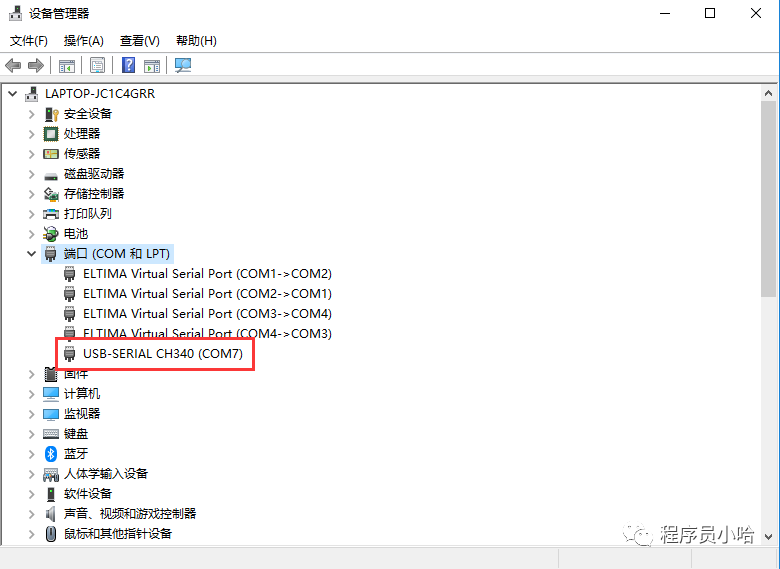
Check the current serial port number occupied by the ESP8266 WiFi in the device manager:
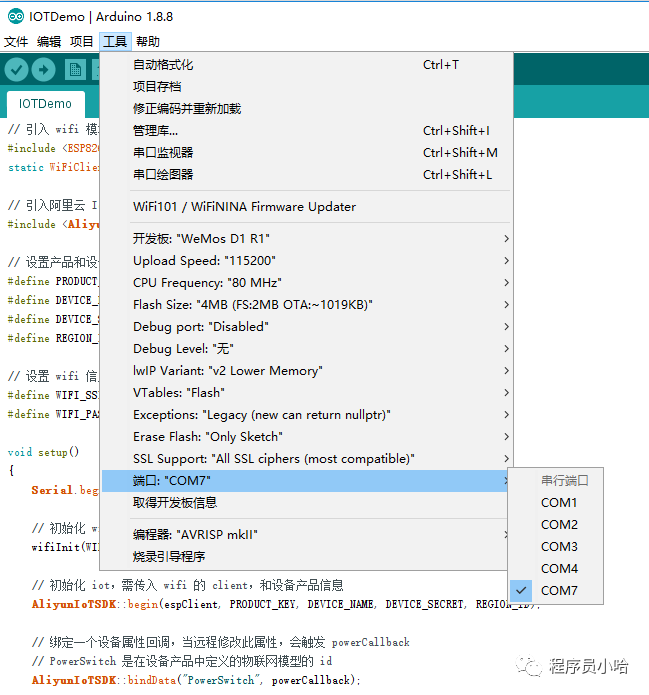
Select the corresponding serial port in Arduino:
Fill in the triplet and WiFi information:
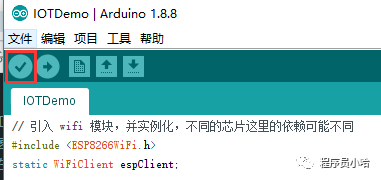
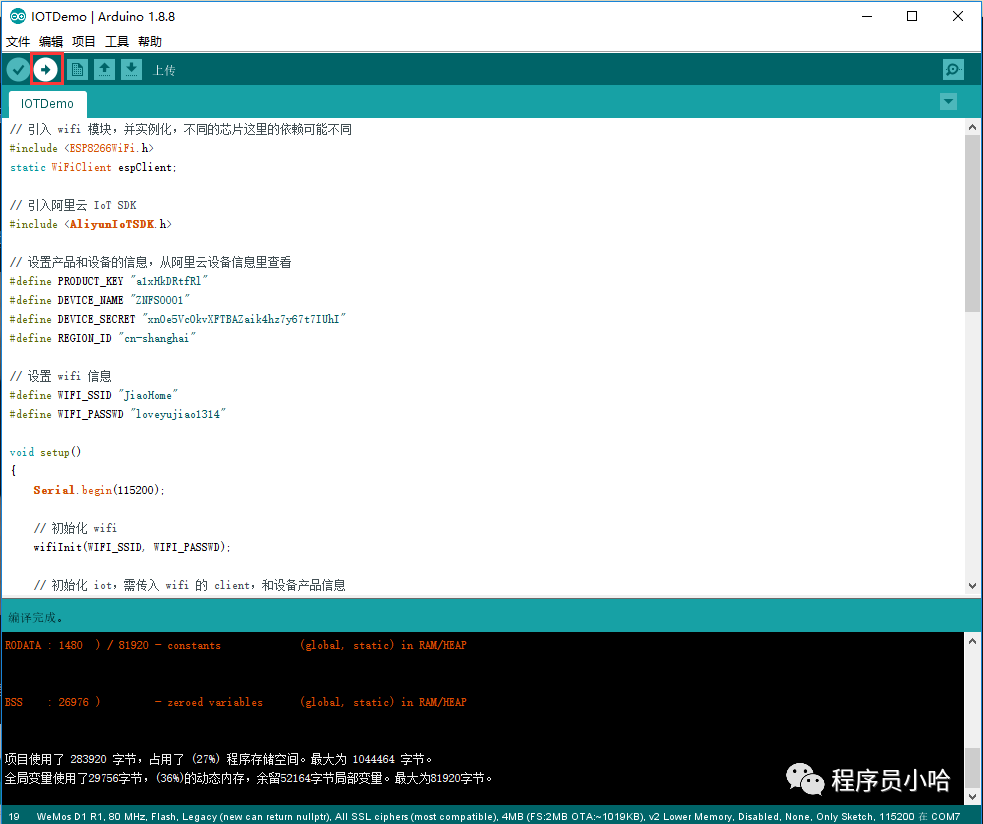
Click the checkmark to compile the project:
Compilation error:

Add: ArduinoJson Library

Still getting errors after recompilation:

Error message as shown:
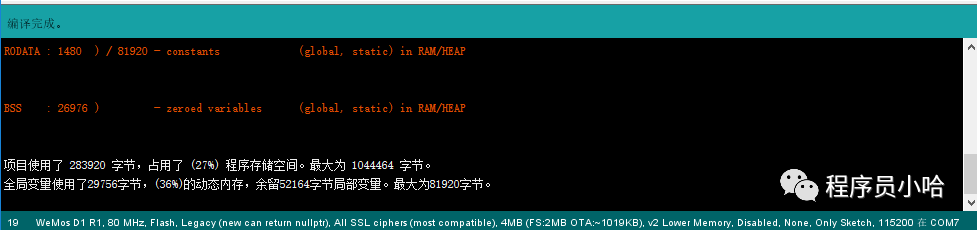
Arduino:1.8.8 (Windows 10), Board:"WeMos D1 R1, 80 MHz, Flash, Legacy (new can return nullptr), All SSL ciphers (most compatible), 4MB (FS:2MB OTA:~1019KB), v2 Lower Memory, Disabled, None, Only Sketch, 115200"

Build options have changed, rebuilding all
C:\Users\juban\Documents\Arduino\libraries\AliyunIoTSDK\src\AliyunIoTSDK.cpp:3:26: fatal error: PubSubClient.h: No such file or directory

 #include <PubSubClient.h>

                          ^

compilation terminated.

exit status 1
Error compiling for board WeMos D1 R1.

Enable "Show verbose output during compilation" option in File -> Preferences
This report would contain more information.
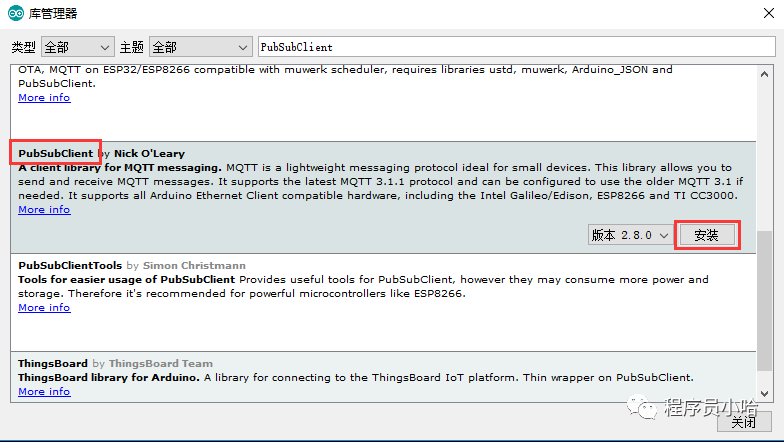
Because the AliyunIoTSDK library relies on the PubSubClient library for the underlying connection, continue to install: PubSubClient Library.
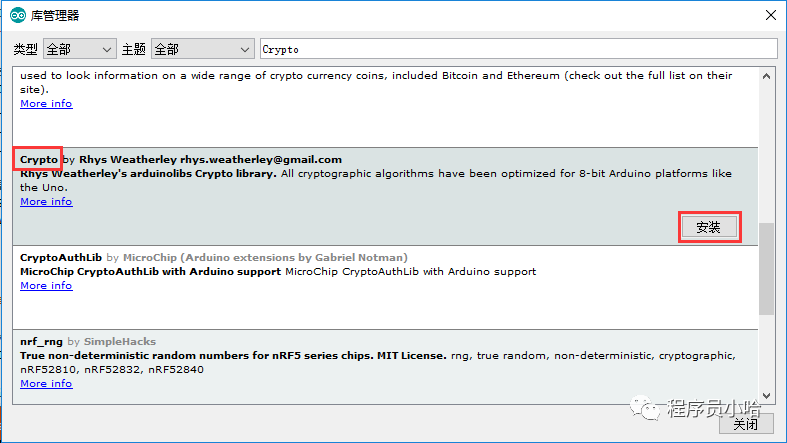
Missing: SHA256 library, continue to install: SHA256 library

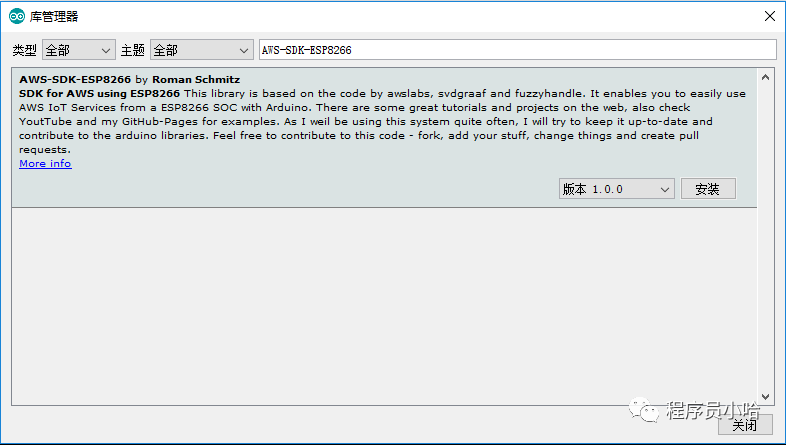
“AWS-SDK-ESP8266” Library.
Recompilation succeeded.
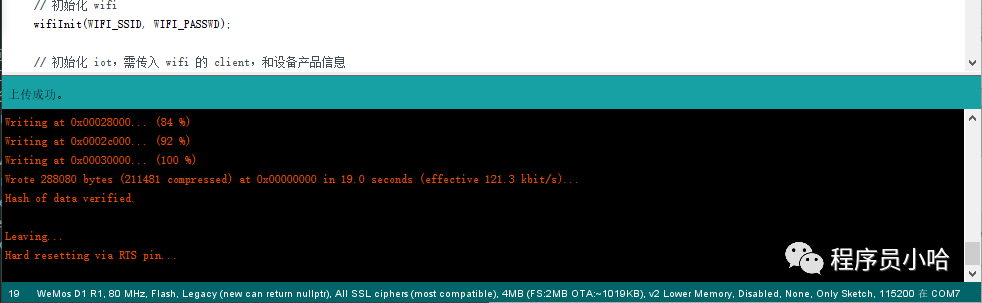
Compile and download the program, upload the firmware to the mini D1 WiFi module.
After a successful upload, it shows as follows:
The four library files required for Alibaba Cloud on Arduino are: PubSubClient, ArduinoJson, AliyunIoTSDK, Crypto (SHA256).
PubSubClient.h is the header file for the publish/subscribe functionality;
SHA256.h is the header file for encryption functionality (already included in Crypto);
ArduinoJson.h is the header file that supports JSON data format;
AliyunIoTSDK.h is the header file for the Alibaba Cloud SDK.
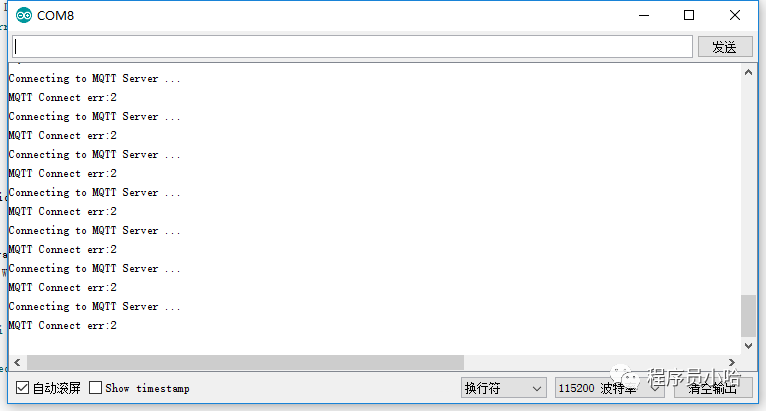
Open the Arduino software, Tools -> Serial Monitor, to view the information printed by the module:
The serial port number has changed, it is no longer COM7 as above, because I changed the USB port, so the serial port number has changed.
Below is the definition of error types in the PubSubClient.h file:
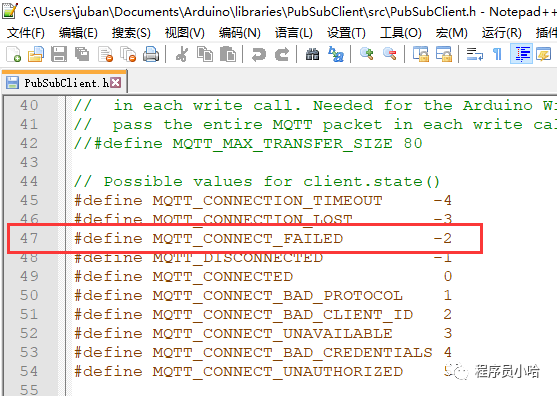
Error MQTT Connect err : -2, indicating that MQTT is not connected.
The solution is to change the two macros MQTT_MAX_PACKET_SIZE and MQTT_KEEPALIVE in the PubSubClient.h file to larger values, such as changing them to 1024 and 60.


After modification, re-download the program, and then see that data can be uploaded normally.

Log in to the Smart IoT Platform – Feiyan Platform
Smart IoT Platform: https://living.aliyun.com/#/
Check the Feiyan platform, you should normally see that the device is online.

Click on the “View” button next to the device in the image above, then enter the operation status page below, where you can see the current temperature we uploaded: 26℃.
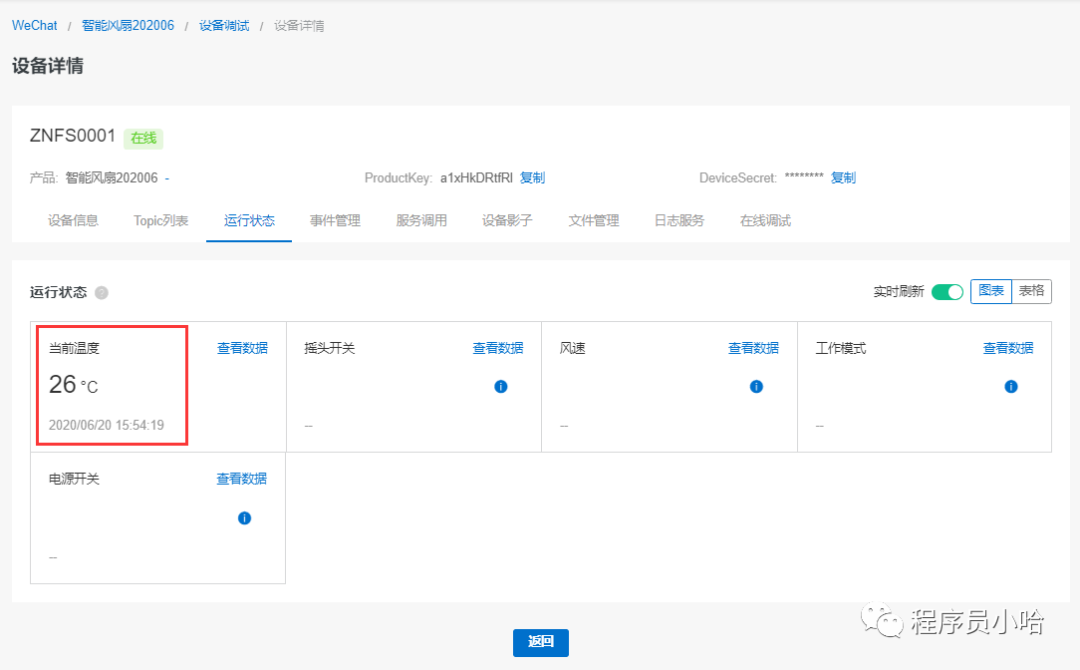
This is consistent with the value we set in the code, indicating that the upload of attribute values was successful. 
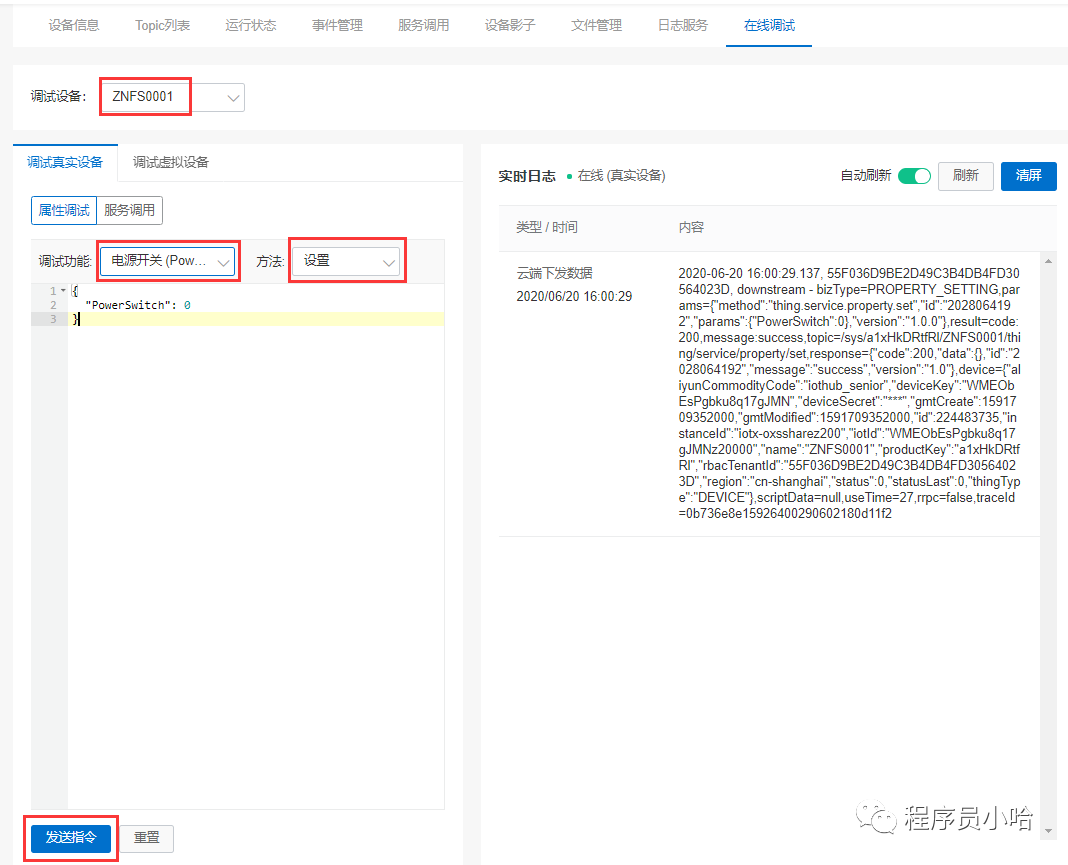
On the “Device Debugging” page, we select the debugging device as “ZNFS0001”, then select a debugging function, then choose a method, and click send command. We can check the logs of the issued data in real-time logs, indicating that the data has been successfully sent.
At this time, check the printed information of the WiFi module, and you can see that the module has received the data packet issued by the server.
{"method":"thing.service.property.set","id":"2028064192","params":{"PowerSwitch":0},"version":"1.0.0"}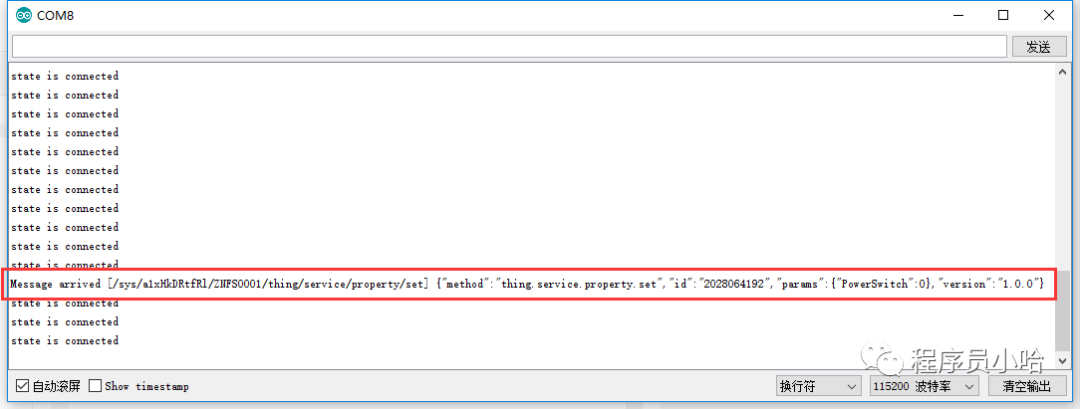
We only need to correctly parse the content of the above data packet, parse out {“PowerSwitch”:0}, and then the microcontroller can perform corresponding actions based on this content.
The data issued in the “Device Debugging” is actually the same logic as clicking a button in the mobile app, thus completing the upload of device properties and wireless control of the device.
In the following content, we will specifically design for the “smart fan”, achieving data interaction between STM32 + ESP8266 and Alibaba Cloud.
The complete code is as follows:
// Import the wifi module and instantiate it; the dependencies may vary for different chips
#include <ESP8266WiFi.h>
static WiFiClient espClient;

// Import the Alibaba Cloud IoT SDK
#include <AliyunIoTSDK.h>

// Set product and device information, view from Alibaba Cloud device information
#define PRODUCT_KEY "a1xHkDRtfRl"
#define DEVICE_NAME "ZNFS0001"
#define DEVICE_SECRET "xnOe5VcOkvXFTBAZaik4hz7y67t7IUhI"
#define REGION_ID "cn-shanghai"

// Set WiFi information
#define WIFI_SSID "XXXXXX"
#define WIFI_PASSWD "XXXXXXXX"

void setup()
{
    Serial.begin(115200);

    // Initialize WiFi
    wifiInit(WIFI_SSID, WIFI_PASSWD);

    // Initialize IoT, need to pass in the WiFi client and device product information
    AliyunIoTSDK::begin(espClient, PRODUCT_KEY, DEVICE_NAME, DEVICE_SECRET, REGION_ID);

    // Bind a device property callback. When this property is modified remotely, powerCallback will be triggered
    // PowerSwitch is the id defined in the IoT model of the device product
    AliyunIoTSDK::bindData("PowerSwitch", powerCallback);

    // Send data to the cloud platform, CurrentTemperature is the id defined in the IoT model of the device product
    AliyunIoTSDK::send("CurrentTemperature", 26);
}

void loop()
{
    AliyunIoTSDK::loop();
}

// Initialize WiFi connection
void wifiInit(const char *ssid, const char *passphrase)
{
    WiFi.mode(WIFI_STA);
    WiFi.begin(ssid, passphrase);
    while (WiFi.status() != WL_CONNECTED)
    {
        delay(1000);
        Serial.println("WiFi not Connect");
    }
    Serial.println("Connected to AP");
}

// Power property modification callback function
void powerCallback(JsonVariant p)
{
    int PowerSwitch = p["PowerSwitch"];
    if (PowerSwitch == 1)
    {
        // Start the device
    }
}
Click “View” to show that I have read it
Read