Innovative Ground Effect Wing Design Based on Arduino Control Platform

Innovative Ground Effect Wing Design Based on Arduino Control Platform

23rd Fengru Cup First Prize Winner

Demonstration Video

Principle Video

Innovative Points


  This project attempts to introduce wing layouts into ground effect vehicles, aiming to compensate for the shortcomings of both through complementarity and innovation. The wing tips are equipped with two vertical stabilizers with control surfaces, allowing the vehicle to achieve no roll yaw during ground effect flight, avoiding wing-ground friction; the vehicle's control system is entirely self-developed, centered around an Arduino Mega 2560

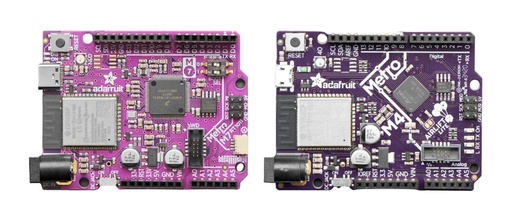
Guide to Choosing Development Boards (Part 1) – MCU

In the previous article, we briefly introduced how to choose development boards in different fields, but many people are still confused because we didn't recommend specific models. In this article, we will look at what types of development boards are suitable for specific fields.

Here, I will recommend development boards based on the performance you need, starting with the lower-performing MCU chips.

MCU (Microcontroller)

This is actually the most commonly used type of development board, which is needed in various aspects. The main

DIY Laser Engraver Guide

1. Main Hardware Components: (Making Two Axes)

1. Two desktop CD drives

2. Two Easydriver stepper motor drivers

3. One Arduino UNO R3 development board

4. One relay module

5. One 100mw blue-violet laser head

It is the simplest and most convenient to make a laser engraver based on the reference prototype, and it only involves two-axis movement. Essentially, you just need to find two CD drives and assemble them at a 90-degree angle to complete the project. However, considering that lasers can be dangerous and

Outstanding Graduation Project by Zhang Yahui: Hard Work is Rewarded, Pursuing Dreams with Technology

Outstanding Students

The graduation project of 2020 is destined to be extraordinary.

Rebirth through professional restructuring.

Forged through the trials of the pandemic.

During the days and nights of the pandemic, Zhang Yahui, a student from the Class of 2016 in Mechanical and Electronic Engineering, sparked design inspiration at home, far from school, overcoming countless difficulties with hard work and effort, step by step towards the finish line of his graduation project. Let's take a look at Zhang Yahui's journey in his graduation design!

Which is Better for Beginners: Arduino or 51 Microcontroller?

The development of microcontrollers has led to a wide variety of models available today, seen in everyday appliances like rice cookers, remote controls, and washing machines, all controlled internally by microcontrollers. The microcontrollers used in these products are customized and are not the same as those we use for learning.
Many beginners may still be torn between choosing Arduino or the 51 microcontroller to start with. Arduino is a platform developed based on the AVR microcontroller, while the 51 microcontroller is

Introduction to Arduino UNO R3: Experimental Unit 3

Requirements for This Unit Experiment

The experiments in Unit 3 are divided into two parts: Basic Experiments and Advanced Experiments. All experiments in this unit are based on the Arduino UNO R3 board. It is essential to understand the hardware circuits and corresponding software, and to thoroughly grasp the principles of each experiment and the meaning of every line of code.

For using the Arduino UNO board, refer to:

  • Getting Started with Arduino UNO R3

  • Arduino Example - Ultrasonic Distance Measurement

  • Arduino Example - PIR

Getting Started with Arduino UNO R3

I purchased the Arduino UNO R3 development board for 23 yuan. Because it is relatively expensive, its board and chip are consistent with the official version priced at 88 yuan. The USB to serial converter uses either the ATmega16U2 or ATmega8U2.

Getting Started with Arduino UNO R3

Specifications:

■ Operating Voltage: 5V

■ Input Voltage: No external power supply is required when connected via USB or external 7V~12V DC input

■ Microprocessor: ATmega328P, with a write/erase cycle of 10,000 times, priced at about

Introduction to Arduino UNO R3 Development Board

To do a good job, one must first sharpen their tools. The previous article explained the software environment for Arduino development, and this article will introduce the hardware environment for Arduino development, namely the Arduino UNO R3 development board.

UNO R3 Development Board

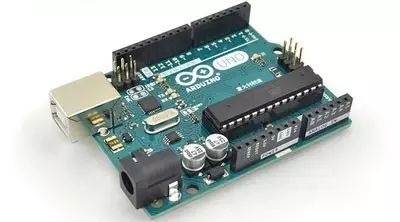
The Arduino ecosystem includes various development boards, modules, and expansion boards. Among them, the UNO R3 is the most suitable for beginners and is the most widely used Arduino development board with comprehensive functionality. Below is the true face

Connecting Arduino Development Board with Card Reader Module

Connecting Arduino Development Board with Card Reader Module

The reading distance is up to 5CM. Coil inductance is 47~68uH.

Direct serial output operation:

Connecting Arduino Development Board with Card Reader Module

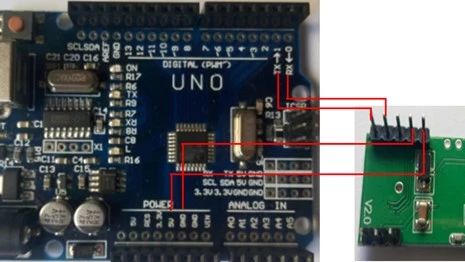
1. RDM6300 card reader module wiring is as follows: 5V power supply.

2. Upload an empty program to the Arduino development board:

void setup(){}
void loop(){}

3. Arduino IDE serial output data:

Connecting Arduino Development Board with Card Reader Module

The RDM630 series is a specialized module for non-contact RF ID

Back to Top
Product has been added to your cart