When it comes to bootloaders, many newcomers to embedded systems might find it a bit unfamiliar. What exactly is it? Simply put, it is the first program that runs when a device is powered on, acting as the “guide” for device startup.
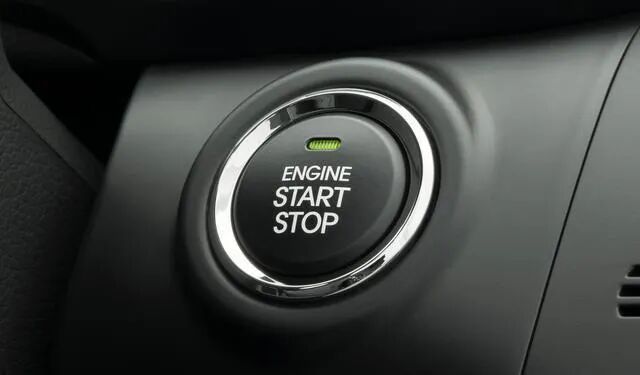
Whether it’s the smartphones and computers we use daily or the microcontrollers and development boards commonly found in embedded development, they all rely on it. Let’s start with a real-life example: when starting a car, you first press the start button, and the car performs a self-check to see if the fuel level is sufficient, if the brakes are functioning properly, and if the engine has any faults. Only after confirming everything is fine does the engine actually start. The bootloader acts like the “start button + self-checker” for the device; once powered on, it jumps in to perform a series of preparatory tasks before handing over the “baton” to the program that needs to run (such as the operating system on a smartphone or the control program in a microcontroller).
Why is a bootloader necessary? Because the “temperaments” of hardware and software are different. When hardware is powered on, its state is very unstable: the memory may be empty, the CPU doesn’t know what instructions to execute, and peripherals (like screens and sensors) are not initialized. If you were to directly run the operating system or application program at this point, it would be like asking someone who just woke up and hasn’t gotten dressed to run a marathon; it would definitely be chaotic. The role of the bootloader is to step in during the “chaotic period” right after hardware startup, organize everything, and pave the way for the subsequent program. For instance, when you boot up a computer, you might see a message on the screen saying “Press DEL to enter BIOS”; here, the BIOS is actually one of the bootloaders for the computer. It first checks whether the hard drive, memory, and graphics card are properly connected and functioning, then loads the Windows or Linux kernel from a specified location on the hard drive (like the boot sector of the system disk) into memory, and finally starts the kernel. The workflow of the bootloader may seem complex, but it essentially involves three core tasks: initializing hardware, loading the target program, and starting the target program. When the hardware is powered on, it is like a person just waking up. The registers in the CPU are disordered, the memory (RAM) has not been “activated”, and even the simplest LED light may not turn on. The first thing the bootloader must do is to “warm up” the hardware, getting the key components to start working.
Step 1: Initialization 1. Initialize the CPU: When the CPU is powered on, the instruction pointer (like the PC register in ARM chips) points to a fixed “startup address” (usually a section in ROM), and the bootloader starts running from here. It first sets the CPU’s operating mode (like disabling interrupts to avoid interference during startup) and configures the clock (to make the CPU operate at its rated frequency, such as switching from a default low frequency to 1GHz). 2. Initialize the memory: Memory (RAM) is the “stage” for program execution, but when powered on, the data in memory is random and cannot be used directly. The bootloader configures the memory timing (like read/write delays) and capacity through the hardware control registers, essentially telling the CPU, “This memory is usable, and the address range is…” Only after the memory is initialized can subsequent programs be loaded to run here. 3. Initialize key peripherals: Some peripherals are essential during startup, such as serial ports (to print startup logs and see messages like “Bootloader is running” and “Memory initialization successful” during debugging), displays (showing self-check screens when the computer boots), and storage devices (like hard drives and Flash, where the target program resides). However, not all peripherals need to be initialized; only the “essential for startup” ones should be selected to avoid wasting time. Step 2: Load the target program After the hardware is initialized, the bootloader gets down to business: loading the final program to be run (like the operating system kernel or the control program of a microcontroller) from the storage device (like Flash or hard drive) into memory. Why do we need to “move” it? Because the “speed” of storage devices and memory differs significantly. For example, the Flash in a microcontroller may have a read/write speed of only a few MB/s, while memory (RAM) can reach hundreds of MB/s or even higher. Running a program in memory allows the CPU to quickly read instructions and data, which is much more efficient than running directly from Flash. The loading process is not complicated; it involves two steps: 1. Locate where the target program is: The target program usually resides at a fixed storage location. For instance, the program for a microcontroller is generally burned into Flash starting at address 0x08000000; the Windows kernel exists in the “boot partition” of the hard drive; the Android system kernel for smartphones is located in a specific partition of the EMMC chip. The bootloader already “knows” this location (either fixed during hardware design or hardcoded by the developer in the code). 2. “Copy” the program to memory: The bootloader reads the program data from the storage device bit by bit through hardware interfaces (like the Flash controller or the SATA interface of the hard drive) and writes it to the specified address in memory (this address is also pre-agreed upon, like 0x20000000 in memory). It’s like copying files from a USB drive to the desktop of a computer. Step 3: Start the target program Once loading is complete, the bootloader’s task is nearly finished. The final step is to “start the target program”: point the CPU’s “instruction pointer” to the “entry address” of the target program in memory, allowing the CPU to begin executing the target program while the bootloader “withdraws”. This “entry address” is crucial; it is the designated “first instruction position” for the target program. For example, the entry address for a microcontroller program is usually 0x08000000 (matching the storage address, as microcontrollers sometimes run programs directly from Flash); the entry address for the Linux kernel is a specific address in memory (like 0x80008000), which is defined during kernel compilation. When handing over, the bootloader must also “clean up the scene”: for instance, disabling interrupts it used and releasing occupied memory to ensure the target program runs without interference. Just like in a relay race, the person passing the baton must stop steadily to avoid colliding with the person receiving it. Application Scenarios 1. “Flashing firmware” for devices: Upgrading programs relies entirely on it.
When we use our smartphones, we upgrade Android/iOS through “system updates”; when using routers, we might flash third-party firmware (like OpenWRT). Many times, these “flashing firmware” operations are completed by the bootloader.
Many bootloaders support the function of “loading programs from external devices”. For example, the bootloader on a development board may support receiving new program data via serial or USB interfaces and then writing that data to Flash; the bootloader on a smartphone (like Android’s “fastboot” mode) can connect to a computer via USB to receive system images sent from the computer and then flash them to the phone’s storage partition. Without a bootloader, flashing firmware would be troublesome. It might require disassembling the device and using a specialized programmer to connect to the Flash chip to write the program, which is something an average person cannot do. 2. Hardware debugging: When embedded development hardware is first created, various issues may arise (like poor memory contact or incorrect peripheral connections). At this point, the bootloader can act as a “debugging assistant”. For instance, after the bootloader initializes the memory, it can send a segment of “test data” via the serial port: first writing the data to a specific address in memory and then reading it back to see if it matches what was written. If it doesn’t match, it indicates a potential memory issue. If it does match, it suggests that the memory is functioning properly. Some bootloaders also provide a “command line interaction” feature: developers can input commands (like “read 0x08000000″—to read data from the 0x08000000 address in Flash) via the serial port, and the bootloader executes and returns the result. This way, developers can quickly check the hardware status without running complex programs. 3. Multi-system booting: Some devices support running multiple programs or systems, such as a development board that can run both Linux and RT-Thread (a real-time operating system). In this case, the bootloader can act as a “boot menu”. Just like a computer’s bootloader (like GRUB) displays a selection interface for “Windows 10” and “Linux Ubuntu” at startup, allowing you to choose which to boot, the bootloader of embedded devices can do something similar: it first checks for user input (like pressing a specific key) at startup; if the user presses “1”, it loads the Linux kernel; if “2” is pressed, it loads the RT-Thread kernel.
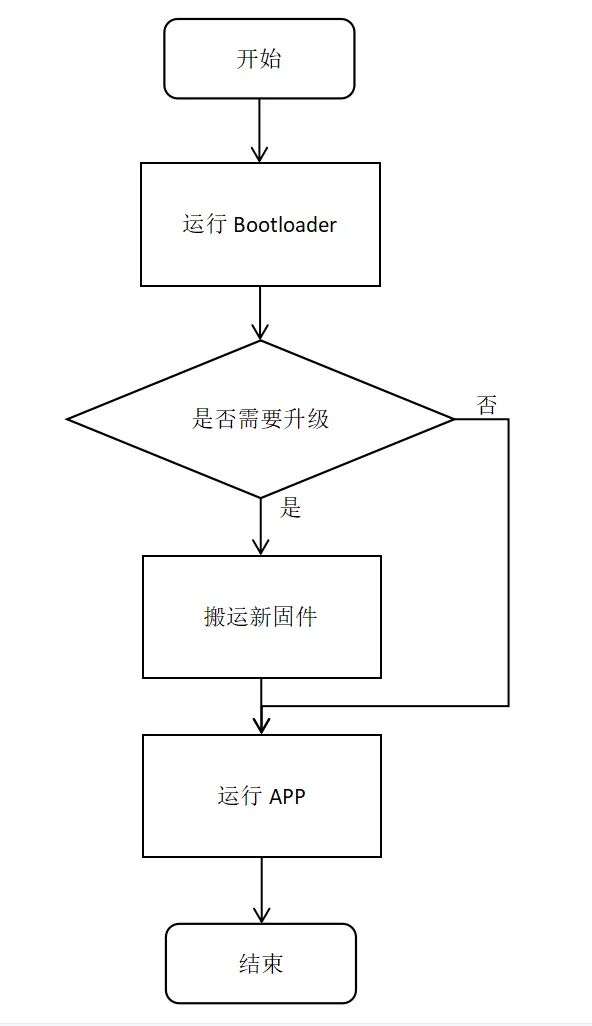
This functionality is very useful in scenarios where “flexible program switching” is needed. For example, in industrial equipment, it usually runs a production control program but can switch to a debugging program during maintenance without needing to disassemble the device to change chips. 4. Fault recovery: A sudden power outage or an error during firmware flashing can lead to program corruption, resulting in the device being unable to boot (commonly referred to as “bricking”). In such cases, the bootloader often serves as the “last lifeline”. This is because the bootloader is usually stored in a “protected area” (like a fixed ROM or a dedicated partition in Flash) that is not easily damaged accidentally. Even if the target program (like the operating system) is corrupted, the bootloader can still start normally. Once started, the bootloader can enter “recovery mode”: for example, by connecting to a computer via USB, it can receive new program data and re-flash the corrupted target program. Many smartphones’ “line flashing mode” operates on this principle; even if the system crashes completely, as long as the bootloader is still functional, recovery is possible.