1. Introduction
Recently, while communicating with developers, there was a request to implement multi-NIC functionality (Ethernet + USB 4G NIC) on the Xianji platform. I sent a reference to an article from nearly two years ago titled “[hpm_application] How to Easily Implement Multi-NIC (Ethernet + USB 4G) on Xianji MCU in RT-Thread” and reflected on how quickly time has passed; it has been almost two years since I wrote that article.

There are some potential requirements for this, such as: multiple Ethernet ports for internal network communication, while another uses a USB HOST to connect to USB NICs like the air780e module, EC20 module, ML307 module, etc., for external network communication.
Another requirement is: having only one Ethernet port but wanting to expand to another port. If USB is available, a USB NIC can be used for expansion.
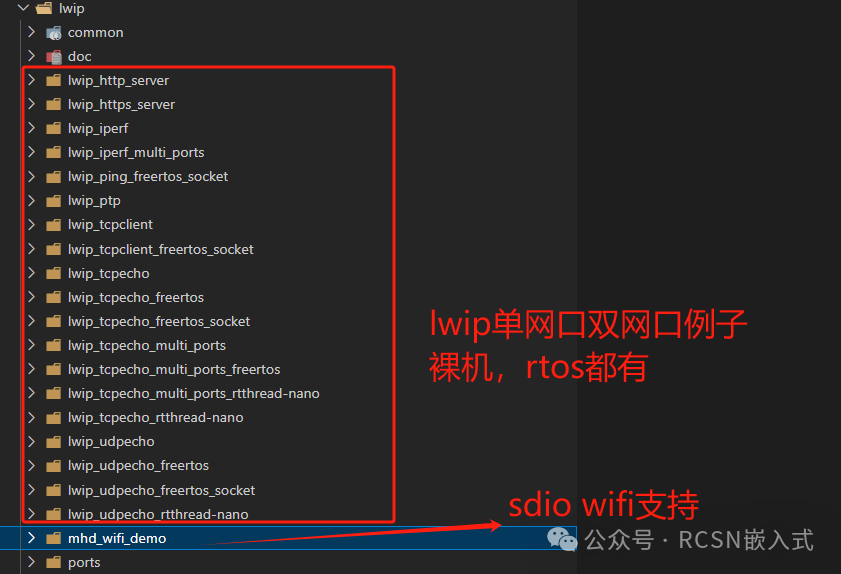
RT-Thread indeed has advantages in its network framework and is relatively easy to develop. However, developers hope to implement this in the HPM SDK, using FreeRTOS as the RTOS. Fortunately, the software ecosystem of Xianji has become much richer compared to two years ago. There are many examples available for LwIP. The HPM SDK includes network interface-related components such as USB NICs, SDIO WiFi networks, and Ethernet ports.
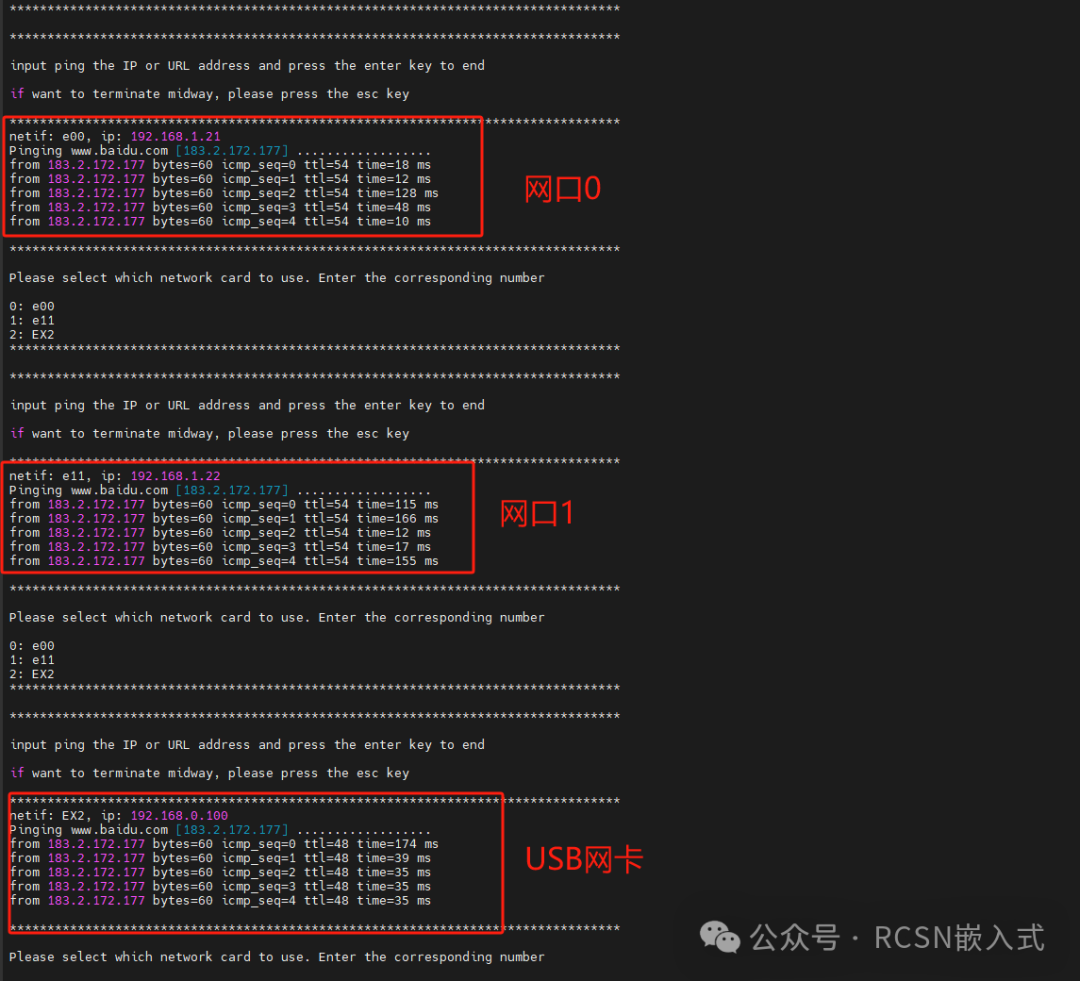
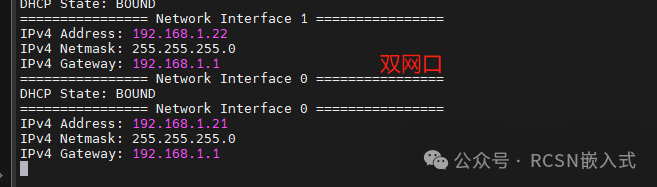
The multi-NIC functionality discussed in this article is achieved by integrating all these examples, making development relatively easy. The result is as follows: three NICs (two Ethernet ports and one USB NIC) are implemented in the Xianji HPM6750evk2, successfully pinging the external network.
Of course, the source code for the HPM’s usbnic_eth_multi_net_lwip will also be open-sourced, and the repository address is:
https://github.com/RCSN/hpm_sdk_extra
The path is demos/usbnic_eth_multi_net_lwip
Just a note, since I do not have an SDIO WiFi module at hand, I will add it later if I acquire the module to implement a four-NIC driver.
2. Porting Process
This article will not detail the porting process step by step but will record some issues encountered during the porting process.
The template referenced in this article is the lwip_tcpecho_multi_ports_freertos example in the HPM SDK.
(1) Configuration Selection
The HPM SDK has adapted and integrated FreeRTOS, LwIP, and CherryUSB third-party middleware, and you only need to enable them in the CMakeLists when using them.
To enable FreeRTOS, simply set CONFIG_FREERTOS.

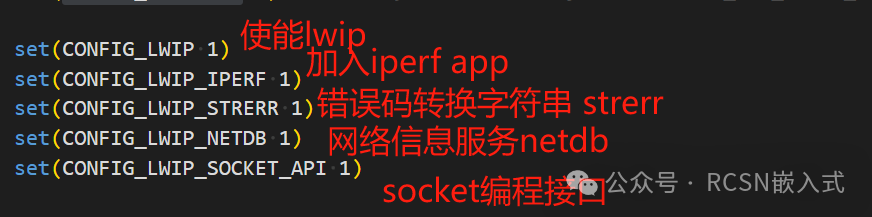
For LwIP, you can select your own functions and modules as needed to reduce LwIP. In the HPM SDK, you can choose modules yourself.
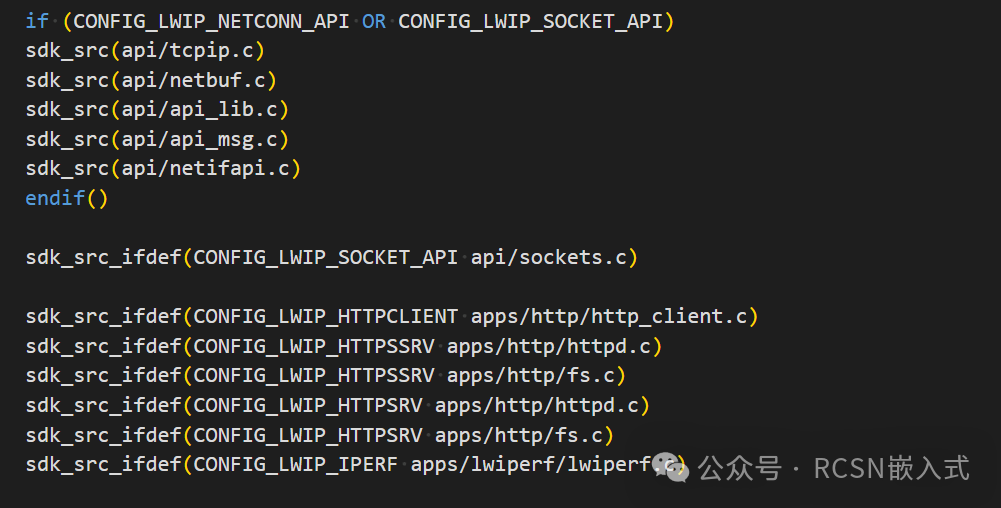
This article requires the use of sockets, domain name resolution, etc. (such as URL to IP), iperf, etc., so the following options need to be enabled:
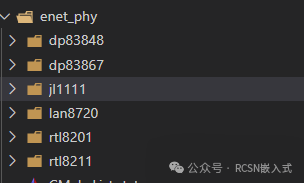
For Ethernet PHY selection, the HPM SDK supports various PHYs. The following:
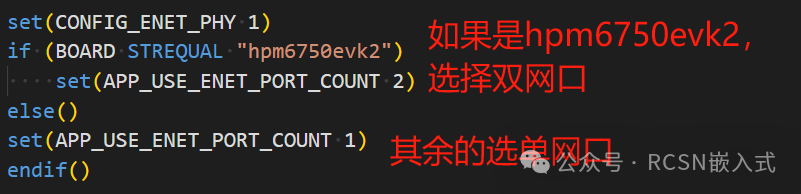
In this article, since the official development board is used, the board has already been configured, and you only need to enable the number of Ethernet ports. If it is the HPM6750evk2, then select dual Ethernet ports; otherwise, all others are single Ethernet ports. This demo example supports all Xianji development boards with USB and Ethernet ports.
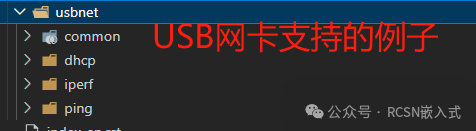
For CherryUSB, you need to enable the RNDIS and ECM functions of the USB HOST to support more types of USB NICs. Here, the air780e module, EC20 module, ML307 module can all be used, and other USB NICs can also be used, such as ASIX NICs, RTL8152 NICs, etc.

3. Socket Binding to Target Netif Network Interface
Function of ip_route API
Before operating, it is essential to understand a key API in LwIP: ip_route.
This is used in both TCP and UDP; you can search for the calling process yourself.
ip_route returns the netif object, and its workflow is as follows:
1. Traverse the network interface list and check each registered network interface (netif).
2. Subnet matching: For each interface, perform a mask operation between the target IP address and the interface’s IP address to determine if they are in the same subnet.
If matched, select that interface as the sending interface.
If not matched, continue to the next interface.
3. Default interface fallback if no matching interface is found:
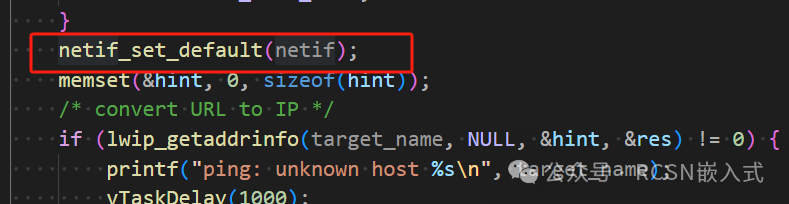
Use the default network interface (must be configured in advance with netif_set_default()).
If the default interface still does not match the target IP, use the default interface’s gateway (gw) as the next hop.
4. Return result: Return the pointer to the selected network interface (struct netif*).
From this API, we can understand its function:
Routing selection: Based on the target IP address, determine which network interface (netif) the packet should be sent from.
Subnet matching: Check if the target IP is in the same subnet as a certain interface (through mask operation).
Default interface selection: If no matching interface is found, use the default network interface (must be configured in advance).
Support forwarding: If the target IP does not belong to the local network, it may need to be forwarded through a gateway (depending on gateway configuration).
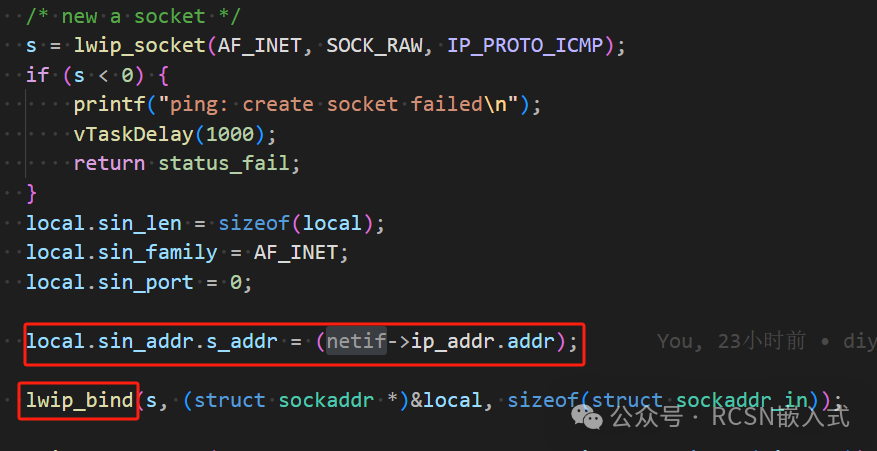
Based on the above explanation, in an environment with multiple NICs, the socket (TCP and UDP) can be bound to the specified netif NIC. This needs to be determined based on different situations:
1. When the target IP is in the same subnet as the local netif interface (local area network), you can bind the socket to the target netif’s IP address using bind.
2. When the target IP and netif interface IP are not in the same subnet (accessing the external network), ip_route will automatically select the netif interface by default, so when binding the socket, you need to set the target netif as the default netif interface. You can use the netif_set_default API.
4. Querying Multiple Netif NICs
Typically, the netif_find API is used, which is an API in LwIP for locating network interfaces (netif). It allows you to locate a specific network interface instance based on its name or IP address.
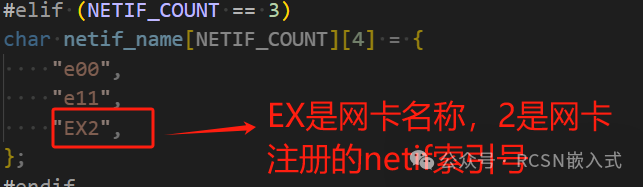
However, the internal implementation of this API has two checks, and the parameter name needs to be the NIC name + the netif index number it is bound to.
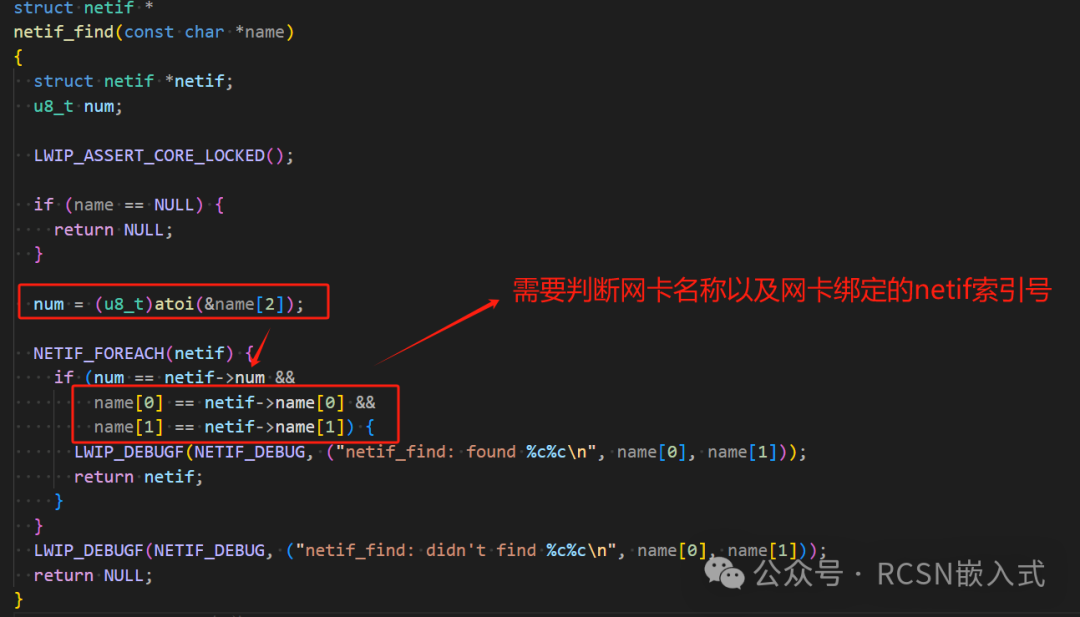
netif.num will automatically increment each time a NIC is added with netif_add. Each NIC is accumulated in the order of netif_add calls. In this article, the Ethernet port is registered first, followed by the USB NIC, so when naming, you need to add the index number at the end.
Enable DHCP to obtain information for each NIC.

5. Conclusion
1. With the increasingly complete ecosystem support of the Xianji HPM SDK, developers can easily implement multi-NIC applications with Ethernet + USB NIC. The multi-NIC functionality is relatively convenient to achieve on the Xianji platform.
2. If further functionality expansion is needed (such as adding an SDIO WiFi interface to achieve four NICs), it can also be flexibly expanded based on the current architecture. The project source code has been open-sourced, and you are welcome to refer to and communicate. There will also be articles introducing this in the future.
3. Next article preview: Implementing multi-NIC (USB device integrating RNDIS NIC and Ethernet into a multi-NIC) on Xianji.