We all know that cross-platform support is one of the key features of Qt, and it is quite an important one. Recently, while learning Qt development, I wondered how it supports cross-platform functionality. My usual development environment is Windows, using C++. So how can I run my C++ Qt programs on the Android platform? With this question in mind, I researched and implemented the following method for cross-platform support. (This may not be the only method, nor is it necessarily the best; it is simply the method I found, documented for learning purposes.)
The greatest advantage of Qt is its cross-platform capability, and since I have been learning Qt, I wanted to port my Qt programs.

1. Preparation Work
Download and install Qt for Android. Each version of Qt prior to 5.9 corresponds to a specific compilation environment, so you need to download the Qt version that corresponds to the Android compilation environment, such as qt-opensource-windows-x86-android-5.7.0.exe. However, these resources are quite hard to find now. Starting from Qt 5.9, the official Qt has combined many compilation environments, and you only need to install the corresponding components, as shown in the image below.
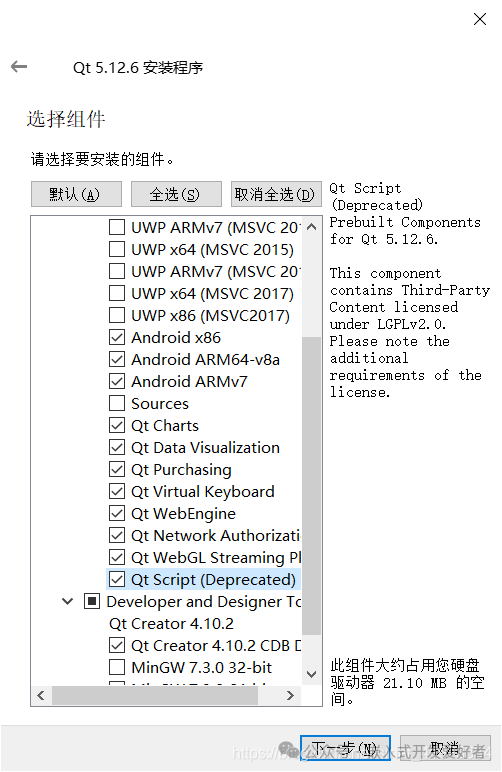
I had version 5.7 installed on my computer, but I couldn’t find the resource for qt-opensource-windows-x86-android-5.7.0.exe, so I had to upgrade Qt to 5.12.6.
Download and install the Android SDK. SDK (Software Development Kit) provides developers with library files and other tools needed for development.
Download and install the Android NDK. NDK (Native Development Kit) is similar to the Android SDK and is also a development toolkit used for developing software for Android devices. However, unlike the SDK, it uses C language, while the Android SDK uses Java language, allowing communication between C++ and Java.
Download and install the Android JDK. JDK (Java Development Kit) is a software development kit for the Java language, including the Java runtime environment, libraries, and development tools. In simple terms, the JDK is an SDK aimed at Java developers.
My JDK, SDK, and NDK were installed via Android Studio, but they can also be installed through other means.
Download and install Apache Ant. Download path: http://ant.apache.org/bindownload.cgi
2. Configuring the Qt Creator Development Environment
In Qt Creator, go to Tools -> Options. Select Devices, then the Android tab, and configure the JDK, SDK, and NDK paths as shown in the image below.
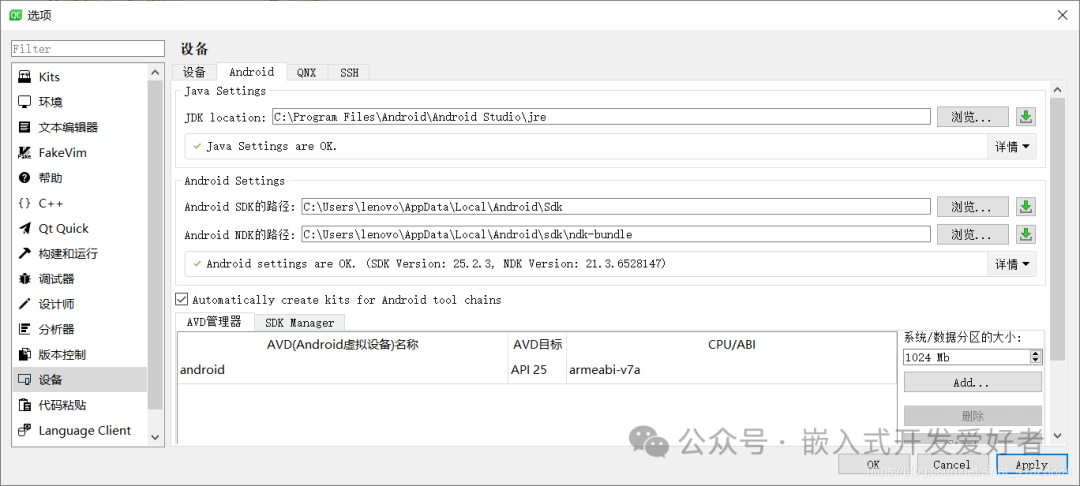
My paths were copied from the Android Studio project structure -> SDK location.
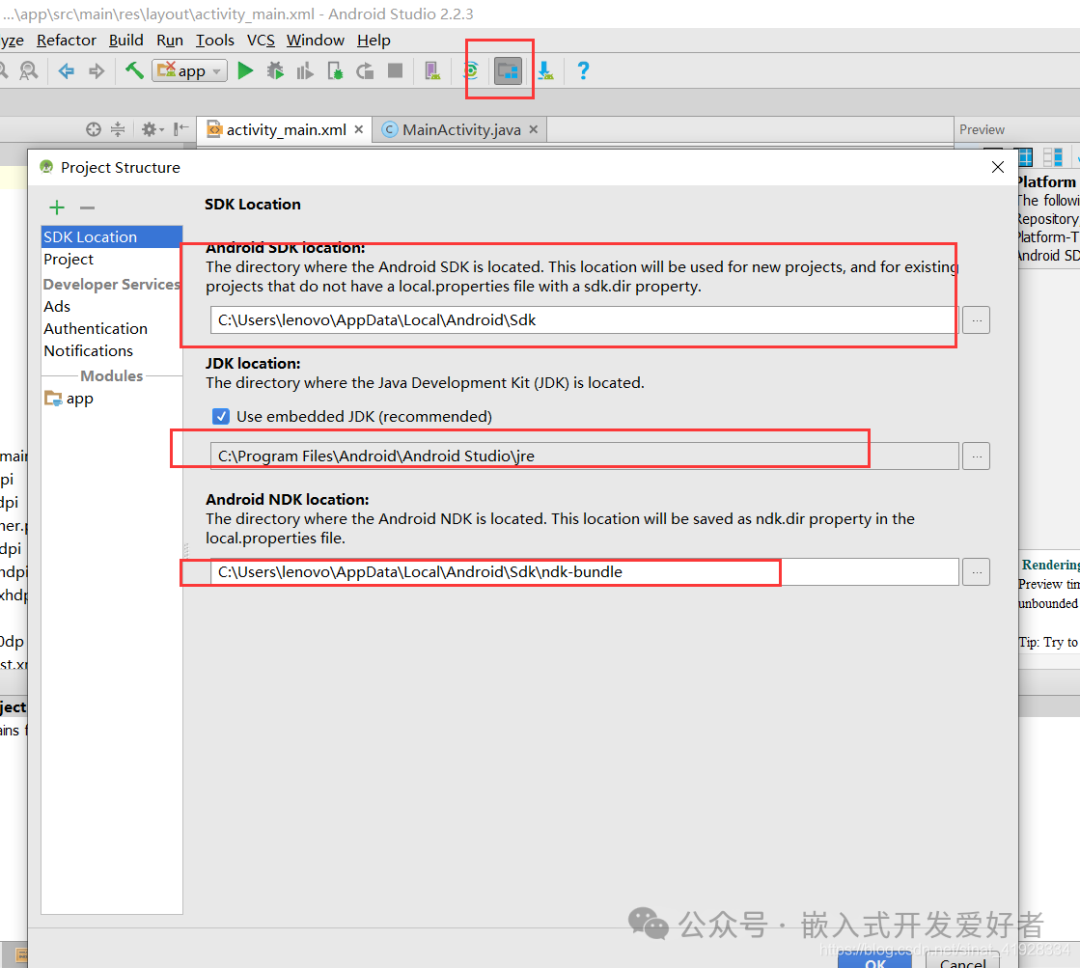
When configuring, make sure to set the paths according to your actual installation.
Configure the AVD Manager by selecting Start AVD Manager -> Create new Android Virtual Device. You may encounter the “No CPU/ABI system image available for this target” issue, as shown in the image below.
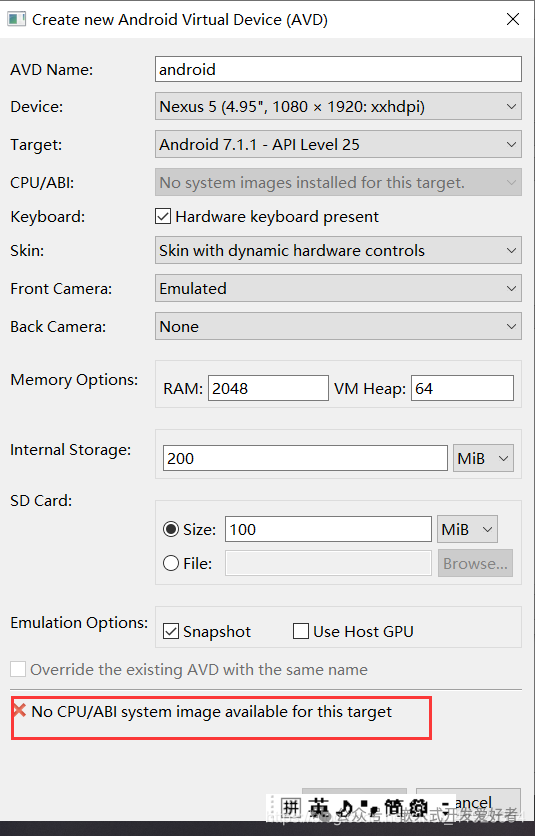
To resolve this issue:
Install the Android version corresponding to the target in the above image in Android Studio. I installed Android 7.1.1, as shown in the image below.
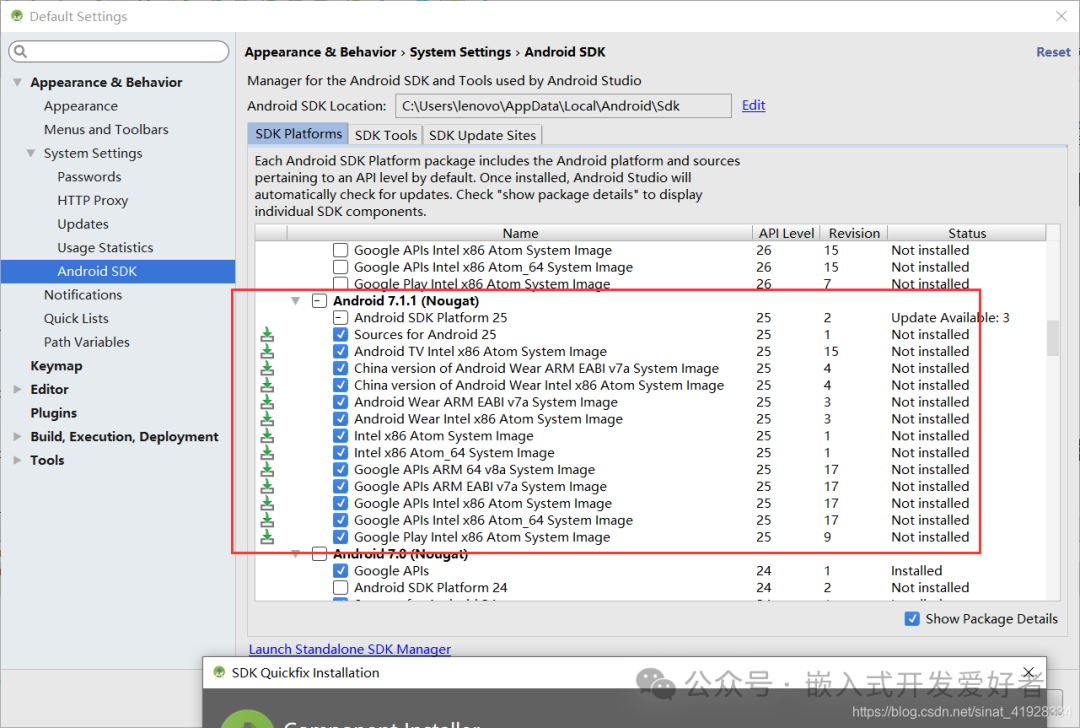
After installation, go back to Qt and select Start AVD Manager -> Create new Android Virtual Device again.
3. Creating a New Project
Create a new project and select the Android template.
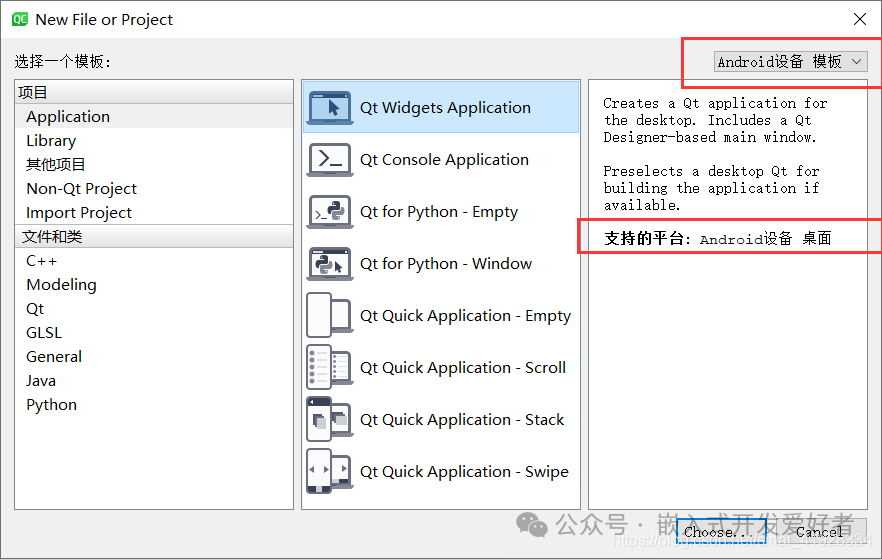
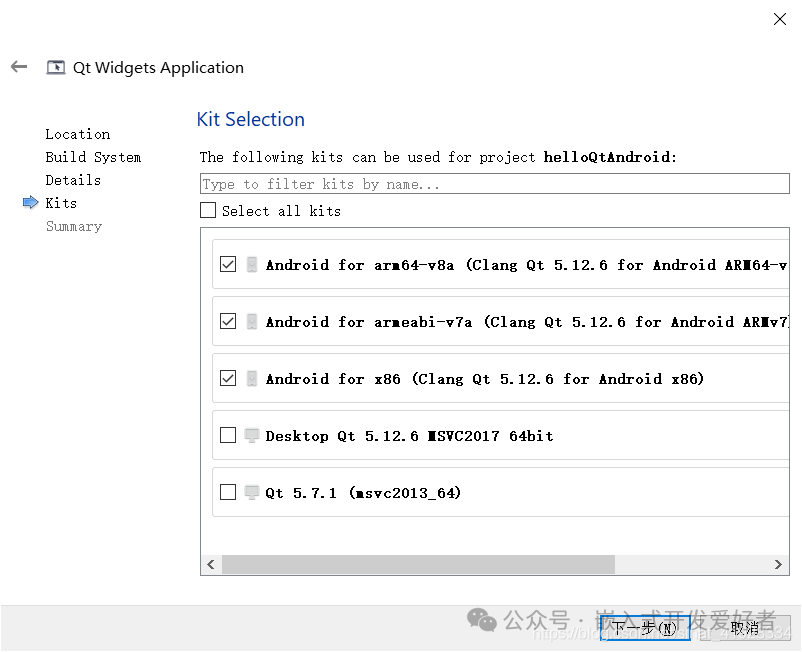
Give it a name, and in the default build kit section, select Android.
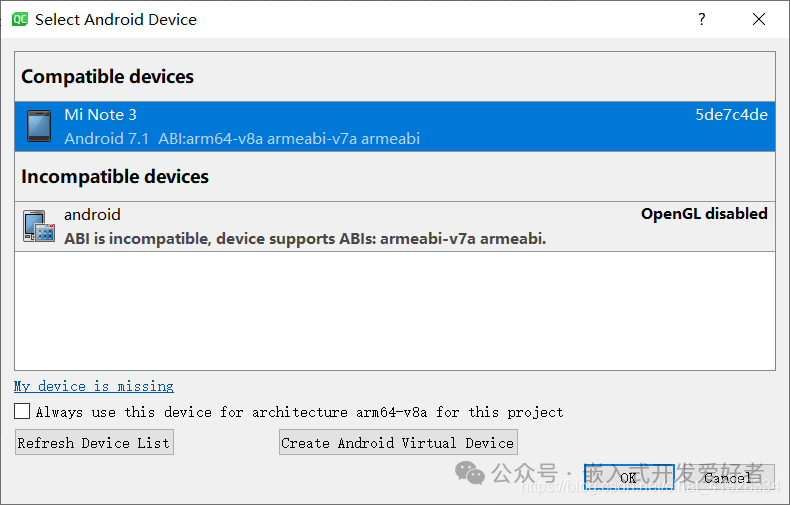
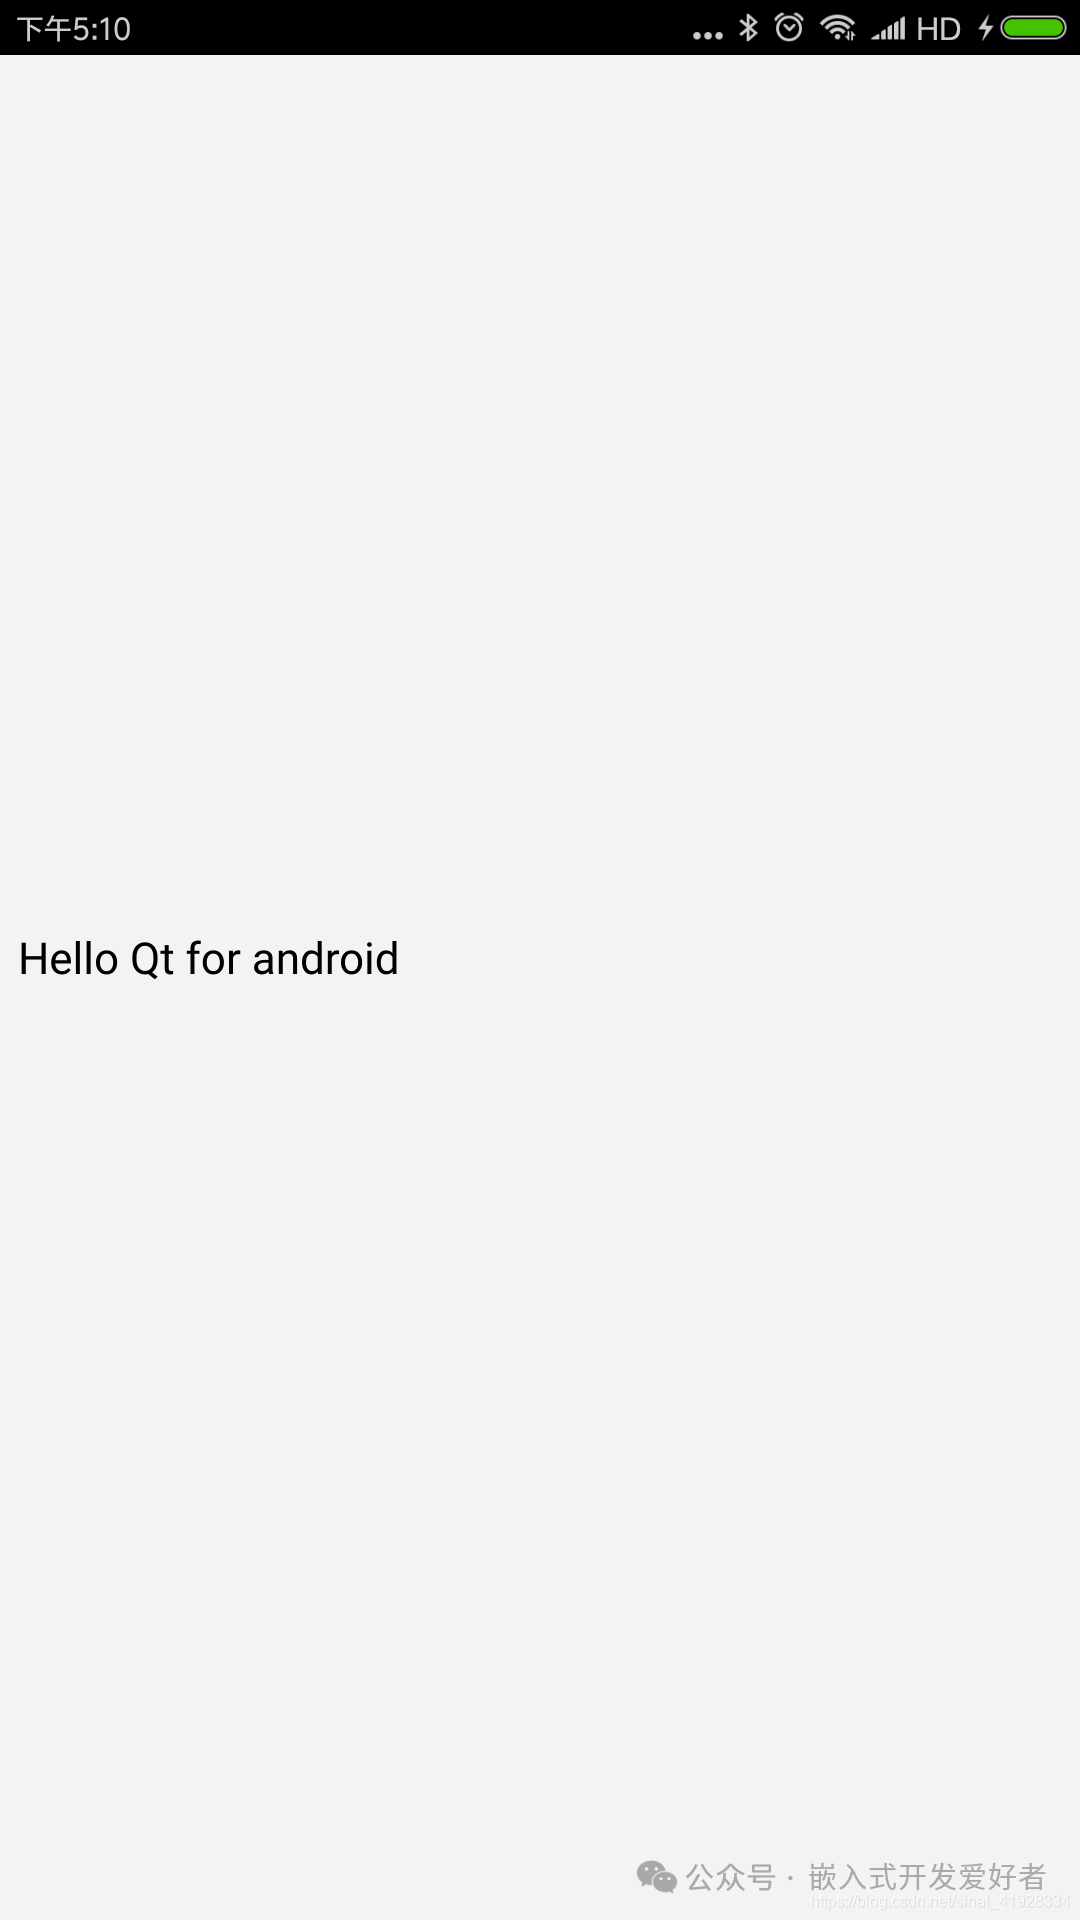
In design mode, drag in a TextLabel and set the content to “Hello Qt for Android.” Save the project, click run, and select my Xiaomi phone from the device options.
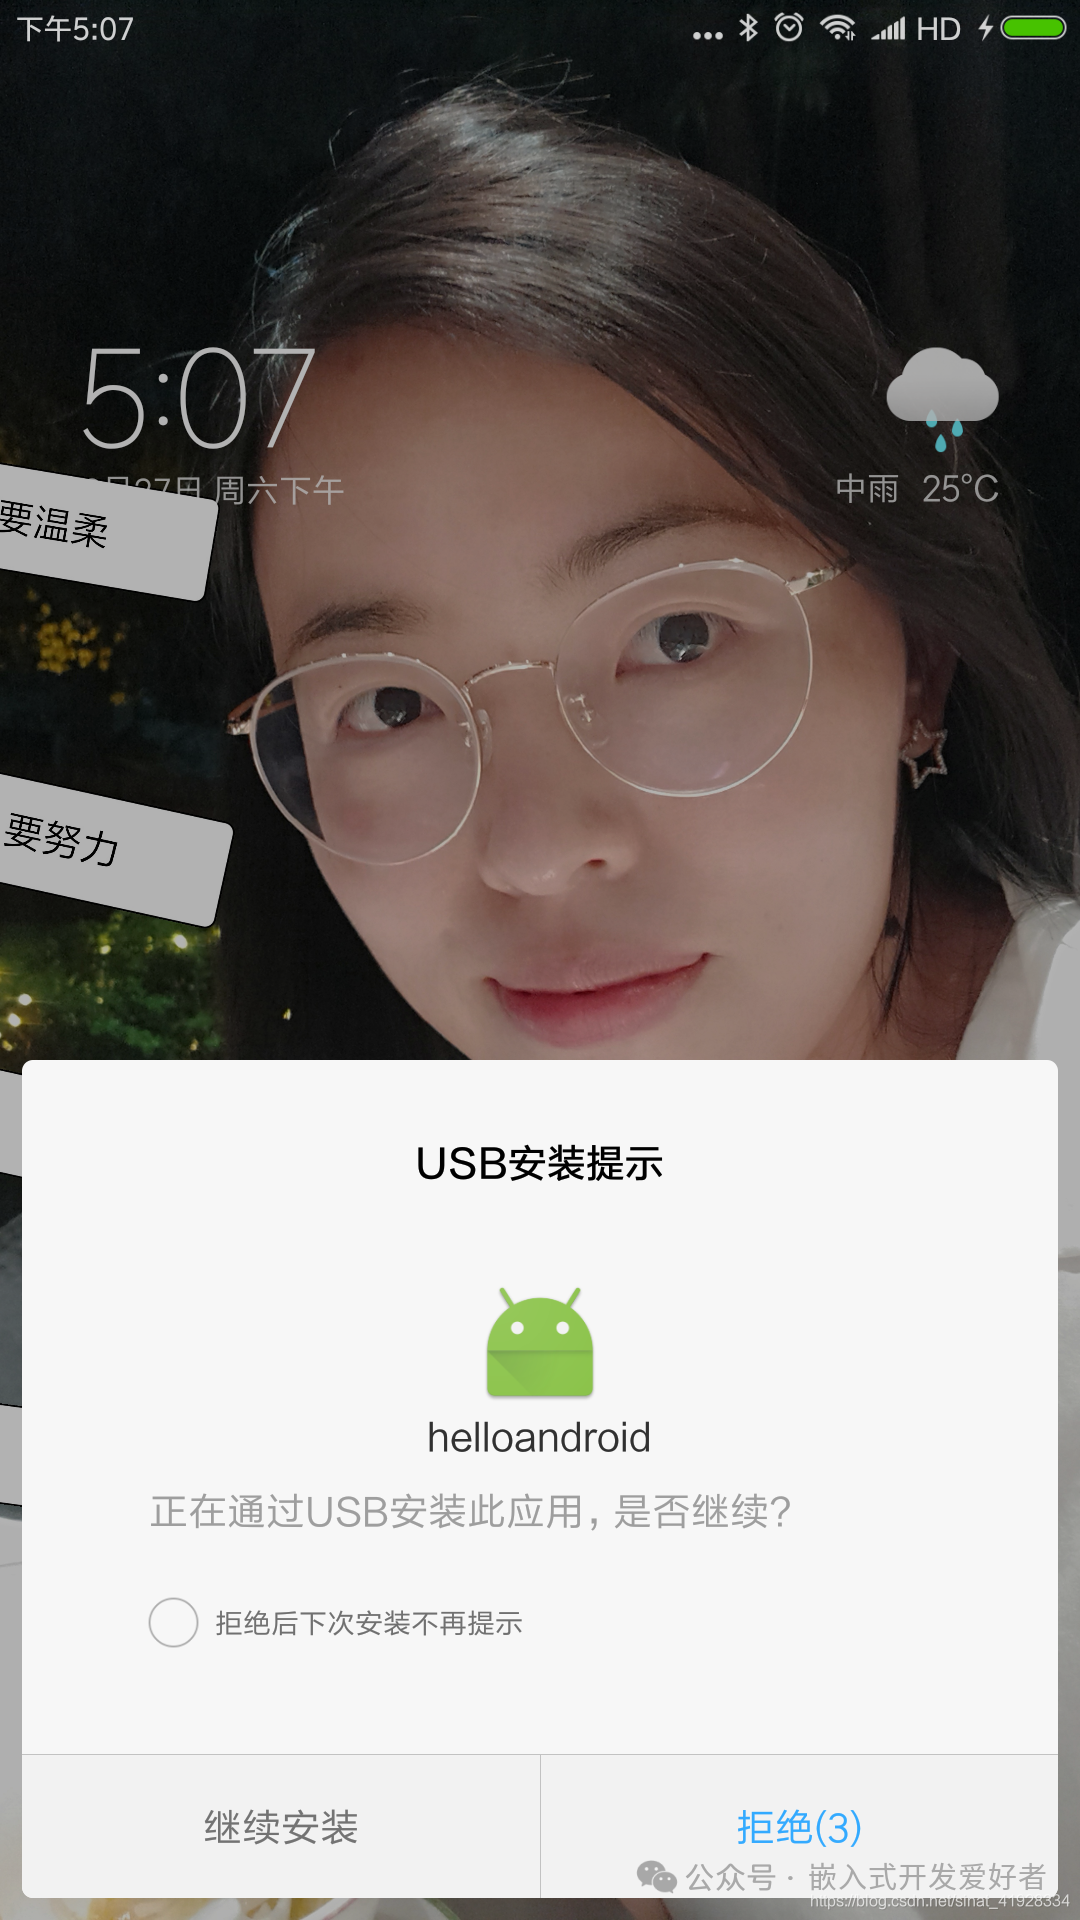
Click run, and when the following screen appears on the phone, click continue to install.
The final running effect on the phone is as follows.
4. Problems Encountered and Solutions
1. When building the project, the Android option is missing from the template selection. The reason is that the Android components are not installed (for Qt versions above 5.9). The solution is to use MaintenanceTool.exe in the Qt installation directory to add components. For versions below 5.9, you need to download the Qt for Android version.
2. When creating an Android virtual device, you may encounter the “No CPU/ABI system image available for this target” issue. The solution is to install the Android version corresponding to the target in the above image. See the second part on environment configuration for details.
3. When using MaintenanceTool.exe, a temporary proxy library is required: http://mirrors.ustc.edu.cn/qtproject/online/qtsdkrepository/mac_x64/root/qt/