This article is edited from the oschina blog by author Nan Mu Dong Er. If it helps you, feel free to share it with your friends!
Recently, due to the company’s shift in testing focus from web page functional testing to API testing, most of the previous tests were conducted manually using Postman and JMeter. Later, someone in the group mentioned transitioning the original web automation testing framework to an automation framework for APIs, which was written in Java. However, as someone who learned Java but is currently learning Python, I find Python much simpler than Java.
Therefore, I decided to write my own Python API automation testing framework. Since I am also new to Python, this automation framework is now basically complete, and I wish to summarize it for future review. There are many imperfections, and I encountered numerous issues, so I hope the experts can provide guidance.
Now, let’s move on to the main content of today.
1. First, let’s clarify our thoughts.
What is the normal process for API testing?
Is the reaction in your mind like this:
Determine the tool for testing the API —> Configure the required API parameters —> Conduct the test —> Check the test results (some may require database assistance) —> Generate the test report (HTML report)
Based on this process, we will build our framework step by step. During this process, we need to separate business logic from data to achieve flexibility and the goal of writing the framework. As long as we do it well, we can succeed. This is what I said to myself at the beginning.
Next, let’s proceed with the structure division.
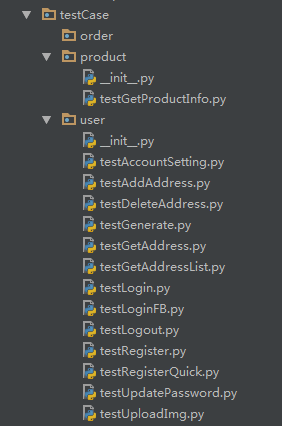
My structure looks like this, and you can refer to it:
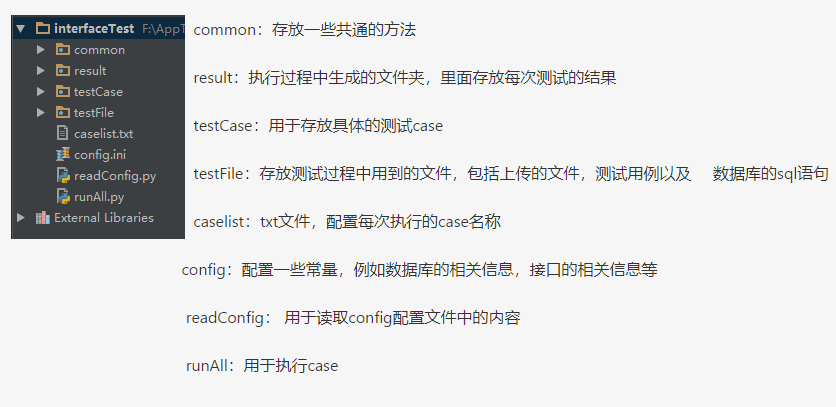
Now that we have a general structure, we can start filling in the entire framework step by step. First, let’s take a look at the config.ini and readConfig.py files, as I think it’s easier to start from them.
Let’s check what the contents of the files look like:
[DATABASE]host = 50.23.190.57username = xxxxxxpassword = ******port = 3306database = databasename
[HTTP]# API URLbaseurl = http://xx.xxxx.xx port = 8080timeout = 1.0
[EMAIL]mail_host = smtp.163.commail_user = [email protected]_pass = *********mail_port = 25sender = [email protected] = [email protected]/[email protected] = pythoncontent = "All interface tests have been completed\nPlease read the report file about the details of the result in the attachment."testuser = Someoneon_off = 1
As you can see, everyone is familiar with such configuration files. That’s right, we can place all the unchanging elements here. Haha, how about that?
Now that we have established a fixed “repository” to store our static elements, how do we retrieve them for use?
This is where the readConfig.py file comes into play, successfully helping us solve this problem. Let’s take a look at its true form.
import os
import codecs
import configparser
proDir = os.path.split(os.path.realpath(__file__))[0]
configPath = os.path.join(proDir, "config.ini")
class ReadConfig:
    def __init__(self):
        fd = open(configPath)
        data = fd.read()
        #  remove BOM
        if data[:3] == codecs.BOM_UTF8:
            data = data[3:]
            file = codecs.open(configPath, "w")
            file.write(data)
            file.close()
        fd.close()
        self.cf = configparser.ConfigParser()
        self.cf.read(configPath)
    def get_email(self, name):
        value = self.cf.get("EMAIL", name)
        return value
    def get_http(self, name):
        value = self.cf.get("HTTP", name)
        return value
    def get_db(self, name):
        value = self.cf.get("DATABASE", name)
        return value
Looks simple, right? We define methods to retrieve corresponding values by name. Isn’t that so easy?! Of course, we only used the get method here; there are other methods, such as set, which interested students can explore further.
Without further ado, let’s see what common methods we have.
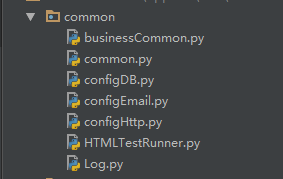
Now that we have completed the configuration file and reading it, and have seen the contents of common, we can proceed to write common methods. Which one should we start with? Today, let’s reveal the “Log.py” file, as it is relatively independent, and we will deal with it separately to lay a good foundation for its future service to us.
Here, I want to say a few more words about this log file. I have dedicated a separate thread to it, so during the entire execution process, writing logs will be more convenient. As the name suggests, this is where we handle all operations related to the output log, mainly defining the output format, output level, and other output definitions.
In summary, anything you want to do with logs can be placed here. Let’s take a look at the code; there’s no more direct and effective way than this.
import logging
from datetime import datetime
import threading
First, we need to import the required modules as shown above to proceed with the following operations.
class Log:
def __init__(self):
global logPath, resultPath, proDir
proDir = readConfig.proDir
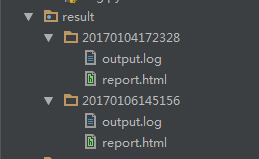
resultPath = os.path.join(proDir, "result")
# create result file if it doesn't exist
if not os.path.exists(resultPath):
os.mkdir(resultPath)
# defined test result file name by localtime
logPath = os.path.join(resultPath, str(datetime.now().strftime("%Y%m%d%H%M%S")))
# create test result file if it doesn't exist
if not os.path.exists(logPath):
os.mkdir(logPath)
# defined logger
self.logger = logging.getLogger()
# defined log level
self.logger.setLevel(logging.INFO)
# defined handler
handler = logging.FileHandler(os.path.join(logPath, "output.log"))
# defined formatter
formatter = logging.Formatter('%(asctime)s - %(name)s - %(levelname)s - %(message)s')
# defined formatter
handler.setFormatter(formatter)
# add handler
self.logger.addHandler(handler)
Now, we have created the Log class above, and in the __init__ method, we performed relevant initialization operations for the log.
The specific operations are clearly annotated in the comments (my English might be a bit lacking, but as long as you can understand it, that’s fine, haha…), so the basic format of the log has been defined. As for other methods, it’s up to everyone to develop, as each person’s needs are different. We will only write common methods. Next, let’s put it into a thread; see the code below:
class MyLog:
    log = None
    mutex = threading.Lock()
    def __init__(self):
        pass
    @staticmethod
    def get_log():
        if MyLog.log is None:
            MyLog.mutex.acquire()
            MyLog.log = Log()
            MyLog.mutex.release()
        return MyLog.log
Doesn’t it seem less complicated than you imagined? Haha, it’s that simple. Python is much simpler than Java, which is why I chose it, even though I’m still learning and have many things I don’t understand.
Alright, that concludes the log content. Don’t you feel great? Actually, no matter when, never be afraid; believe that “Nothing in the world is difficult for the one who is willing to try.”
Next, we will continue building, this time focusing on the content of configHttp.py. Yes, we are starting to configure the API files now! (Finally writing about the API, aren’t you excited?)
Below is the main part of the API file, let’s take a look together.
import requests
import readConfig as readConfig
from common.Log import MyLog as Log
localReadConfig = readConfig.ReadConfig()
class ConfigHttp:
    def __init__(self):
        global host, port, timeout
        host = localReadConfig.get_http("baseurl")
        port = localReadConfig.get_http("port")
        timeout = localReadConfig.get_http("timeout")
        self.log = Log.get_log()
        self.logger = self.log.get_logger()
        self.headers = {}
        self.params = {}
        self.data = {}
        self.url = None
        self.files = {}
    def set_url(self, url):
        self.url = host + url
    def set_headers(self, header):
        self.headers = header
    def set_params(self, param):
        self.params = param
    def set_data(self, data):
        self.data = data
    def set_files(self, file):
        self.files = file
    # defined http get method
    def get(self):
        try:
            response = requests.get(self.url, params=self.params, headers=self.headers, timeout=float(timeout))
            # response.raise_for_status()
            return response
        except TimeoutError:
            self.logger.error("Time out!")
            return None
    # defined http post method
    def post(self):
        try:
            response = requests.post(self.url, headers=self.headers, data=self.data, files=self.files, timeout=float(timeout))
            # response.raise_for_status()
            return response
        except TimeoutError:
            self.logger.error("Time out!")
            return None
Here, let’s focus on the key points. First, you can see that I am using Python’s built-in requests library for API testing. Those who are attentive may have noticed that the Python + requests combination is very useful; it has already encapsulated the methods for testing APIs, making it very convenient to use.
Here, I’ll discuss the two methods: get and post (these are the most commonly used methods; others can be expanded based on this).
url='http://api.shein.com/v2/member/logout'
header={'content-type': 'application/x-www-form-urlencoded'}
param={'user_id': 123456,'email': '[email protected]'}
timeout=0.5
requests.get(url, headers=header, params=param, timeout=timeout)
url='http://api.shein.com/v2/member/login'
header={'content-type': 'application/x-www-form-urlencoded'}
data={'email': '[email protected]','password': '123456'}
timeout=0.5
requests.post(url, headers=header, data=data, timeout=timeout)
import os
from xlrd import open_workbook
from xml.etree import ElementTree as ElementTree
from common.Log import MyLog as Log
localConfigHttp = configHttp.ConfigHttp()
log = Log.get_log()
logger = log.get_logger()
# Read test cases from excel file
def get_xls(xls_name, sheet_name):
    cls = []
    # get xls file's path
    xlsPath = os.path.join(proDir, "testFile", xls_name)
    # open xls file
    file = open_workbook(xlsPath)
    # get sheet by name
    sheet = file.sheet_by_name(sheet_name)
    # get one sheet's rows
    nrows = sheet.nrows
    for i in range(nrows):
        if sheet.row_values(i)[0] != u'case_name':
            cls.append(sheet.row_values(i))
    return cls
# Read SQL statements from xml file
database = {}
def set_xml():
    if len(database) == 0:
        sql_path = os.path.join(proDir, "testFile", "SQL.xml")
        tree = ElementTree.parse(sql_path)
        for db in tree.findall("database"):
            db_name = db.get("name")
            # print(db_name)
            table = {}
            for tb in db.getchildren():
                table_name = tb.get("name")
                # print(table_name)
                sql = {}
                for data in tb.getchildren():
                    sql_id = data.get("id")
                    # print(sql_id)
                    sql[sql_id] = data.text
                table[table_name] = sql
            database[db_name] = table

def get_xml_dict(database_name, table_name):
    set_xml()
    database_dict = database.get(database_name).get(table_name)
    return database_dict

def get_sql(database_name, table_name, sql_id):
    db = get_xml_dict(database_name, table_name)
    sql = db.get(sql_id)
    return sql
-
We use xml.etree.Element to operate on XML files, and through our custom methods, we can get different values based on different parameters.
-
We use xlrd to operate on Excel files. Note that we manage test cases using Excel files.


import pymysql
import readConfig as readConfig
from common.Log import MyLog as Log
localReadConfig = readConfig.ReadConfig()
class MyDB:
    global host, username, password, port, database, config
    host = localReadConfig.get_db("host")
    username = localReadConfig.get_db("username")
    password = localReadConfig.get_db("password")
    port = localReadConfig.get_db("port")
    database = localReadConfig.get_db("database")
    config = {
        'host': str(host),
        'user': username,
        'passwd': password,
        'port': int(port),
        'db': database
    }
    def __init__(self):
        self.log = Log.get_log()
        self.logger = self.log.get_logger()
        self.db = None
        self.cursor = None
    def connectDB(self):
        try:
            # connect to DB
            self.db = pymysql.connect(**config)
            # create cursor
            self.cursor = self.db.cursor()
            print("Connect DB successfully!")
        except ConnectionError as ex:
            self.logger.error(str(ex))
    def executeSQL(self, sql, params):
        self.connectDB()
        # executing sql
        self.cursor.execute(sql, params)
        # executing by committing to DB
        self.db.commit()
        return self.cursor
    def get_all(self, cursor):
        value = cursor.fetchall()
        return value
    def get_one(self, cursor):
        value = cursor.fetchone()
        return value
    def closeDB(self):
        self.db.close()
        print("Database closed!")
pip install pymysql
import os
import smtplib
from email.mime.multipart import MIMEMultipart
from email.mime.text import MIMEText
from datetime import datetime
import threading
import readConfig as readConfig
from common.Log import MyLog
import zipfile
import glob
localReadConfig = readConfig.ReadConfig()
class Email:
    def __init__(self):
        global host, user, password, port, sender, title, content
        host = localReadConfig.get_email("mail_host")
        user = localReadConfig.get_email("mail_user")
        password = localReadConfig.get_email("mail_pass")
        port = localReadConfig.get_email("mail_port")
        sender = localReadConfig.get_email("sender")
        title = localReadConfig.get_email("subject")
        content = localReadConfig.get_email("content")
        self.value = localReadConfig.get_email("receiver")
        self.receiver = []
        # get receiver list
        for n in str(self.value).split("/"):
            self.receiver.append(n)
        # defined email subject
        date = datetime.now().strftime("%Y-%m-%d %H:%M:%S")
        self.subject = title + " " + date
        self.log = MyLog.get_log()
        self.logger = self.log.get_logger()
        self.msg = MIMEMultipart('mixed')
    def config_header(self):
        self.msg['subject'] = self.subject
        self.msg['from'] = sender
        self.msg['to'] = ";".join(self.receiver)
    def config_content(self):
        content_plain = MIMEText(content, 'plain', 'utf-8')
        self.msg.attach(content_plain)
    def config_file(self):
        # if the file content is not null, then config the email file
        if self.check_file():
            reportpath = self.log.get_result_path()
            zippath = os.path.join(readConfig.proDir, "result", "test.zip")
            # zip file
            files = glob.glob(reportpath + '\*')
            f = zipfile.ZipFile(zippath, 'w', zipfile.ZIP_DEFLATED)
            for file in files:
                f.write(file)
            f.close()
            reportfile = open(zippath, 'rb').read()
            filehtml = MIMEText(reportfile, 'base64', 'utf-8')
            filehtml['Content-Type'] = 'application/octet-stream'
            filehtml['Content-Disposition'] = 'attachment; filename="test.zip"'
            self.msg.attach(filehtml)
    def check_file(self):
        reportpath = self.log.get_report_path()
        if os.path.isfile(reportpath) and not os.stat(reportpath) == 0:
            return True
        else:
            return False
    def send_email(self):
        self.config_header()
        self.config_content()
        self.config_file()
        try:
            smtp = smtplib.SMTP()
            smtp.connect(host)
            smtp.login(user, password)
            smtp.sendmail(sender, self.receiver, self.msg.as_string())
            smtp.quit()
            self.logger.info("The test report has been sent to the developer by email.")
        except Exception as ex:
            self.logger.error(str(ex))
class MyEmail:
    email = None
    mutex = threading.Lock()
    def __init__(self):
        pass
    @staticmethod
    def get_email():
        if MyEmail.email is None:
            MyEmail.mutex.acquire()
            MyEmail.email = Email()
            MyEmail.mutex.release()
        return MyEmail.email
if __name__ == "__main__":
    email = MyEmail.get_email()

import unittest
import HTMLTestRunner
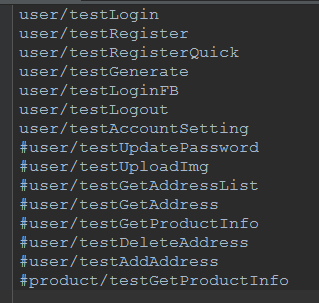
def set_case_list(self):
fb = open(self.caseListFile)
for value in fb.readlines():
data = str(value)
if data != '' and not data.startswith("#"):
self.caseList.append(data.replace("\n", ""))
fb.close()
def set_case_suite(self):
self.set_case_list()
test_suite = unittest.TestSuite()
suite_model = []
for case in self.caseList:
case_file = os.path.join(readConfig.proDir, "testCase")
print(case_file)
case_name = case.split("/")[-1]
print(case_name + ".py")
discover = unittest.defaultTestLoader.discover(case_file, pattern=case_name + '.py', top_level_dir=None)
suite_model.append(discover)
if len(suite_model) > 0:
for suite in suite_model:
for test_name in suite:
test_suite.addTest(test_name)
else:
return None
return test_suite
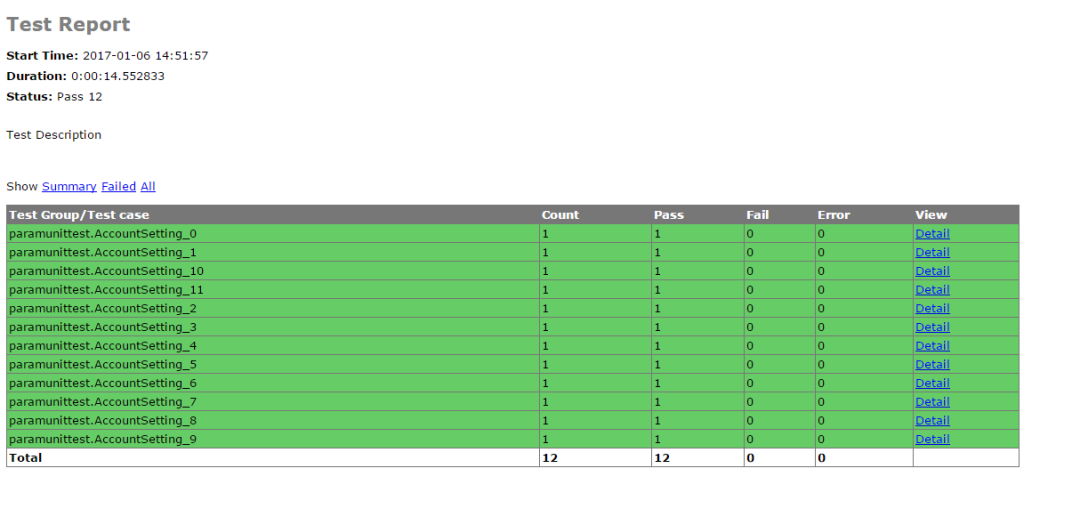
def run(self):
try:
suit = self.set_case_suite()
if suit is not None:
logger.info("********TEST START********")
fp = open(resultPath, 'wb')
runner = HTMLTestRunner.HTMLTestRunner(stream=fp, title='Test Report', description='Test Description')
runner.run(suit)
else:
logger.info("Have no case to test.")
except Exception as ex:
logger.error(str(ex))
finally:
logger.info("*********TEST END*********")
# send test report by email
if int(on_off) == 0:
self.email.send_email()
elif int(on_off) == 1:
logger.info("Doesn't send report email to developer.")
else:
logger.info("Unknown state.")
Finally, the entire API automation framework has been explained. Do you understand it? What? The files listed in the directory structure mentioned earlier have not been discussed?

This article is transferred from: https://my.oschina.net/u/3041656/blog/820023
——————— End ———————