Project Sharing | The Amazing Video Transmission via Light

If you don’t want to miss my updates, remember to check the official account in the upper right corner and set it as a star, and send me a star.

Project Sharing | The Amazing Video Transmission via Light
There are many ways to transmit video between two devices, such as using Bluetooth, USB drives, etc. However, there is one method that will definitely amaze you.
Project Source: IMDEA Networks Institute

Compiled by: Gao Yang

That’s right, it’s Visible Light Communication, where the two development boards in the video transmit video via light.

First, let me explain the principle of visible light communication: by flashing a single LED light, using those light variations that are too small for the human eye to perceive, data is encoded in binary, and transmitted through a receiver.

The communication platform used in the video, OpenVLC, is an open-source, flexible, and low-cost visible light communication system platform developed by IMDEA Networks Institute in Spain. The code and hardware design provided in this article are based on the OpenVLC platform, and if you are interested, you can reply with Visible Light Communication on WeChat to get it.

✦ Project Equipment List:

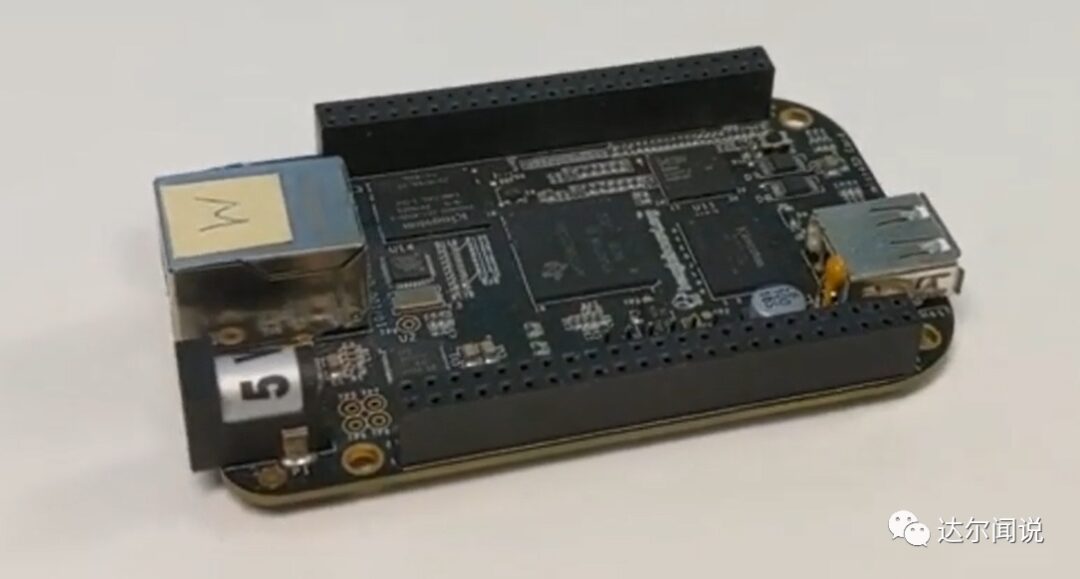
BEAGLEBONE Black (BBB) Board: Requires a Rev C version produced in 2017; needs an external 5V power supply; cost $45-$60; AM3359 1GHz; 4 timers; 65 GPIO.

Project Sharing | The Amazing Video Transmission via Light

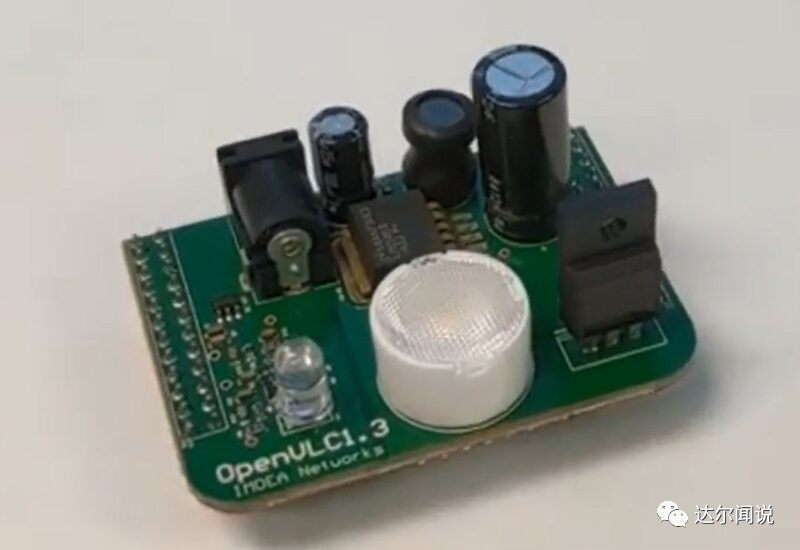
OpenVLC1.3 RevA cape: VLC front-end transmission and reception module, can be used as a transmitter (TX) or receiver (RX). This board is open-source, and the design drawings, PCB files, and BOM are included in the source file Hardware folder. If you are interested, you can download it and make the board yourself.

Project Sharing | The Amazing Video Transmission via Light

OpenVLC1.3 Driver: Software-defined MAC and PHY layer (Linux version driver) and firmware (for controlling BBB (PRU) programmable real-time unit).

The new version of the OpenVLC1.3 transmission module utilizes the programmable real-time unit (PRU) included in the BBB, as well as a new receiver design that allows us to increase the transmission frequency to 1MHz, thereby increasing the communication rate.
Experimental Setup
Step 1: Create SD Card
We need to flash the BBB with a Debian image. For this, a SD card of at least 4 GB is required.
First, format the SD card using an overwrite format SD card formatter.
Then, download the image from the following link: https://debian.beagleboard.org/images/bone-debian-8.7-iot-armhf-2017-03-19-4gb.img.xz
Finally, write the image “bone-debian-8.7-iot-armhf-2017-03-19-4gb” to the SD card. If using Windows, you can use Win32 Disk Imager. For Linux, you can use the command line dd.
Step 2: Flash the BBB
After preparing the SD card and image, it is time to flash the BBB.
With the power off, insert the SD card into the BBB, then power it on with a USB cable;
Connect via SSH to IP 192.168.7.2;
To run the operating system from the SD card, flash it to the BBB:
a) Go to /opt/scripts/tools/eMMC and run sudo ./bbb-eMMC-flasher-eewiki-ext4.sh
b) Wait until the script reports the following message: “eMMC has been flashed.” Once done, disconnect the USB cable and remove the SD card while the BBB is off.
Step 3: Set Up the Operating System
1) Disable HDMI: HDMI uses some of the PRU pins we need. To disable the HDMI cape, edit the uEnv.txt file: sudo nano /boot/uEnv.txt and uncomment this line: dtb=am335x-boneblack-emmc-overlay.dtb
2) Restart the OpenVLC board. After restarting, HDMI will be disabled.
3) Install Header: Connect the BeagleBone to the Internet and then update: sudo apt-get update
4) The development board is ready to install with the following command:
Header: sudo apt-get install linux-headers-$(uname -r)
The code is located in the GitHub repository at https://github.com/openvlc/OpenVLC. In the Latest_Version subdirectory, you will find the driver (kernel) and PRU code folders. Just use:
sudo git clone https://github.com/openvlc/OpenVLC
to obtain them, then copy them to the path “/home/Debian”.
Step 4: Connect the Module
Connecting the module to the BBB is very easy. You just need to insert the module into the correct pins as shown in the figure below:
Project Sharing | The Amazing Video Transmission via Light
After inserting the power, just connect the 5V power supply. Note: When pressing or pulling the module, be careful not to bend the protruding components.
Step 5: Set Up TX/RX
TX/RX use two kernel drivers and PRU code respectively.
To load the kernel driver, run the following command inside the Driver folder: sudo ./load_test.sh. This script allows you to change the IP used by the interface. This is the IP in the VLC network, so TX and RX must have different IPs (for example TX: 192.168.0.1 and RX 192.168.0.2).
After installing the module driver, ensure that the correct paths and symbolic links are established for the PRU compiler (clpru) and linker (lnkpru). For this, you can use the following commands:
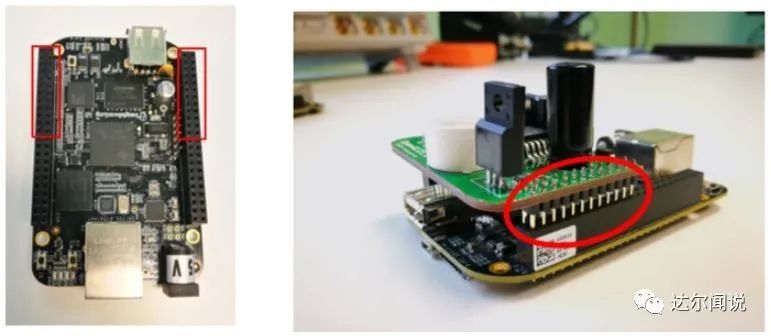
cd /usr/share/ti/cgt-prusudo mkdir bincd binsudo ln -s /usr/bin/clpru clprusudo ln -s /usr/bin/lnkpru lnkpru

Then go to the PRU folder, enter TX/RX and run sudo ./deploy.sh. This will start the PRU with the code needed to send and receive VLC data.

After completing the above steps in both TX and RX, you can start using VLC as a general network interface.

Use the iperf tool to measure the data transmission speed of the visible light transmission channel. To do this, start iperf’s client mode on TX (sudo iperf -c 192.168.0.2 -u -b 400k -l 800 -p 10001 -t 100), and start iperf’s server mode on the Receiver (sudo iperf -u -l 800 -s -i3 -B 192.168.0.2 -p 10001). Make sure the Transmitter and Receiver have different IPs, and the Receiver’s IP is 192.168.0.2.

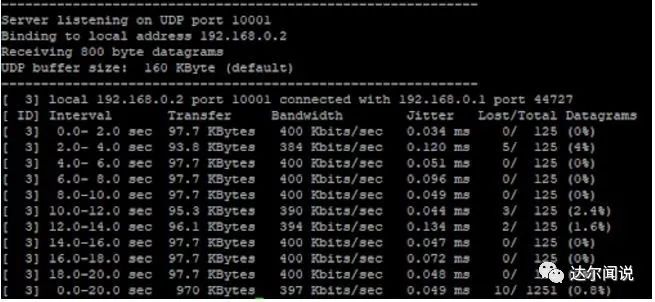
The following figure shows the iperf test results at a distance of 2.5 meters: an average transmission rate of 400kb/s can meet most video transmission needs.

Project Sharing | The Amazing Video Transmission via Light

Actually, light transmission is not that magical; it appeared in the 2017 electrical competition. If you want to try this cool transmission method, you can reply with Visible Light Communication on WeChat to obtain the code.
END
Project Sharing | The Amazing Video Transmission via Light

More Practical Project Recommendations:

STM32 IoT Smart Home Project

Project Sharing | Step-by-Step Face Recognition with MATLAB + Raspberry Pi

Raspberry Pi + Compute Stick 2 Complete Real-Time Face Recognition Project

Building a Cloud Computing Platform for Embedded Development Boards

STM32 Implementing the Simplest Air Mouse

Arduino Rubik’s Cube Robot

STM32 Version “AI Soul Painter”

Making an STM32 Electronic Photo Album

STM32 + DDS Homemade Signal Generator

Remotely Control Home Appliances with Raspberry Pi and Web Interface

STM32 “Cloud” Music Player

Raspberry Pi Remote Monitoring

Designing a Glow Tube Clock Based on STM32

Homemade FPGA Minimum System Board (PCB can be directly made)

Building NAS with Raspberry Pi 4 to Easily Connect Hard Drives

ESP32 Car Software and Hardware Practical Sharing

Complete Creative Gesture Recognition with Just 79 Lines of Code

IoT + Electronic E-Ink Screen to Create Custom Display Screen

Build a Pathfinding Robot for Just a Few Dollars

Glasses-Free 3D Holographic Display, Visual Persistence POV Project

DIY Gesture Recognition Module

Practical Small Designs That Can Be DIYed with 0 Basics

Raspberry Pi Creates a Smart Doorbell + Smart Lock with Video Capability

Strange! My Development Board Can Automatically Play Games

Homemade Ventilator

ESP8266 + Zigbee Networking to Modify Wall Switches

Wireless Home Monitoring System

DIY Bionic Arm, a Tool to Free Your Hands

Handmade Air Purifier, All Design Materials Open Source

Tech Toys: Bluetooth Artillery That Can Be Controlled Remotely

Making LittleBee Monitoring System with ST Sensors to Let Bees “Talk”

Homemade Cat Toy

STM32 + Raspberry Pi to Achieve 6s Rubik’s Cube Robot

Blindly Modifying Drone Controllers, DIY “Foam” Drone

Make a Smart Relay without Arc Using STM32

Only 5 Components Needed to Make a Practical New Type Necklace

The Simplest Method for Heart Rate Measurement (Suitable for Secondary Development)

Breaking the Magnetic Levitation Globe

Recommended Reading:

Project Sharing | Electrical Competition Series | Artificial Intelligence | Postgraduate Entrance Examination
Must-Know Knowledge Points | Graduation Design | Switching Power Supply | Job Seeking
We are Nimo, the founder of Darwin, a girl who only talks about technology and not flirting. The Darwin online education platform aims to serve professionals in the electronics industry, providing skill training videos that cover popular topics in various subfields, such as embedded systems, FPGA, artificial intelligence, etc. We tailor layered learning content for different groups, such as commonly used knowledge points, disassembly assessments, electrical competitions/smart cars/postgraduate entrance examinations, etc. Welcome to follow us.
Official Website: www.darwinlearns.com
Bilibili: Darwin
QQ Group: Group 1: 786258064 (Full)
Group 2: 1057755357
Project Sharing | The Amazing Video Transmission via Light

Like, watch, and share for the triple support!Project Sharing | The Amazing Video Transmission via Light

Project Sharing | The Amazing Video Transmission via Light

Leave a Comment