Introduction
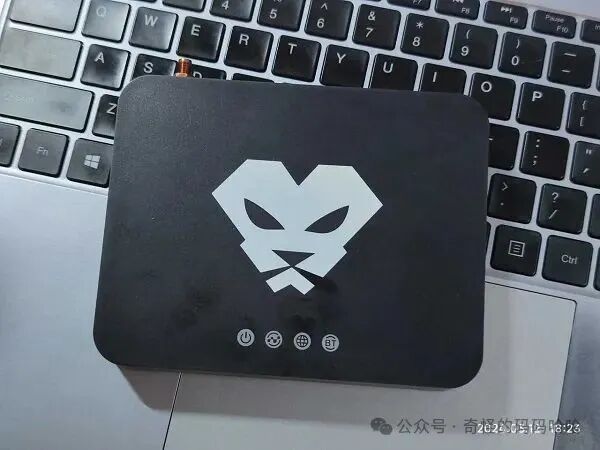
Recently, while browsing a seafood market, I noticed a mining box called the Panther X2, which is another custom hardware box similar to the Xunlei Money Treasure that has already ceased operations. The price for a brand new unit in the seafood market is approximately 110 RMB (as of 2025/5/27).
The hardware configuration includes a Rockchip 3566 processor, 4GB of RAM, 32GB of built-in eMMC flash storage, TF card expansion, a Gigabit Ethernet port, and a USB 2.0 interface. There is no video output interface, and the original packaging comes with a 64GB SanDisk TF card and a 12V/2A DC power supply.
This hardware configuration offers relatively high CPU performance among similar boxes, with ample memory and flash storage, and supports TF card expansion. It is based on the aarch64/arm64 architecture, so there is no need to worry about performance bottlenecks for a long time, unlike the ARM32/ARMv7l architecture used in some other devices that lack third-party application support. However, there are many drawbacks, such as the USB interface being only 2.0 and limited to one port, and the absence of HDMI/DP means it cannot be used as a TV box. Additionally, it has only a single Ethernet port, so it cannot function as a soft router.
The Panther X2 can be flashed using two methods: the first is via SD card, and the second is via USB cable.
SD Card Flashing
This method is relatively simple and does not require special tools. Prepare an SD card or USB drive.
Download the SD Card Flashing Package
Download the “SD Card Flashing” package containing all files from the following link:
https://pan.xunlei.com/s/VORH4ivQX_SrnaWVzMF4c6RXA1?pwd=2uep#
Step 1: Burn the System
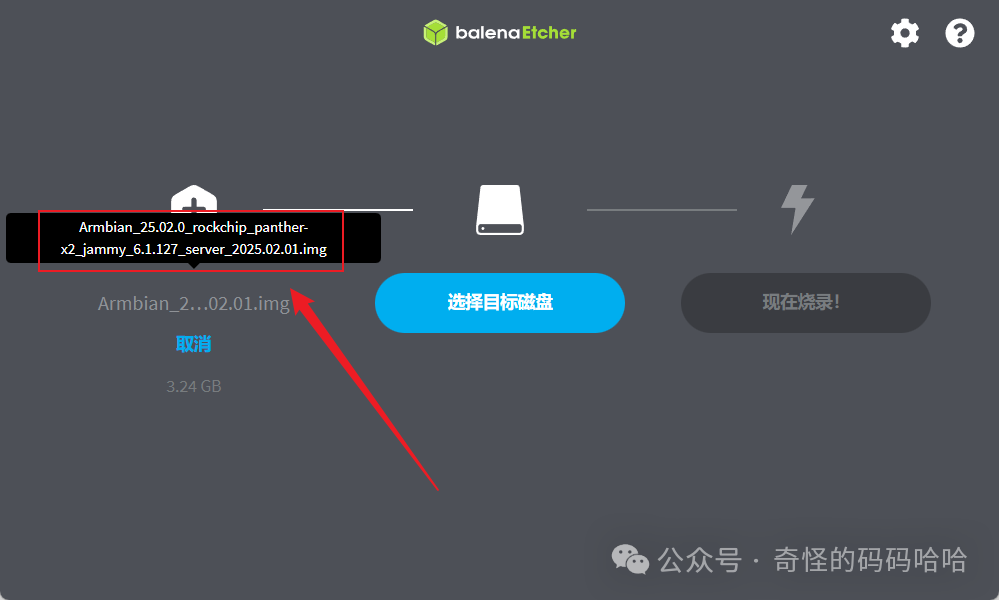
1. Open the balenaEtcher-Portable software, select the image compressed package (the package is in compressed format, do not extract, just select it):
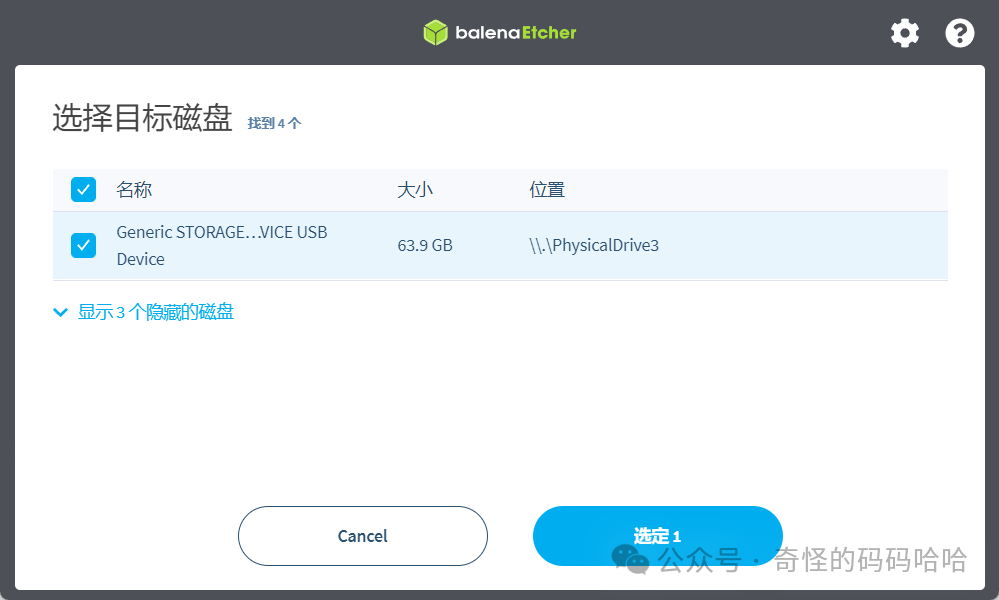
2. Click on the target disk and select your USB drive; I selected my TF card here.
3. Click “Flash Now” and wait for the flashing process to complete;4. Then insert it into the device and power it on. After half a minute, you can see the new Armbian device’s IP in the router’s backend, and then SSH into the device.
Step 2: Write Firmware to Built-in eMMC (Optional)
If you do not need to write the system to eMMC, you can use it directly at this point, meaning you can use the USB drive/TF card as the storage medium.
This operation differs from Amlogic chip TV boxes, as you cannot directly use the <span>armbian-install</span> command to complete it.
After successfully booting the system from the TF/USB drive in the previous step, you need to use the <span>dd</span> command to write the Armbian firmware (e.g., Armbian_24.5.0_xxx.img) directly to the built-in eMMC. After writing is complete, power off, remove the TF card/USB drive, and power on again to boot into the Armbian system on eMMC.
dd if=Armbian_24.5.0_xxx.img of=/dev/mmcblk1 bs=1M status=progressUSB Cable Flashing
Requirements for USB Cable Flashing:
- • A USB cable with dual male connectors (if your computer has a Type-C port, you can use a regular Type-C charging cable).
Download the materials (all in the “USB Flashing” package)
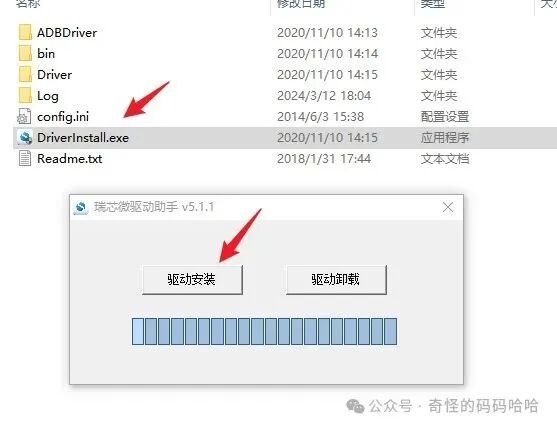
- • Rockchip driver program
<span>DriverAssitant</span> - • Rockchip development tool
<span>RKDevTool</span> - • Bootloader file for rk356x
Download the USB Flashing Package
Download link:
https://pan.quark.cn/s/7811cccf5aae
Step 1: Install Drivers on the Computer
Step 2: Select Firmware
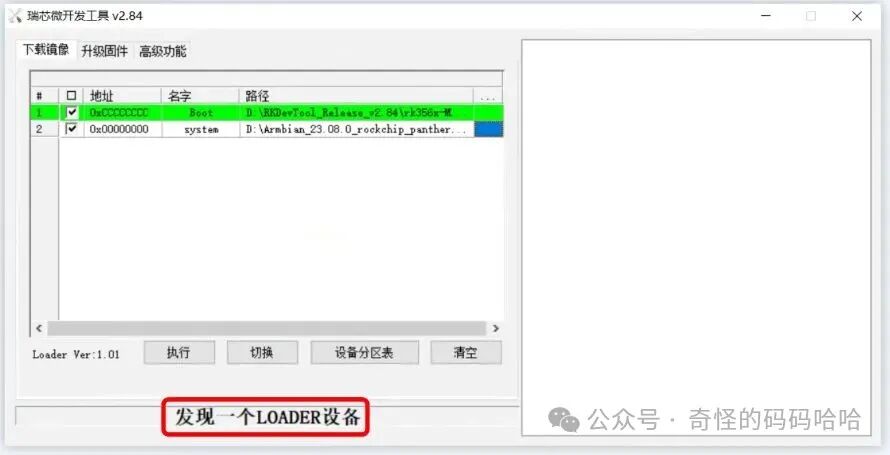
Launch the RKDevTool software, in the <span>boot</span> section, select the <span>RK356x_loader/rk356x-MiniLoaderAll.bin</span> file, and in the <span>system</span> section, select the Armbian image file you downloaded.

Step 3: Start Flashing
- 1. Do not power on the device, remove the TF card. Use a pin to long-press the reset button on the box, then connect the dual male USB cable. The computer will make a “ding” sound, and the Rockchip development tool will display
<span>Found a LOADER device</span>.

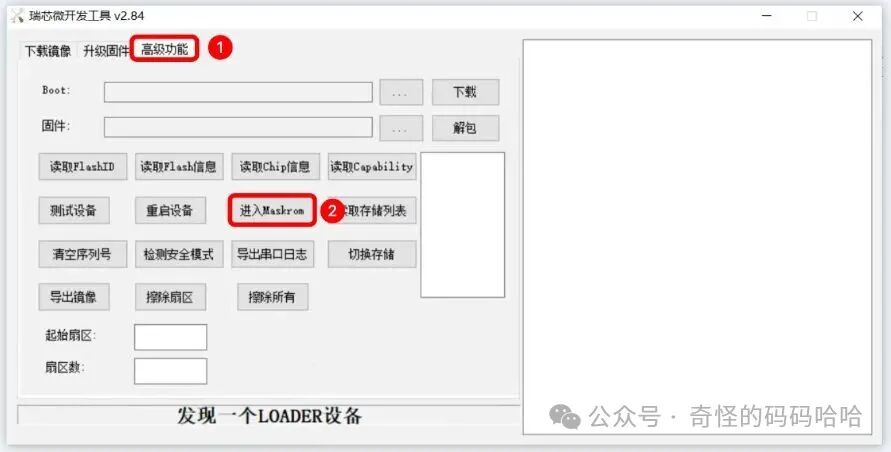
- 2. Click on 【Advanced Features – Enter Maskrom】 to restart the device.
- 3. Click on 【Download Image – Execute】 to start flashing.
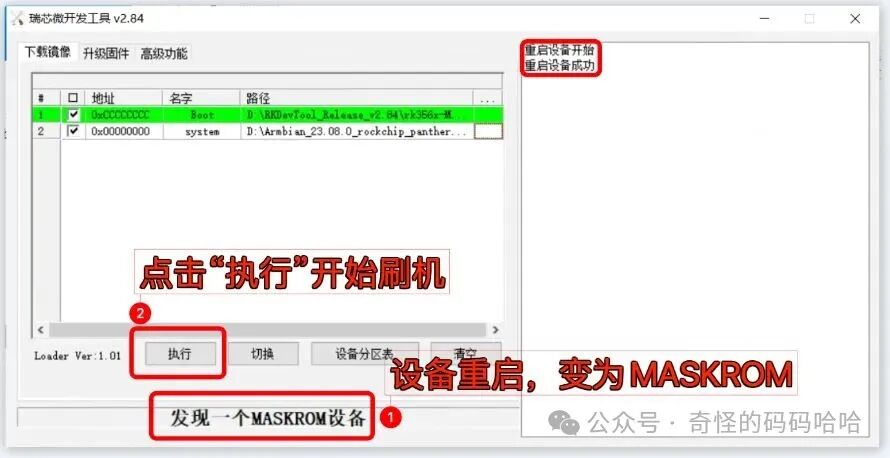
- 4. When you see the message
<span>Download Complete</span>, the flashing process is complete. You can disconnect the dual male USB cable and power on the device.

- 5. Wait for half a minute, and you will see the device appear in the router. You can then connect via SSH.
What Are the Benefits of Installing Armbian?
Installing Armbian can provide powerful functionality expansion and performance optimization for ARM architecture devices (such as TV boxes, development boards, etc.). Below is a detailed analysis of its core uses and practical application scenarios:
1. Lightweight Alternative for Home Servers and NAS
- 1. Low-Cost Home Server Armbian can transform low-power ARM devices (such as the Magic Box M401A, N1 Box) into 24/7 running servers, supporting the following functions:
- • Media Center: Deploy Jellyfin, Plex, and other streaming services for local video transcoding and playback.
- • File Sharing: Set up a home NAS using Samba or NFS protocols, supporting cross-device file access and backup.
- • Docker Containers: Run various containerized applications (such as Nextcloud, Home Assistant) to expand service functionality.
- • Website Hosting: Build personal blogs or small websites based on Nginx/Apache.
- • Edge Computing Node: Run lightweight databases (such as SQLite) or data analysis tools to optimize resource utilization.
2. Embedded Development and IoT Prototyping Platform
- 1. Deep Hardware Adaptation Armbian provides:
- • Custom Kernel: Supports mainstream chips (Amlogic S905, Allwinner H3, etc.), optimizing GPU acceleration and hardware decoding.
- • Driver Compatibility: Pre-installed drivers for common peripherals (such as GPIO, sensors), simplifying hardware debugging.
- • Device Prototyping: Connect sensor networks via MQTT, CoAP protocols to quickly validate IoT solutions.
- • Low Power Optimization: Use ZRAM swap technology to reduce memory usage and extend device battery life.
3. Education and Experimental Environment
- 1. Linux Learning Platform
- • System Management Practice: Learn Shell scripting, service configuration (such as Cron jobs), and network management.
- • Kernel Debugging: Modify kernel parameters or compile custom modules to gain a deeper understanding of Linux operation principles.
- • Security Testing: Simulate penetration testing environments (such as Metasploit) or validate firewall rules.
- • New Technology Validation: Test compatibility of Kubernetes edge nodes, AI inference frameworks (such as TensorFlow Lite).
4. Smart Home and Automation Control
- 1. Home Automation Hub
- • Smart Device Integration: Manage smart bulbs, thermostats, and other devices through Home Assistant or OpenHAB.
- • Voice Assistant Support: Deploy Mycroft or Snips for localized voice control.
- • Intranet Penetration: Use Cloudflare Tunnel or Cpolar for public access to home services.
- • Security Monitoring: Run MotionEye or Shinobi for camera linkage and anomaly detection.
5. Performance Optimization and Resource Management
- 1. Lightweight System Design
- • Low Memory Usage: By default, unnecessary services (such as Bluetooth, desktop environment) are disabled, reducing memory usage by 30% compared to native Ubuntu.
- • Storage Optimization: Use log2ram to reduce write cycles on SD cards, extending storage lifespan.
- • Multiple Kernel Versions: Choose between mainline kernels (long-term support) or vendor-customized kernels (hardware acceleration support).
- • Community Support: An active developer community provides continuous updates and troubleshooting, supporting user contributions to the codebase.