Introduction to the Development Board
The Xurui X3 development board is equipped with Horizon’s new generation low-power, high-performance AI processor AMR-Cortex-A53; it integrates Horizon’s advanced Bernoulli 2.0 architecture AI engine (BPU), providing 5 TOPS of equivalent computing power.
The new BPU architecture greatly enhances support for advanced CNN network architectures and significantly reduces the AI computation’s occupancy rate on the DRR bandwidth.
With the Horizon Tiangong AI development platform, the algorithm development and deployment process is greatly simplified. It features built-in TCP/IP protocol, power input of 5V-2A, power output of 5V1A & 3.3V1A, a package size of 85mm*56mm*20mm, 40 IO interfaces, and supports powerful performance with Ubuntu 20.04 system.
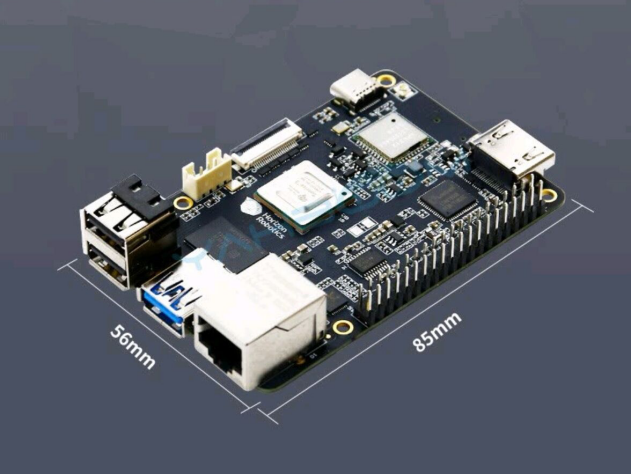
Figure 1 Size of the Xurui X3 Development Board
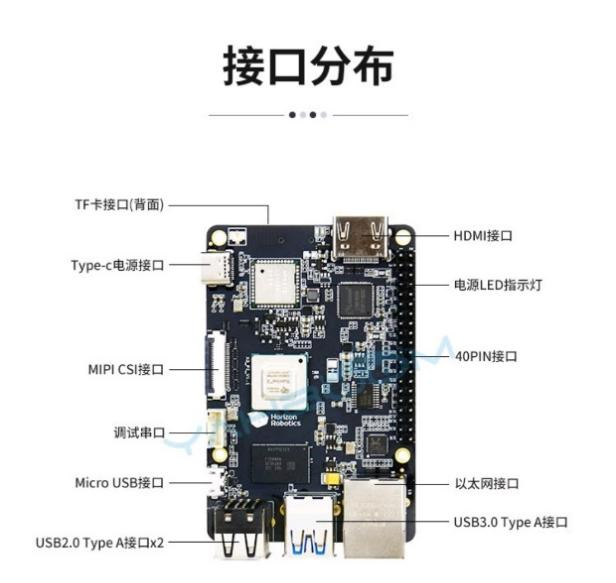
Figure 2 Interface Distribution of the Xurui X3 Development Board
Initial Unboxing and Basic Wiring
1. Unboxing and Preparation

Figure 3 Unopened Image Upon Arrival
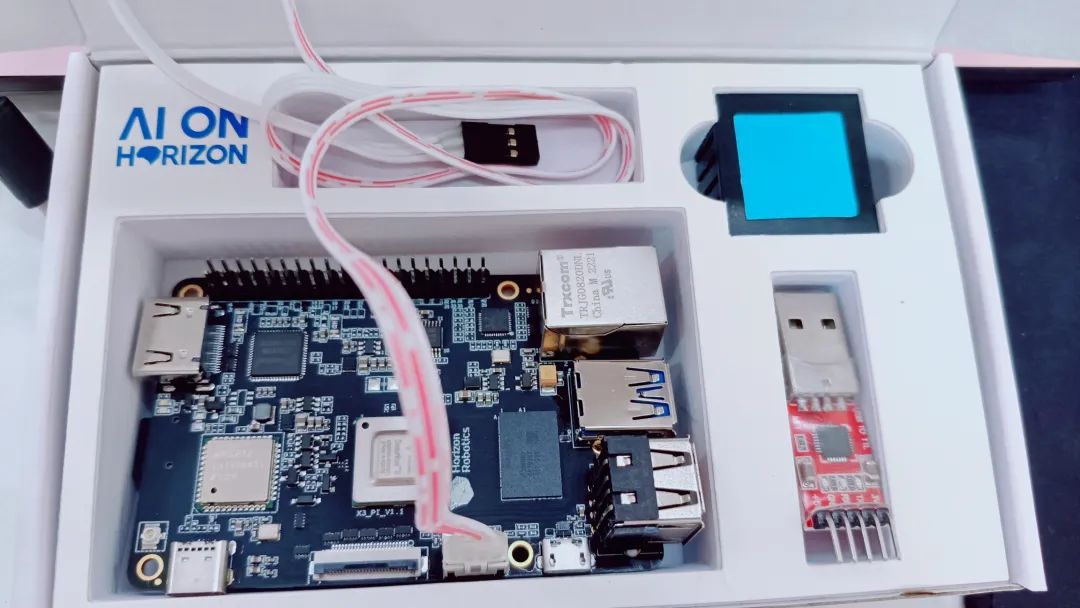
Figure 4 Unboxing Image
After unboxing, you can see a mainboard, a USB-TTL adapter board, connecting wires, and a heatsink. You will need to prepare a Type-C switch connection, a card reader, and a mobile storage card (a basic 8-32G is sufficient)【The Xurui X3 has higher performance requirements for TF cards. I encountered issues during programming due to insufficient performance of the TF card, but I successfully used a SanDisk TF card.】
2. Wiring of the Xurui X3 Development Board and Adapter Board
The wiring is TX<—>RX, GND<—>GND,
Note that the USB adapter board has detailed markings for GND, TX, RX, while the mainboard does not have clear markings, so I have included a diagram here!
As shown in the diagram below:
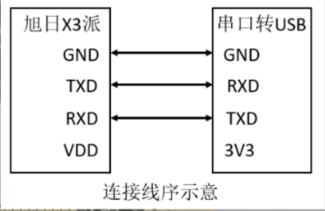
Figure 5 Connection Sequence Diagram
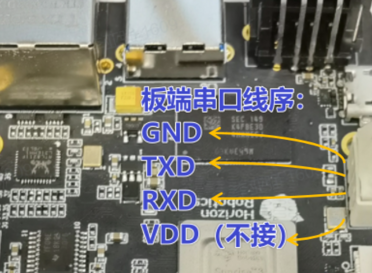
Figure 6 Xurui X3 Interface Diagram
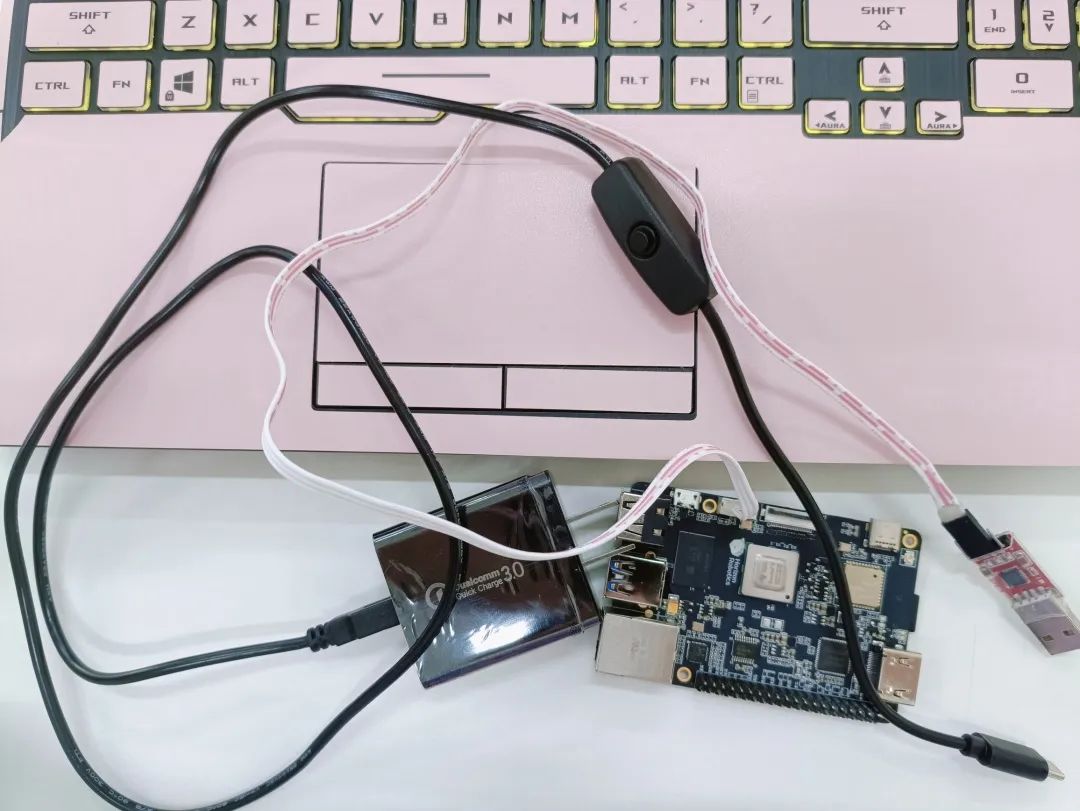
Figure 7 All Basic Preparations Completed
Initial Debugging
1. First, find the X3 package on the Horizon official website and download the X3 system image. Here’s the official website link: https://developer.horizon.ai/resource
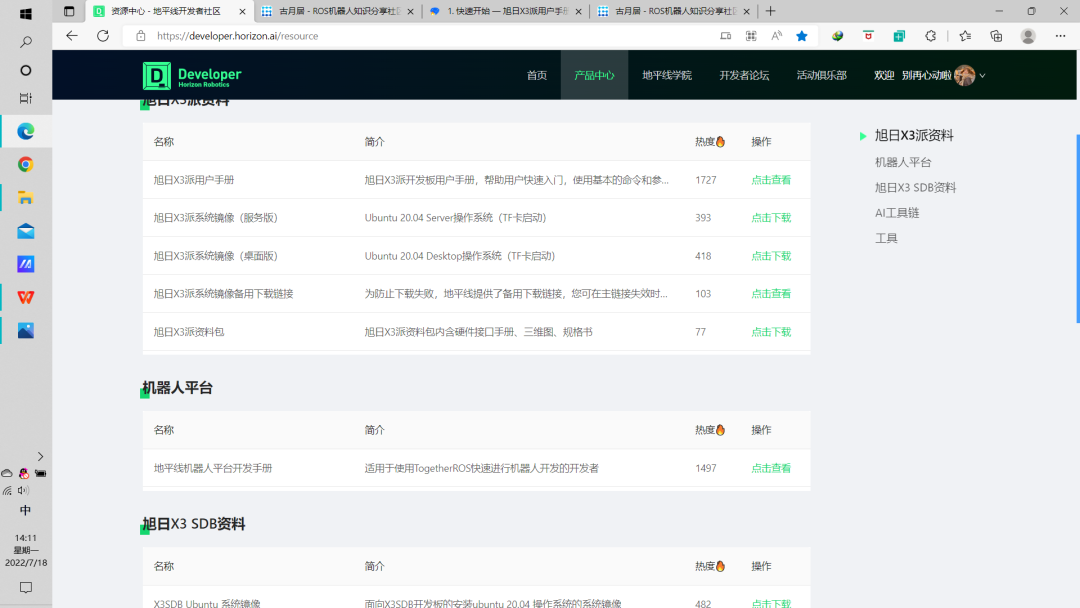
Figure 7 Horizon AI Community Official Resource Download Interface
(Here’s a note: I downloaded the Ubuntu 20.04 Desktop version.)
2. After downloading, the next step is to burn the image. Insert the TF card into the card reader on the PC and open Rufus (I used Rufus for the burning process), waiting for the system to recognize the TF card【A tip here: when I was reading the TF card, my computer did not recognize it, and there was no pop-up for removable devices. If anyone encounters the same issue, you can adjust the allocation in the disk management settings on your computer.】.
Then select the just downloaded and extracted image file in Rufus, click start and confirm to begin the image creation. Once the progress bar completes, you can close Rufus and remove the card reader.
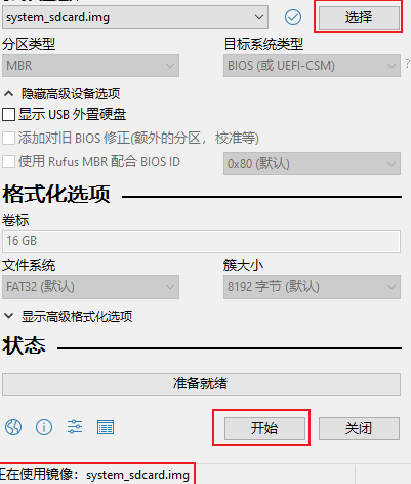
Figure 8 Image Burning
3. After the image burning is complete, insert the TF card that you just removed from the card reader into the Xurui X3 development board. The first time, I chose to log in via the serial port. I used the MobaXterm software, plugged the X3’s USB adapter board into the computer port, and connected the Type-C power supply (do not power on at this time), open MobaXterm, click session—Serial, select the serial port number (mine is COM3; everyone should choose according to their situation) and set the baud rate to 921600, then click OK (after clicking OK, turn on the power switch).
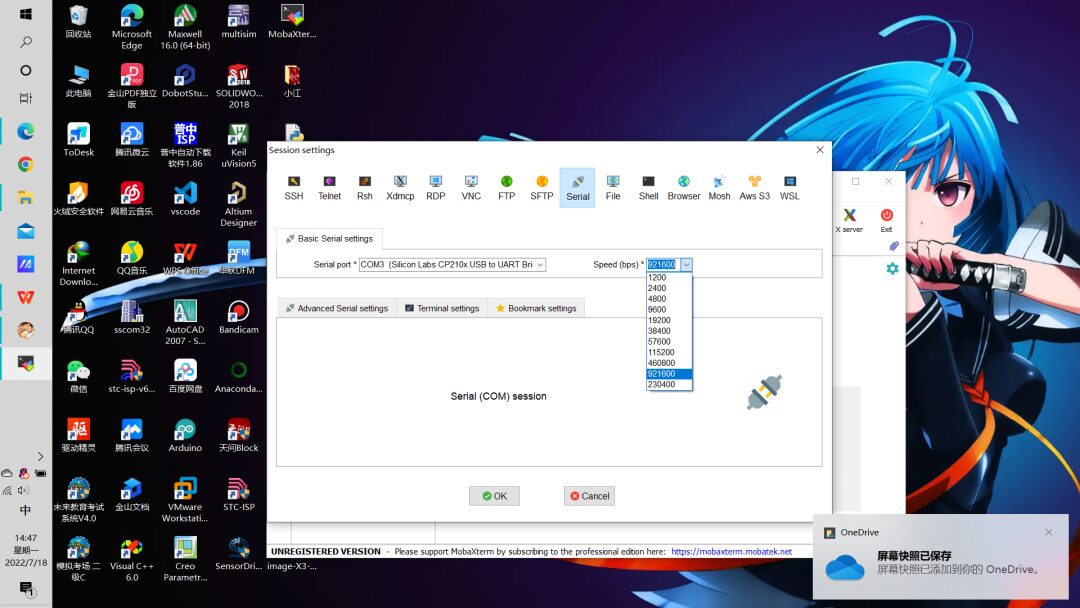
Figure 9 Selection of Serial Port Number and Baud Rate in MobaXterm
4. At this point, a lot of English letters will start scrolling, haha. Wait for it to stop, then enter the username and password, both are: root; this ends the serial connection method! Next, just use methods as you would in a Linux system, for example, we can try entering ls and pwd.

Figure 10
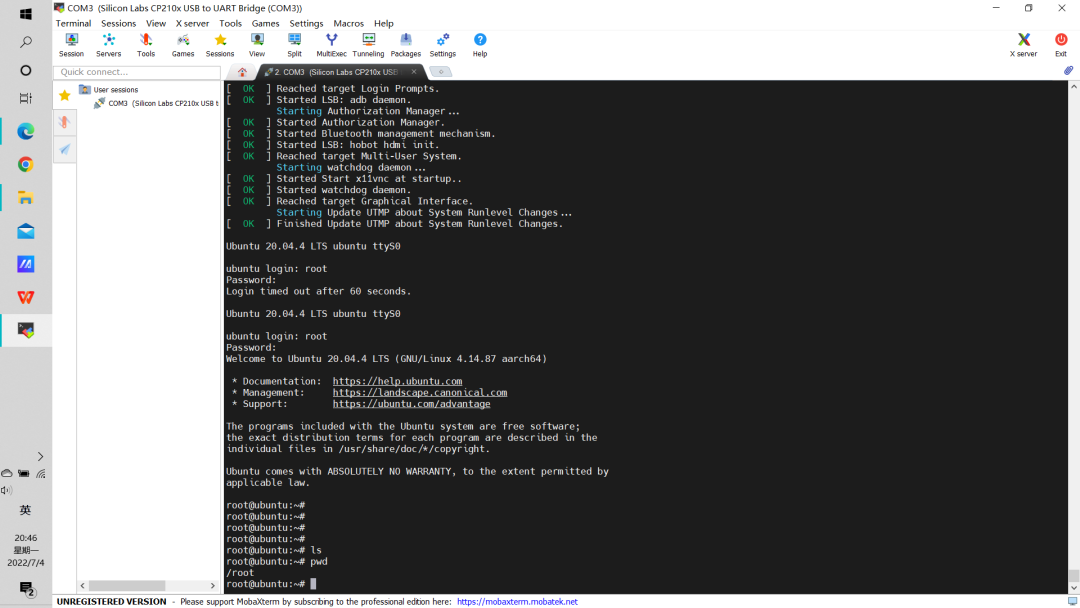
Figure 11 Serial Login Completed
That’s all for now! The next part will continue! If there are any mistakes or inaccuracies, I hope everyone can criticize and correct them!

“Together ROS Core Principles and Applications”
This series of courses will be continuously updated alongside system iterations, providing a systematic learning resource from system installation to AI applications. It supports content for intelligent robotics industry applications, maker development, and teaching practice.

(Scan to join the learning for free)