👇👇Follow and reply “Join Group” to be added to the Programmer Group Chat👇👇
Link | segmentfault.com/a/1190000021143144
Raspberry Pi (the Chinese name is 树莓派, abbreviated as RPi, or RasPi / RPI) is a microcomputer designed for learning computer programming education, only the size of a credit card, with a system based on Linux. With the release of Windows 10 IoT, we can also run Windows on Raspberry Pi.
Since its launch, it has been sought after by many computer enthusiasts and makers, and it was once very hard to find. Don’t be fooled by its small appearance; it is powerful inside, with video, audio, and other functions, making it a small yet complete device.
1. Understanding in My Words
In my words, Raspberry Pi is like a host computer; you can connect external monitors, keyboards, mice, USB drives, and other peripherals. Because it is very small and has many serial and external ports, it can directly call many low-level hardware components.
2. Models on the Market
The most common model on the market is the 3B+ model, which you can find a lot of on Taobao. The price for just the mainboard (without any peripherals) is around 230+, which is a bit expensive and exceeds my budget, so I continued searching for a cheaper option, and finally found a Raspberry Pi for 100+.
3. Raspberry Pi Zero W
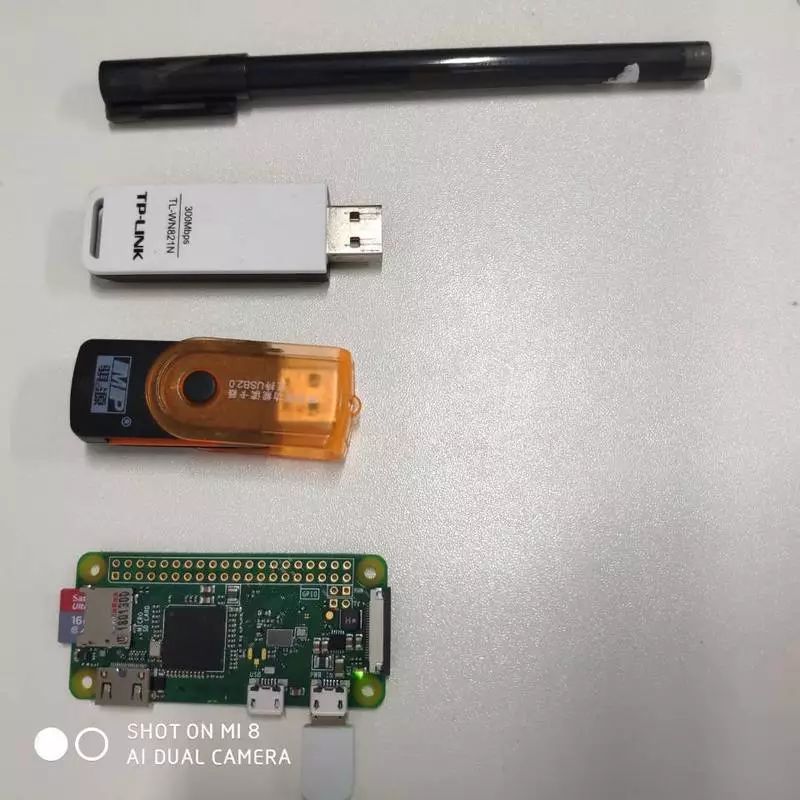
Raspberry Pi Zero W is a mini version of Raspberry Pi, only 1/3 the size of 3B+. When you actually get it, you will find it is super small and super cute. Below is a picture of my actual device, you can see how mini it really is.
You can see that at the top is a regular black pen, followed by a plug-and-play external WiFi adapter, then a USB card reader, and at the bottom is our main character today, Zero W. It is really super small, isn’t it? It perfectly illustrates the phrase “Though the sparrow is small, it has all the vital organs.”
The main parameters of this Raspberry Pi are as follows:
• BCM2835 processor, 1GHz main frequency, 512MB RAM
• micro-USB power interface
• micro-USB OTG interface
• Composite video and reset expansion interface
• Fragile CSI camera interface
• micro-SD card slot for storing the operating system
• 40-pin GPIO expansion interface
Don’t underestimate its CPU with only 1 core and 512MB of RAM; it can still perform quite well, running a website is really a small case for it.
4. More Raspberry Pi
For more Raspberry Pi models or usage tutorials, you can visit the Raspberry Pi Lab website, which has a wealth of resources.
Installing the System on Raspberry Pi Zero W
1. Preparation
You may need to prepare the following items:
• 16GB or 32GB SanDisk memory card (note that it’s the small type used in old phones)
• A very ordinary USB Android data cable (not type-c)
• USB drive formatting tool (recommended to use SDFormatter)
• System burning tool (Win32DiskImager)
• Raspberry Pi system (can be downloaded from the official website)
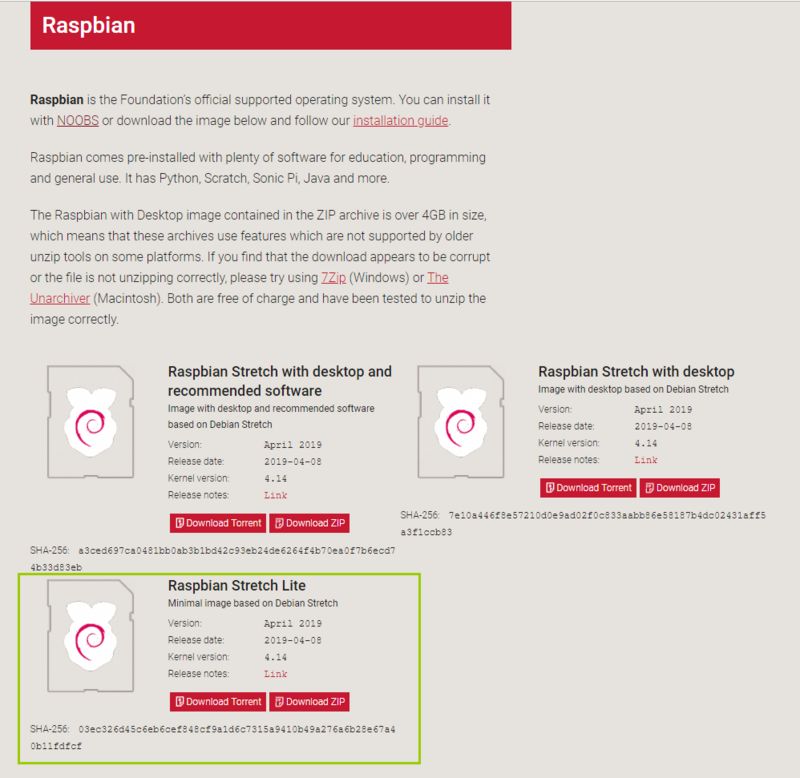
I used the Raspbian Stretch Lite system image, which is officially made, and the lite version is without a desktop, only a black console, which is small in size, saving performance and memory.
The version with desktop in its name is more user-friendly for those unfamiliar with Linux systems, but it is larger in size and consumes more resources.
2. The First Step: Download the System Image
After downloading the system image you need, as shown in the picture below
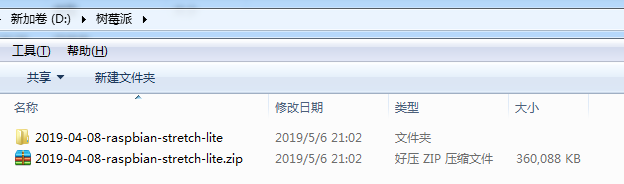
At first, there is only a zip compressed file, about 360MB in size. You need to unzip it to get the folder shown in the picture.
Then enter the folder to find an img image, about 1.7GB in size.
PS: This is the official Raspbian image. If it is another third-party image, the downloaded compressed package may not be an img image after unzipping. In that case, please search for a solution separately.
3. Use Win32DiskImager to Write the Image to the Memory Card
Insert the memory card into the card reader, then connect it to the computer.
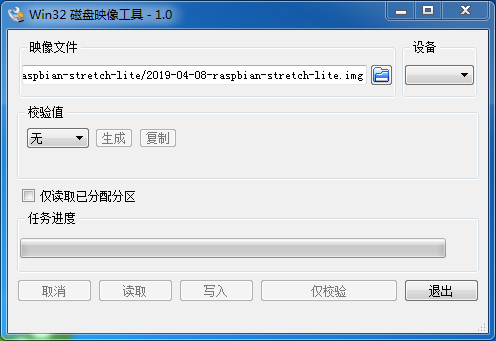
Open the Win32DiskImager software, select the img image, choose your USB drive as the device, and then click write. Once writing is complete, a success prompt will pop up.
PS: In the picture above, I did not select a device because it was not inserted into the card reader; it’s just a demonstration.
4. Modify Files in the Boot Partition
Don’t rush to unplug the card reader; at this point, we can see that the USB drive only has a partition named boot, which may only be around 40MB in size. Don’t worry because Windows does not recognize the other partitions of the Linux system on the memory card.
4.1 Create an SSH File
Since our Zero W has a mini HDMI interface, but I don’t need a screen, I need to connect to the Zero W system using SSH, which requires enabling SSH functionality on the first boot.
We enter the boot partition and create a file named ssh. Be careful not to add a file extension and do not write anything inside!
4.2 Create a wpa_supplicant.conf File
Since SSH connection requires an IP address, we need the Zero W to automatically connect to WiFi on the first boot, so it is in the same local area network as our computer, allowing us to connect to the Zero W system via SSH.
Similarly, in the boot partition, create a file named wpa_supplicant.conf, then write the following content inside and save:
country=CN
ctrl_interface=DIR=/var/run/wpa_supplicant GROUP=netdev
update_config=1

network={
ssid="your_wifi_name"
psk="your_wifi_password"
}
5. Assemble Our Minimal Host and Connect
Take the memory card out of the card reader and insert it into the Zero W, then connect it to power using a USB Android data cable (5V1A).
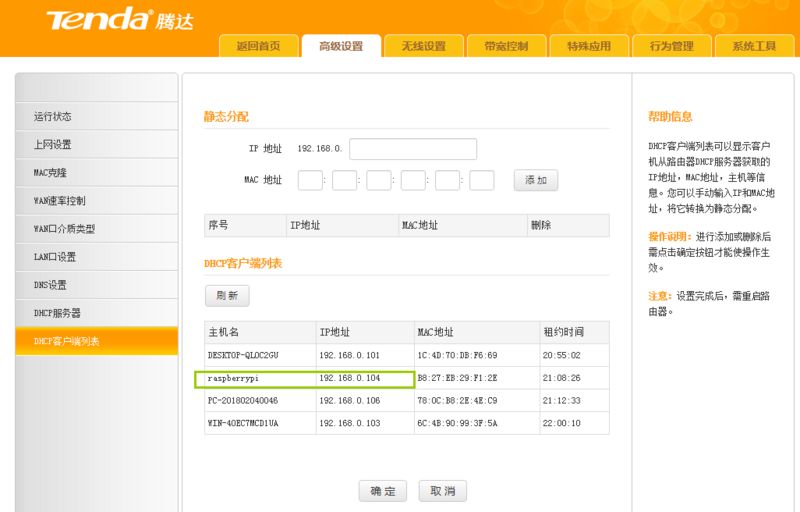
Wait a few minutes; during this time, the indicator light on our Zero W will keep flashing, which is normal. When the indicator light stays on, we go to the router to check the Raspberry Pi’s IP address.
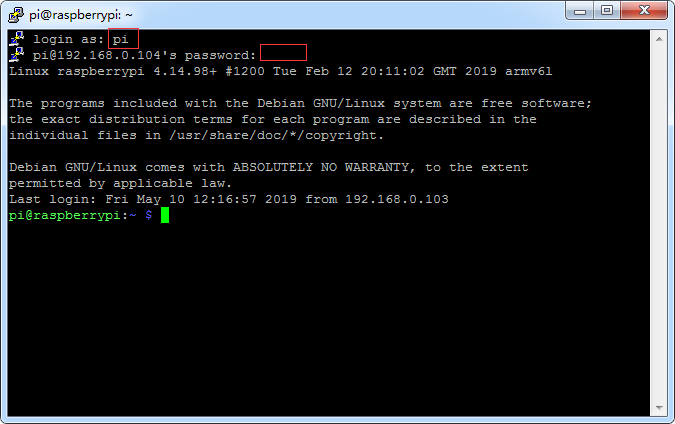
We can see that our Zero W’s IP is 192.168.0.104. Then use an SSH connection tool (recommended to use Putty) to connect to the Raspberry Pi. The initial account is pi, and the password is raspberry.
Connection successful, as shown in the picture above. This means our system has been installed correctly.
PS: If using a mobile phone as a hotspot acting as a router, you can download an app called Android Terminal on your phone, then enter the command ip neigh to check the IP information of devices connected to your phone.
6. Optimize Our Raspberry Pi System
6.1 Modify Sources
Because foreign sources have very slow connection speeds from within China, we need to change to domestic sources. I modified it to the USTC source.
6.1.1 Modify sources.list File
sudo nano /etc/apt/sources.list
-- Comment out other contents, add the following:
deb http://mirrors.ustc.edu.cn/raspbian/raspbian/raspbian stretch main contrib non-free rpi
6.1.2 Modify raspi.list File
sudo nano /etc/apt/sources.list.d/raspi.list
-- Comment out other contents, add the following:
deb http://mirrors.ustc.edu.cn/archive.raspberrypi.org/debian stretch main ui
6.1.3 Execute Update
sudo apt-get update
sudo apt-get upgrade
6.2 Modify Time Zone
sudo dpkg-reconfigure tzdata
Find Asia, then select Shanghai, and you are done.
6.3 Enable SSH on Startup
sudo raspi-config
Enter, select Interfacing Options, then find SSH, press Enter to enable it.
After starting the SSH service in the terminal command line, if the system is restarted or shut down, the SSH service is turned off by default and needs to be started manually. To make it easier, you can set the SSH service to start automatically on boot. Open the /etc/rc.local file and add the following line before the exit 0 statement:/etc/init.d/ssh start
It’s recommended to try both methods; I can confirm that mine works.
7. Install Nginx
# Install
sudo apt-get install nginx
# Start
sudo /etc/init.d/nginx start
# Restart
sudo /etc/init.d/nginx restart
# Stop
sudo /etc/init.d/nginx stop
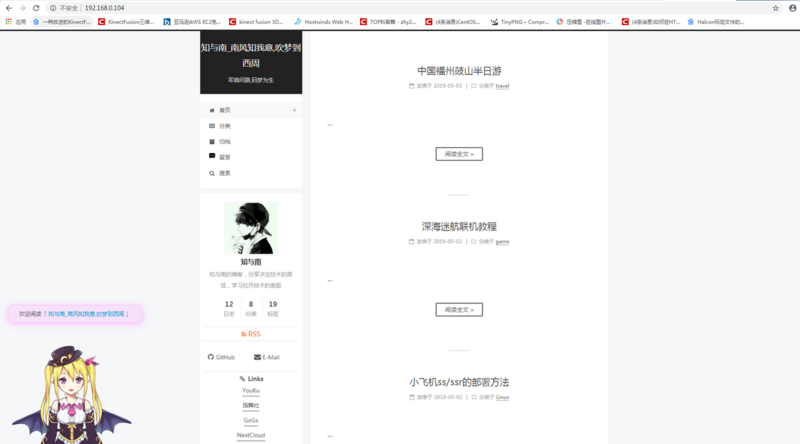
Open the browser and visit 192.168.0.104 (your Raspberry Pi IP address), and you can see the Nginx page, indicating that it has been installed successfully.
I have uploaded my blog, as shown in the picture below.
You can see the page normally, but this can only be accessed within the local area network. I want to know how to allow everyone to access it?
8. Intranet Penetration
Intranet penetration means exposing the web application from the local network to the public network through NAT, allowing others to access it.
Currently, intranet penetration is mainly done using ngrok and frp, both of which are very useful. In China, free ngrok options include ittun, sunny, and natapp. The first two allow custom domain names, while the latter requires a VIP version for custom domain names.
I have tried all three, and I found that the arm version of the ngrok client from sunny couldn’t run on my Raspberry Pi, but both ittun and natapp’s ngrok work. Since I need a custom domain name, I used the ittun ngrok_arm version.
Usage methods are detailed on the official websites of these three, so please check them out yourself.
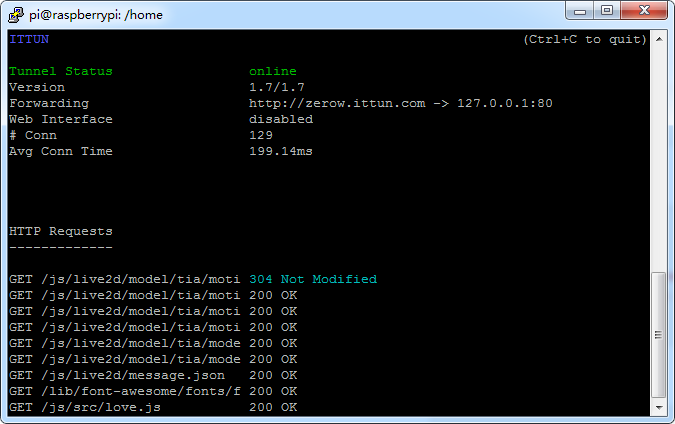
This is a screenshot during normal operation; when accessing http://zerow.ittun.com/, you can…
Since ngrok needs to run in the background, I use a screen session to allow it to run in the background. However, I haven’t figured out how to enable it to start automatically; in case of power failure or disconnection, I must manually run ngrok again, which is currently an unresolved pain point.
9. More
Raspberry Pi can be used not only to run a website but also has many other functions waiting for your development. You can check out the Raspberry Pi Lab for many practical tutorials written by experts.
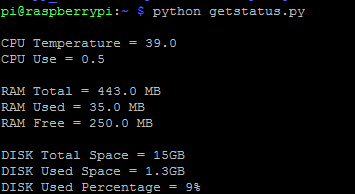
The status information of this Zero W is as follows:
It has nginx and ngrok services running, with 250MB of memory left, which is quite comfortable. The CPU temperature is also not high, running for two days, basically between 37-39 degrees.
-End-
Recently, some friends have asked me to help find some interview questions, so I went through my 5TB of collected resources and compiled them. They can be said to be essential for programmer interviews! All materials are organized in a cloud disk, welcome to download!
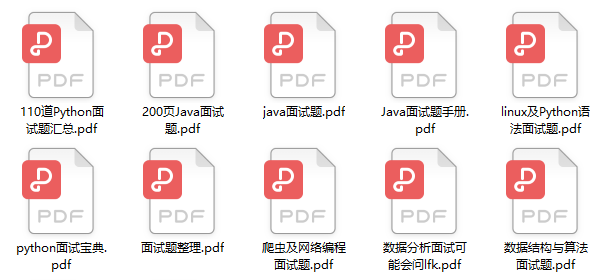
Click the card above, follow, and reply 【<strong>Interview Questions</strong>】 to get them
For those who are watching, here’s a good article to share with more people↓↓