This tutorial will specifically introduce how to modify the Arduino part of the ROSArduinoBridge code. This code is the main code for the lower computer mobile chassis, running on the Arduino Mega2560 main control board, which is used to control the chassis motor rotation and receive feedback from each motor encoder, thus allowing the mobile chassis to form a closed-loop control.
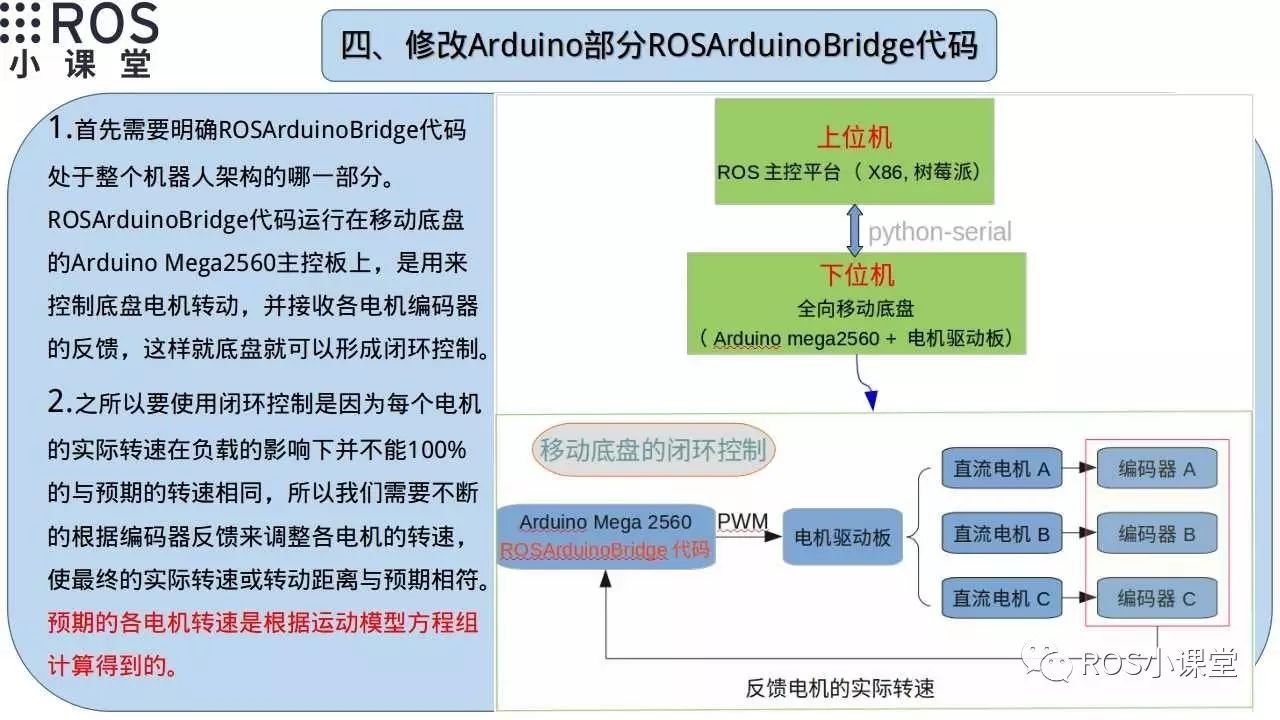
First, let’s introduce the position of the modified Arduino code in the entire robot code architecture. We treat the mobile chassis code as lower computer code, and this part of the code runs on the Arduino Mega2560. Moreover, in the entire chassis motion control, we form a complete closed-loop control.
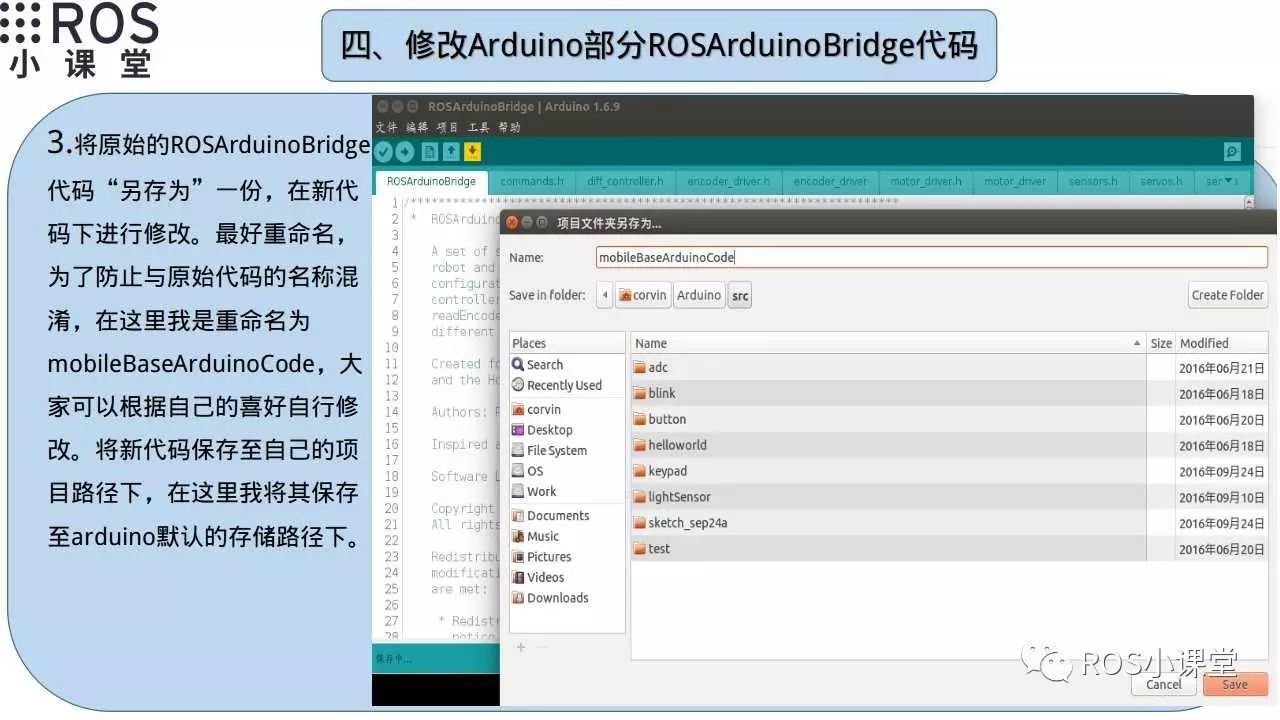
Save the original code as a copy before making modifications. It is best to rename it to prevent confusion with the original project name and save the code to your project path.
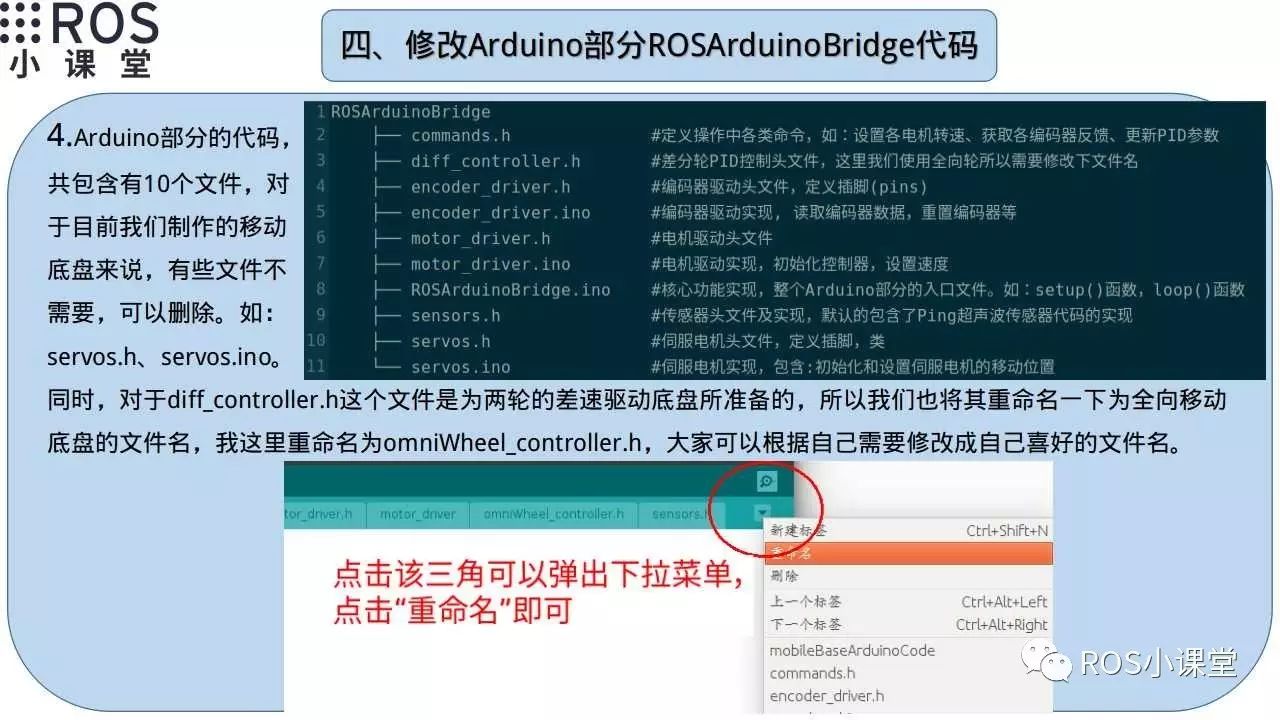
In the entire project source code, some source files are not needed for now and can be deleted. For example, the servos.h and servos.ino files for controlling the servo can be deleted since we currently do not have servos installed on the mobile chassis.
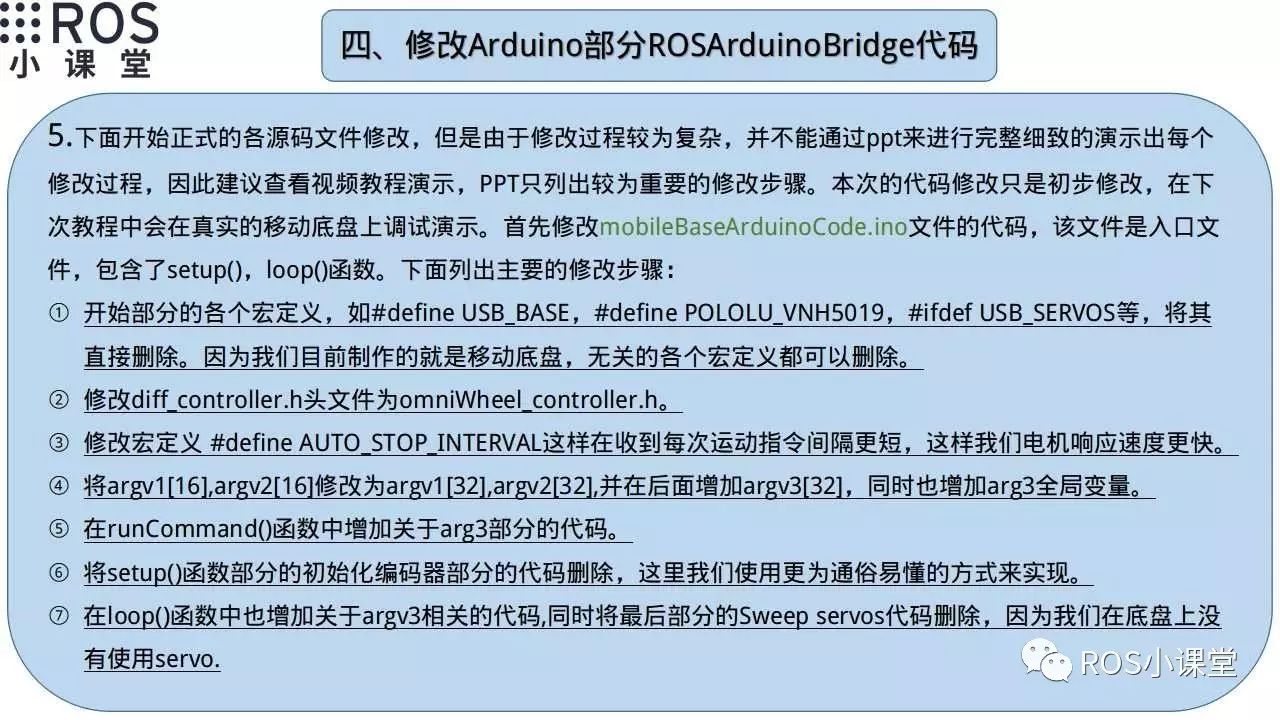
Introduce how to modify the entry file mobileBaseArduinoCode.ino, the main steps have been listed in the above image. If you want to see the entire modified code, it is recommended to watch the video tutorial.
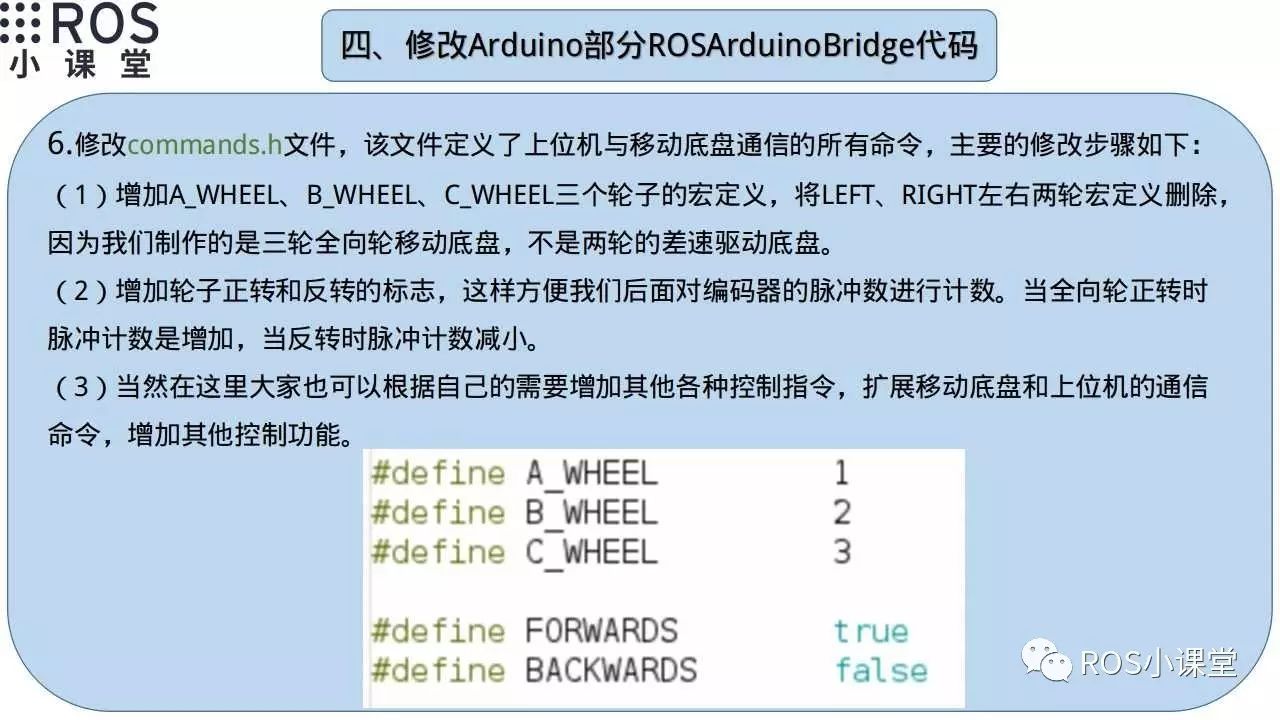
Introduce the modification of the commands.h file, mainly changing the macro definitions of two wheels to three wheels and adding macros for the forward and reverse rotation of the wheels.
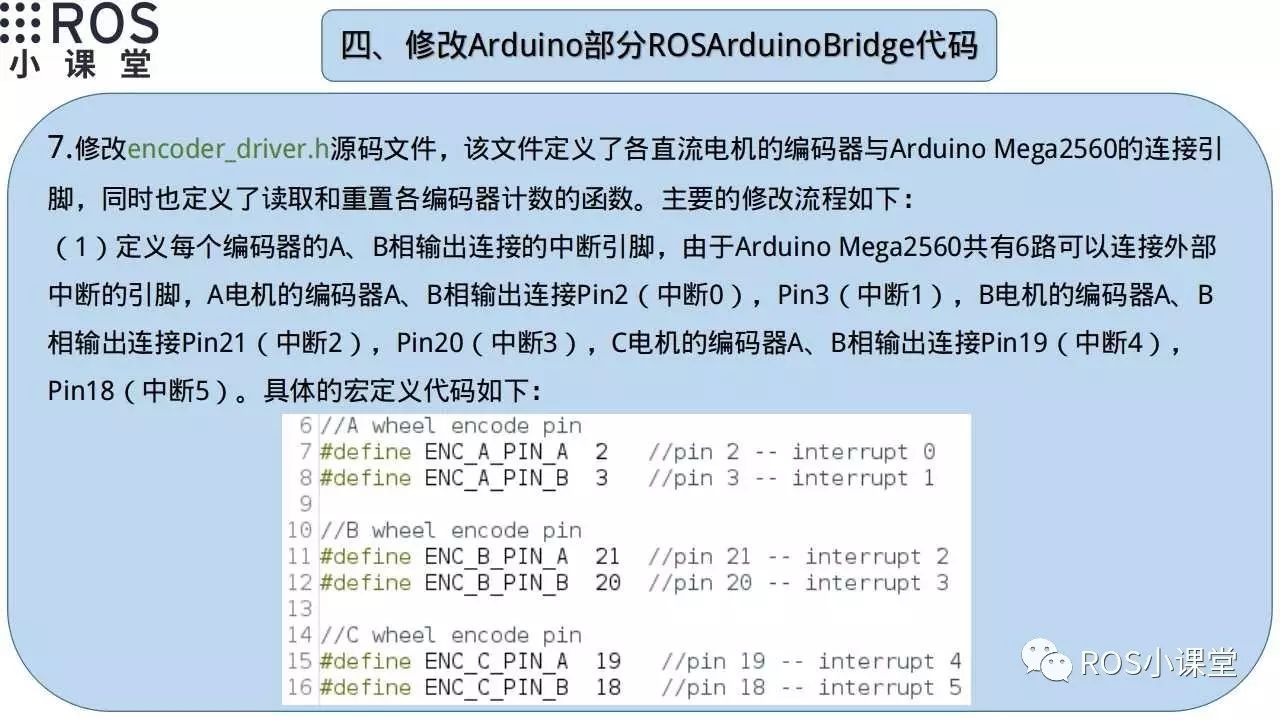
Introduce the modification of the encode_driver.h source file. We use interrupts to count the pulse number of each encoder. Here, we first define the pins connected to each encoder.
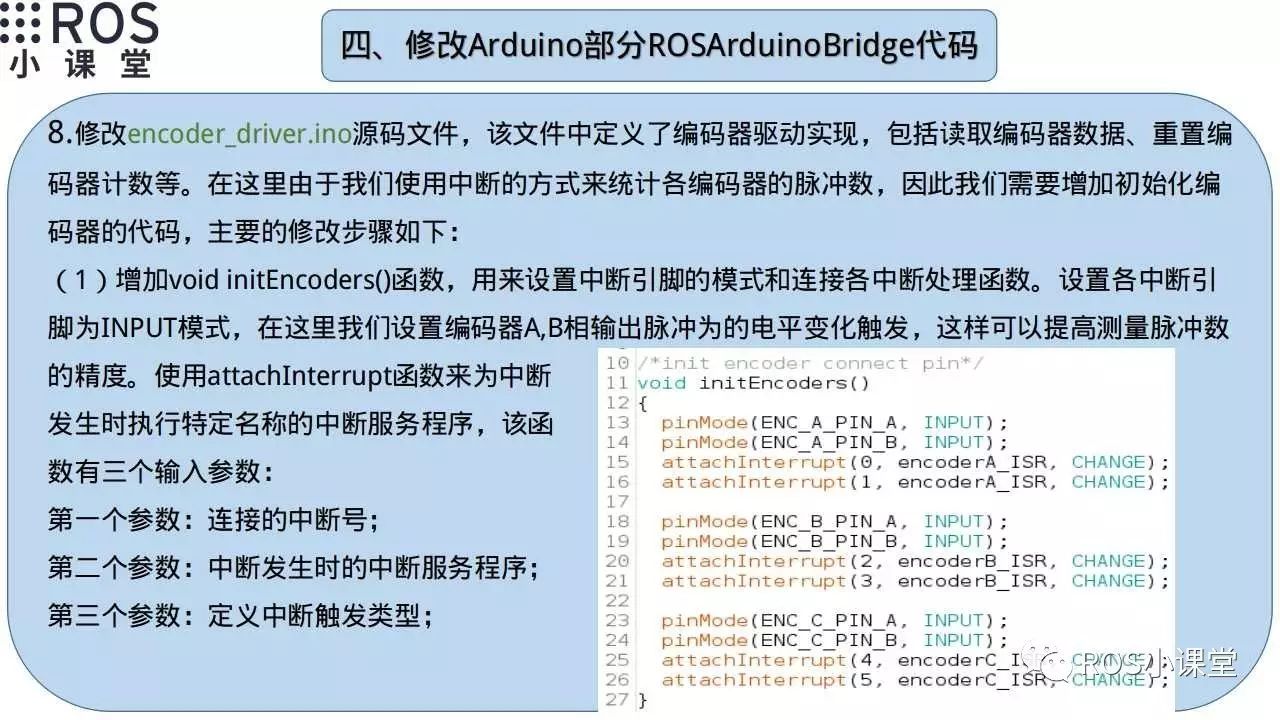
Introduce how to modify the encoder_driver.ino file, first adding the encoder initialization function, setting the mode of each encoder pin, and connecting the interrupt handler function.
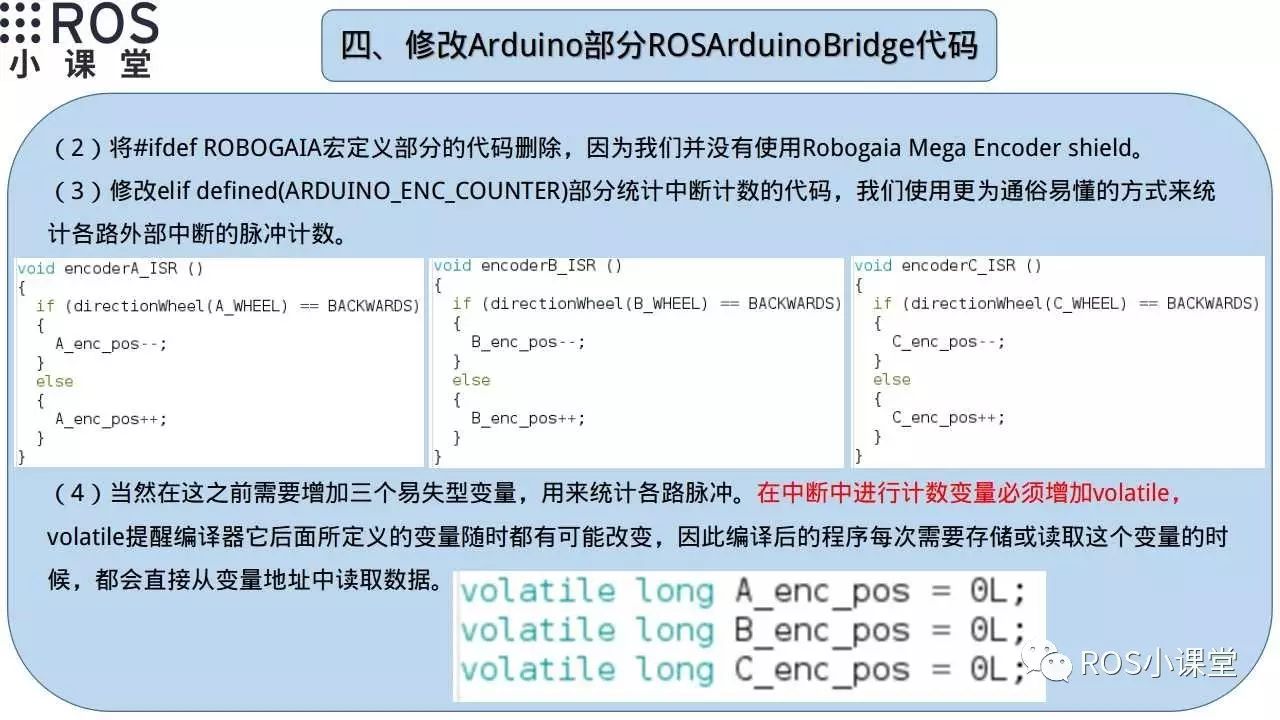
The interrupt handler function mainly increases or decreases the encoder pulse count based on the motor’s forward and reverse rotation. Here, it is also important to note that when operating on variables within the interrupt, if the variable is read outside the interrupt function, the variable must be marked as volatile to indicate that it is a volatile variable.
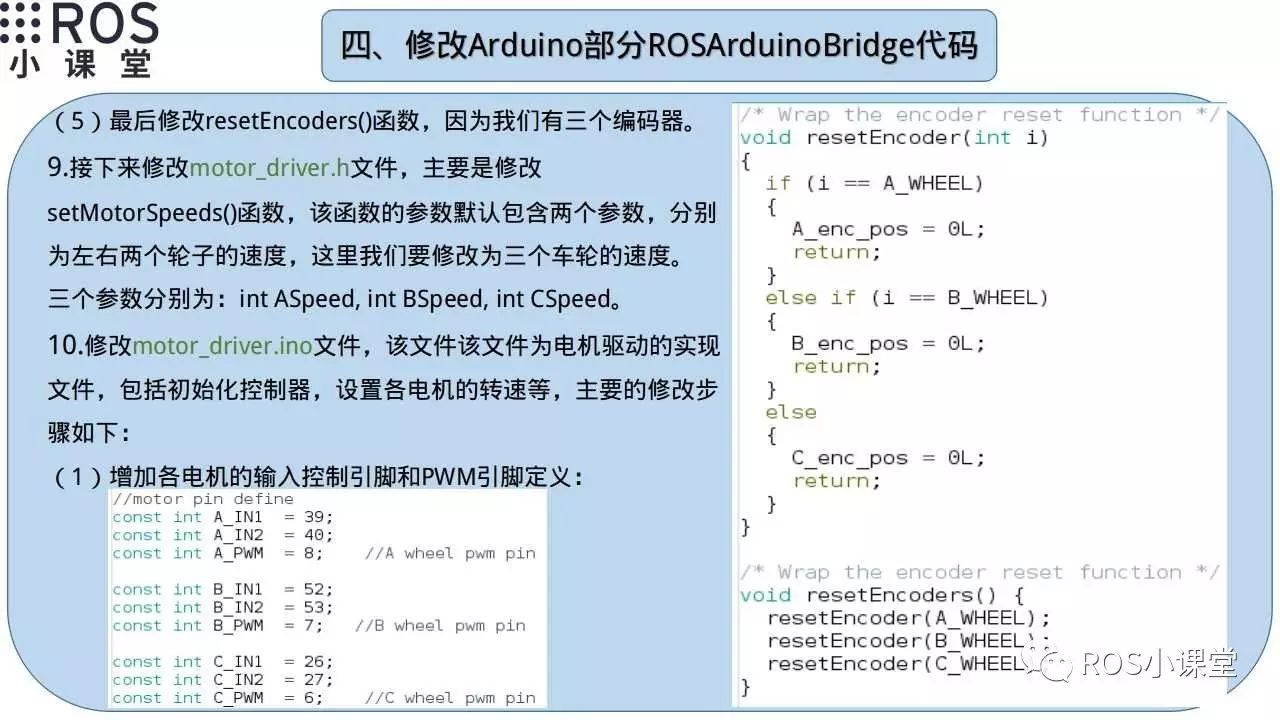
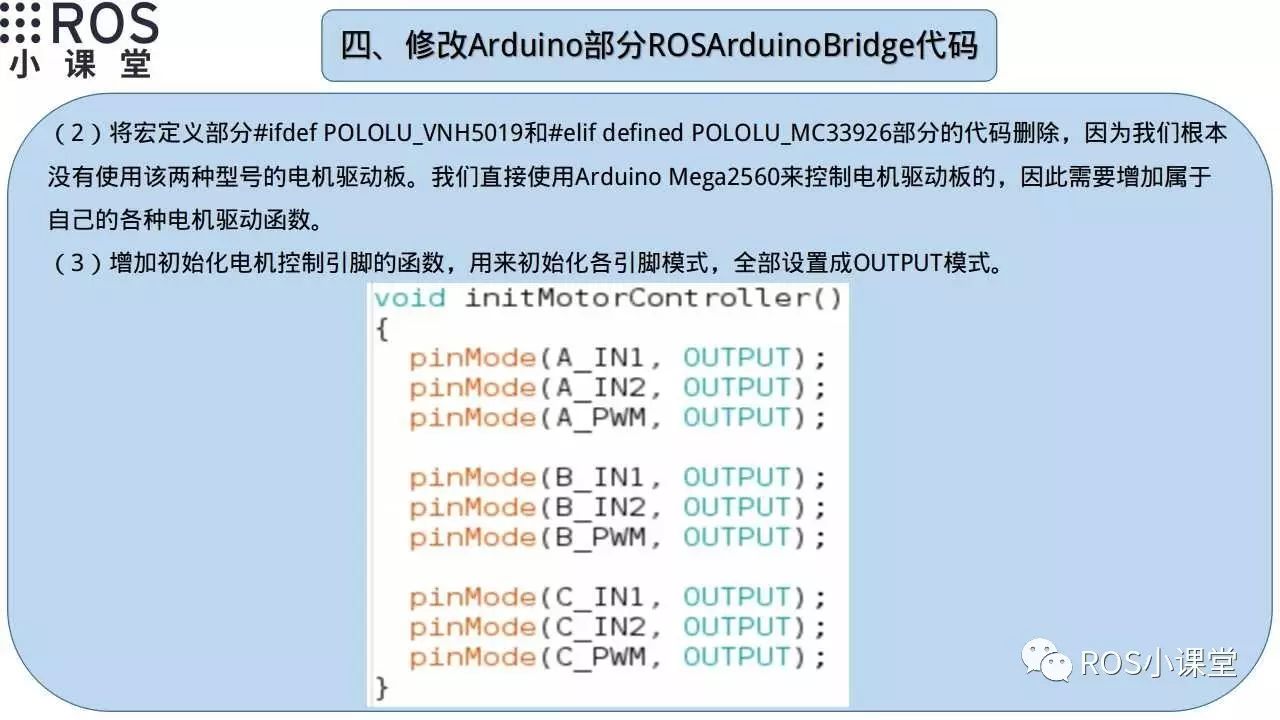
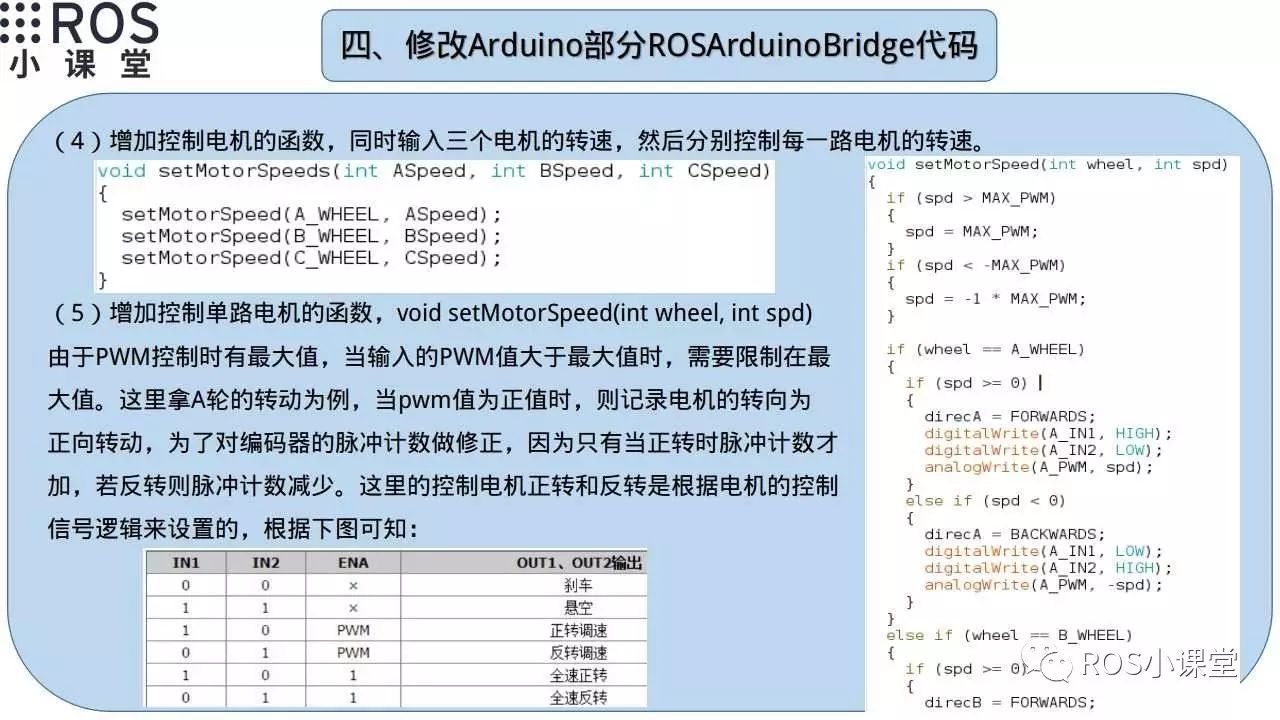
The modification of the motor_driver.ino file is relatively complex. First, we need to add macro definitions for the control pins of each motor, then add a function to initialize the motor pins, setting each control pin to OUTPUT mode, and finally write code to control the forward and reverse rotation of the motors based on the motor control signal logic.
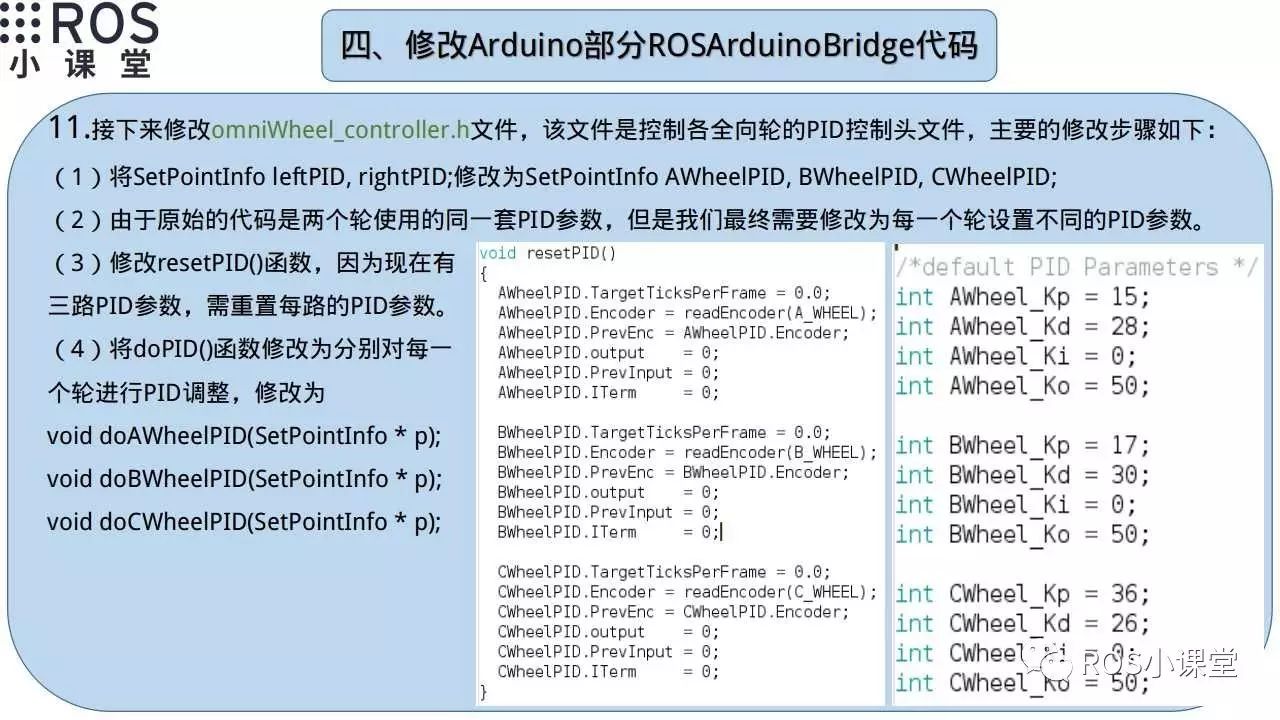
Next, modify the omniWheel_controller.h file, mainly to add PID control parameters for each motor, so we can adjust each motor individually. The final PID parameters need to be obtained after PID calibration to achieve optimal parameters.
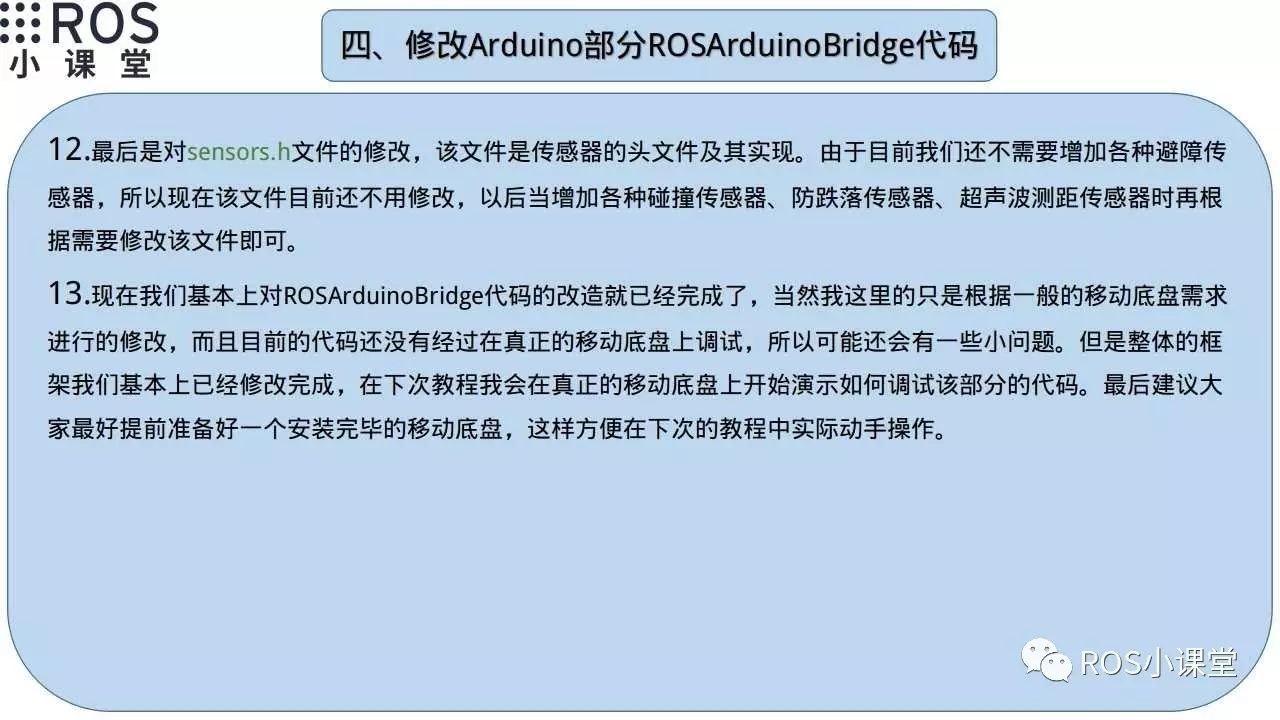
Currently, we do not need to modify the sensors.h file because there is no need to add various obstacle avoidance sensors to the chassis for now. We will modify this file accordingly when we need to add various sensors in the future. At this point, we have basically completed the modifications to the ROSArduinoBridge code, having modified the two-wheeled differential drive chassis code to control a three-wheeled omnidirectional mobile chassis. Of course, further debugging on a real three-wheeled omnidirectional mobile chassis is required to finalize the project. The next tutorial will demonstrate how to debug the code on a real chassis.
Due to my limited ability, if there are any issues in this tutorial, please leave me a message, and I will correct any errors in the tutorial promptly. Similarly, if you want to view the video tutorial for this tutorial, you can search for “ROS Classroom” on Youku to find the corresponding playlist “Making ROS Three-Wheeled Omnidirectional Mobile Chassis” to see the video explanation for this tutorial.