Jetson Nano is a small embedded development board for artificial intelligence launched by NVIDIA. The module measures only 70mm x 45mm, smaller than a credit card, but can provide 472 GFLOPs of computing performance, capable of running multiple neural networks in parallel and processing data from multiple high-resolution sensors simultaneously. Its power consumption is very low, with two modes: 5W (low power mode; can be powered via USB) and 10W (must use a 5V power supply via power jack).
Jetson Nano is equipped with a 128-core Maxwell GPU, a quad-core Cortex-A57 CPU, 4GB LPDDR4 memory, and 16GB of storage. It offers multiple interfaces, including USB 3.0, Gigabit Ethernet, and video (supports 4k60fps), along with a set of 40-pin GPIO expansion pins. Most importantly, it supports a range of popular AI frameworks and algorithms, such as TensorFlow, PyTorch, etc.
Comparison between Raspberry Pi 4 and Jetson Nano mainboard:
 In Raspberry Pi 4, the Cortex-A72 is only one generation newer than the Cortex-A57 in Nano. The newer A72 has a higher clock speed and consumes 20% less power or improves performance by 90%.
Nano runs a Linux-based operating system and can utilize nano to run ROS (Robot Operating System) to control drones and vehicles, requiring the installation of the Ubuntu operating system. It can be controlled remotely via a client after setting up a multi-machine communication framework, including running commands like rviz on the client, which alleviates the performance bottleneck of the Nano host.
Installation of the Image System
Prepare a 32GB or larger TF card and card reader, first format it (if it’s a new card, you can skip this), then burn the image file into the card.
Formatting tool download link:
https://pan.baidu.com/s/1RfOFxnWWXq0vZQyjJu66pQ Extraction code: stu1
Burning software download link:
https://pan.baidu.com/s/1tUPtlzYXOIsqiKBdnmTZNg Extraction code: stu2
Official image download portal:
https://developer.nvidia.com/embedded/downloads
Native image download link:
https://developer.download.nvidia.cn/embedded/L4T/r32_Release_v7.1/JP_4.6.1_b110_SD_Card/Jeston_Nano/jetson-nano-jp461-sd-card-image.zip
 Formatting tool
As shown in the picture, select the location of the image file for ImageFile and choose the location to burn (i.e., the disk where the TF card is located) for Device. Click Write to start burning, which takes about 10 minutes to half an hour, depending on the size of the image.
 Successful burning will display write successfully, then a lot of strange pop-ups will appear, close them one by one and safely eject the card. This is because the disk partitioning method of Ubuntu is different from that of Windows. Then correctly insert the TF card and wireless network card (Nano has no built-in network card), connect the power supply (do not use the USB port of the computer for power supply, the current is insufficient, the adapter is 5V4A MAX) and the monitor to automatically boot. After downloading the native image, it is a brand new Ubuntu system, and the first boot requires configuring language, account password, and possibly installing network card drivers, etc., which will not be elaborated here.
 Installing TF Card
If you want to back up the image system, first format the TF card, insert the TF card into the Ubuntu computer, and use one of the following two commands to check the disk number.
Installing TF Card
If you want to back up the image system, first format the TF card, insert the TF card into the Ubuntu computer, and use one of the following two commands to check the disk number.
sudo fdisk -u –lsudo parted -l
Assuming the disk number checked is sdb, use the following command to back it up.
sudo dd if=/dev/sdb | gzip>/home/jetsonnano.img.gz
There is no progress bar during the backup process; open a new terminal and use the command to check the progress.
sudo pkill -USR1 -n -x dd
Next, I will introduce how to achieve remote control of Nano from the client computer, introducing two methods: one is SSH remote login, and the other is remote desktop software. Both methods require the host and the client to be on the same local area network, either connected to the same network or one of them issuing a hotspot.
1. SSH Remote Login
In the first entry into the Nano desktop, configure the network connection to Wi-Fi and check the IP address.
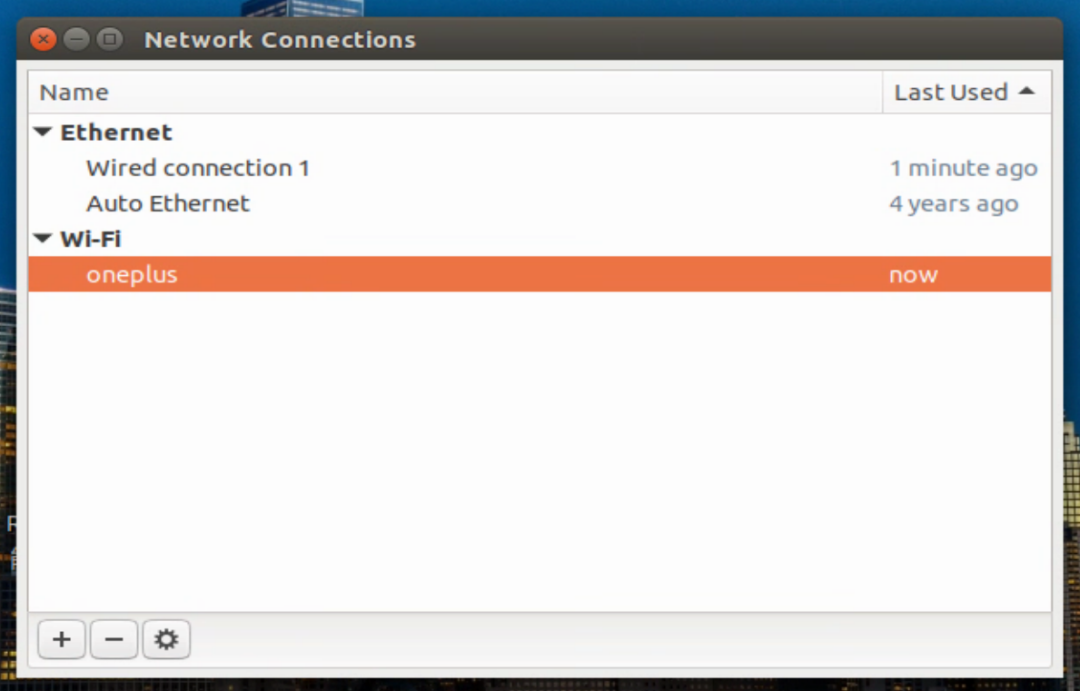
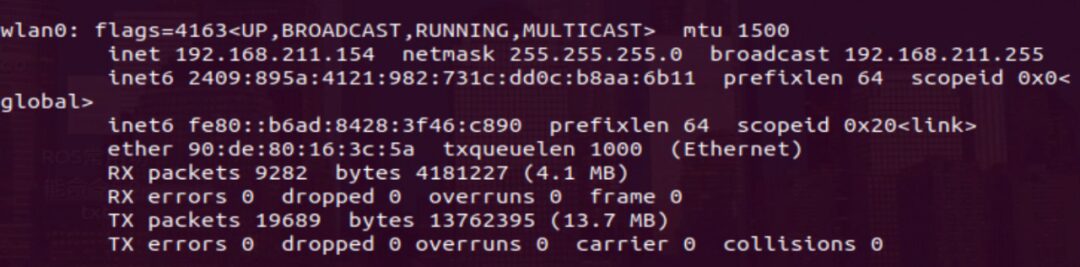
In the terminal, enter ifconfig to see that the IP address of Nano in this local area network is 192.168.211.154.
Return to your Ubuntu computer, connect to the same Wi-Fi to ensure both are on the same local area network. Now you can perform remote login in the terminal.
You need to enter the password of the Nano host account to achieve SSH remote login.
If the following information appears, enter yes. This is because you are connecting to this specific host for the first time, and the SSH client needs to confirm the identity of the remote host. This is part of the SSH security mechanism to prevent man-in-the-middle attacks.
The authenticity of host '192.168.211.xxx (192.168.211.xxx)' can't be established.ECDSA key fingerprint is SHA256:D4DzjZWH58/gI9ZMhX1mVZxAJy2UX3X1zhuK9qoVEJQ.Are you sure you want to continue connecting (yes/no/[fingerprint])?
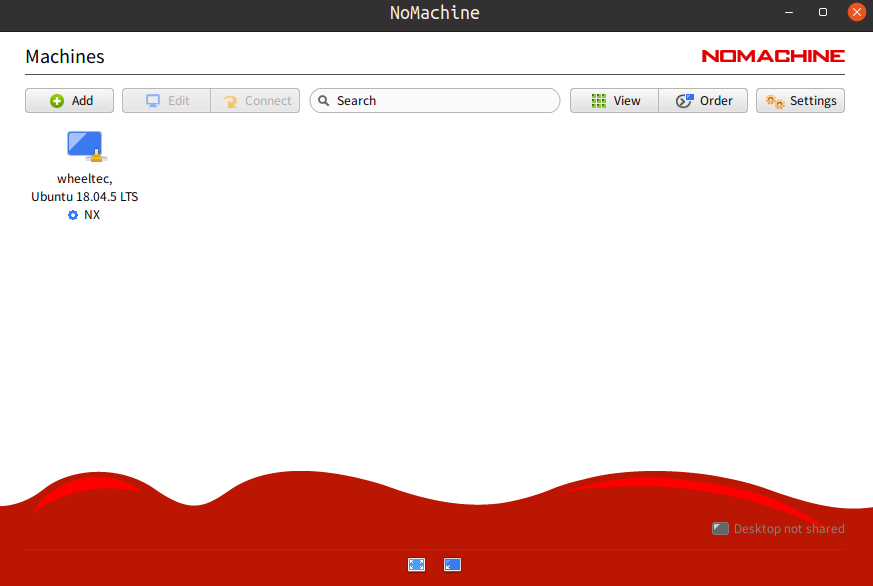
After successfully logging in, as shown in the following image, you have logged into Nano’s account from the Ubuntu local account and can operate on Nano’s file system. SSH only provides a command-line interface, which may not be very user-friendly for users unfamiliar with the command line. SSH itself does not support direct graphical user interface (GUI) access. If you need to access the graphical user interface, run specific applications, or require a better user experience, you can use remote desktop software, and it can even support cross-system operations. Here I recommend NoMachine, similar to Sunlogin.
https://downloads.nomachine.com/linux/?id=1 Official download link
Select NoMachine for Linux DEB amd64 to download and extract.
SSH only provides a command-line interface, which may not be very user-friendly for users unfamiliar with the command line. SSH itself does not support direct graphical user interface (GUI) access. If you need to access the graphical user interface, run specific applications, or require a better user experience, you can use remote desktop software, and it can even support cross-system operations. Here I recommend NoMachine, similar to Sunlogin.
https://downloads.nomachine.com/linux/?id=1 Official download link
Select NoMachine for Linux DEB amd64 to download and extract.
sudo dpkg -i nomachine_8.xxx_amd64.deb
Find NoMachine in the applications, which looks like the Xiaomi logo, open the software, and as long as you are connected to the same local area network, you can search for devices.
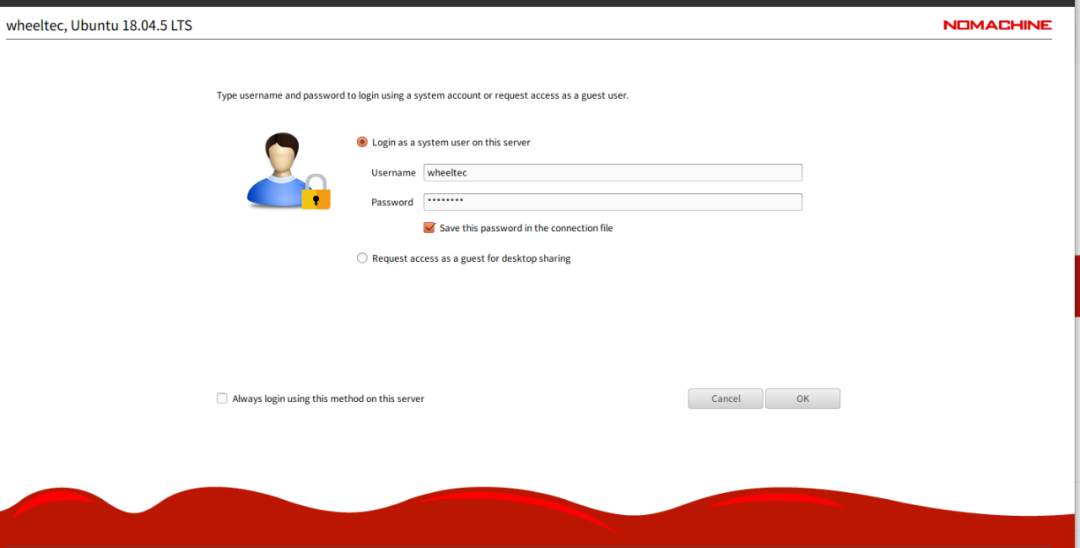
Enter the account password to log in.
Then set Nano for password-free login on boot and auto-start NoMachine.
To set up automatic login on boot, go to System Setting – User Accounts, and click UNLOCK in the upper right corner to unlock.
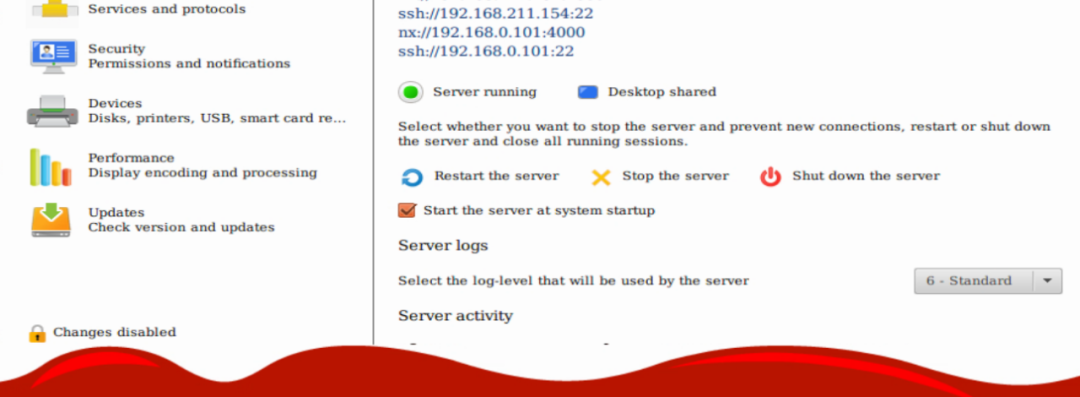
Generally, NoMachine is set to auto-start on boot, you can check in settings (Start the server at system startup).
Thus, the issue of controlling without a screen is successfully resolved. Remote desktop and SSH login each have their pros and cons; generally, use SSH login for command operations, while remote desktop can be a bit laggy. NFS (Network File System) is a distributed file system protocol that allows users and applications to access files stored on a remote server as if they were local files. In Linux systems, NFS can be used to mount remote file systems, making remote directories usable like local directories, allowing you to easily edit code on Nano using a local IDE.
Server (Nano):1. SSH remote login to install necessary packages, install NFS server in Nano.
NFS (Network File System) is a distributed file system protocol that allows users and applications to access files stored on a remote server as if they were local files. In Linux systems, NFS can be used to mount remote file systems, making remote directories usable like local directories, allowing you to easily edit code on Nano using a local IDE.
Server (Nano):1. SSH remote login to install necessary packages, install NFS server in Nano.
sudo apt-get install nfs-kernel-server
2. Create the directory folder to be shared.
3. Edit the configuration file to add NFS shared directories.
4. Enter the nano editor to add the file path you want to mount and save to return to the terminal.
/home/ABC/abc *(rw,sync,no_root_squash)#/home/ABC/abc: This is the path of the local directory you want to share.#*: This indicates that any remote host can access this share. You can also specify specific IP addresses or networks to restrict access.#rw: This means that remote clients can read and write to this share.#sync: This means that all operations will be synchronously written to disk, ensuring data consistency.#no_root_squash: This means that the remote root user will have the same permissions as the local root user.
5. Set permissions for the mounted directory and modify the file user.
sudo chmod -R 777 /home/ABC/abcsudo chown -R 777 nobody /home/ABC/abc
sudo /etc/init.d/nfs-kernel-server start sudo /etc/init.d/nfs-kernel-server restart
Client (Ubuntu Host):1. Install nfs-utils and portmap packages.
sudo apt-get install nfs-common portmap
2. Create a directory for mounting.
sudo mkdir /mnt/mount_nfs
3. Mount, the IP address is Nano’s IP.
sudo mount -t nfs -o nolock 192.168.xxx.xxx:/home/ABC/abc /mnt
Once mounted, you can check the /mnt folder with ls or use df -h in the terminal to check the mounting status.
4. To unmount the mounted file, use the umount command, remembering to end all processes accessing the mount first, or it will prompt that the device is busy.
Thus, the preliminary setup of Jetson Nano is complete.


