1. Introduction to Arduino
1.1 The Origin and Development of Arduino
Arduino was born in the winter of 2005 when students of Massimo Banzi, an Italian teacher, complained about not being able to find cheap and easy-to-use microcontrollers. Coincidentally, Spanish chip engineer David Cuartielles came to the school as a visiting scholar. After discussions, they decided to design their own circuit board and invited David Mellis, who raised the issue, to participate in programming the language for the board. Amazingly, in just two days, David Mellis wrote the code, and three days later, the circuit board was completed. Massimo Banzi then named it Arduino.
The name Arduino comes from a bar called “di Re Arduino” in the small town of Ivrea, Northern Italy. Arduin was the count of Ivrea and became the national ruler in 1002, although he was deposed by German King Henry II two years later. The bar commemorates this king, and Massimo Banzi, who often visited this place, named the board to signify “strong friend”.
Initially, Banzi intended to sell Arduino in the market, but he was not good at business. After five years of effort, the company faced bankruptcy. However, Professor Banzi was unwilling to let Arduino end, so he decided to open-source it and lower the hardware price. Unexpectedly, this move allowed Arduino to spread rapidly and gradually develop into one of the world’s most mainstream open-source hardware platforms, later launching various models and numerous derivative controllers, with applications continually expanding across many fields such as the Internet of Things, smart homes, and robotics design and development.
1.2 Basic Components of Arduino
Arduino mainly consists of hardware and software.
In terms of hardware, there are various models of Arduino boards, such as:
- Arduino Uno
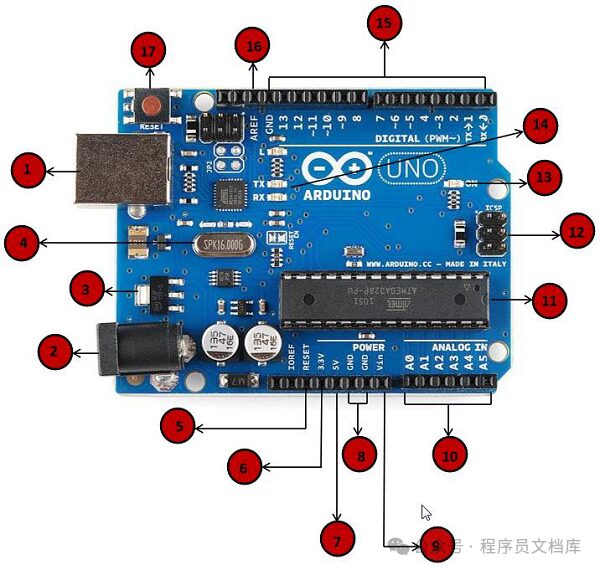
: A microcontroller development board based on ATmega328P, with 14 digital input/output pins (6 of which can be used as PWM outputs), 6 analog input pins, a 16 MHz crystal oscillator, USB connection, power jack, ICSP header, and reset button. It is classic and suitable for beginners; you can start using it by connecting it to a computer with a USB cable or powering it with an AC-to-DC adapter or battery. Even if you make a mistake, the worst case is just replacing a few yuan chip to start over. The Uno board is also the first board in the USB Arduino series and serves as a reference model for the Arduino platform, but its performance is relatively mediocre.
- Arduino Leonardo
: A development board based on ATmega32u4, with 20 digital input/output pins (7 of which can be used as PWM outputs, 12 as analog inputs), a 16 MHz crystal oscillator, micro USB connection, ICSP header, and reset button. It can be connected to a computer using a USB cable or powered by an AC-to-DC adapter or battery. The difference from other boards is that the ATmega32u4 has built-in USB communication, eliminating the need for an auxiliary processor, allowing it to appear as a mouse and keyboard on the connected computer. However, its compilation principle differs from other Arduino’s AVR controllers, making deep development somewhat troublesome.
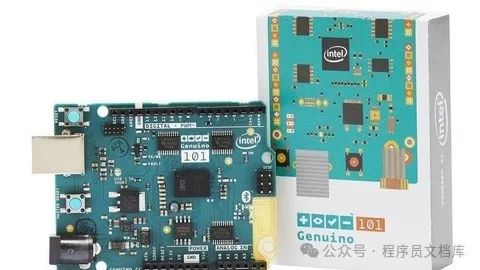
- Arduino 101 (Intel Curie)
: A high-performance, low-power development board at an entry-level price (compared to other Intel products) suitable for learning and development, maintaining the same shape and external pins as the UNO, adding onboard Bluetooth BLE and a 6-axis accelerometer/gyroscope. This module contains two small cores, one x86 (Quark) and one 32-bit ARC architecture core, both at 32MHz crystal oscillators. Intel tools can optimize the compilation of Arduino programs between the two cores to complete more demanding tasks. However, it is relatively expensive, sometimes has manual reset issues, and its powerful capabilities are limited due to its desire to mimic the UNO’s shape.
- Arduino Mega 2560
: A microcontroller development board based on ATmega2560, with 54 digital input/output pins (15 of which can be used as PWM outputs), 16 analog inputs, 4 UARTs (hardware serial ports), 1 16MHz crystal oscillator, 1 USB interface, 1 power jack, ICSP interface, and reset button. It contains all the elements required for the microcontroller to operate and is compatible with most shields designed for Genuino Uno. It has a large flash space, many IOs, and multiple hardware serial ports, making it suitable for IoT projects, but it is slightly more expensive and larger than the Uno and Nano.
- Arduino Nano
: A small development board based on ATmega328 (Arduino Nano 3.x), with only one DC power jack and using a mini USB cable, compact and reasonably priced, suitable for small products.
- Arduino Micro
: A development board based on ATmega32U4, co-developed with Adafruit, with 20 digital input/output pins (7 of which can be used as PWM outputs, 12 as analog inputs), a 16 MHz crystal oscillator, micro USB connection, ICSP header, and reset button, perfectly sized for breadboards, capable of simulating mouse and keyboard inputs, low price, but the IO ports differ from 328, which may cause issues during low-level programming.
- Arduino Ethernet
: A development board based on ATmega328, with 14 digital input/output pins, 6 analog inputs, 16 MHz crystal oscillator, RJ45 connection, power jack, ICSP header, and reset button. However, pins 10, 11, 12, and 13 are reserved for interfacing with the Ethernet module, which reduces the number of available pins to 9, of which 4 can be used as PWM outputs. It does not have an onboard USB to serial driver chip but has a Wiznet Ethernet interface and can access the onboard microSD card reader through the SD library.
On the software side, the main tool is the Arduino IDE, a professional development tool for Arduino programs, featuring open-source circuit design, supporting ISP online burning, and compatibility with various programming languages such as Flash, Max/Msp, VVVV, PD, C, and Processing. The Arduino IDE uses a C++-based Arduino programming language that encapsulates the complexities of standard C++, allowing programmers to execute digital IO and analog IO operations with minimal code through functions like digitalWrite() and analogRead(), significantly reducing the difficulty of hardware operations. The program structure typically includes two main functions: setup() and loop(). The setup() function is executed once at the beginning of the program for initialization, while the loop() function runs continuously, forming the main body of the program. Additionally, the Arduino ecosystem includes a wealth of libraries that encapsulate various functions, allowing developers to achieve more advanced hardware operations and algorithms through simple calls, further expanding Arduino’s capabilities while ensuring ease of use.
2. Features of Arduino
2.1 Advantages of Open Source
Both the hardware and software of Arduino are open source, meaning people can freely modify, copy, and share it within the scope of open source agreements. For example, in terms of hardware, experienced circuit designers can create specific versions of modules based on open-source hardware design schemes according to their needs, and can also expand and improve them. On the software side, programmers can view and modify the code, extending the functionality of the programming language through C++ libraries. This openness greatly promotes innovation and development within the community, allowing developers to build upon others’ achievements to quickly realize various personalized functions, providing great convenience for project development and enabling Arduino to adapt to a wide range of different application scenarios.
2.2 Usability
Arduino, both in hardware interfaces and the software development environment (Arduino IDE), is designed for beginners and non-professionals. The hardware interfaces are clear and the functions of each pin are well-defined, making it easy for users to connect various external devices, such as sensors and actuators. The Arduino IDE features a simple and intuitive user interface, using a C/C++-based Arduino programming language that encapsulates the complexities of standard C++. Functions like digitalWrite() and analogRead() allow programmers to execute digital IO and analog IO operations with minimal code, significantly reducing the difficulty of hardware operations. Even those without much microcontroller or programming background can quickly get started with development and easily implement their ideas through code on the Arduino platform. For example, when creating a simple LED blinking project, only a few lines of code are needed to achieve the desired functionality, providing strong support for beginners to quickly enter the field of electronic development.
2.3 Cost-Effectiveness
Arduino is relatively low-cost in terms of hardware and software, allowing users to realize their ideas at a low cost. From a hardware perspective, common Arduino development boards on the market, such as Arduino Uno and Arduino Nano, are relatively affordable. An Arduino Uno development board typically costs only a few dozen yuan, making it very suitable for personal projects or educational purposes with limited budgets. Even if mistakes occur during development and the development board is damaged, the cost of replacement is not high. On the software side, the Arduino IDE is an open-source and free development tool that anyone can download and use without paying extra for expensive software licenses. Compared to other similar microcontroller platforms, Arduino has a clear cost advantage, making it a popular choice for many people to start their electronic project explorations without worrying about limiting creativity due to cost issues.
2.4 Diverse Model Selection
Arduino offers a variety of models and versions, such as Arduino Uno, Arduino Mega 2560, Arduino Nano, Arduino Leonardo, etc. Different models are suitable for different needs, making it easy for users to select the right development board based on their needs and preferences. The classic Arduino Uno is suitable for beginners, featuring a moderate number of pins to meet the basic digital and analog input/output needs of most simple projects, such as basic sensor data collection and simple control projects. The Arduino Mega 2560, on the other hand, has more digital input/output pins and analog input pins, along with a larger flash space and multiple hardware serial ports, making it suitable for more complex IoT projects, such as smart home systems that require connecting multiple sensors and controlling multiple actuators. The compact and affordable Arduino Nano is ideal for small products that have size constraints, such as wearable devices or small smart toys. Users can accurately select the most suitable Arduino model based on specific requirements for pin count, performance, size, etc., to better carry out development work.
2.5 Support for Innovation and Creativity
Arduino can be used to create various interesting and useful projects, providing strong support for people to turn their ideas into actual electronic projects. In the field of robotics, by connecting various sensors, motor drivers, and other peripherals, Arduino can create mobile robots, robotic arms, drones, etc., achieving complex motion control and environmental perception functions. For instance, in an obstacle-avoidance robot project, ultrasonic sensors can help the robot automatically avoid obstacles. In smart homes, it can control the lights, adjust brightness and color, and monitor temperature and humidity, thereby controlling air conditioners, humidifiers, and other devices to build a complete smart home control system. In artistic and creative projects, many artists and makers use Arduino to create interactive installations, light shows, sound control projects, etc. For example, one can create an interactive lighting installation that changes the flashing frequency of lights based on the ambient sound level or a creative device that plays different music through gesture control, fully showcasing Arduino’s powerful capabilities in stimulating innovation and creativity and realizing personalized electronic projects.
3. Arduino LVGL Graphics Library
3.1 Definition and Key Components of LVGL
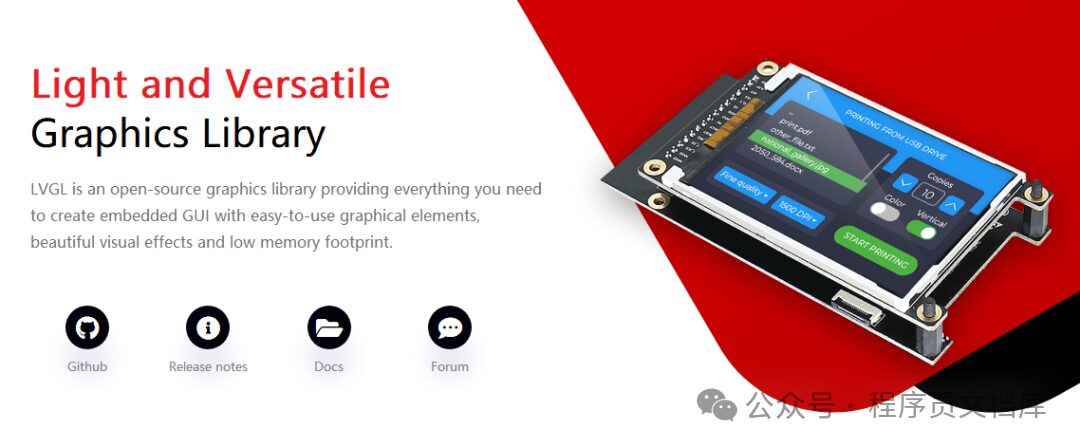
Arduino LVGL refers to the use of the LVGL (Light and Versatile Graphics Library) graphics library to develop embedded graphical user interface (GUI) applications on the Arduino platform.
As an open-source electronic prototyping platform, Arduino plays an important role in this combination. It includes a variety of hardware (various mainboards) and software (IDE), allowing users to write code uploaded to Arduino boards to control external devices, providing the fundamental environment support for the operation of the LVGL graphics library.
LVGL itself is a graphics library specifically designed for embedded systems, characterized by being lightweight, portable, and feature-rich. It provides various graphical components such as buttons, labels, sliders, switches, lists, tables, and charts, while also having a flexible styling system that can set the appearance of the interface through a CSS-like stylesheet. With these rich graphical components and tools, developers can create beautiful and highly interactive user interfaces on small devices.
3.2 Main Features of LVGL
1. Lightweight Advantage
LVGL is a lightweight graphics library, perfectly suited for resource-limited embedded systems. It focuses on optimizing memory usage and processing speed, minimizing memory consumption through efficient memory management mechanisms and streamlined code logic, ensuring smooth operation on hardware with limited resources, such as low-power devices, providing stable and efficient graphical interface support for various small embedded devices.
2. Rich Component Listing
LVGL provides a variety of user interface components, such as buttons, sliders, charts, lists, images, etc. For example, if a developer wants to create a smart home control panel interface, they can easily implement control buttons for light switches and curtain opening/closing using the button component; the slider component can intuitively adjust parameters like appliance power and temperature; the chart component can display trends in temperature and humidity collected by environmental sensors. With these diverse components, developers can quickly construct complex and fully functional user interfaces to meet diverse needs in different application scenarios.
3. Efficient Rendering Capability
LVGL supports various display drivers, whether common SPI interface displays or other types of display devices, it can adapt well and efficiently render graphics. Moreover, it supports anti-aliasing, alpha blending, and other graphical effects. The anti-aliasing function smooths the edges of graphics, avoiding jagged and rough display effects; alpha blending allows for transparent overlay and other special effects, greatly enhancing the visual quality of the interface, making it look more beautiful and refined, providing users with a better visual experience.
4. Flexible Theme Styling
LVGL supports custom themes and styles, allowing developers to easily adjust the appearance of the interface based on specific needs. For instance, for the operating interface of a medical device, to facilitate use by medical staff in different environments, developers can set the interface theme to a bright and clear style during the day, making it easy to view various parameters and operation buttons; while at night or in dim environments, they can switch to an eye-friendly dark theme, adjusting button colors, font sizes, and other styles to enhance the interface’s aesthetics and user experience, allowing users to customize the interface according to their preferences and actual usage scenarios.
5. Multi-Input Device Support
LVGL supports multiple input devices such as touchscreens, mice, and keyboards, meaning it can realize rich user interaction functions. On portable smart devices, users can directly perform touch operations via the touchscreen, such as clicking buttons and swiping the screen to browse information; for embedded devices connected to mice and keyboards, such as industrial control computers, users can operate interface elements as if using a regular computer, using the mouse for precise clicks and the keyboard for data input and command execution, greatly expanding the ways and convenience of interaction between devices and people.
6. Cross-Platform Applicability
LVGL can run not only on Arduino but also on multiple embedded platforms and operating systems such as ESP32, STM32, Linux, etc., demonstrating good cross-platform advantages. For example, when developers are working on an IoT project, if they initially develop and test on the Arduino platform, and later need to switch to the ESP32 platform due to project requirements or hardware selection adjustments, thanks to LVGL’s cross-platform features, only minor adaptation adjustments are needed to smoothly migrate the original graphical interface application without needing to redevelop from scratch, greatly saving development time and costs.
3.3 Application Scenarios of LVGL
1. User Interface for Embedded Devices
LVGL is suitable for many embedded devices that require graphical user interfaces, such as smart home control panels, which can visually present the status of devices in each room, such as the on/off status of lights and appliances, and conveniently allow users to control them with one click; in industrial control systems, operators can use interfaces built with LVGL to monitor equipment operating parameters, production process data, etc., and promptly detect and adjust any abnormalities; in medical devices, LVGL can create clear and easy-to-understand operating interfaces, facilitating medical staff in accurately setting parameters and viewing patient monitoring data. In these scenarios, LVGL plays a crucial role in facilitating device operation and information display.
2. Applications in IoT Devices
In IoT applications, LVGL has a wide range of uses. For example, in smart sensor devices, it can be used to build sensor data display and setting interfaces, making it easy for users to view information such as temperature, humidity, and air quality collected by sensors, while also allowing for the configuration of parameters like data collection frequency and alarm thresholds; for gateway devices, LVGL can create intuitive setting interfaces that allow administrators to easily configure network connections and device access parameters, aiding IoT devices in achieving more convenient and efficient interactive control, enhancing the management and usage efficiency of the entire IoT system.
3. Adaptation for Portable Devices
LVGL is very suitable for portable electronic devices, such as handheld devices and smartwatches. These devices typically rely on battery power, requiring high performance and low power consumption, while LVGL’s lightweight nature minimizes power consumption, and its high performance ensures smooth operation of the graphical interface, meeting the demands of battery-powered devices. For example, various functional interfaces on smartwatches, such as exercise monitoring interfaces and message notification interfaces, can achieve simple, beautiful, and smoothly operating display effects with LVGL, enhancing user experience when using portable devices.
4. Support for Education and Prototyping Development
In educational and prototyping environments, LVGL is highly applicable. For students learning embedded system development, they can quickly realize user interfaces with LVGL, visually seeing the graphical effects of code implementation, thereby better understanding the design and implementation principles of graphical interfaces. For developers engaged in prototyping, LVGL’s rich components and convenient development methods can help them quickly validate ideas and build preliminary product interface prototypes, accelerating the development iteration speed.
5. Expansion of Advanced Applications
LVGL can be used for applications that require complex graphics and animations, such as in game development, where it can leverage its efficient rendering capabilities to create beautiful game graphics and smooth character animations, providing players with an excellent gaming experience; in multimedia applications, whether for displaying images during video playback or for the operation interface of audio playback software, LVGL can achieve rich user experiences through its powerful features, meeting users’ demands for high-quality graphics and interaction.
3.4 Considerations When Using LVGL
1. Memory Management Points
Although LVGL is lightweight, careful attention is still needed regarding memory usage. Since embedded systems often have limited resources, developers should manage memory wisely to avoid memory leaks or overflow situations. For example, when creating numerous graphical objects or frequently updating interface elements, it is essential to promptly release unused memory spaces, especially in environments where resources are severely limited. Proper planning of memory allocation and optimization of data structures are necessary to ensure LVGL operates smoothly, avoiding program crashes or abnormal interface displays due to memory issues.
2. Performance Optimization Strategies
When implementing complex interfaces, it is necessary to optimize performance to ensure responsiveness and smoothness. For example, unnecessary redraw operations can be minimized by only redrawing interface elements when their states change, avoiding performance loss caused by frequent refreshes; using image caching techniques for infrequently changing elements like icons and background images can reduce reading and rendering time. These common performance optimization methods can effectively enhance interface responsiveness, making user operations smoother.
3. Input Device Compatibility
When selecting input devices, ensure their compatibility with LVGL. Different touch screens, mice, and keyboards may vary in driver programs, communication protocols, etc. For instance, touch screens produced by different manufacturers may have different touch detection principles, resolution settings, and corresponding driver programs. Developers need to configure the correct driver program and make necessary parameter adjustments based on the specific hardware used to ensure that the hardware works correctly with LVGL to achieve accurate input interaction functions.
4. Coping with the Learning Curve
While LVGL is powerful, its use and configuration may involve a certain learning curve. It has numerous function interfaces, configuration parameters, and usage rules for various components, which may require developers new to it to spend some time familiarizing themselves with LVGL’s API and workflow to effectively utilize its capabilities. It is recommended that developers start with simple example projects and gradually delve deeper into understanding how to use each component, grasp the meanings of configuration file parameters, and learn how different functional modules cooperate, becoming proficient in using LVGL to develop the desired graphical interface.
5. Utilizing Documentation and Community
LVGL has good documentation and community support. The official documentation provides detailed instructions on how to use each functional module, API references, configuration instructions, and more, offering comprehensive technical guidance for developers. Additionally, the active community gathers many developers who share their experiences and discuss problems and solutions. Therefore, when encountering issues, developers should actively consult the official documentation to find relevant knowledge and operational guidelines; they can also participate in community discussions and seek help from more experienced developers, often obtaining assistance quickly to resolve problems encountered during development.
4. Application Areas of Arduino
4.1 Home Automation
Arduino has extensive applications in home automation systems, such as easily controlling the on/off status of lights, adjusting their brightness and color to achieve diverse lighting effects; it can also control the opening and closing of curtains, automatically adjusting their state according to different times or light conditions; for appliances like air conditioners, Arduino can control their operation mode and temperature settings based on indoor temperature and humidity.
By programming, people can set timers for these devices, such as having lights automatically turn on at a specific time every evening and turn off in the morning, which is both convenient and energy-saving; with network modules, remote control can be achieved, allowing users to operate home devices via mobile apps even when they are away, checking device statuses at any time; various scene modes can also be created, such as the “movie mode,” which can dim the lights, close the curtains, and turn on the TV with one click, bringing great convenience and comfort to home life.
4.2 Industrial Control
In the industrial control field, Arduino holds significant application value. In automated production lines, it can connect with various sensors (like photoelectric sensors, temperature sensors, etc.) and actuators (like motors, cylinders, etc.) to monitor the status of various processes in real-time. For example, a photoelectric sensor can detect whether a product is accurately positioned, sending signals to Arduino, which then controls the start/stop and speed of the motor according to program logic, accurately completing product transportation and processing tasks.
For industrial robots, Arduino can also play a role. It can receive information from external sensors (such as visual sensors for environment images, tactile sensors for force perception, etc.), process this information, and send control instructions to the robot’s joint motors, achieving precise movements and path planning for complex tasks such as material handling and component assembly. Through effective monitoring and control of industrial equipment, it can not only improve production efficiency and reduce errors caused by manual operations but also enhance the safety of the entire production process, avoiding potential safety hazards.
4.3 Artistic Creation
Artists often use Arduino to create unique interactive art pieces. For example, using Arduino to control LED lights can create dazzling light shows that change based on the environment or audience interaction, with the flashing frequency and color combinations of the LEDs set through programming to achieve various dynamic effects, making them visually appealing.
By controlling motors, certain components of art installations can be made to move, such as creating an artistic piece of a mechanical flower where motors drive the petals to open and rotate, giving life to the work; combined with sensors, when an audience member approaches, the sensor detects the human presence and transmits it to Arduino, which controls the motors to change the flower’s movement state, achieving interaction with the audience and greatly enhancing the artistic experience, allowing them to personally engage with the art piece and feel its unique charm.
4.4 Scientific Research
In scientific research, Arduino is also a powerful tool. In environmental monitoring, connecting it with temperature, humidity, light, and air quality sensors can collect real-time data on external environmental conditions such as temperature, humidity, light intensity, and pollutant concentration, allowing for continuous monitoring over extended periods, providing reliable and substantial data support for studying climate change and ecological evolution.
In biological experiments, for example, when studying the relationship between plant growth and environmental factors, using Arduino to connect soil moisture sensors to monitor soil moisture content, and light sensors to detect light duration and intensity, can accurately record how these environmental parameters influence plant growth at various stages, helping researchers analyze experimental results more effectively and explore the mysteries of biological growth and its interactions with the surrounding environment.
4.5 Educational Value
As an open-source hardware platform, Arduino is highly applicable in education. In school courses, such as during physics lab classes, students can connect various physical sensors (like sound sensors, electromagnetic sensors, etc.) through Arduino to experience the relationship between physical phenomena and actual electrical signals, understanding the application of physical principles in practice.
In programming education, students can use Arduino IDE to write programs, learning the syntax and logical structures of programming languages, while also seeing how code controls hardware devices to perform corresponding actions, making abstract programming knowledge more tangible. Moreover, during comprehensive project practices, such as creating simple smart cars or small weather stations, students can learn about electronic circuit knowledge, physical principles, and enhance teamwork skills, improving innovation and practical abilities, laying the foundation for cultivating innovative talents with comprehensive qualities.
4.6 Other Diverse Applications
In the robotics field, Arduino can serve as the core control board, combining with different sensors and drivers to create various forms and functions of robots, whether wheeled robots, humanoid robots, or flying robots; in drones, it can control flight posture and receive remote control signals, ensuring flight stability and controllability.
In IoT applications, it acts as a hub connecting various devices, enabling data exchange and collaborative control between devices, constructing intelligent IoT systems. In sound and audio processing, it can control audio playback devices and achieve sound effects; for power management, it can monitor power parameters and control the on/off status of electrical devices, intelligently adjusting the power usage mode of devices based on power conditions, showcasing its wide-ranging and flexible applications, capable of functioning in virtually all areas requiring programming and control.
5. How to Start Using Arduino
5.1 Setting Up the Development Environment
If you want to start using Arduino for development, the first step is to set up the corresponding development environment. Here are the specific steps:
- Visit the official website to download Arduino IDE
: Arduino IDE is a professional development tool for Arduino that supports running on various operating systems, including Windows, Macintosh OS (Mac OS), Linux, etc., while most other controllers can only be developed on Windows. You can go directly to the official Arduino website (https://www.arduino.cc/en/Main/Software) to download the Arduino IDE installation package suitable for your operating system version. For instance, under Windows, select the corresponding Windows version (like Win10 and newer, 64bits) as prompted, and then click the “JUST DOWNLOAD” button to start downloading.
- Install Arduino IDE
: After the download is complete, perform the corresponding installation operations based on your operating system. For Windows, find the downloaded installation file (like arduino-ide_2.3.2_Windows_64bit.exe), double-click to run it, and follow the installation wizard’s prompts step by step, selecting the installation location, agreeing to the license agreement, etc., to complete the installation process. When you first open the Arduino IDE software, you may need to wait a while because it will automatically install some libraries and related drivers, such as Adafruit Industries LLC port, Arduinosrl’s Arduino USB Driver, etc. Select all the drivers prompted in the pop-up for installation.
- Set Up the Development Environment
: After installing Arduino IDE, you can also make some basic settings to optimize the development experience. For example, in Arduino IDE, open “File” -> “Preferences,” and you can add some additional board management URLs in the “Additional Boards Manager URLs” field (which will be used when you need to use third-party hardware). Additionally, through the “Tools” menu, you can select the corresponding Arduino board model (such as Arduino Uno, Arduino Mega 2560, etc.) and set the port (after connecting the Arduino board to the computer via USB, select the corresponding COM port or USB port here).
After completing these steps, your Arduino development environment will be set up, and you can start writing code and other operations.
5.2 Code Writing and References
When preparing to write Arduino programs, referring to official documentation or other online resources can bring you much inspiration and guidance, helping you create code more efficiently. Here are some common and practical ways to obtain resources:
- Official Documentation
: The Arduino official website (https://www.arduino.cc) provides very comprehensive and authoritative documentation. It covers everything from basic programming language syntax introductions, usage instructions for various functions (like digitalWrite(), analogRead(), etc.), to detailed pin definitions and hardware feature explanations for different board models. For example, if you want to understand the program structure of Arduino, the official documentation clearly explains that the setup() function is executed once at the beginning of the program for initialization, while the loop() function continuously runs to form the main body of the program, among other key points. Whether for beginners or for those with some foundation looking to learn more deeply, the official documentation is the first reference material.
- Examples Built into Arduino IDE
: Arduino IDE itself includes many related cases. After opening Arduino IDE, you can see various example projects under the “File” -> “Examples” menu. These examples cover common application scenarios such as controlling LED blinking, reading sensor data, and communicating with external devices. For instance, in the classic LED blinking control example, you can see how to set pin modes and control the high and low levels to achieve the blinking and timing settings of the light, learning from the example code and making appropriate modifications to quickly apply it to your own project.
- Online Forums and Communities
: There are many active Arduino-related forums and communities, such as the official Arduino forum (https://forum.arduino.cc), which gathers many developers and enthusiasts from around the world. You can share the problems you encounter during your project development, showcase your creative project results, and learn many practical tips from others’ shared experience posts. If you encounter a function you do not know how to implement through code or an error you do not know how to resolve, posting a help request in the forum often leads to warm-hearted developers offering assistance.
- Open Source Code Platforms
: Platforms like Github.com are treasure troves of open source code. Searching for Arduino-related code repositories can uncover various projects shared by developers, covering different application areas and levels of complexity. By reviewing these open-source codes, you can learn excellent code architecture design, functional module implementation methods, and even borrow ideas for integrating different hardware and software functions, and you can even directly reuse part of the code in your own projects (subject to the relevant open-source protocol requirements).
With these rich resource acquisition methods, you will find it easier to write Arduino code and successfully implement the desired functions.