
Command Description

Basic AT Commands
ATI displays the ID information of the MT
AT+CIMI queries the IMSI
AT+CGSN queries the product serial number
AT+CGATT? queries the current PS domain status
AT+QBAND queries or sets the mobile band operation
AT+CSQ queries the signal strength
AT+CEREG queries the network registration status
AT+CGPADDR queries the PDP address
MQTT Configuration Commands
AT+QMTCFG configures optional parameters for MQTT
AT+QMTOPEN opens the MQTT client network
AT+QMTCLOSE closes the MQTT client network
AT+QMTCONN connects the client to the MQTT server.
AT+QMTDISC disconnects the client from the MQTT server
AT+QMTSUB subscribes to a topic
AT+QMTUNS unsubscribes from a topic
AT+QMTPUB publishes a message

Process

Step 1: Configure Huawei Cloud Platform
Visit the Huawei Cloud official website and log in with your account and password.
(https://www.huaweicloud.com/)
Click on “Console” in the upper right corner of the page to enter the management backend. In the service list at the upper left corner of the console, search for “Device Access IoTDA” and click to enter.
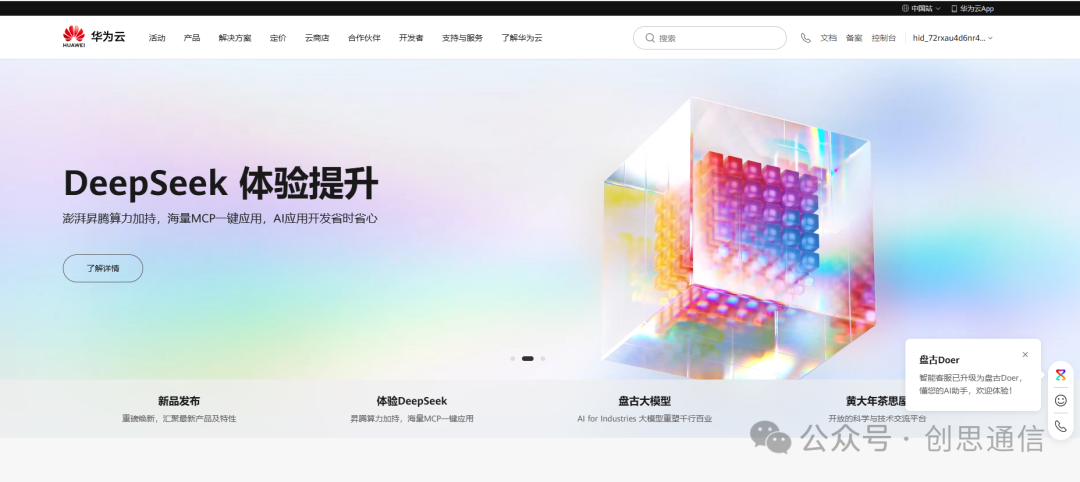
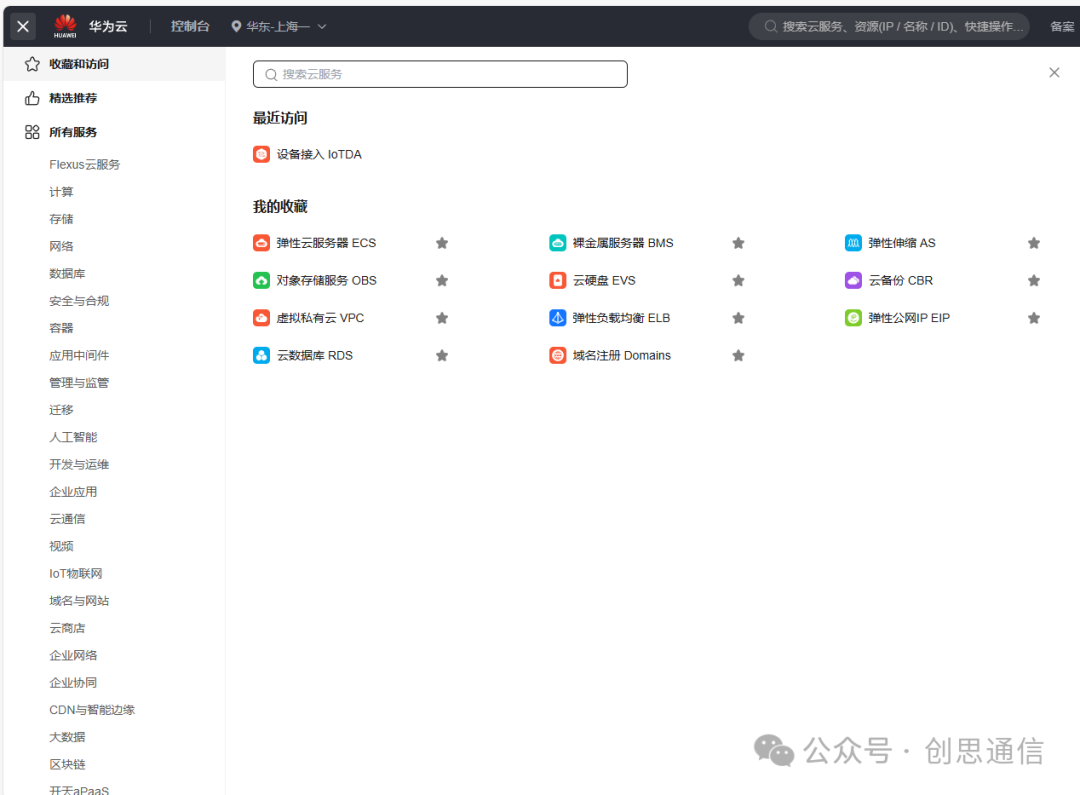
On the IoTDA service page, click “Instances” to enter the backend management interface.
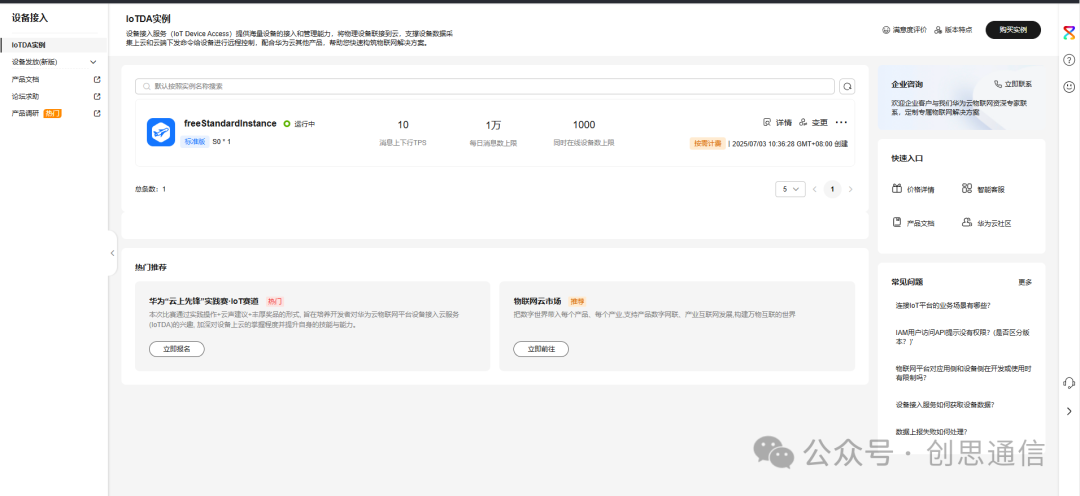

In the left navigation bar, select [Products] → [Create Product]. Fill in the product name (e.g., “Smart Sensor”), resource space, protocol type (e.g., MQTT), device type (custom or standard category), etc.
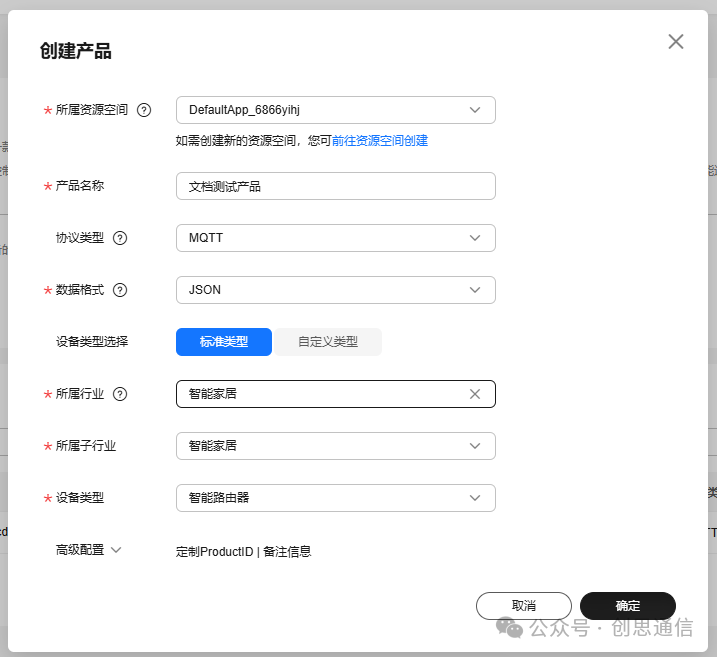
Find the created product in the product list, click on details to enter the product development detail page.
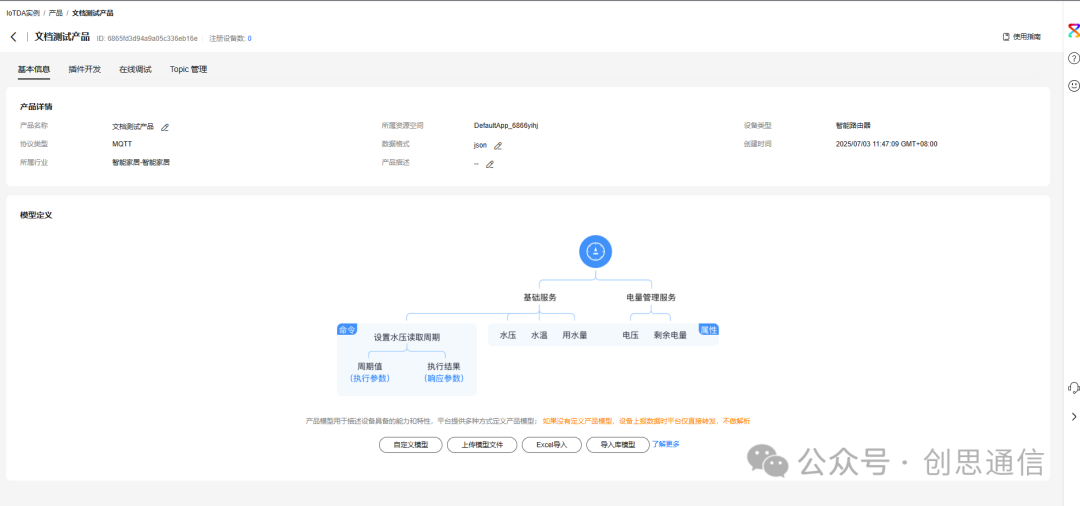
Click on “Custom Model” and fill in the basic information of the model (e.g., model name, description).
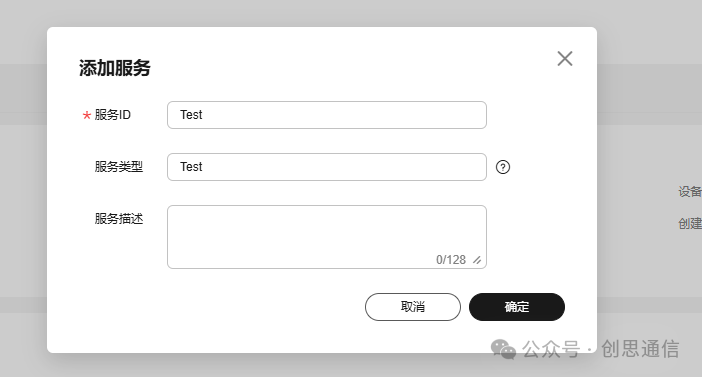
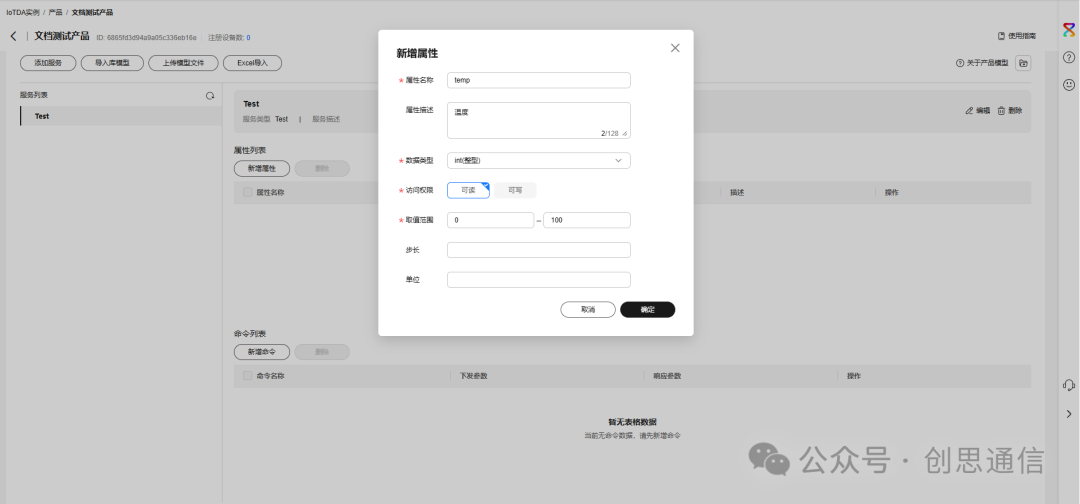
After adding, click on “Add Property” in this interface, fill in the property name (e.g., “Temperature”), data type (int/float/string, etc.), access permission (read/write), unit (°C), etc., and click “OK”.
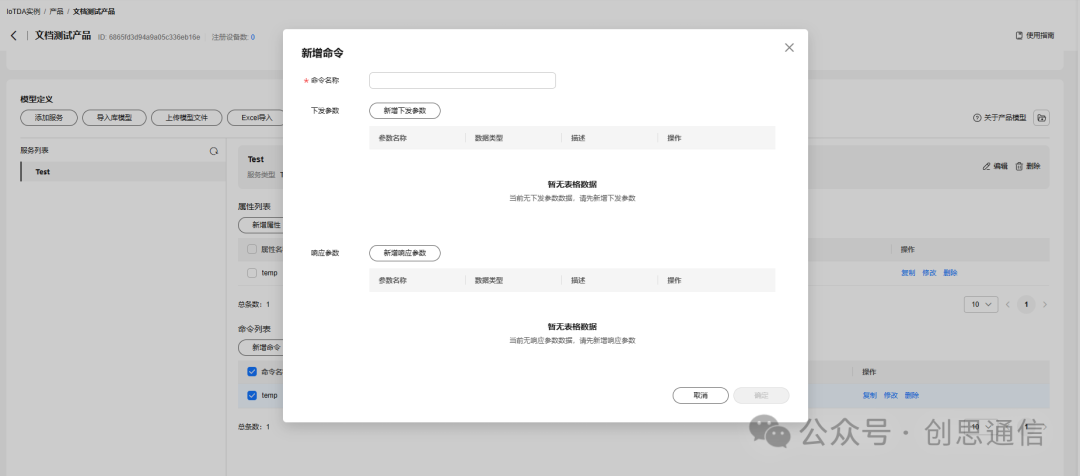
Click on “Add Command” to configure the command name (e.g., “Set Temperature Threshold”), parameter list (e.g., threshold value), response parameters, etc., and click “OK”.
Exit the product detail page, in the left navigation bar select [Devices] → [All Devices]. Click on “Register Device”, select the created product, and fill in the device name, etc.
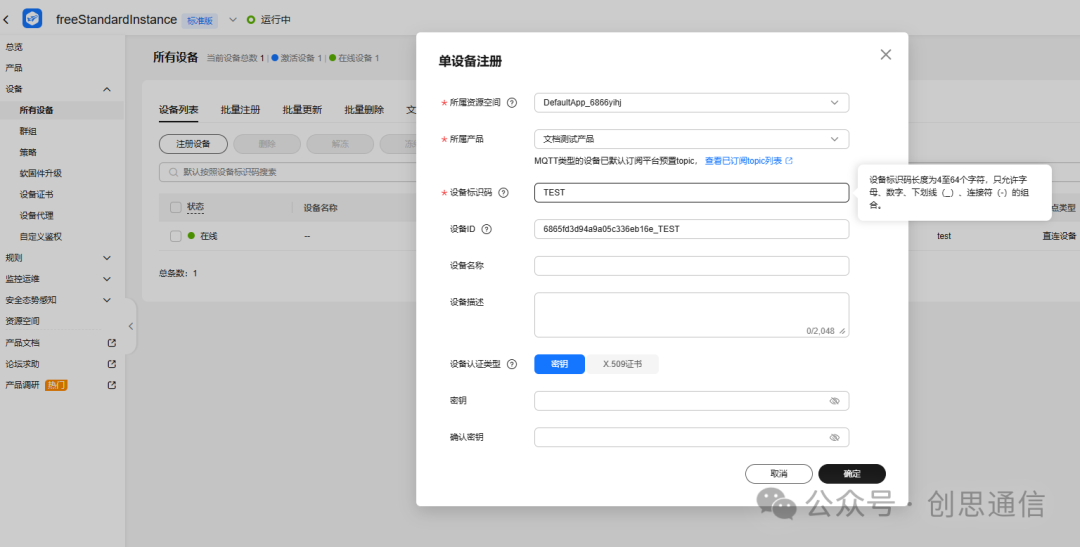
By following the above steps, you can complete the device access configuration for the Huawei Cloud IoTDA platform.


Step 2: Wiring the NB Module
NB Module —– USB to TTL
VCC —– 5V
GND —– GND
TX —– RX
RX —– TX
Physical Wiring
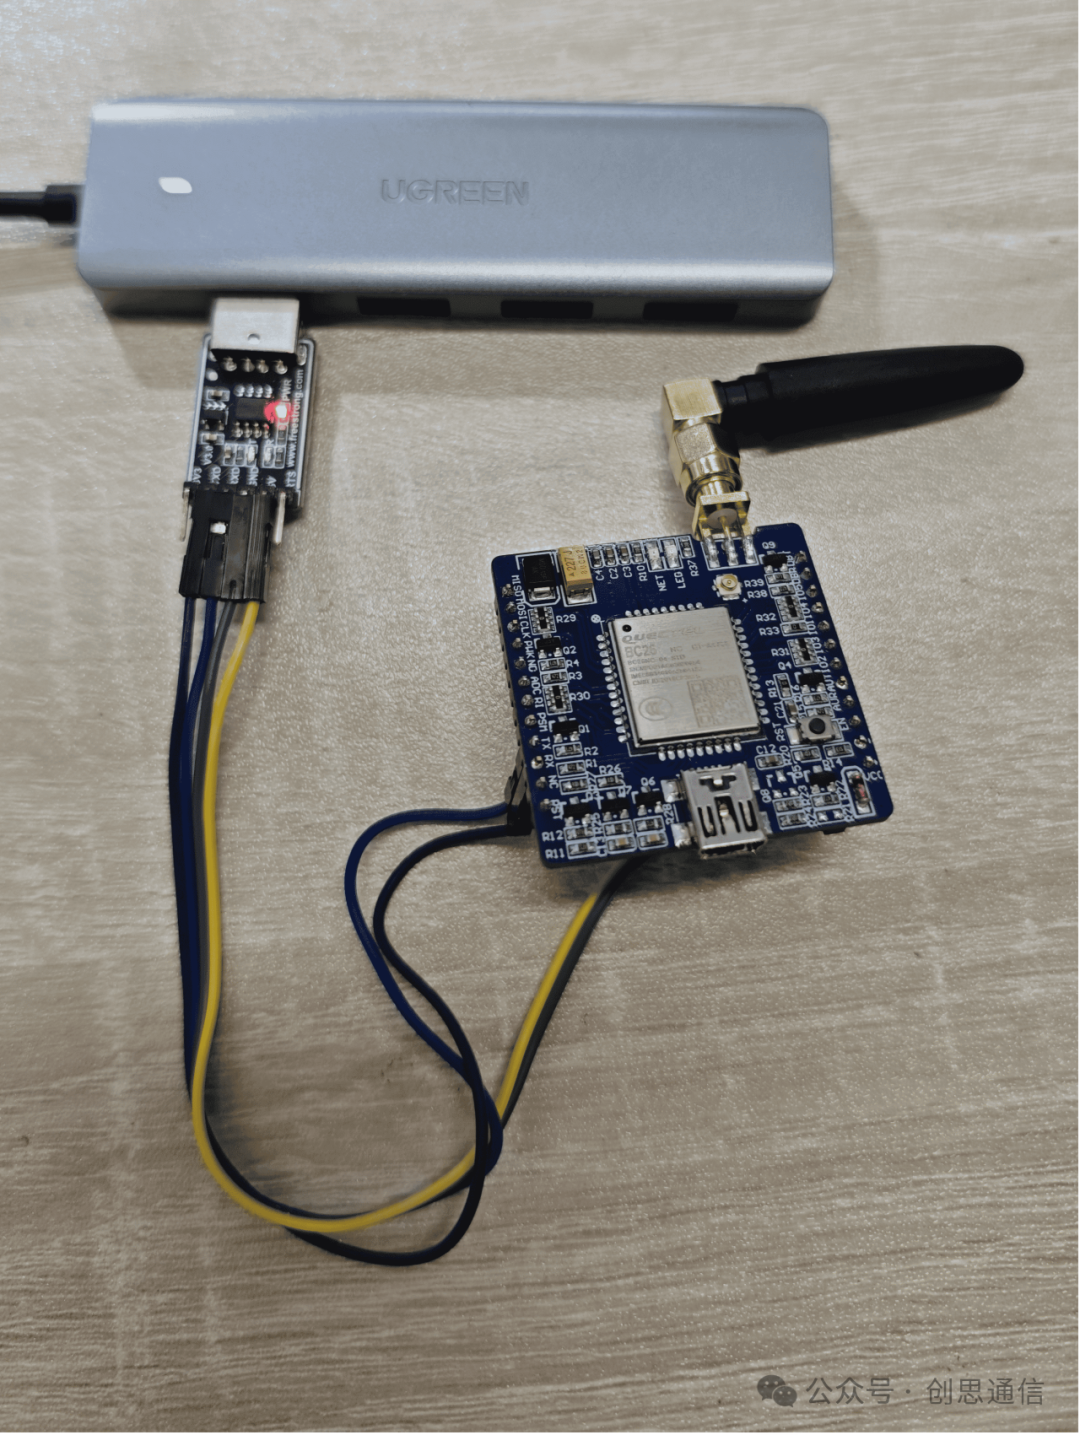
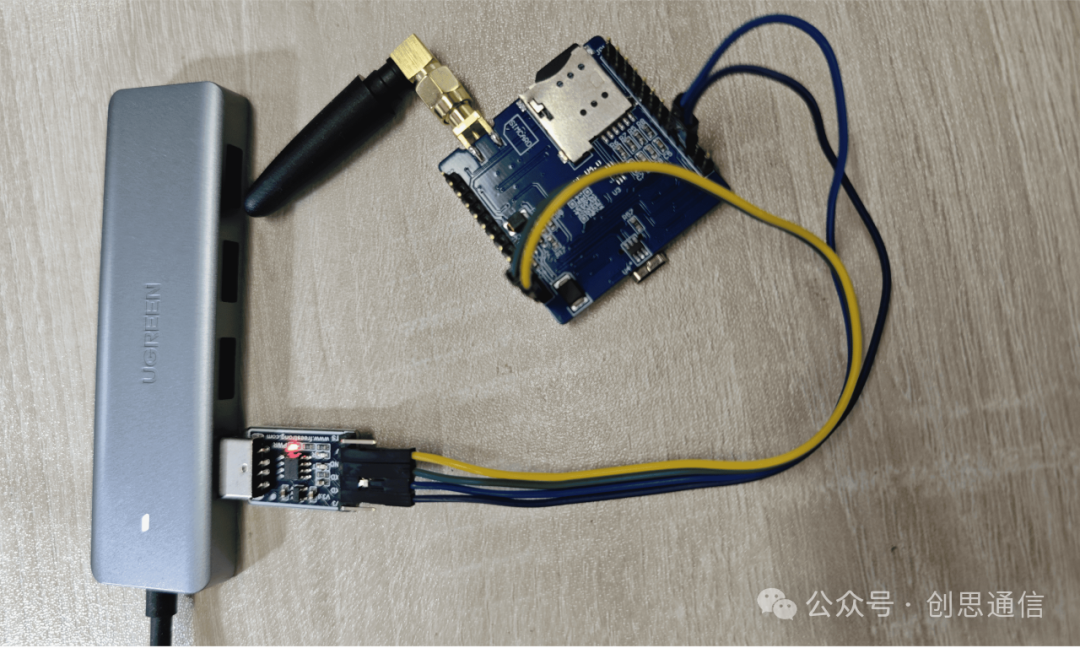


Step 3: Connect to Huawei Cloud Platform
Connect the USB to TTL module to the device, open the serial port debugging assistant, select the corresponding communication port, and set the baud rate to 115200. Then, by sending AT commands, you can connect the device to the Huawei Cloud platform, completing data upload and data downlink operations.
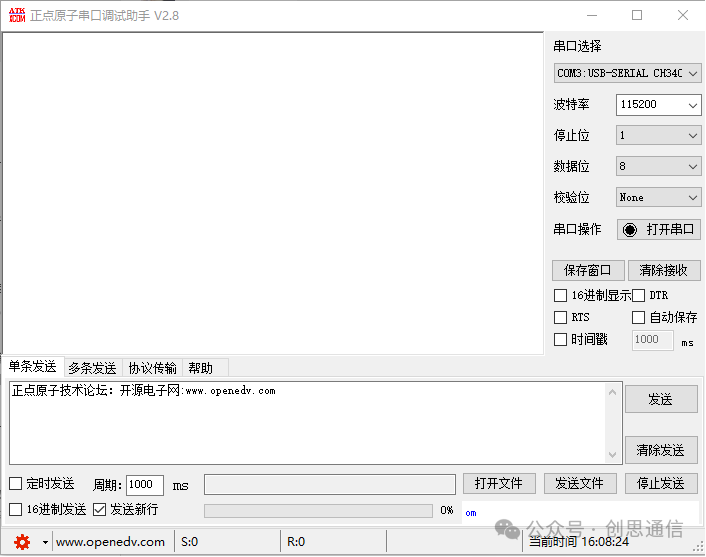
AT Command Process and Command Results:
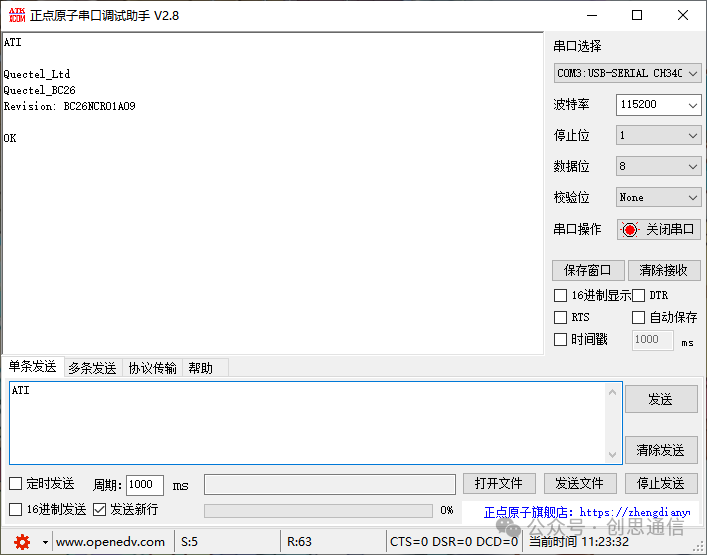
1. Query Module Information
Send Command: ATI
Description: Query the module model, firmware version, and other basic information.
Expected Response: Quectel_Ltd Quectel_BC26 Revision: BC26NCR01A09
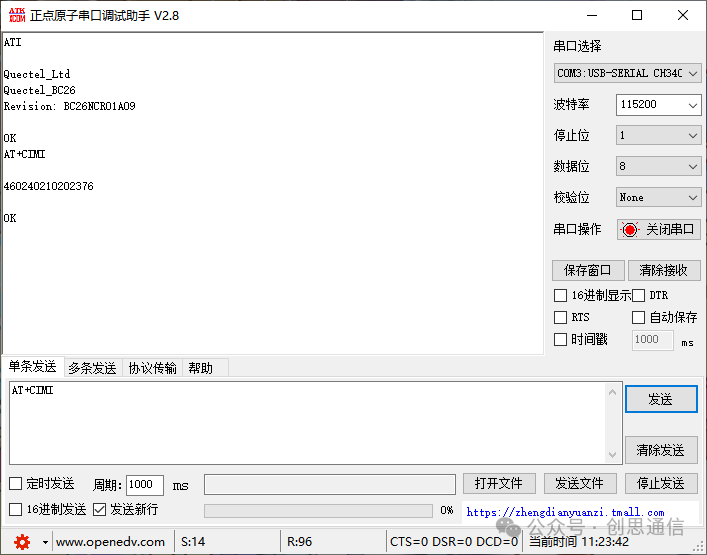
2. Query International Mobile Subscriber Identity (IMSI)
Send Command: AT+CIMI
Description: Obtain the IMSI number of the SIM card for identifying mobile users.
Expected Response: 460049167111311 OK
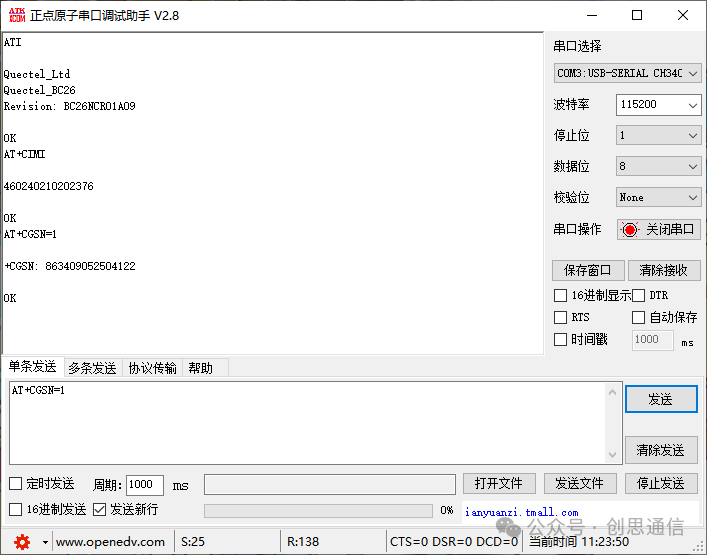
3. Query Product Serial Number
Send Command: AT+CGSN=1
Description: Obtain the International Mobile Equipment Identity (IMEI) of the device.
Expected Response: +CGSN: 863409052504122
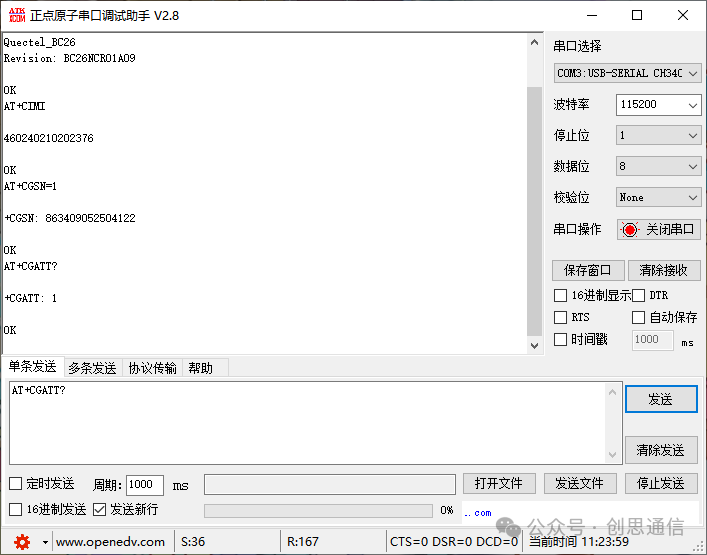
4. Query GPRS Attachment Status
Send Command: AT+CGATT?
Description: Check if the module is attached to the GPRS network (1=attached, 0=not attached).
Expected Response: +CGATT: 1 OK
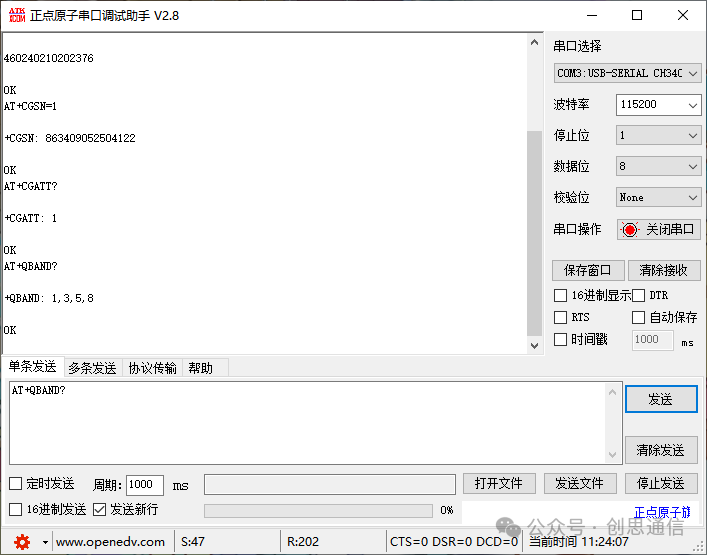
5. Query Band Information
Send Command: AT+QBAND?
Description: Query the current band information used by the module.
Expected Response: +QBAND: 1,3,5,8
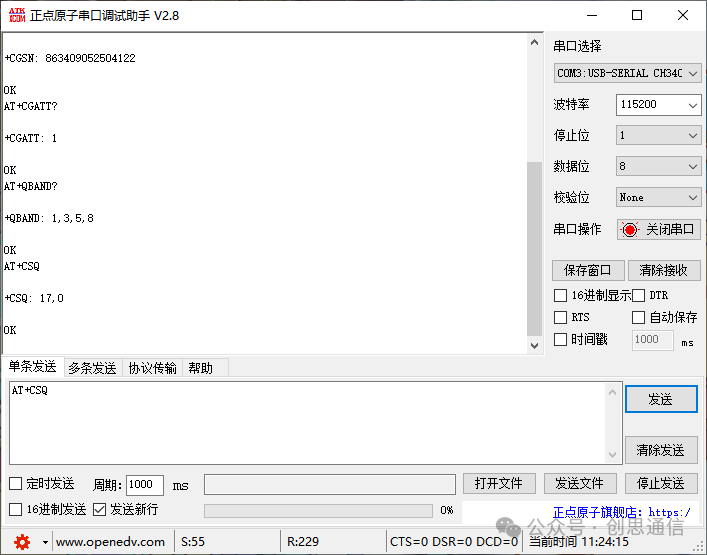
6. Query Signal Strength
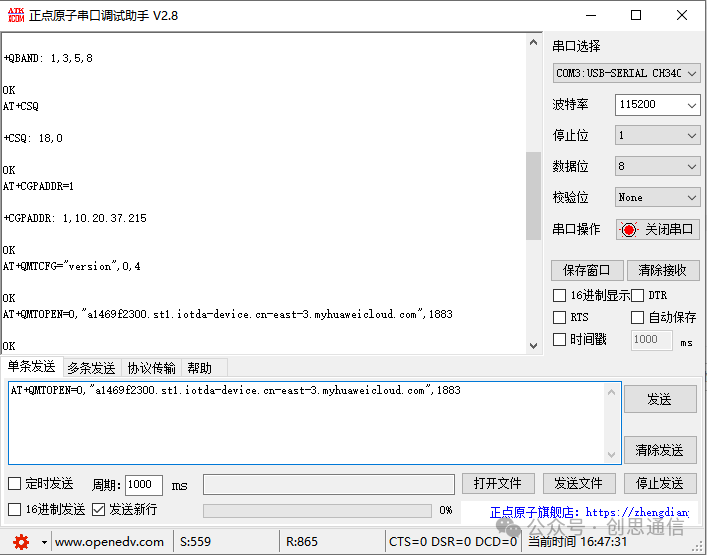
Send Command: AT+CSQ
Description: Check the current network signal quality (0-31, the higher the value, the stronger the signal).
Expected Response: +CSQ:18,0 OK
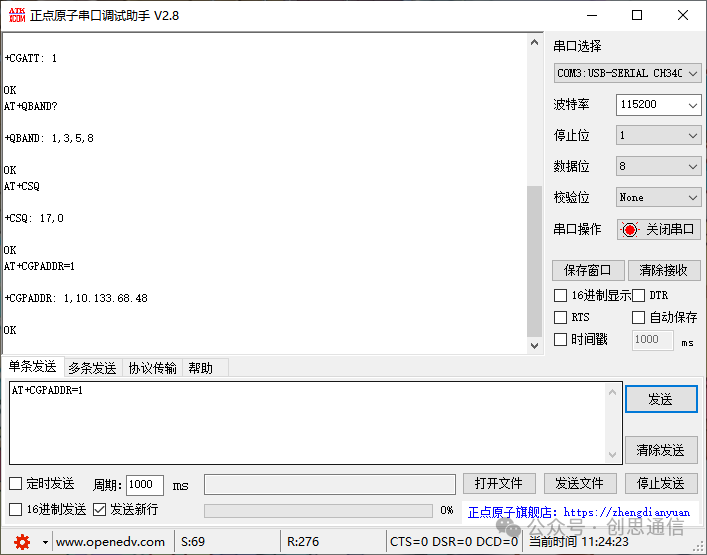
7. Query PDP Address
Send Command: AT+CGPADDR=1
Description: Query the IP address corresponding to the PDP, which is used to establish a data connection.
Expected Response: +CGPADDR: 1,”10.133.68.48″
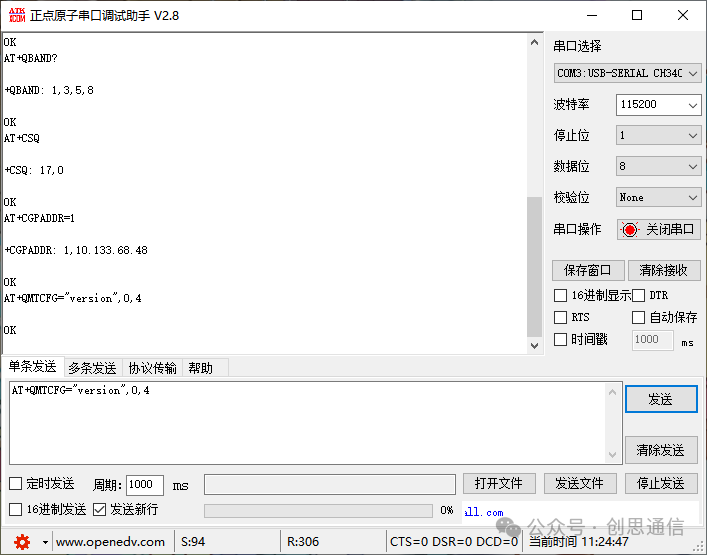
8. Configure MQTT Protocol Version
Send Command: AT+QMTCFG=”version”,0,4
Description: Set the MQTT client (ID=0) to use the MQTT v3.1.1 protocol.
Expected Response: OK
9. Open MQTT Connection
Send Command: AT+QMTOPEN=0,”a1469f2300.st1.iotda-device.cn-east-3.myhuaweicloud.com”,1883
Description: Establish a server connection, with the MQTT client identifier as 0.
“a1469f2300.st1.iotda-device.cn-east-3.myhuaweicloud.com” is the MQTT server, and 1883 is the server port number.
Expected Response: OK +QMTOPEN: 0,0
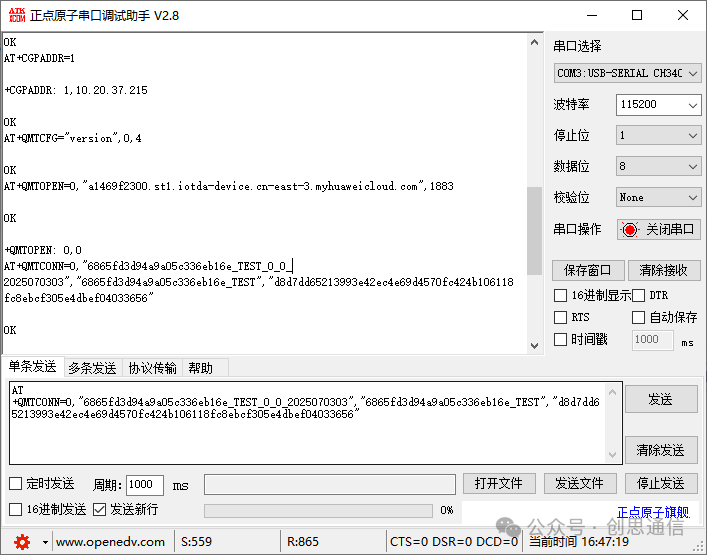
10. Connect Client to MQTT Server
Send Command:
AT+QMTCONN=0,”6865fd3d94a9a05c336eb16e_TEST_0_0_2025070303″,”6865fd3d94a9a05c336eb16e_TEST”,”d8d7dd65213993e42ec4e69d4570fc424b106118fc8ebcf305e4dbef04033656″
Description: Parameter 0 is the MQTT client identifier, “6865fd3d94a9a05c336eb16e_TEST_0_0_2025070303” is the MQTT client ID,
“6865fd3d94a9a05c336eb16e_TEST” is the username,
“d8d7dd65213993e42ec4e69d4570fc424b106118fc8ebcf305e4dbef04033656” is the key.
Expected Response: OK +QMTCONN: 0,0,1
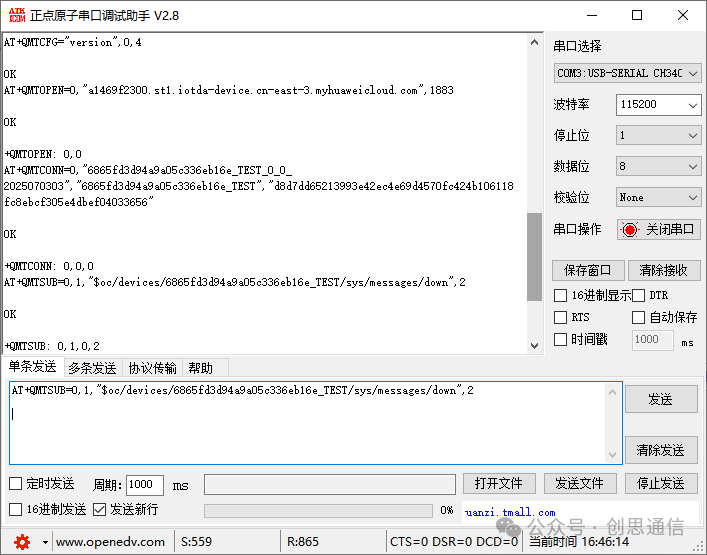
11. Subscribe to MQTT Topic
Send Command:
AT+QMTSUB=0,1,”$oc/devices/6865fd3d94a9a05c336eb16e_TEST/sys/messages/down”,2
Description: Subscribe to the topic for attribute settings issued by the platform, where 0 is the MQTT client identifier, 1 is the packet identifier,
“$oc/devices/6865fd3d94a9a05c336eb16e_TEST/sys/messages/down” is the subscribed topic name, and 2 is the QoS level.
Expected Response: OK +QMTSUB: 0,1,0,2
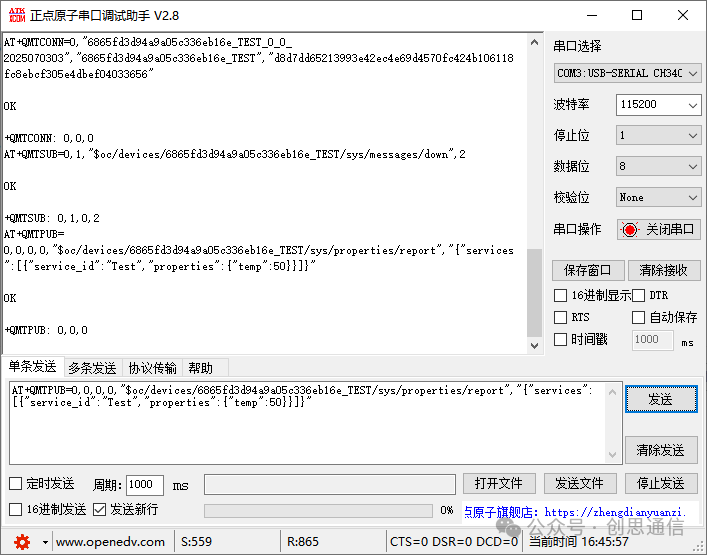
12. Publish MQTT Message
Send Command:
AT+QMTPUB=0,0,0,0,”$oc/devices/6865fd3d94a9a05c336eb16e_TEST/sys/properties/report”,”{\”services\”:[{\”service_id\”:\”Test\”,\”properties\”:{\”temp\”:50}}]}”
Final Response: OK +QMTPUBEX: 0,0,0
Data Interaction Operations on Huawei Cloud Platform:
In the Huawei Cloud IoTDA console, select [Devices] → [All Devices] in the left navigation bar, click on the target device name to enter the detail page. You can view the basic information of the device (such as device ID, online status, registration time), and the reported attribute data (such as temperature).
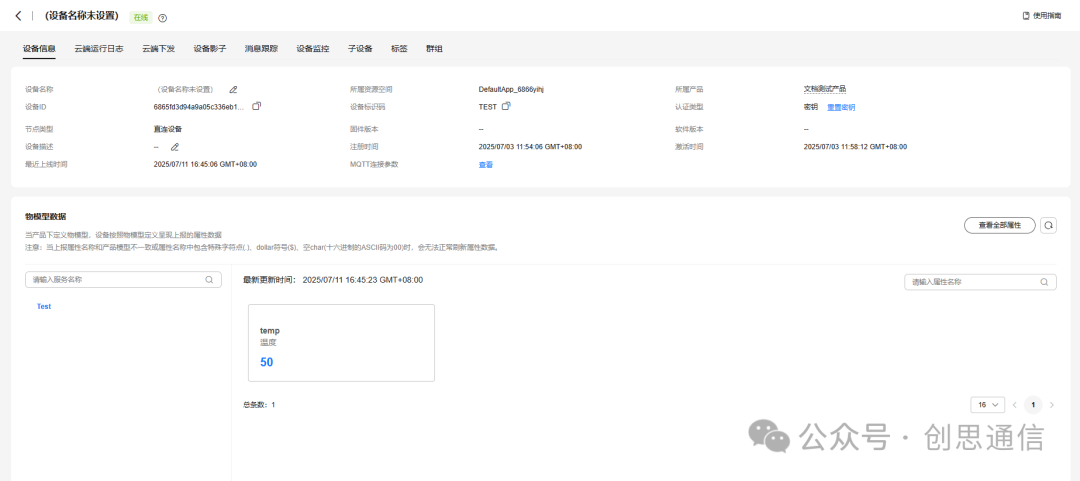
Data Interaction Operations on Huawei Cloud Platform:
In the Huawei Cloud IoTDA console, select [Devices] → [All Devices] in the left navigation bar, click on the target device name to enter the detail page. You can view the basic information of the device (such as device ID, online status, registration time), and the reported attribute data (such as temperature).
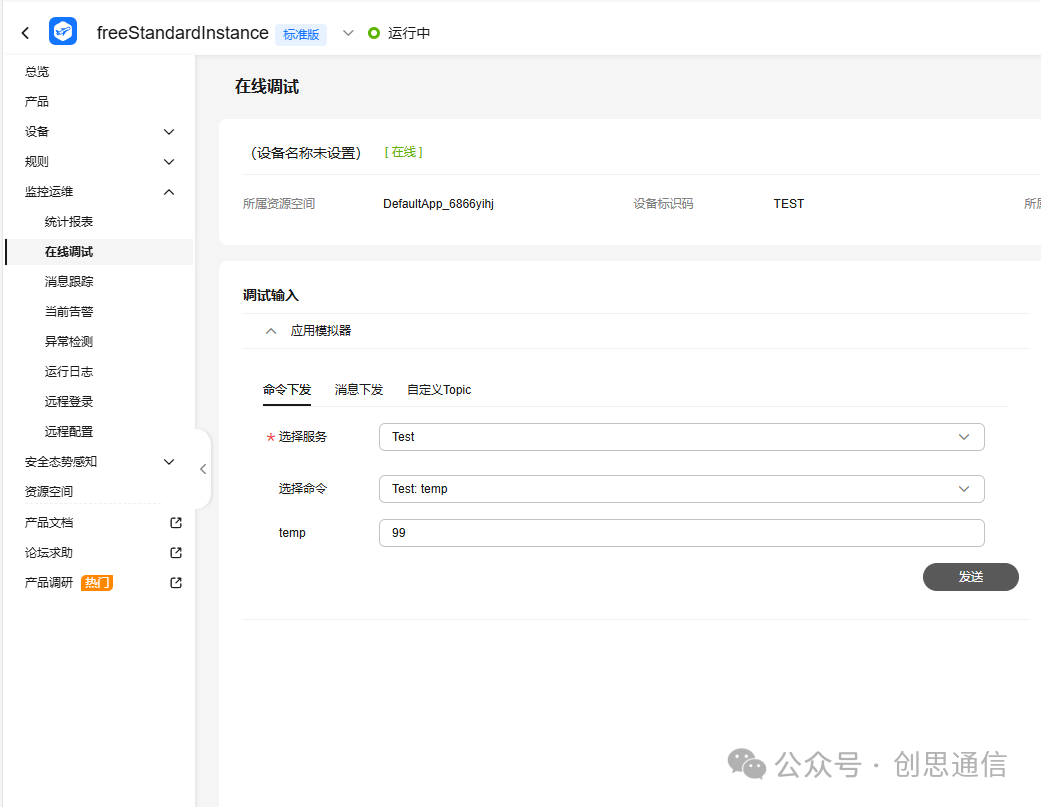
In the serial port debugging assistant, you can monitor the status of the data received by the device in real-time:
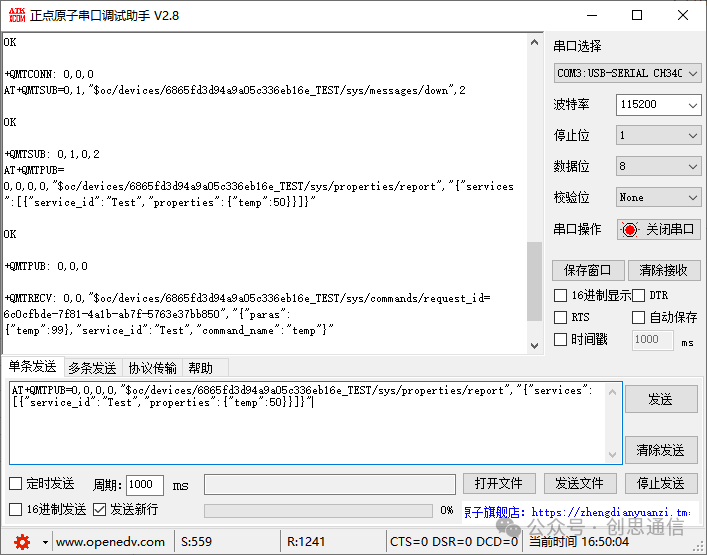

Summary of Command Process

config.css
ATI
AT+CIMI
AT+CGSN=1
AT+CGATT?
AT+QBAND?
AT+CSQ
AT+CGPADDR=1
AT+QMTCFG="version",0,4
AT+QMTOPEN=0,"a1469f2300.st1.iotda-device.cn-east-3.myhuaweicloud.com",1883
AT+QMTCONN=0,"6865fd3d94a9a05c336eb16e_TEST_0_0_2025070303","6865fd3d94a9a05c336eb16e_TEST","d8d7dd65213993e42ec4e69d4570fc424b106118fc8ebcf305e4dbef04033656"
AT+QMTSUB=0,1,"$oc/devices/6865fd3d94a9a05c336eb16e_TEST/sys/messages/down",2
AT+QMTPUB=0,0,0,0,"$oc/devices/6865fd3d94a9a05c336eb16e_TEST/sys/properties/report","{\"services\":[{\"service_id\":\"Test\",\"properties\":{\"temp\":50}}]}"

Purchase Link

https://item.taobao.com/item.htm?id=583282366803