Word count: 1803, reading time approximately 10 minutes
Those who have used comfyui should be aware of the stunning effects of the RMBG model for removing image backgrounds. For a long time, it has been one of the best-performing open-source matting models. The RMBG model can achieve hair-level background segmentation, which has significant applications in posters, games, and advertising content.
(The cover image was achieved using text code segmentation)
The RMBG model (weights are open-source, training is not) is open-source. The address is as follows:
https://huggingface.co/briaai/RMBG-2.0Rust? RMBG?
The RMBG model has an official version of ONNX weights, and we can use ONNX to implement RMBG model inference in Rust. Before inference begins, we need to clarify some basic information about RMBG to facilitate our code writing.
Essentially, RMBG is a segmentation model. Its network structure should be based on <span>BiRefNet</span> (https://github.com/ZhengPeng7/BiRefNet/blob/main/models/birefnet.py).
The most famous architecture for segmentation models is the encoder-decoder structure represented by UNet. Its input and output sizes correspond, and the model’s output is generally a binary mask.
It looks something like this (not absolute, depends on the model and training method): Input:<span>[1,3,224,224]</span> Output:<span>[1,1,224,224]</span>
The input for RMBG is:<span>[1,3,1024,1024]</span>, and the output is:<span>[1,1,1024,1024]</span>
Knowing the input and output, we can determine how to perform preprocessing and postprocessing. The general process is as follows:
- 1. Load the model.
- 2. Load the image and resize it to
<span>[1024,1024]</span>. - 3. Normalize/standardize the image to:
<span>[0,255]</span>=><span>[-1,1]</span>. - 4. Model inference.
- 5. Denormalize
<span>[-1,1]</span>=><span>[0,255]</span>. - 6. Resize the dimensions
<span>[1024,1024]</span>to the original image size. - 7. At this point, we have obtained a grayscale mask image, which can be processed according to the task.
Steps
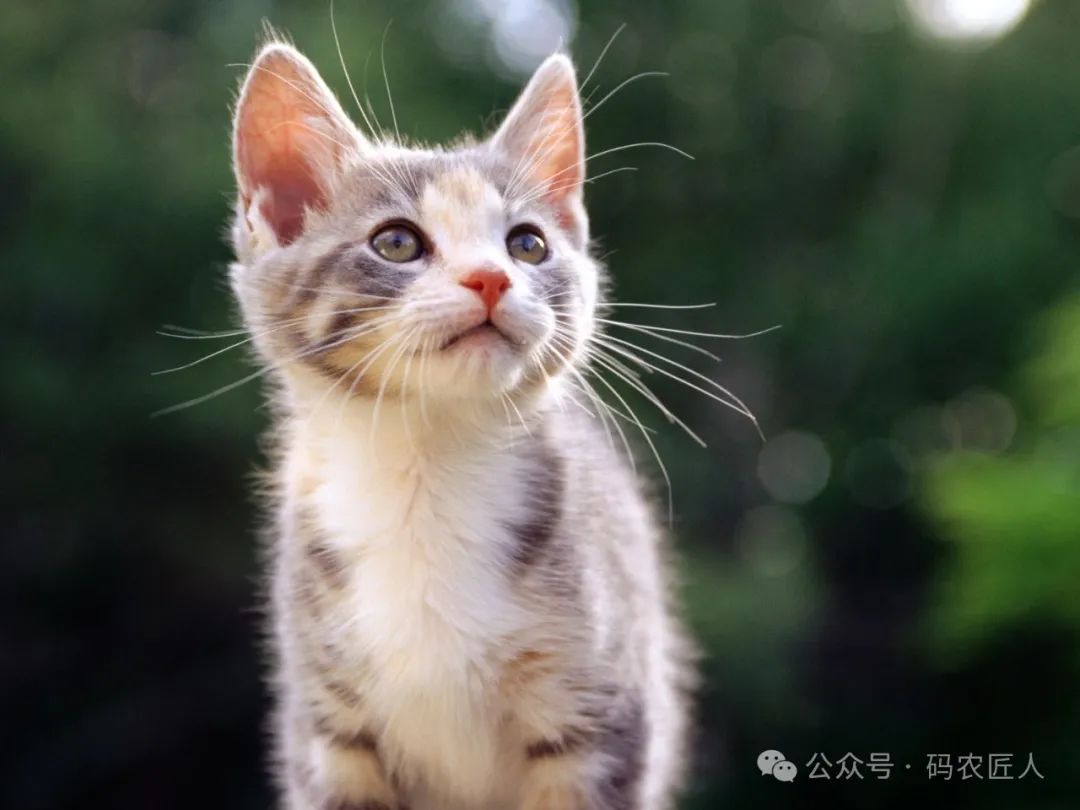
Taking this cat image as an example:
Required libraries:
[dependencies]
darray = "0.16.1"
anyhow = "1.0.97"
ort = {version = "=2.0.0-rc.9", git="https://github.com/pykeio/ort", features = ["cuda"]}
image = "0.25.6"
Loading the model
fn load_onnx<P: AsRef<Path>>(model_file: P) -> anyhow::Result<Session> {
    let model = Session::builder()?
        .with_intra_threads(4)?
        .with_execution_providers(vec![
            CPUExecutionProvider::default().build(),
            CUDAExecutionProvider::default().with_device_id(0).build()
        ])?
        .commit_from_file(model_file)?;

    Ok(model)
}
Loading the image and resizing requires using <span>image-rs</span>.
// Load the image
let original_img = image::open(image_path)?;
    let (img_width, img_height) = (original_img.width(), original_img.height());
There are various algorithms for resizing, and different algorithms have some differences; here we use the Linear Filter.
let img = original_img.resize_exact(1024, 1024, image::imageops::FilterType::Triangle);
Normalization needs to be handled by <span>ndarray</span>, where the process is to first convert to<span>[0,1]</span>, then to <span>[-1,1]</span>.
    let mut input = Array::zeros((1, 3, 1024, 1024));
    for pixel in img.pixels() {
        let x = pixel.0 as _;
        let y = pixel.1 as _;
        let [r, g, b, _] = pixel.2.0;

        input[[0, 0, y, x]] = ((r as f32) / 255. - 0.5) / 0.5;
        input[[0, 1, y, x]] = ((g as f32) / 255. - 0.5) / 0.5;
        input[[0, 2, y, x]] = ((b as f32) / 255. - 0.5) / 0.5;
    }
After normalization, preprocessing is complete, and the next step is inference:
    let outputs = model.run(inputs![
        "pixel_values"=>TensorRef::from_array_view(&input)?
    ])?;
    let output = outputs["alphas"].try_extract_array::<f32>()?;
<span>pixel_values</span> can be obtained by printing <span>model.inputs</span>. This way, we have obtained the mask vector output from the model. The next step is to denormalize to<span>[0,1]</span>, and then restore to the required image format of<span>[0,255]</span>.
// Reverse operation, # Normalize to [0, 1]
let output = output.map(|x| (x + 1.) * 0.5);
// im_array is a grayscale image mask
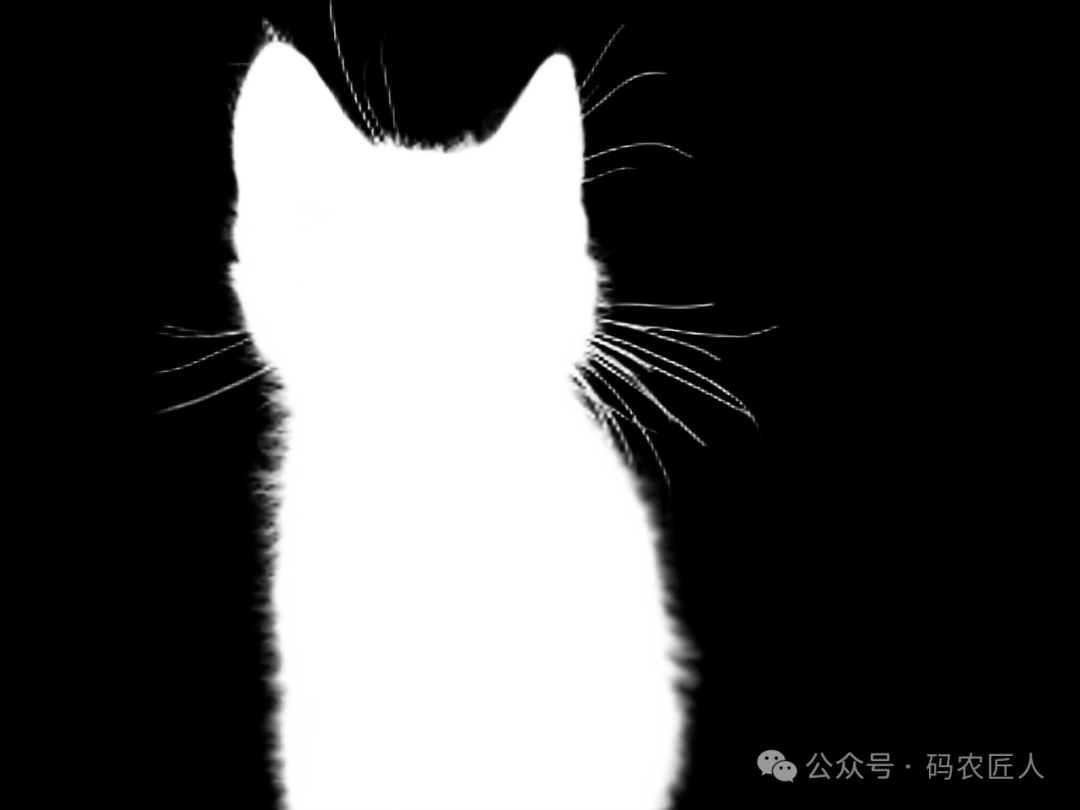
let im_array = output.map(|x| (x * 255.) as u8);At this point, we have obtained the RMBG segmentation map, converted to a grayscale image to save and check the result:
    let dim = im_array.dim();//dim = [1, 1, 1024, 1024]
    let height = dim[2];
    let width = dim[3];

    // get raw vec
    let (buf, _) = im_array.into_raw_vec_and_offset();
// Convert the raw vector to a grayscale image
    let gray = image::GrayImage::from_vec(width as u32, height as u32, buf).unwrap();

    // Restore the grayscale image to the original size
    // Essentially, this is the reverse operation of input; the input and output sizes of RMBG are the same, both 1024x1024. It is essentially still a segmentation model.
    let gray = image::imageops::resize(&gray, img_width, img_height, image::imageops::FilterType::Nearest);
    let _ = gray.save("gray.png");
Results show:
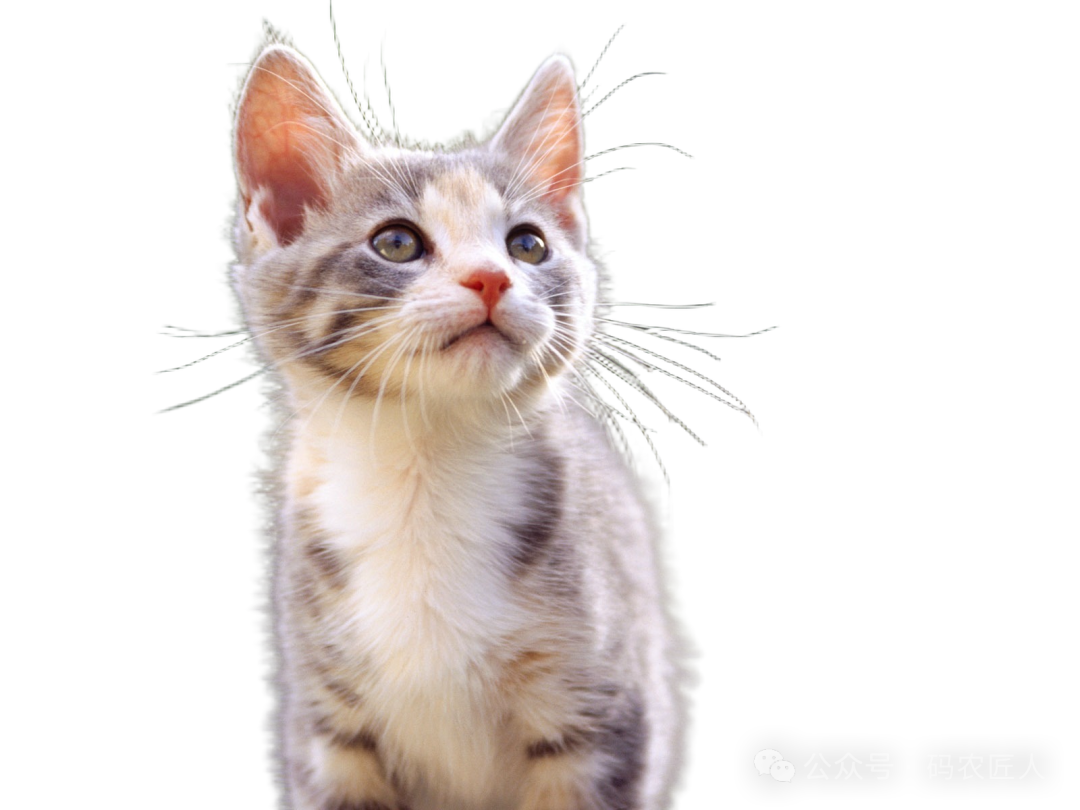
Next, we can process the image based on the actual task. For example, if we want to extract the cat in the image based on the mask, we can perform simple binary operations based on the mask:
// Binarize the original image based on the mask image
// The purpose of this function is to retain or set the original image pixels to transparent based on the grayscale values of the mask image
// Parameters:
//   original_img: &DynamicImage - Reference to the original image
//   mask: &GrayImage - Reference to the mask image, should be a grayscale image
// Return value:
//   anyhow::Result<DynamicImage> - Returns the processed image, or returns an error in Result if an error occurs
fn apply_mask(original_img: &DynamicImage, mask: &image::GrayImage) -> anyhow::Result<DynamicImage> {
    // Get the dimensions of the original image
    let (width, height) = original_img.dimensions();
    // Create a mutable image with the same dimensions as the original image, using RGBA format
    let mut cropped_img = DynamicImage::ImageRgba8(ImageBuffer::new(width, height));

    // Iterate over each pixel of the original image
    for (x, y, pixel) in original_img.pixels() {
        // Get the corresponding pixel in the mask image
        let mask_pixel = mask.get_pixel(x, y);
        // Get the grayscale value of the mask pixel, assuming the mask is a grayscale image
        let mask_value = mask_pixel[0];

        // Decide whether to retain the original pixel based on the grayscale value of the mask pixel
        if mask_value > 128 { // If the grayscale value is greater than 128, retain the original pixel
            cropped_img.put_pixel(x, y, pixel);
        } else { // Otherwise, set the pixel to transparent
            cropped_img.put_pixel(x, y, Rgba([0, 0, 0, 0]));
        }
    }

    // Return the processed image
    Ok(cropped_img)
}
The effect is as follows:

Based on binary judgment, the edge processing is too rough, so we will optimize it further.
fn apply_mask2(
    original_img: &DynamicImage,
    mask: &image::GrayImage,
) -> anyhow::Result<DynamicImage> {
    let (width, height) = original_img.dimensions();
    let mut result_img = DynamicImage::new_rgba8(width, height);
    let original_rgb = original_img.to_rgb8(); // Note: Use RGB instead of RGBA

    for y in 0..height {
        for x in 0..width {
            let rgb_pixel = original_rgb.get_pixel(x, y);
            let mask_value = mask.get_pixel(x, y)[0];

            let new_pixel = if mask_value == 0 {
                Rgba([0, 0, 0, 0]) // Fully transparent
            } else {
                // Directly use mask_value as new Alpha, keep original RGB unchanged
                Rgba([rgb_pixel[0], rgb_pixel[1], rgb_pixel[2], mask_value])
            };

            result_img.put_pixel(x, y, new_pixel);
        }
    }

    Ok(result_img)
}
The result is as follows:
Improvements
The first point: The app_mask algorithm still has some minor edges and unnaturalness, requiring some improvements.
The second point: If you use other complex backgrounds, you will find that the background in the above code is not pure enough, the reason is that the denormalization algorithm of the mask directly linearly maps <span>(x+1)*0.5</span>, which may retain invalid intermediate values.
let output = output.map(|x| (x + 1.) * 0.5);We will optimize it further, based on <span>(output - min)/(max - min)</span>. Since Rust’s f32 does not implement <span>std::cmp::Ord</span>, we cannot directly take the minimum and maximum values; the following code uses a custom implementation.
let max = output.iter().filter(|&&x| !x.is_nan()).fold(f32::MIN, |a, &b| a.max(b));
let min = output.iter().filter(|&&x| !x.is_nan()).fold(f32::MAX, |a, &b| a.min(b));
let normalized = output.map(|x| (x - min) / (max - min));
Crabtime: A simpler macro declaration implementation in Rust than macro_rules!