Copyright belongs to the author. If reposting, please indicate the source of the article: https://cyrus-studio.github.io/blog/
Source Code Download
- • LineageOS Official Website: https://lineageos.org/
- • LineageOS Source Code GitHub: https://github.com/LineageOS/android
- • LineageOS Source Code Domestic Mirror: https://mirrors.tuna.tsinghua.edu.cn/help/lineageOS/
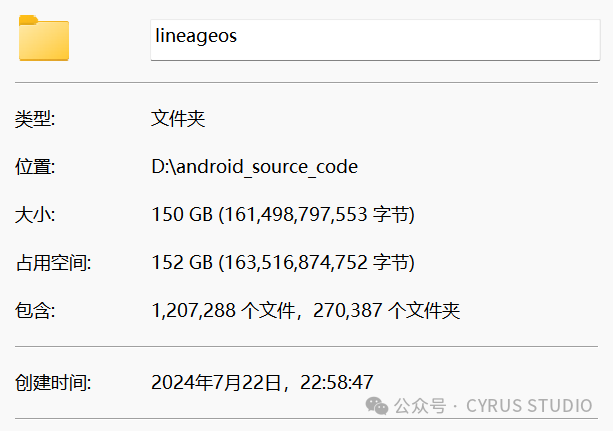
The source code requires approximately 150GB of hard disk space, and the compiled output will be around 300GB.
1. Configure Git
git config --global user.email "[email protected]"
git config --global user.name "Your Name"
2. Install Repo
mkdir ~/bin
PATH=~/bin:$PATH
curl https://storage.googleapis.com/git-repo-downloads/repo > ~/bin/repo
chmod a+x ~/bin/repo
3. Install Git LFS
sudo apt install git-lfs
git lfs install
4. Install Android SDK Platform-Tools
To configure the Android SDK Platform-Tools[1] on Linux, follow these steps:
4.1 Download Android SDK Platform-Tools:
# Change to the directory where platform-tools will be stored
cd /mnt/case_sensitive
# Download platform-tools
wget https://dl.google.com/android/repository/platform-tools-latest-linux.zip
# Unzip platform-tools
unzip platform-tools-latest-linux.zip
4.2 Configure Environment Variables:
To use adb and fastboot commands from anywhere, you need to add the platform-tools directory to your PATH.
Edit the ~/.bashrc file
nano ~/.bashrcAdd the following line at the end of the file
export PATH=$PATH:/mnt/case_sensitive/platform-toolsThen reload the .bashrc file
source ~/.bashrc4.3 Verify Configuration
You can check if adb is configured successfully with the following command
adb versionTest the connection to the device, ensuring your Android device is connected via USB, and that Developer Mode and USB Debugging are enabled.
adb devicesThis will list the connected devices.
5. Mirror Settings
Find the path where repo is located
which repoEdit repo
nano /home/cyrus/bin/repo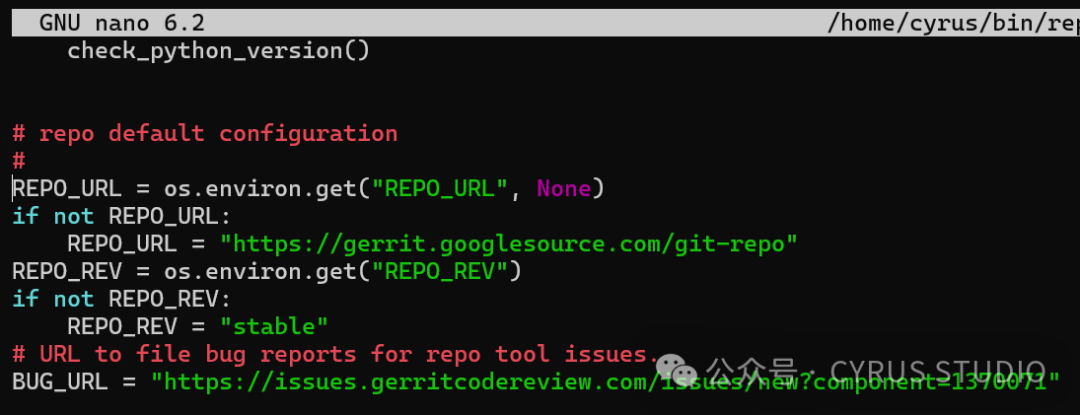
You can see that repo will prioritize the REPO_URL environment variable; otherwise, it defaults to googlesource.
Use the following script to set the REPO_URL environment variable to the Tsinghua University mirror, solving the issue of accessing googlesource from within China, and modify .gitconfig to replace the URL for accessing the LineageOS repository with the Tsinghua University mirror.
add_mirrors.sh (Set Mirror)
#!/bin/bash

export REPO_URL=https://mirrors.tuna.tsinghua.edu.cn/git/git-repo/
echo "REPO_URL="$REPO_URL

# Define the configuration to be added
config=$(cat <<EOF
[url "https://mirrors.tuna.tsinghua.edu.cn/git/git-repo"]
    insteadof = https://gerrit.googlesource.com/git-repo
[url "https://mirrors.tuna.tsinghua.edu.cn/git/lineageOS/"]
    insteadof = https://review.lineageos.org/
[url "https://mirrors.tuna.tsinghua.edu.cn/git/AOSP/"]
    insteadof = https://android.googlesource.com/
[url "https://mirrors.tuna.tsinghua.edu.cn/git/lineageOS/LineageOS/"]
    insteadof = https://github.com/LineageOS/
EOF
)

# Check if the configuration already exists in ~/.gitconfig
if grep -q "https://mirrors.tuna.tsinghua.edu.cn/git/git-repo" ~/.gitconfig; then
    echo "URL replacement already exists, no duplicate addition made."
else
    # If the configuration does not exist, add it to ~/.gitconfig
echo "$config" >> ~/.gitconfig
echo "URL replacement added to ~/.gitconfig"
fi


cat ~/.gitconfig
remove_mirrors.sh (Remove Mirror)
#!/bin/bash

unset REPO_URL
echo "REPO_URL="$REPO_URL

# Use sed command to delete the entire URL configuration block, including the URL and related insteadof lines
sed -i '/\[url "https:\/\/mirrors\.tuna\.tsinghua\.edu\.cn\/git\/git-repo"\]/,+1d' ~/.gitconfig
sed -i '/\[url "https:\/\/mirrors\.tuna\.tsinghua\.edu\.cn\/git\/lineageOS\/"\]/,+1d' ~/.gitconfig
sed -i '/\[url "https:\/\/mirrors\.tuna\.tsinghua\.edu\.cn\/git\/AOSP"\]/,+1d' ~/.gitconfig
sed -i '/\[url "https:\/\/mirrors\.tuna\.tsinghua\.edu\.cn\/git\/lineageOS\/LineageOS"\]/,+1d' ~/.gitconfig

echo "URL replacement removed from ~/.gitconfig"


cat ~/.gitconfig
Grant execution permissions to the script files
chmod +x add_mirrors.sh remove_mirrors.shSet to use the mirror
./add_mirrors.sh6. Download Source Code
Create a directory
mkdir lineage-17.1Change to the lineageos directory
cd lineage-17.1If you can access GitHub normally, use the following command to initialize the repo
repo init -u https://github.com/LineageOS/android.git -b lineage-17.1 --git-lfs --depth=1Otherwise, use the Tsinghua University mirror to initialize the repo and modify default.xml
repo init -u https://mirrors.tuna.tsinghua.edu.cn/git/lineageOS/LineageOS/android.git -b lineage-17.1 --git-lfs --depth=1\Finally, sync the source code
repo syncOr use the following command to download a shallow clone of the source code
repo sync --no-clone-bundle --current-branch --no-tags -j$(nproc)This will shallow clone the latest LineageOS source code for the current branch, saving download time and space.
7. Resolve WebView Sync Failure Issues
error: Unable to fully sync the tree
error: Checking out local projects failed.
Failing repos:
external/chromium-webview/prebuilt/arm
external/chromium-webview/prebuilt/arm64
external/chromium-webview/prebuilt/x86
external/chromium-webview/prebuilt/x86_64
Try re-running with "-j1 --fail-fast" to exit at the first error.
================================================================================
Repo command failed due to the following `SyncError` errors:
Cannot initialize work tree for LineageOS/android_external_chromium-webview_prebuilt_arm
Cannot initialize work tree for LineageOS/android_external_chromium-webview_prebuilt_arm64
Cannot initialize work tree for LineageOS/android_external_chromium-webview_prebuilt_x86
Cannot initialize work tree for LineageOS/android_external_chromium-webview_prebuilt_x86_64
Syncing WebView from the mirror address keeps failing
Delete chromium-webview/prebuilt
rm -rf external/chromium-webview/prebuilt/*Execute remove_mirrors.sh to remove the mirror, enable the proxy, and re-sync from GitHub.
repo sync --no-clone-bundle --current-branch --no-tags -j$(nproc)8. Manually Add Device Repository
Create wayne.xml in .repo/local_manifests to manually add the device configuration repository for wayne (Xiaomi 6X).
Execute the command nano .repo/local_manifests/wayne.xml
mkdir .repo/local_manifests
nano .repo/local_manifests/wayne.xml
Configure Device tree, Common tree, Kernel, Vendor repositories
<manifest>
<remote  name="real_github"
           fetch="https://github.com" />

<project name="LineageOS-MI-A2-MI-6X/android_device_xiaomi_wayne" path="device/xiaomi/wayne" remote="real_github" revision="lineageos-17.1"/>
<project name="LineageOS-MI-A2-MI-6X/android_device_xiaomi_sdm660-common" path="device/xiaomi/sdm660-common" remote="real_github" revision="lineageos-17.1"/>
<project name="LineageOS-MI-A2-MI-6X/android_kernel_xiaomi_sdm660" path="kernel/xiaomi/sdm660" remote="real_github" revision="master"/>
<project name="LineageOS-MI-A2-MI-6X/android_vendor_xiaomi_sdm660-common" path="vendor/xiaomi/sdm660-common" remote="real_github" revision="master"/>
<project name="LineageOS-MI-A2-MI-6X/android_vendor_xiaomi_wayne-common" path="vendor/xiaomi/wayne-common" remote="real_github" revision="master"/>
</manifest>
Where:
- • name=”GitHub Username/Repository Name”
- • path is the location where the code is stored.
Kernel: The kernel is the core of the operating system, responsible for the interaction between hardware and software. The Android kernel is developed based on the Linux kernel, managing device resources and hardware drivers.
Device Tree: The device tree is a hardware description file that tells the operating system the hardware layout of the device, avoiding tight coupling of kernel code with specific hardware. The device tree is usually located in the device/ directory and contains device-specific configurations.
Common Tree: The common tree contains generic code and configurations shared by multiple devices. For example, some devices share the same hardware platform (like sm7250), and these configurations are placed in the Common Tree to avoid duplicate code.
Vendor Tree: The Vendor Tree contains proprietary binary drivers, libraries, and other software components provided by specific devices or hardware vendors (like Qualcomm, Xiaomi). These components are critical for the device to function correctly, especially for proprietary hardware features (like modems, cameras, GPUs, etc.).
The Vendor Tree is usually located in the vendor/ directory and contains closed-source components provided by the device manufacturer. Unlike the Kernel and Device Tree, it involves hardware-related binary files and libraries rather than kernel or hardware descriptions.
After completing this, run repo sync to sync the source code
repo sync --no-clone-bundle --current-branch --no-tags -j$(nproc)Or manually clone it
git clone https://github.com/LineageOS-MI-A2-MI-6X/android_device_xiaomi_wayne.git device/xiaomi/wayne
git clone https://github.com/LineageOS-MI-A2-MI-6X/android_device_xiaomi_sdm660-common.git device/xiaomi/sdm660-common
git clone https://github.com/LineageOS-MI-A2-MI-6X/android_kernel_xiaomi_sdm660.git kernel/xiaomi/sdm660
git clone https://github.com/LineageOS-MI-A2-MI-6X/android_vendor_xiaomi_sdm660-common.git vendor/xiaomi/sdm660-common
git clone https://github.com/LineageOS-MI-A2-MI-6X/android_vendor_xiaomi_wayne-common.git vendor/xiaomi/wayne-common
Proxy Settings
Since the compilation process requires connecting to GitHub to download device trees and kernels, you need to set up a proxy first.
For proxy settings in Linux, you can refer tothis article[2].
Cache Settings
Create a cache directory
mkdir -p /mnt/case_sensitive/ccacheAdd the cache configuration to the end of the environment variable configuration file .bashrc
cat >> ~/.bashrc <<EOF
# Use cache
export USE_CCACHE=1
# ccache file path
export CCACHE_EXEC=/usr/bin/ccache
# Set cache directory
export CCACHE_DIR=/mnt/case_sensitive/ccache
EOF
Execute the following command to make the configuration effective
source ~/.bashrcSet the maximum cache space to 50GB
ccache -M 50GEnable ccache compression to reduce the disk space occupied by cache files
ccache -o compression=trueSource Code Compilation
1. Initialize the Compilation Environment
# Initialize the compilation environment
source build/envsetup.sh

# Set the compilation target
# If the local device repository is not available, it will download the device's Device tree and Kernel from the LineageOS repository
breakfast wayne
2. Supplement Vendor Files
Since vendor files are closed-source and cannot be directly included due to copyright reasons, LineageOS does not provide vendor files directly.
If the breakfast command indicates missing vendor files
In file included from build/make/core/config.mk:291:
In file included from build/make/core/envsetup.mk:266:
vendor/xiaomi/wayne-common/wayne-common-vendor.mk:782: error: _nic.PRODUCTS.[[device/xiaomi/wayne/lineage_wayne.mk]]: "vendor/xiaomi/wayne/wayne-vendor.mk" does not exist.
16:24:01 dumpvars failed with: exit status 1
In file included from build/make/core/config.mk:291:
In file included from build/make/core/envsetup.mk:266:
vendor/xiaomi/wayne-common/wayne-common-vendor.mk:782: error: _nic.PRODUCTS.[[device/xiaomi/wayne/lineage_wayne.mk]]: "vendor/xiaomi/wayne/wayne-vendor.mk" does not exist.
16:24:01 dumpvars failed with: exit status 1
According to the error message, you can supplement the corresponding vendor files in one of the following two ways
2.1 Use TheMuppets Vendor Repository
In the LineageOS project, some vendor files for devices are maintained by the community and stored in a repository called TheMuppets.
Repository address: https://github.com/orgs/TheMuppets/repositories
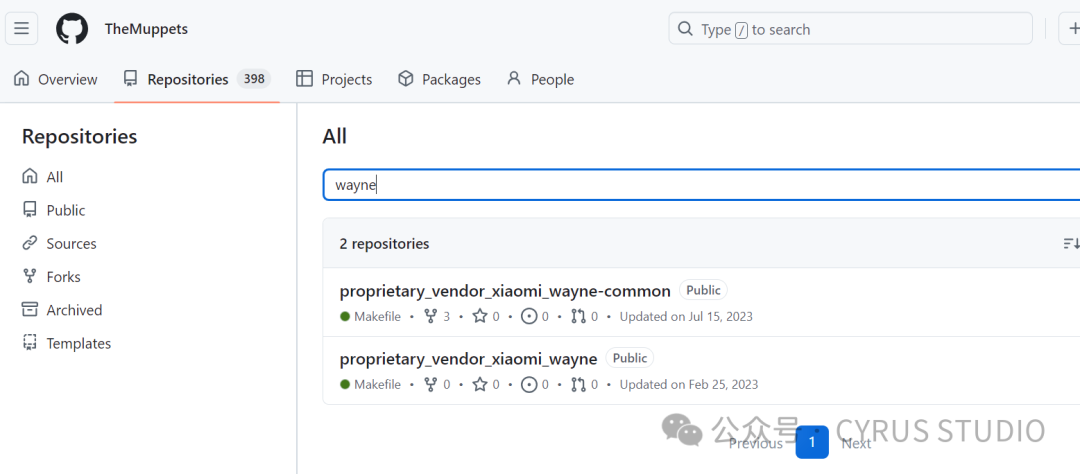
Clone the vendor repository to your local machine
git clone https://github.com/TheMuppets/proprietary_vendor_xiaomi_sdm660-common.git vendor/xiaomi/sdm660-common

git clone https://github.com/TheMuppets/proprietary_vendor_xiaomi_wayne-common.git vendor/xiaomi/wayne-common

git clone https://github.com/TheMuppets/proprietary_vendor_xiaomi_wayne.git vendor/xiaomi/wayne
2.2 Extract from the Device
Note: This step requires the device to have the current compilation branch of LineageOS installed. (You can flash it first and then extract)
Ensure your device is connected to the computer via USB, with adb debugging and root enabled, and located in the device/xiaomi/wayne directory
In this directory, you can usually find two key files:
- • extract-files.sh: A script used to extract vendor files from the device or firmware.
- • proprietary-files.txt: This file lists all the vendor files required by the device.
Run the extract-files.sh script
./extract-files.shThe vendor driver files will be automatically pulled into the vendor/xiaomi folder.
3. Start Compilation
# Go back to the root directory of the Android source tree
croot
# Start compilation
brunch wayne
Resolve Case Sensitivity Issues in WSL During Compilation
21:38:08 ************************************************************
21:38:08 You are building on a case-insensitive filesystem.
21:38:08 Please move your source tree to a case-sensitive filesystem.
21:38:08 ************************************************************
21:38:08 Case-insensitive filesystems not supported
1. Create a Case-Sensitive Filesystem
Create a 300GB ext4 filesystem image file and mount it to /mnt/case_sensitive to provide a case-sensitive filesystem
# Create a 300GB empty file
dd if=/dev/zero of=/mnt/e/case_sensitive.img bs=1G count=300


# Format this file as an ext4 filesystem
mkfs.ext4 /mnt/e/case_sensitive.img

# Create a new mount point directory
sudo mkdir /mnt/case_sensitive

# Mount the formatted file to the newly created mount point
sudo mount /mnt/e/case_sensitive.img /mnt/case_sensitive

# Copy your LineageOS source directory to the newly mounted virtual disk
# -a: Archive mode, meaning recursively copy directories and preserve symlinks, permissions, timestamps, owners, etc.
# -v: Show detailed information.
# --progress: Show file transfer progress.
sudo rsync -av --progress /mnt/e/android_source_code/lineageos/ /mnt/case_sensitive/lineageos/
# Or
# Move your LineageOS source directory to the newly mounted virtual disk
sudo mv /mnt/e/android_source_code/lineageos /mnt/case_sensitive/

cd /mnt/case_sensitive/lineageos
To ensure case_sensitive.img is automatically mounted to /mnt/case_sensitive at each system startup.
- 1. Open the /etc/fstab file
sudo nano /etc/fstab- 2. Add the following line
/mnt/e/case_sensitive.img /mnt/case_sensitive ext4 loop 0 02. Access case_sensitive from Windows
The access path is as follows:
\\wsl.localhost\Ubuntu\mnt\case_sensitive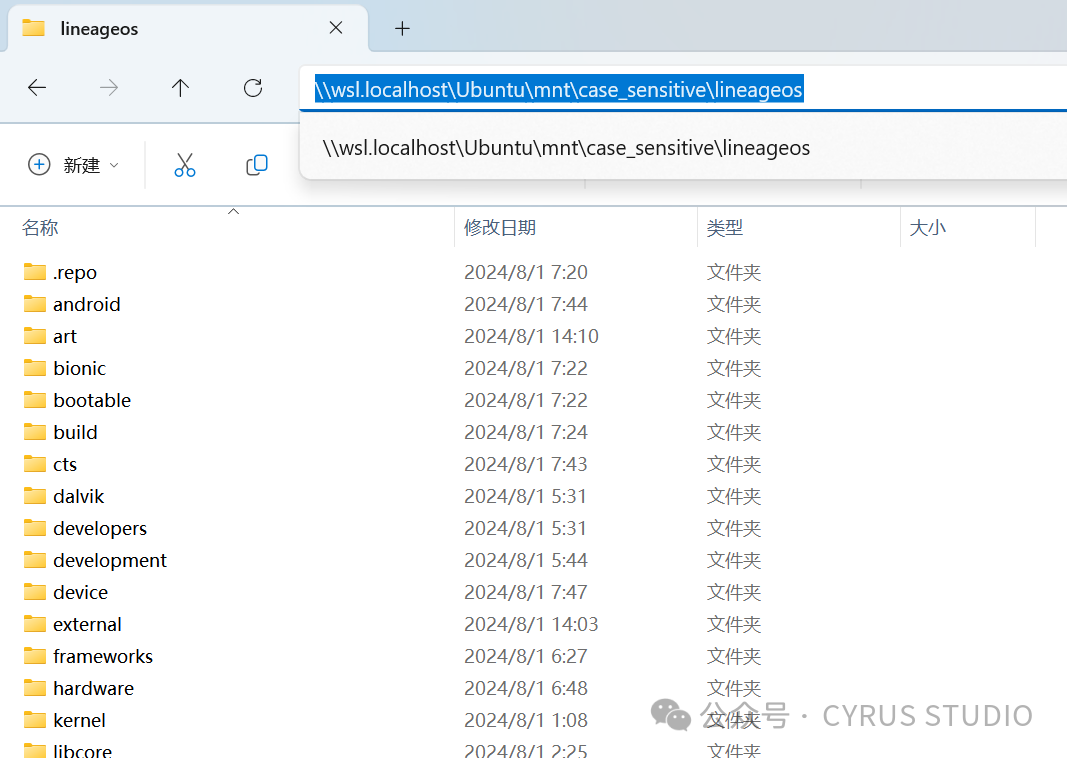
Ensure Windows users have sufficient permissions for this directory. You may need to set some permissions in WSL
sudo chmod -R 777 /mnt/case_sensitiveThis way, you should be able to access and use the case-sensitive filesystem in WSL from Windows.
3. How to Expand case_sensitive.img if Space is Insufficient?
- 1. Unmount the filesystem
sudo umount /mnt/case_sensitiveThis command unmounts the currently mounted case_sensitive.img filesystem to ensure it is not in use during the expansion process.
- 2. Increase the size of the image file
dd if=/dev/zero bs=1G count=100 >> /mnt/e/case_sensitive.imgParameter explanation:
- • The dd command is used to append 100GB of space to the case_sensitive.img file.
- • if=/dev/zero: Indicates the input file is /dev/zero, a device file that outputs an infinite number of zero bytes.
- • bs=1G: Indicates the block size is 1GB.
- • count=100: Indicates writing 100 blocks of 1GB.
- •
/mnt/e/case_sensitive.img: Indicates appending the output to the existing case_sensitive.img file.
- 3. Check and Repair the Filesystem
sudo e2fsck -f /mnt/e/case_sensitive.imgParameter explanation:
- • The e2fsck command is used to check and repair ext2/ext3/ext4 filesystems.
- • The -f option forces a filesystem check even if the filesystem appears clean.
- 4. Resize the Filesystem
sudo resize2fs /mnt/e/case_sensitive.imgThe resize2fs command is used to resize ext2/ext3/ext4 filesystems to fit the new image file size.
- 5. Check the Partition Table
First, use parted to check and adjust the partition table.
sudo parted /mnt/e/case_sensitive.imgIn parted, execute the following command
(parted) printThis will print the current partition information. Then, use the following command to resize the partition
(parted) resizepart 1 100%Exit parted
(parted) quit- 6. Remount the Filesystem
sudo mount /mnt/e/case_sensitive.img /mnt/case_sensitiveBy following these steps, you can expand the space of case_sensitive.img without affecting existing data.
Resolve Insufficient Memory During Compilation
21:38:07 You are building on a machine with 7.62GB of RAM
21:38:07
21:38:07 The minimum required amount of free memory is around 16GB,
21:38:07 and even with that, some configurations may not work.
21:38:07
21:38:07 If you run into segfaults or other errors, try reducing your
21:38:07 -j value.
21:38:07 ************************************************************
Create Virtual Memory
# Create an 8GB file, located at /mnt/case_sensitive/swapfile. fallocate is a tool for quickly creating large files.
sudo fallocate -l 8G /mnt/case_sensitive/swapfile

# Change the permissions of /swapfile so that only the owner (root) has read and write permissions. This is for security, to prevent other users from accessing the swap file.
sudo chmod 600 /mnt/case_sensitive/swapfile

# Initialize /mnt/case_sensitive/swapfile as swap space. This command sets the filesystem flag to inform the operating system that this is a swap file.
sudo mkswap /mnt/case_sensitive/swapfile

# Enable /mnt/e/swapfile as swap space. This command activates the swap file for system use.
sudo swapon /mnt/case_sensitive/swapfile

# Check the usage of swap space
swapon --show
If memory is still insufficient?
Change the virtual memory size from 8G to 16G
# Turn off the current swap file
sudo swapoff /mnt/case_sensitive/swapfile

# Create a new 16G swap file
sudo fallocate -l 16G /mnt/case_sensitive/swapfile

# Set the permissions of the swap file to 600, ensuring only the root user can read and write to it.
sudo chmod 600 /mnt/case_sensitive/swapfile

# Format the swap file as swap
sudo mkswap /mnt/case_sensitive/swapfile

# Enable the new swap file
sudo swapon /mnt/case_sensitive/swapfile

# Use swapon --show or free -h to verify that the new swap file has been correctly enabled.
swapon --show
# Or
free -h
To ensure /mnt/case_sensitive/swapfile remains effective after reboot, add it to the /etc/fstab file
echo '/mnt/case_sensitive/swapfile swap swap sw 0 0
' | sudo tee -a /etc/fstab
After setting up, compile again. If the actual physical memory does not exceed 16G, the prompt may still exist, but it will not affect normal compilation.
WSL defaults to setting the maximum available memory to 50% of the actual physical memory. If you want to modify the maximum available memory for WSL, you can do so by modifying .wslconfig:
[wsl2]
memory=16GB
Resolve Compilation Errors
‘duplicate entry for genfs entry *’ at token ‘genfscon’
FAILED: out/target/product/wayne/obj/ETC/sepolicy_neverallows_intermediates/sepolicy_neverallows
/bin/bash -c "(ASAN_OPTIONS=detect_leaks=0 out/host/linux-x86/bin/checkpolicy -M -c             30 -o out/target/product/wayne/obj/ETC/sepolicy_neverallows_intermediates/sepolicy_neverallows.tmp out/target/product/wayne/obj/ETC/sepolicy_neverallows_intermediates/policy.conf ) && (out/host/linux-x86/bin/sepolicy-analyze out/target/product/wayne/obj/ETC/sepolicy_neverallows_intermediates/sepolicy_neverallows.tmp neverallow -w -f out/target/product/wayne/obj/ETC/sepolicy_neverallows_intermediates/policy_2.conf ||      ( echo "" 1>&&2;      echo "sepolicy-analyze failed. This is most likely due to the use" 1>&&2;      echo "of an expanded attribute in a neverallow assertion. Please fix" 1>&&2;        echo "the policy." 1>&&2;      exit 1 ) ) && (touch out/target/product/wayne/obj/ETC/sepolicy_neverallows_intermediates/sepolicy_neverallows.tmp ) && (mv out/target/product/wayne/obj/ETC/sepolicy_neverallows_intermediates/sepolicy_neverallows.tmp out/target/product/wayne/obj/ETC/sepolicy_neverallows_intermediates/sepolicy_neverallows )"
device/xiaomi/sdm660-common/sepolicy/vendor/genfs_contexts:31:ERROR 'duplicate entry for genfs entry (sysfs, /devices/soc/800f000.qcom,spmi/spmi-0/spmi0-00/800f000.qcom,spmi:qcom,pm660@0:qcom,pm660_rtc/rtc)' at token 'genfscon' on line 85793:
# Touchscreen
genfscon proc /nvt_wake_gesture                                 u:object_r:proc_dt2w:s0
checkpolicy:  error(s) encountered while parsing configuration
There is a duplicate genfscon entry in the sepolicy configuration file.
The path /devices/soc/800f000.qcom,spmi/spmi-0/spmi0-00/800f000.qcom,spmi:qcom,pm660@0:qcom,pm660_rtc/rtc is defined twice.
Find and remove the duplicate definition in the device/xiaomi/sdm660-common/sepolicy/vendor/genfs_contexts file.
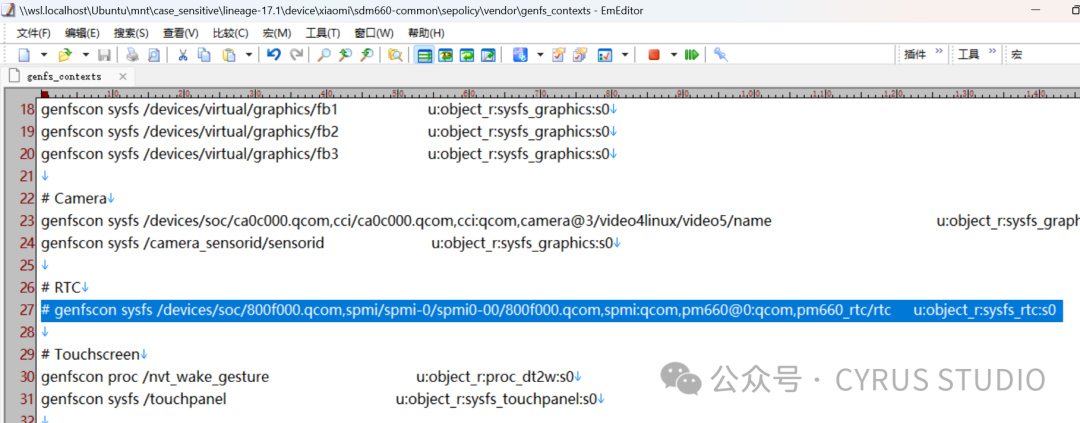
Clear the cache and recompile
make clean
brunch wayne
Compilation Complete
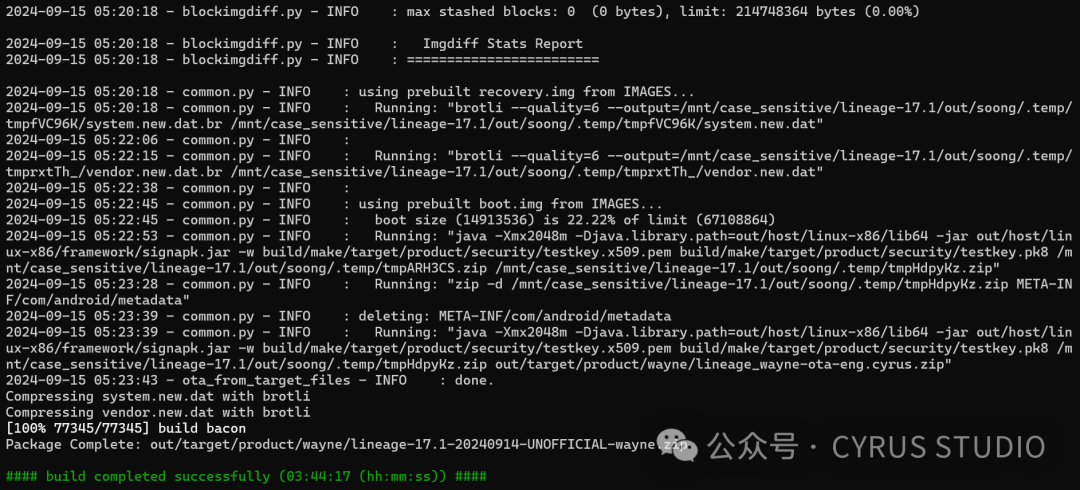
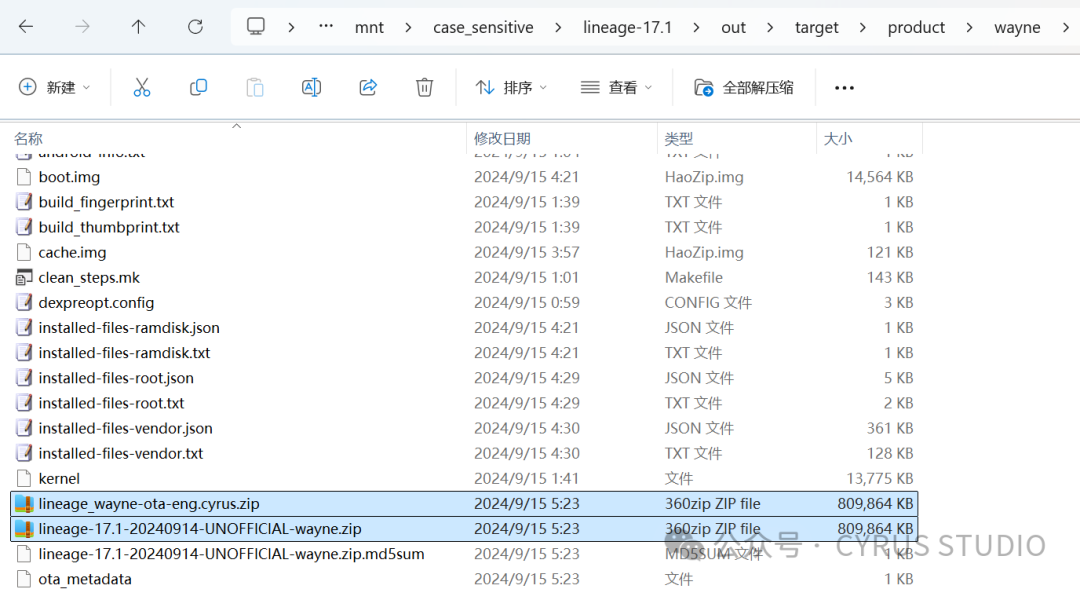
After compilation, you can find the following two zip files in the out/target/product/wayne directory:
- • lineage-17.1-20240914-UNOFFICIAL-wayne.zip is the complete LineageOS ROM, typically used for fresh installations or re-flashing devices.
- • lineage_wayne-ota-eng.cyrus.zip is an OTA update package, possibly used for incremental updates to existing LineageOS installations, typically not used for first-time flashing.
Flashing
Enter recovery, format data first, then use adb sideload to start flashing
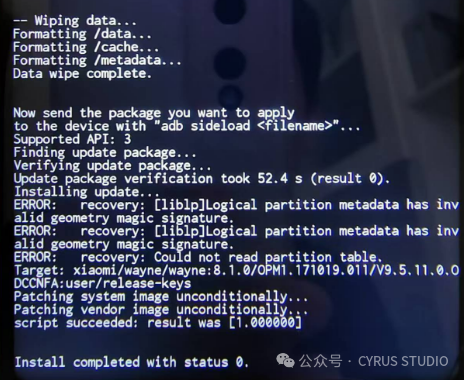
Wait for the flashing to complete, then reboot the system.
Related Links:
- • A Guide to Flashing LineageOS from Scratch: Recovery + Sideload Full Process Practical Guide[3]
- • https://wiki.lineageos.org/devices/wayne/build/
- • [ROM][OTA][10.x] LineageOS 17.1 Unofficial [wayne/ Mi 6X][4]
Reference Links
<span>[1]</span> Android SDK Platform-Tools: https://developer.android.com/tools/releases/platform-tools?hl=zh-cn<span>[2]</span> This article: https://cyrus-studio.github.io/blog/posts/linux%E4%B8%8B%E4%BB%A3%E7%90%86%E8%AE%BE%E7%BD%AE/<span>[3]</span> A Guide to Flashing LineageOS from Scratch: Recovery + Sideload Full Process Practical Guide: https://cyrus-studio.github.io/blog/posts/%E6%95%99%E4%BD%A0%E4%BB%8E%E9%9B%B6%E5%88%B7%E5%85%A5-lineageosrecovery-+-sideload-%E5%85%A8%E6%B5%81%E7%A8%8B%E5%AE%9E%E6%93%8D%E6%8C%87%E5%8D%97/<span>[4]</span> [ROM][OTA][10.x] LineageOS 17.1 Unofficial [wayne/ Mi 6X]: https://xdaforums.com/t/rom-ota-10-x-lineageos-17-1-unofficial-wayne-mi-6x.3989193/