 MAKER:yishaisilver8/译:趣无尽
This project is based on the Raspberry Pi Zero, using a fisheye camera to stream video in real-time to the wearable Vufine display. The display effect is similar to a four-inch screen, outputting at 720p.
Additionally, these glasses can assist patients with retinitis pigmentosa, providing a broader field of vision, convenience, and more joy in their lives.
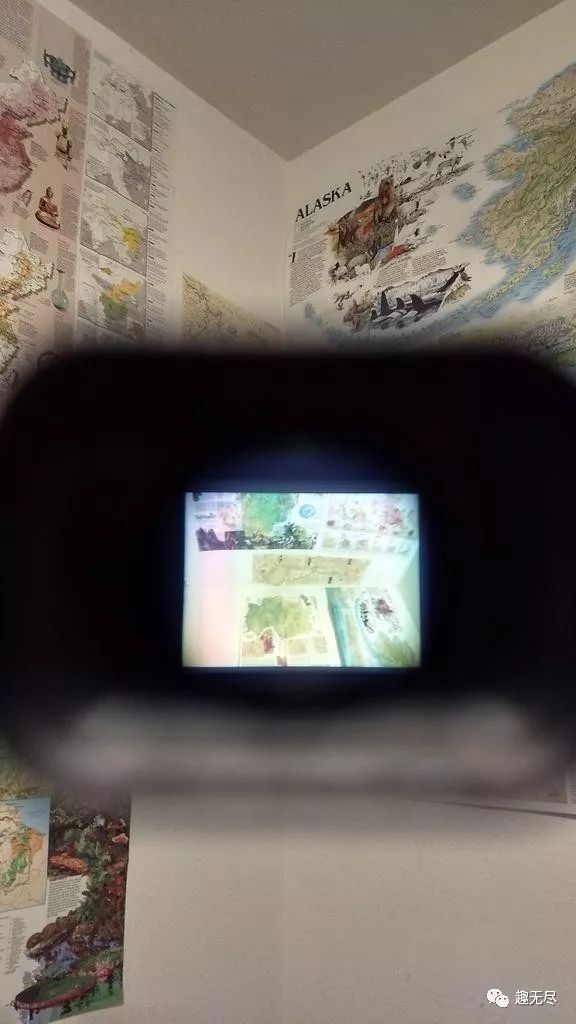
Materials List
Raspberry Pi Zero W ×1Micro SD Card ×1USB Adapter ×1Mini HDMI to HDMI Cable ×1Vufine Wearable Display ×1Micro to Mini HDMI Cable ×1HDMI Adapter ×1HDMI Flat Cable ×1micro USB Cable ×2Raspberry Pi Fisheye Camera ×1Camera Cable ×1Small Zip Ties ×SeveralPliers ×1Hot Glue Gun ×1Keyboard ×1Screen ×1 (supports HDMI)Soldering Iron ×1Solder ×SeveralUtility Knife ×1
Setting Up the Raspberry Pi
Hardware Section 1. Connect the keyboard. Use the USB adapter to connect the Raspberry Pi to the Type A USB connector on the keyboard, the other USB port will be used for power. 2. Insert the HDMI cable into the mini HDMI port on the Raspberry Pi and the HDMI port on the screen (if your screen is the Vufine display, please use the HDMI cable).
Software Section1. Install Raspbian on the Raspberry Pi (refer to this tutorial http://shumeipai.nxez.com/2013/09/07/raspberry-pi-under-windows-system-installation-to-sd-card.html).2. Enable the camera in the Raspberry Pi configuration menu (refer to the camera enabling section in this tutorial http://shumeipai.nxez.com/2017/11/01/build-rtmp-stream-live-server-with-raspberry-pi.html).
Installing the Camera
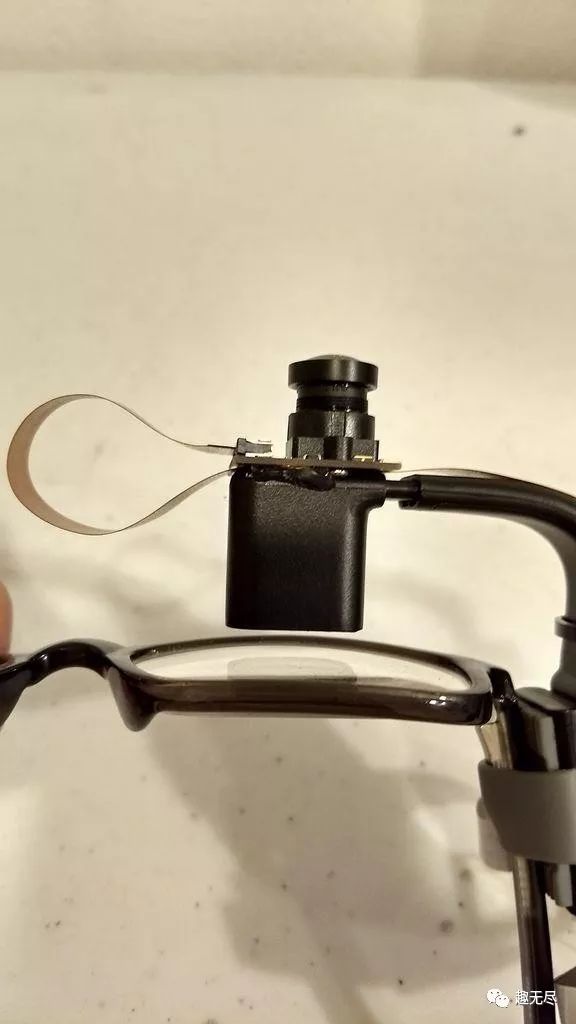
Connect the camera to the Raspberry Pi using the flat cable.
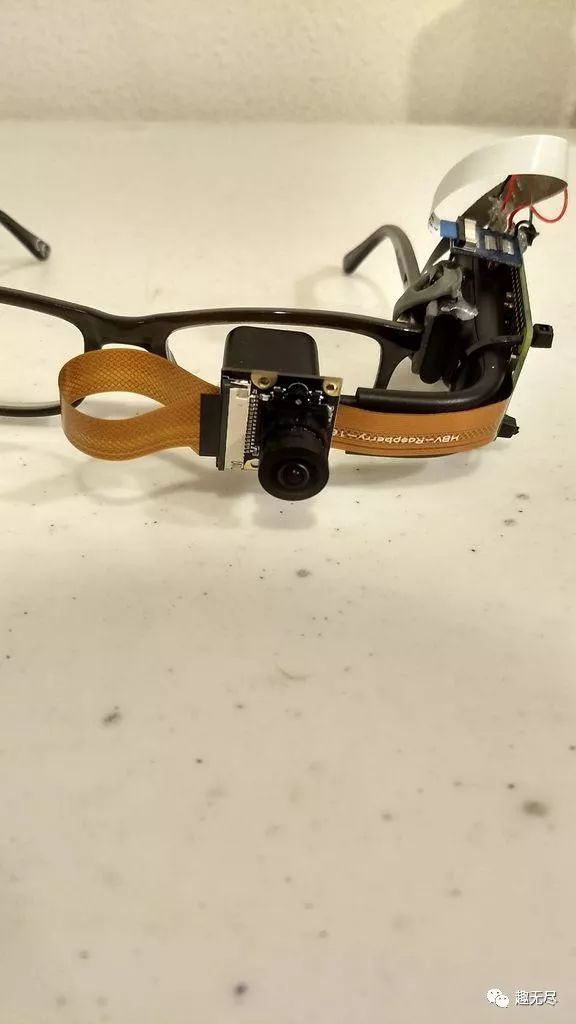
Note, the white flat cable that comes with the camera is not suitable for the Raspberry Pi Zero, replace it with the gold flat cable. Also, ensure that the exposed part of the wire is facing down and inserted into the Raspberry Pi and camera board.
Software SectionThe software setup for the camera is very simple. Stream video directly from the camera to HDMI by executing the command in the terminal:
raspivid -t 0 -rot 0
Now the camera can stream video to the screen. Press ctrl+c to stop the video stream. For the standard Vufine module, configure for the right eye by changing the 0 after “-rot” to 90. For the left eye, change the 0 after “-rot” to 270.
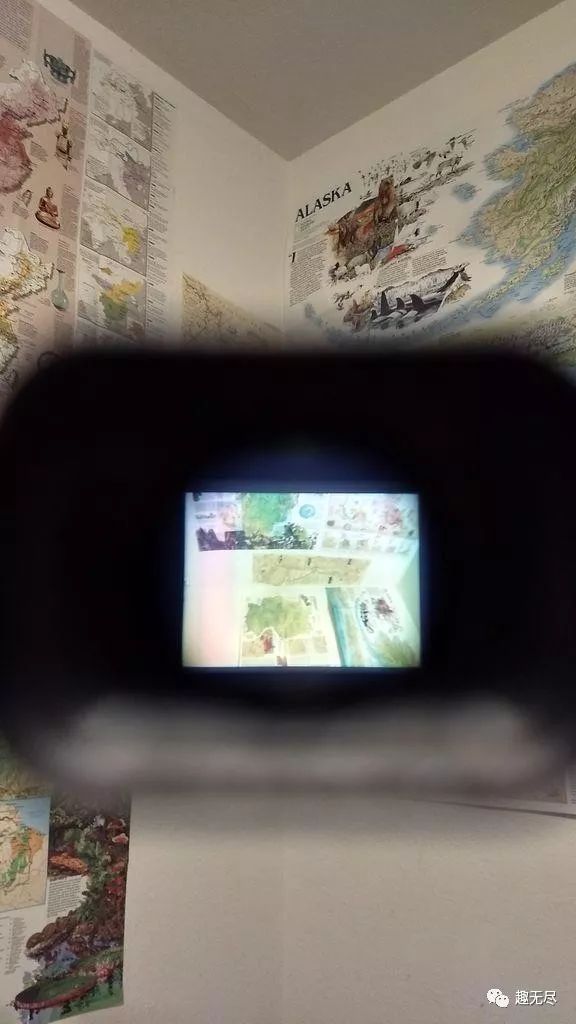
As shown, point the camera at the Vufine display, and you should see an upright image. If your image is inverted, try adjusting the number; if you previously executed 90, change it to 270, and vice versa, then press ctrl+c to exit the video stream.
Determine the orientation of the camera’s video stream through software. Next, let’s ensure that the Raspberry Pi can boot up properly. Execute the following command:
raspivid -t 0 -rot 0
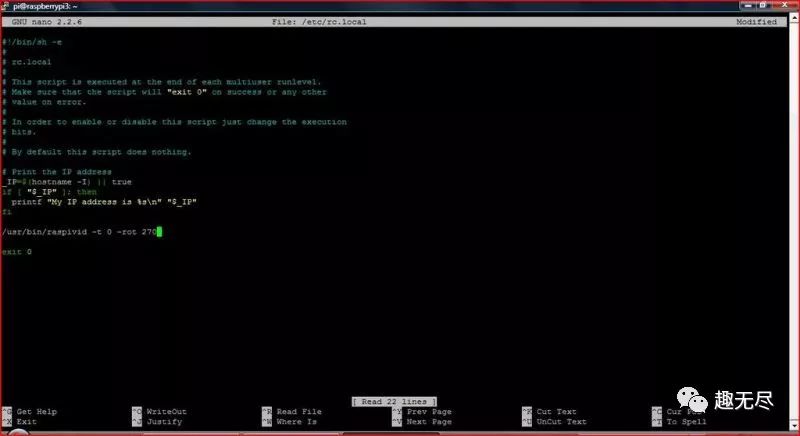
As shown, enter the command “/usr/bin/raspivid -t 0 -rot 90/270” between the lines “fi” and “exit 0”. If you want a low-resolution image with a higher frame rate, use “/usr/bin/raspivid -t 0 -rot 90/270 -md 6”.
Then press ctrl+x to save, type y to confirm saving, and press enter to save. Restart the Raspberry Pi and test if it runs correctly. If everything is normal, you should see the camera streaming video to the HDMI output at the end of the boot process.
Friendly reminder:1. After completing the above operations, you may consider applying a small amount of hot glue to the flat cable or connectors of the camera and Raspberry Pi to ensure they are secured (optional).2. If your Vufine display is configured for the right eye, the orientation you choose will be different. The USB port of the Raspberry Pi is located at the bottom, which is more convenient; when wearing it, the top of the camera will be on the left side.3. If you want to upload photos to the Raspberry Pi’s camera connector but don’t want to remove the Raspberry Pi, it’s best to upload them now and update later.
Powering the Vufine Display
The Vufine display has its own battery but lasts only ninety minutes, which is insufficient for the project needs. Here, a USB cable needs to be connected; since regular USB cables are too bulky, to reduce weight, the insulation of the wire needs to be stripped. After modifying the battery, it can not only charge the Vufine during use but also extend its battery life.
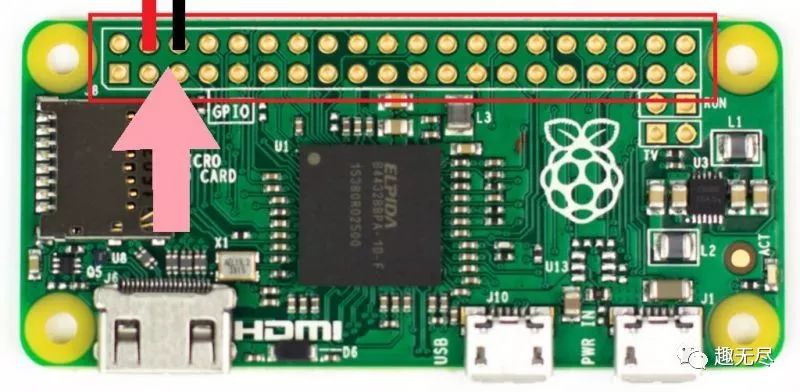
1. Prepare the USB cableIn this step, please be careful when cutting the wire.Step one: Cut a section of USB cable five inches long. (For the right eye, you can prepare a seven-inch long one). Then completely strip the insulation from the micro end of the USB cable.Step two: Use a utility knife to cut the plastic casing. It is recommended to use pliers to hold the plug while doing this. As shown, cut along the seam on the side.
2. Encapsulate the USB plug
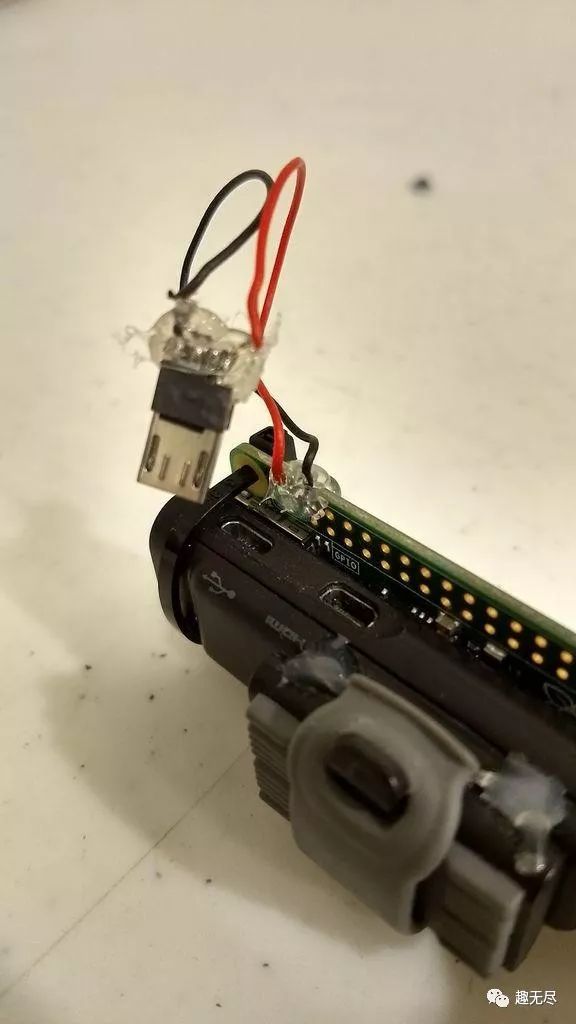
Step one: Remove the two middle wires next to the metal port of the USB cable (not the red and black wires). You can cut them off or use a soldering iron to remove them.Step two: Apply some hot glue at the bottom of the wire (near the Micro USB plug) to ensure insulation and safety.
3. Connect to the Raspberry Pi
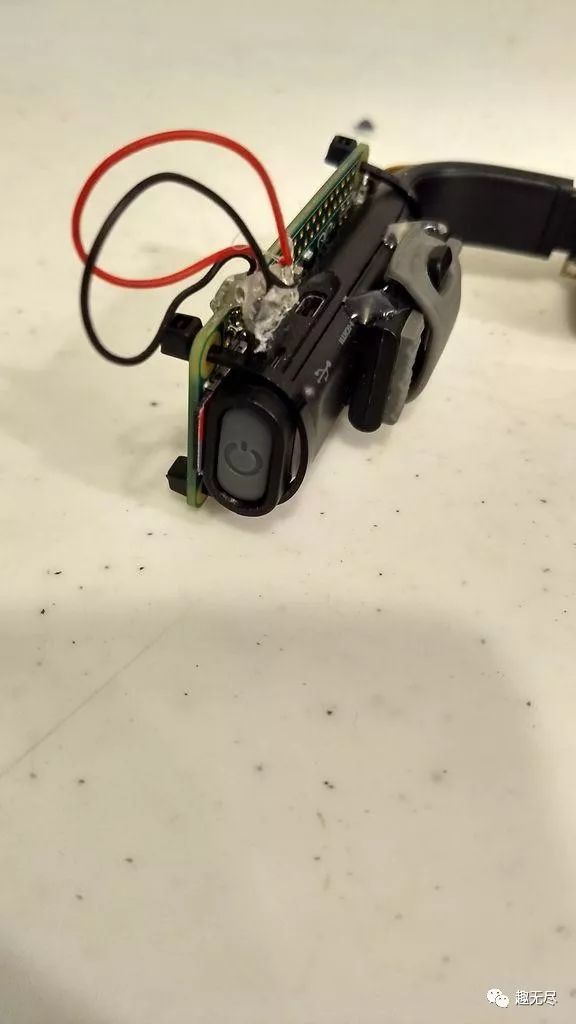
Step one: Solder the red wire to the 5V port and the black wire to the ground (GND) pin of the Raspberry Pi.Step two: Apply some hot glue at the soldering points on both sides of the Raspberry Pi, which will not only secure the wires but also ensure insulation.
Connecting All Components
1. Secure the Raspberry Pi Place the Raspberry Pi on the Vufine module, close to the front end of the camera interface, with the USB connector facing down and inward. Use two pairs of zip ties to secure it. Pass a zip tie through a hole at the top of the Raspberry Pi, wrap it around the Vufine, and then pass it through another hole at the bottom on the same side of the Raspberry Pi.
Take another zip tie and secure it to the first one. Pull tightly to fix the Raspberry Pi and Vufine together. Finally, cut off the excess zip tie. Repeat this step on the other side of the Raspberry Pi.
2. Insert the USB cablePlug the USB cable soldered to the Raspberry Pi into the Vufine display.
3. Secure the connectorSince it is a magnetic extension base, it is not very stable, and the connection needs to be reinforced with hot glue. As shown, connect the Vufine module to the magnetic extension base. Ensure it remains parallel to the Vufine; you can also adjust the position of the display by moving the strap on the glasses. Apply an adequate amount of hot glue to the top and bottom. Let it cool and ensure the position remains unchanged.
4. Insert the HDMI flat cable
 Insert the HDMI flat cable between the Vufine module and the Raspberry Pi.
5. Connect the cameraFor left eye configuration:As shown, connect the camera and ensure its side is wrapped around with the flat cable underneath it. Install it on the Vufine screen and apply an adequate amount of hot glue at the top and bottom to secure it.
Be careful not to place any components on either side to facilitate the adjustment of the flat cable and Vufine screen.
For right eye configuration:I did not configure the right eye in this project, but it is not difficult. Just adjust the edge of the camera and install it at the appropriate position on the top of the display. When worn on the left, the top should face the left side. Use hot glue to attach the camera to the Vufine module’s screen. Similarly, use hot glue or zip ties to secure any excess flat cable (you may leave some wire for adjustment, but do not leave it too long to prevent folding, as it cannot withstand high rotation).
If the camera stream needs to be reconfigured due to a change in installation position, please return to the previous camera installation steps and readjust.
Completion
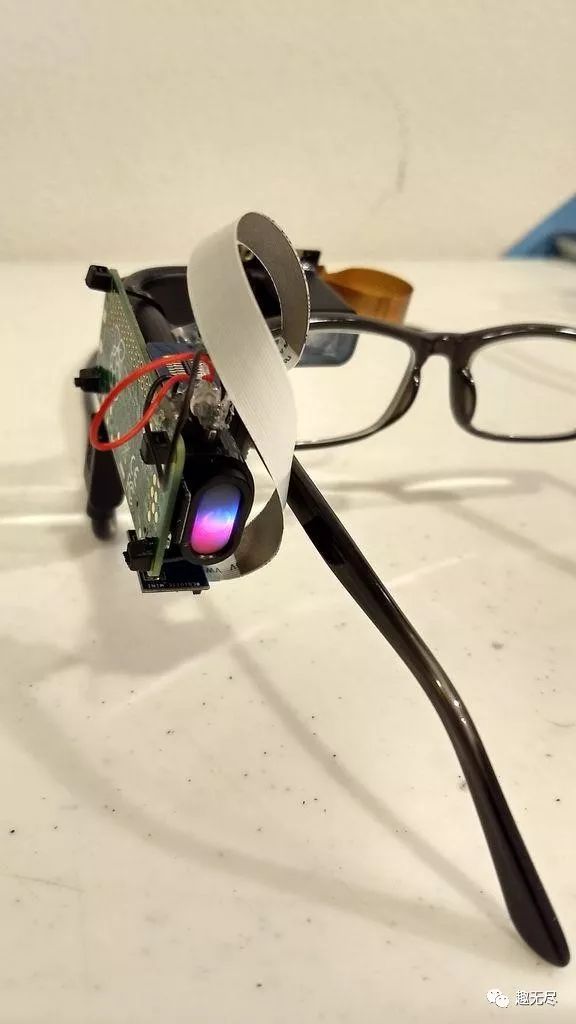
1. Power OnStep one: Turn on the glasses by pressing the gray button on the back to activate the Vufine module, and the blue light will flash.Step two: Insert the rightmost USB port into the Raspberry Pi Zero (marked as PWR IN on the outside). In addition to the flashing blue light on the Vufine module, you will also see a steady red light after it is turned on. This indicates that the Vufine is charging.Step three: The screen will start working, and once the Raspberry Pi powers up normally, the camera will produce a video stream.Step four: After the screen image appears, the flashing blue light on the Vufine button will stabilize.
Note: Power on the Raspberry Pi before turning on the Vufine. If your screen displays abnormally, please turn off the Raspberry Pi and restart it.
2. Power OffAfter unplugging the USB cable, turn off the Raspberry Pi. You can press the gray button on the Vufine until the blue light stops flashing or let it automatically turn off.
Areas for Improvement
This glasses project based on the Raspberry Pi has many features yet to be developed.1. Use a wireless keyboard to connect and start the Linux computer.2. Add a hand gesture-based interface.3. Add buttons on the side for saving pictures and videos with zoom in and out functionality.4. Include a power switch on the body, 3D printed casing, and audio output.5. Add accessories to balance the other side of the glasses.6. Create CNN with TTS output for audio description of the environment. This neural network can run on a neural computing stick for higher computational power.7. Be able to use current vestibular stimulation for emergency operations.
Similar Projects
If you like this project, we recommend two similar projects:OpenEyeTap: Open-source AR smart glasses based on Raspberry PiRaspberry Pi + Hat = Wearable Video Recorder
via instructables.com/id/Poor-Mans-Google-GlassAid-for-Those-With-Tunnel-Vi/
The links in the text can be clicked to read the original text at the end
Biometric Lock Made with ESP8266
3D Printed Minimalist Automatic Fish Feeder
Raspberry Pi + Dot Matrix to Create Bitcoin Tracker
Raspberry Pi to Create Low-cost Interactive Microscope
Elegantly Add Power On/Off Button to Raspberry Pi
Raspberry Pi + Hat = Wearable Video Recorder
Arduino Made Smart Water Consumption Monitor
 MAKER:yishaisilver8/译:趣无尽
 1. Connect the keyboard. Use the USB adapter to connect the Raspberry Pi to the Type A USB connector on the keyboard, the other USB port will be used for power. 2. Insert the HDMI cable into the mini HDMI port on the Raspberry Pi and the HDMI port on the screen (if your screen is the Vufine display, please use the HDMI cable).


 Place the Raspberry Pi on the Vufine module, close to the front end of the camera interface, with the USB connector facing down and inward. Use two pairs of zip ties to secure it. Pass a zip tie through a hole at the top of the Raspberry Pi, wrap it around the Vufine, and then pass it through another hole at the bottom on the same side of the Raspberry Pi.
 Insert the HDMI flat cable between the Vufine module and the Raspberry Pi.

