A few days ago, a junior gave me an ESP32-CAM camera module. Now that I finally have some free time, I’m going to play with this camera module, so I can remotely monitor my home later.
What is the ESP32-CAM Camera?
The ESP32-CAM is a micro module based on the ESP32-S2 chip, featuring camera functionality, equipped with an OV2640 camera, GPIO for connecting peripherals, and a microSD card for storing captured images.
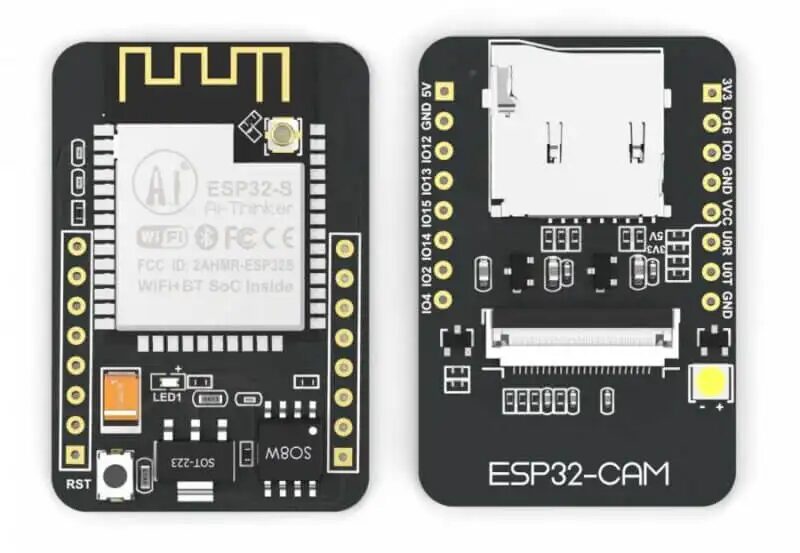
The ESP32-CAM can be widely applied in various IoT scenarios, suitable for smart home devices, industrial wireless control, wireless monitoring, QR wireless identification, wireless positioning system signals, and other IoT applications, making it an ideal solution for IoT applications.
Pin Definitions
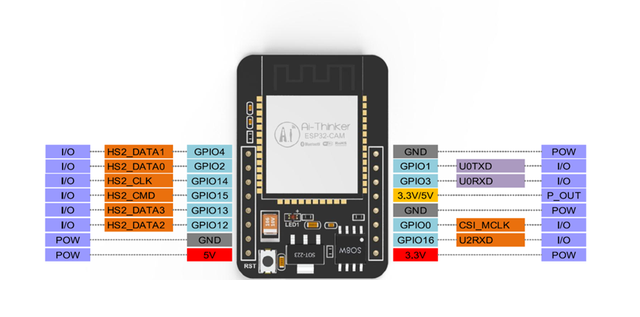
The ESP32-CAM has three GND pins and two pins for power: 3.3V or 5V.
GPIO 1 and GPIO 3 are serial pins. You need these pins to upload code to your board. Additionally, GPIO 0 also plays an important role as it determines whether the ESP32 is in flashing mode. When GPIO 0 is connected to GND, the ESP32 is in flashing mode.
The following pins are internally connected to the microSD card reader:
-
GPIO 14: CLK -
GPIO 15: CMD -
GPIO 2: Data0 -
GPIO 4: Data1 (also connected to the onboard LED) -
GPIO 12: Data2 -
GPIO 13: Data3
Importing the ESP32 CAM Library
Configure and install the ESP 32 CAM development board library in the Arduino IDE as follows:
1. Download and install the Arduino IDE; there are many guides online for this, so I won’t go into detail here. You can search for it yourself if needed.
2. Add the ESP32 development board in the Arduino IDE:
Add the following URL to the additional board manager URLs: https://dl.espressif.com/dl/package_esp32_index.json
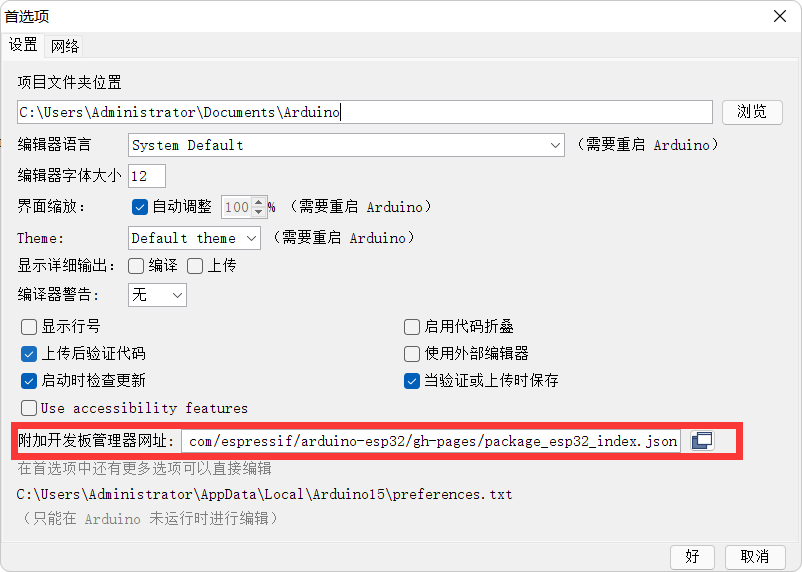
3. After completing the URL addition, you can search for and download the esp32 development board data package in “Tools -> Board -> Board Manager”.
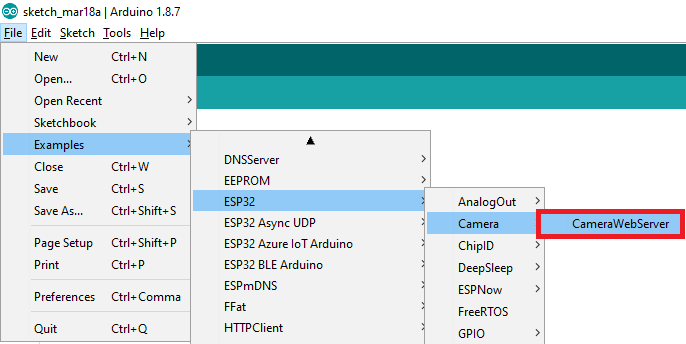
4. Import the CameraWebServer example code.

If you can’t find the code in the Arduino IDE, you can download and unzip the folder, then openCameraWebServer.inofile.
Before uploading the code, you also need to insert your network credentials into the following variables:
const char* ssid = "REPLACE_WITH_YOUR_SSID";
const char* password = "REPLACE_WITH_YOUR_PASSWORD";
Then, make sure to select the correct camera module. In this case, we are using the AI-THINKER model.
Configuring WIFI Password
We need to modify the loaded code so that the module can connect to WIFI.
1. WIFI Configuration
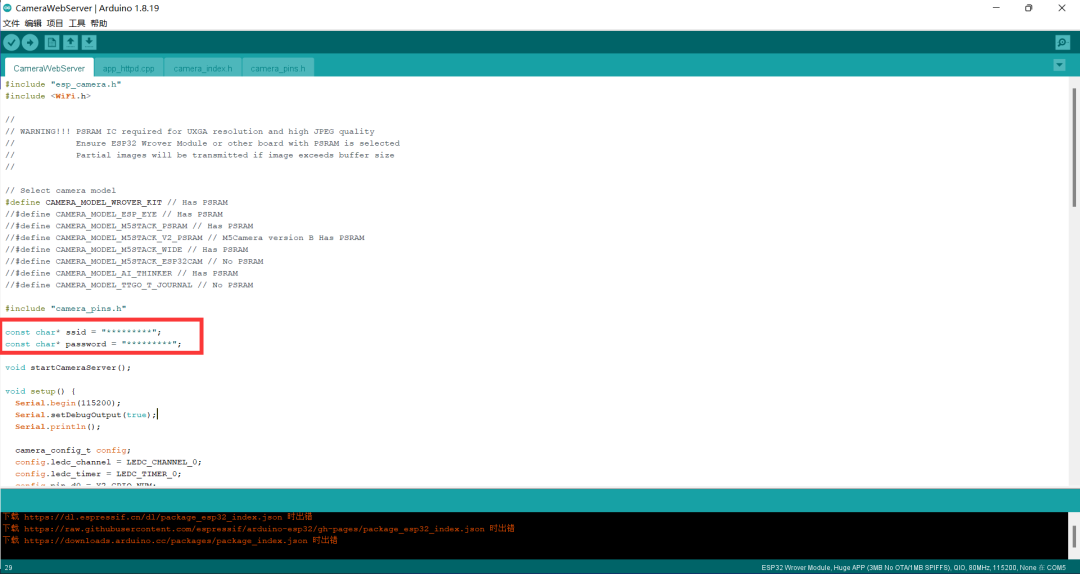
Here, ssid is the WIFI name, and password is the WIFI password.
2. Select Camera
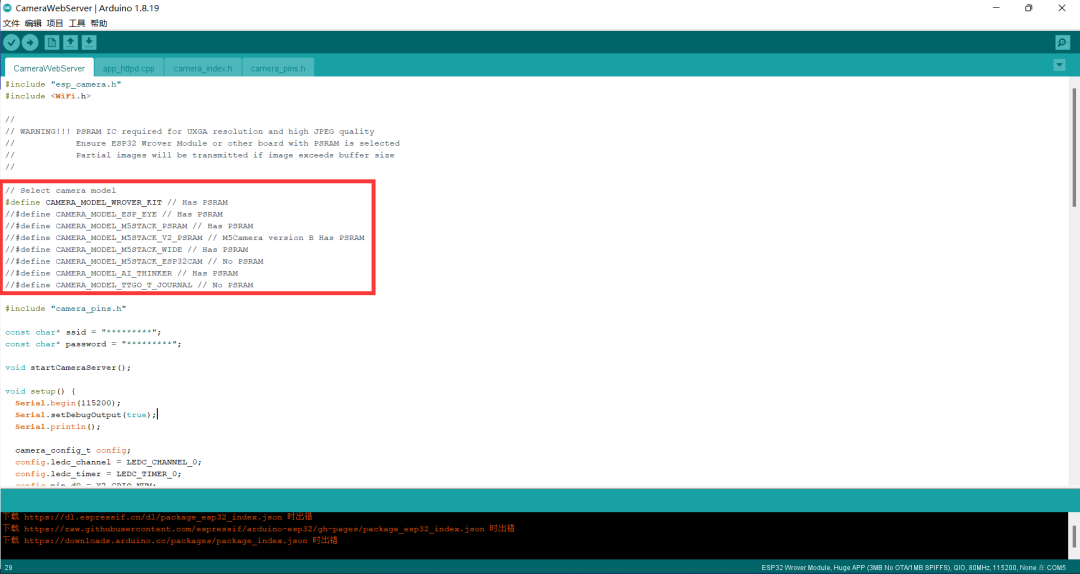
Select your camera by uncommenting, and if you don’t know which camera you have, you can contact the seller, and they will provide you with the camera manufacturer information.
Downloading the Program
Required Hardware:
-
One ESP32-CAM module -
Five Dupont wires -
One USB-TTL serial downloader
Connect the USB-TTL to the ESP32-CAM module as follows, and note that IO0 must be shorted to GND before powering on to enter download mode; otherwise, the program cannot be downloaded.
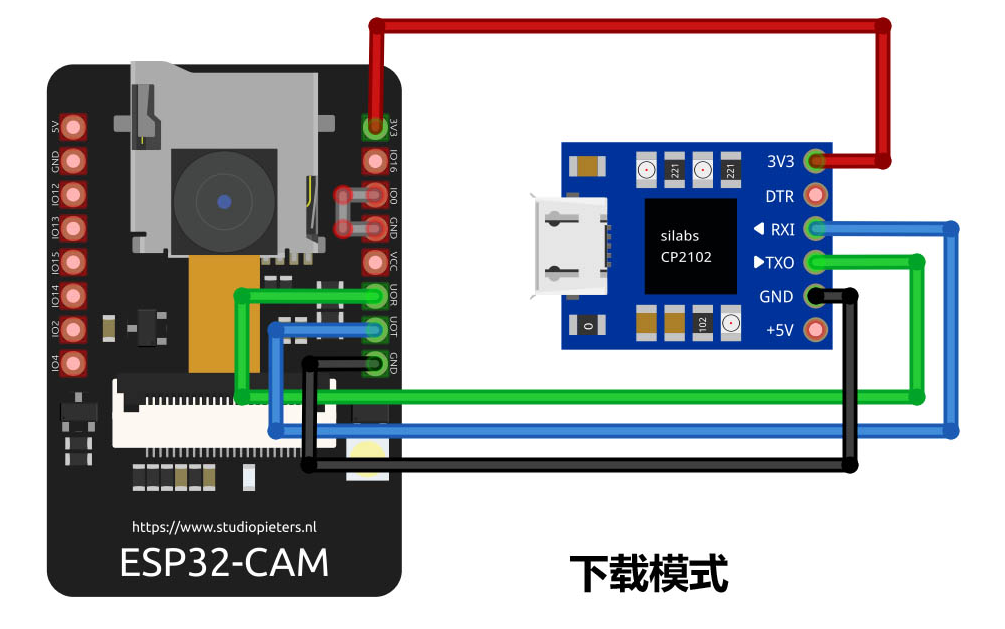
To upload the code, follow these steps:
-
Go to Tools > Board and select the ESP32 Wrover module -
Go to Tools > Port and select the COM port connected to the ESP32 -
In Tools > Partition Scheme, select “Huge APP (3MB no OTA)” -
Press the RESET button on the ESP32-CAM board -
Then, click the upload button to upload the code
Important Note: If you cannot upload the code, please double-check that GPIO 0 is connected to GND, and that the correct settings are selected in the “Tools” menu. Also, press the onboard reset button to restart the ESP32 in flashing mode.
Connecting the Camera
We need to disconnect the connection between IO0 and GND to open the serial monitor at baud rate 115200, and press the reset key on the ESP32-CAM board, which will pop up the following window:

We copy the displayed IP address from the monitor and open it in the browser, and we can use the ESP32-CAM over the local area network. Click Start Stream to see the real-time feed from the ESP32-CAM.
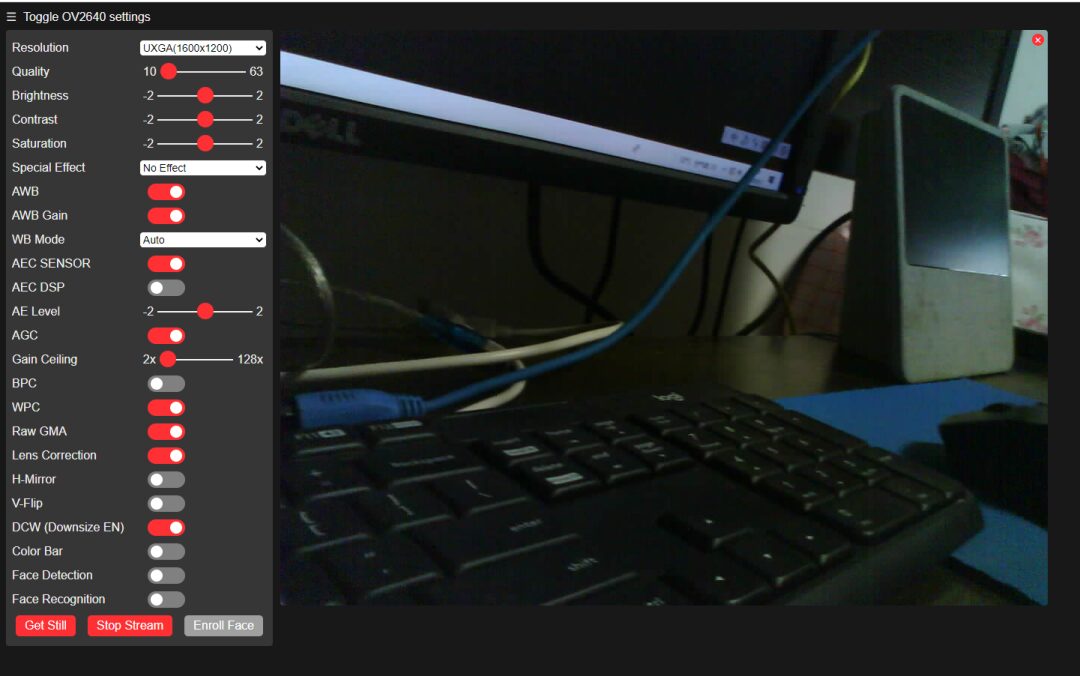
There are still many parameters that can be set on the left side, which I will study in detail later. The focus is, of course, on the image on the right, which is quite clear, much clearer than the camera for over ten yuan from Raspberry Pi.
Notes
-
Ensure the wiring is correct; the IO0 interface of the ESP32-CAM being grounded means it’s in programming mode, while it being unconnected means it’s in operating mode; -
Make sure to determine the port; you need to install the corresponding driver for the programming cable and check the port in the device manager; -
Some devices may need to press the RST button before programming or power cycle to restart; -
If you want to know more about Arduino IDE, please click on the end of the article “Read the original” to view.
Conclusion
Today I mainly introduced the (what I think is simple and easy to use) downloading and debugging method for the ESP32-CAM. I will explore later whether this device can record video to achieve the functionality of a surveillance camera. Interested friends can refer to the above content and try it themselves.
Author: Li Bin
Source: Embedded Yuexiang Garden
Due to recent changes in the WeChat public platform push rules, many readers have reported not seeing updated articles in a timely manner. According to the latest rules, it is recommended to click on “Recommended Reading, Share, Collect, etc.” more often to become a regular reader.
Recommended Reading:
-
Breaking! Another 7 Chinese entities added to the U.S. export control list
-
Brazil’s programming language can conquer the world; why can’t we?
-
Another chip company collapses! Just three months after receiving 600 million financing
Please click 【To See】 to give the author a thumbs up
