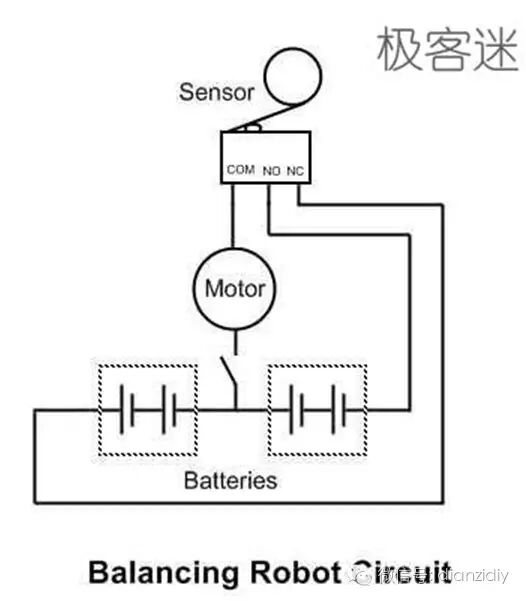
This is a very simple robot that uses a basic switch as a sensor, utilizing the inverted pendulum mechanism to stand on two wheels. When the robot is about to fall, the motor activates, causing the robot to move in the direction it is about to tip over. The center of gravity of the motor torque is above the motor, allowing the robot to maintain balance.

Step 1: Required Materials: You will need the following equipment to complete the simple balancing robot: 1. A small motor; (you can dismantle your four-wheel drive car)

2. Some gears (I guess your four-wheel drive car won’t escape this)
3. An axle (you might as well give up, you definitely dismantled your four-wheel drive car)

4. Two wheels (……) 5. Some plastic sheets to make the robot’s bearing sleeves and neck (let’s just call it a neck for now)

6. Two battery holders (the kind that holds two batteries in a group)

7. Some wires
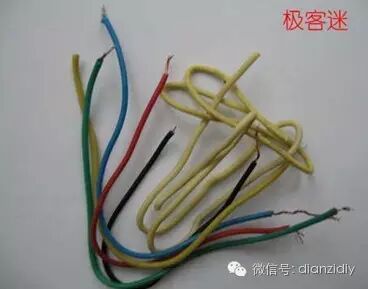
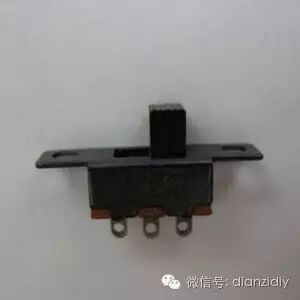
8. A button battery 9. A single-pole double-throw switch with a metal lever 10. A toggle switch 11. A nail 12. A soldering iron 13. Glue
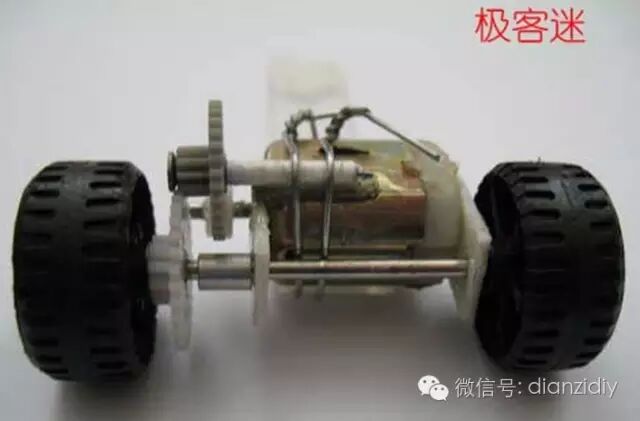
Step 2: The key here is to connect the motor, axle, and wheels together. You can use the gears, motor, wheels, and any method you can think of to combine them organically. You can also use a geared motor to accomplish this; how you complete it is not critical, what matters is that you complete it.
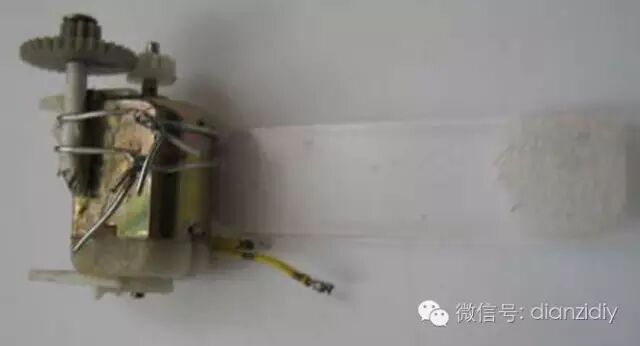
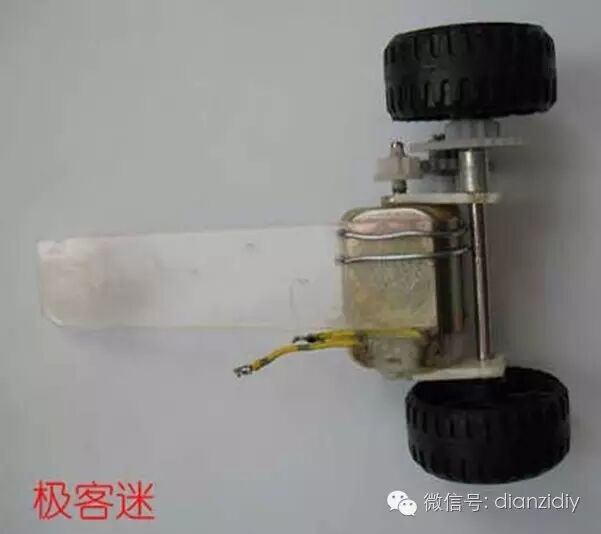 Step 3: Connect the robot’s neck and head. Fix the plastic sheet to the motor with glue, then apply glue to both sides of the plastic sheet and attach the battery holder at the highest point. (Alright, the plastic sheet between the battery holder and the motor will be called the neck)

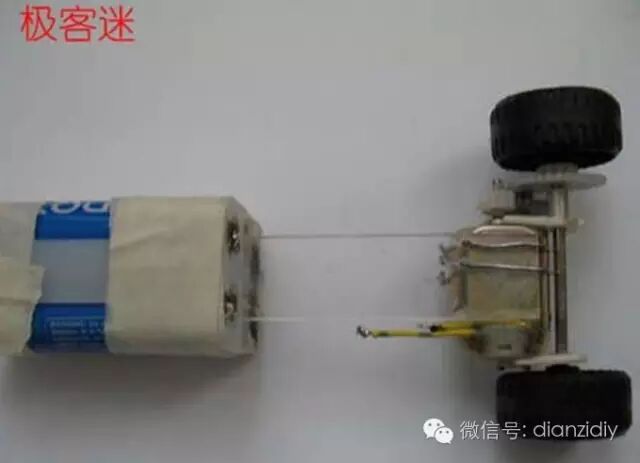
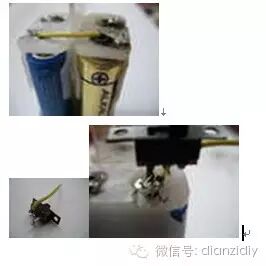
Step 4: Install the sensor. Solder the button battery to the micro switch. Heat the nail over a flame, pierce it through the plastic sheet, and then glue the micro switch to the nail. Pay attention to the position of the nail to ensure that the button battery can just touch the ground; this is crucial. (Determining this position is key, remember to ensure the robot is vertical to the plane) This is critical for the success of this robot.


Step 5: Connect the switch. Connect a wire to one end of the battery holder as the positive terminal, connect the other end to the toggle switch, and then connect another wire as the negative terminal to the motor.
Step 6: Wiring. Your wiring must make the robot move in the direction it is about to tip over.
Step 7: Testing. Install the batteries and let’s see if it works properly. Adjust the position of the micro switch to make it work better. If it tips over, swap the positive and negative wires.
Postscript:
This balancing robot is quite “rudimentary”, yet extraordinary. Firstly, it achieves the balance of an inverted pendulum in a simple way; although the duration is short, it serves as the foundation for all balancing robots in terms of principle. Additionally, it illustrates an important control method in automatic control: feedback, closed-loop feedback, which may provide an interesting educational model for those just starting with robotics or other automatic control systems. Secondly, it reminds us of a fact: human imagination is astonishing, and it makes us reflect on how often we use complex methods to solve simple problems, while others use simple methods to solve complex problems.
I believe many people may not value the making of this robot, but for children who are just getting into robotics, this is indeed a great robot—fun and not difficult to make. I hope someone can introduce this robot to children.