To not miss my updates, remember to check the public account in the upper right corner and set it as a star, give me a star!
A smart watering device that can connect to the internet, allowing you to check when to water, and can notify you via web or mobile.
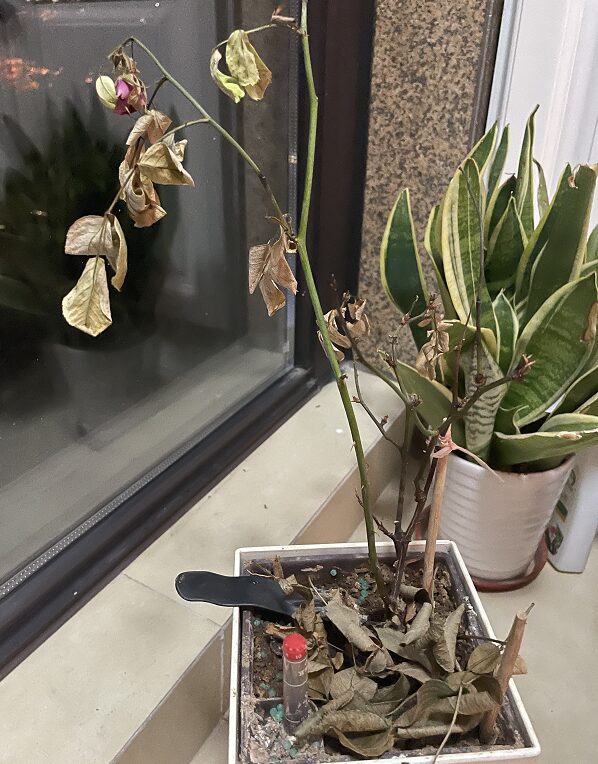
PS: If Sister Ni had such a watering device, the roses wouldn’t suffer from drought and wither. .
.
✓ Components used in the project
✓ What is ThingSpeak?
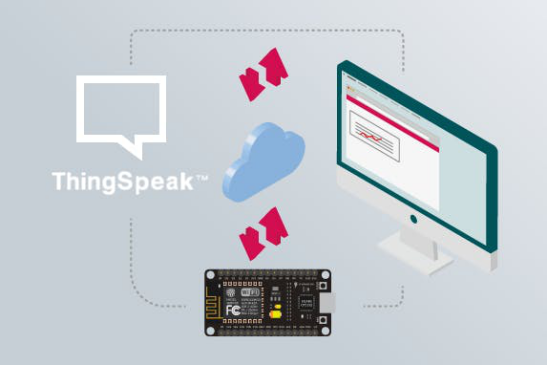
ThingSpeak is a cloud platform for data collection and analysis from Mathworks’ IoT product line. In this project, ThingSpeak serves as the backend for IoT, providing free storage for data collected by hardware and free online MATLAB analysis capabilities for this data.
ThingSpeak is a cost-free IoT platform that can upload numerical data, which is stored in the cloud and can be visualized in real-time graphics. This means that if you want to remotely monitor any value (humidity, temperature, pressure, etc.) over the internet, ThingSpeak is a good choice. It is worth mentioning that ThingSpeak is continuously evolving, so new features can be added at any time.
ThingSpeak only has one limitation: the time between data uploads must be at least 15 seconds. If it is less than 15 seconds, the data will be ignored or not recorded. Therefore, the watering device project is set to upload data every 30 seconds.
✓ Uploading data to ThingSpeak
To send data to ThingSpeak, you need to make an HTTP request to the ThingSpeak server. An HTTP request is just a string (containing HTTP request information) sent from a TCP client (which wants to make the request) to a TCP server (the server that will receive the request, in this case, the ThingSpeak server) through port 80.
Another important piece of information is that there will be a write key for the ThingSpeak channel in the HTTP request. It is a string (unique for each channel) that ThingSpeak must “know” to which channel to send the data. Note: Established TCP strings do not have a long lifecycle. Once the server sends a response to the request, the connection with the server ends. In other words, the HTTP request is “temporary,” so it is only used for short data traffic between the TCP client and the TCP server.
Process: Visit ThingSpeak.com, then click “Get Started for Free” to register for ThingSpeak.
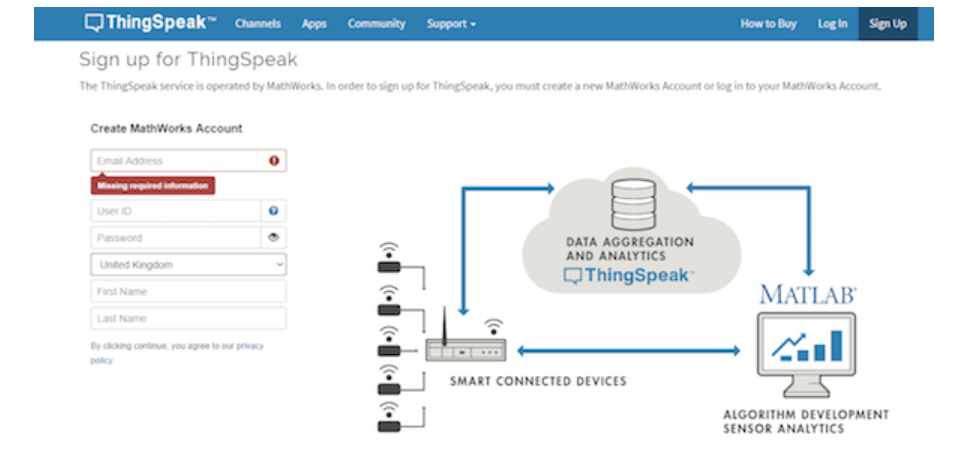
After registration, you can create your own channel and fill in some information. However, pay attention to the API keys section, you need to copy your defined API key, which will be used in the ESP8266 code.
✓ Using the IoT Plant with ESP8266 NodeMCU
The Plant IoT project with ESP8266 NodeMCU includes having NodeMCU send the measured humidity percentage to the ThingSpeak channel every thirty seconds.
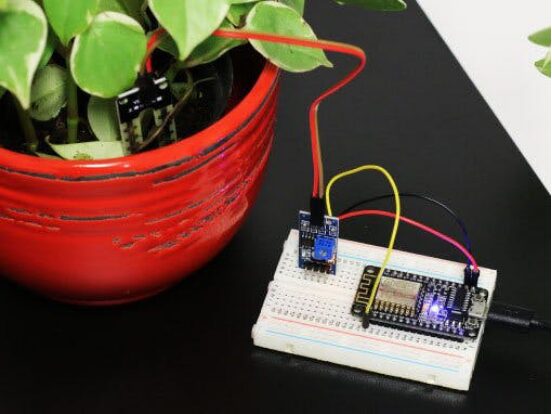
In terms of hardware, you need a NodeMCU, a humidity sensor, a 100-ohm resistor, and a 200-ohm resistor for the voltage divider, jumper wires, and a breadboard, making wiring very convenient.
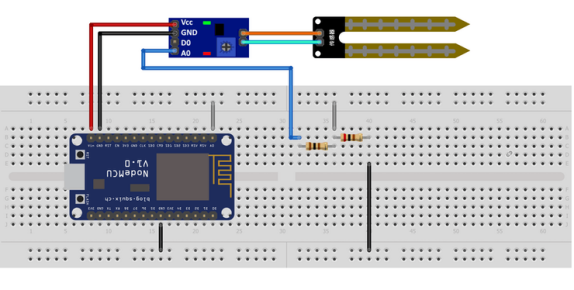
Power is supplied via USB, and the humidity sensor reads through the single ADC pin (A0) of the NodeMCU, allowing the reading of percentage humidity (0 – 100%).
✓ ESP8266 NodeMCU Module Code
//NextPCB #include <ESP8266WiFi.h> //defines#define SSID_REDE " " #define SENHA_REDE " " #define INTERVALO_ENVIO_THINGSPEAK 30000 //constants and global variableschar EnderecoAPIThingSpeak[] = "api.thingspeak.com";String ChaveEscritaThingSpeak = "KGFP6X4JQTJZFIAP";long lastConnectionTime; WiFiClient client; //prototypesvoid EnviaInformacoesThingspeak(String StringDados);void FazConexaoWiFi(void);float FazLeituraUmidade(void);/* * Implementations *///Function: sends information to ThingSpeak//Parameters: String with the information to be sent//Return: nonevoid EnviaInformacoesThingspeak(String StringDados){ if (client.connect(EnderecoAPIThingSpeak, 80)) { //makes the HTTP request to ThingSpeak client.print("POST /update HTTP/1.1\n"); client.print("Host: api.thingspeak.com\n"); client.print("Connection: close\n"); client.print("X-THINGSPEAKAPIKEY: "+ChaveEscritaThingSpeak+"\n"); client.print("Content-Type: application/x-www-form-urlencoded\n"); client.print("Content-Length: "); client.print(StringDados.length()); client.print("\n\n"); client.print(StringDados); lastConnectionTime = millis(); Serial.println("- Information sent to ThingSpeak!"); } } //Function: makes the WiFi connection//Parameters: none//Return: nonevoid FazConexaoWiFi(void){ client.stop(); Serial.println("Connecting to the WiFi network..."); Serial.println(); delay(1000); WiFi.begin(SSID_REDE, SENHA_REDE); while (WiFi.status() != WL_CONNECTED) { delay(500); Serial.print("."); } Serial.println(""); Serial.println("WiFi connected successfully!"); Serial.println("IP obtained: "); Serial.println(WiFi.localIP()); delay(1000);} float FazLeituraUmidade(void){ int ValorADC; float UmidadePercentual; ValorADC = analogRead(0); //978 -> 3.3V Serial.print("[ADC Reading] "); Serial.println(ValorADC); UmidadePercentual = 100 * ((978-(float)ValorADC) / 978); Serial.print("[Percentage Humidity] "); Serial.print(UmidadePercentual); Serial.println("%"); return UmidadePercentual;}void setup(){ Serial.begin(9600); lastConnectionTime = 0; FazConexaoWiFi(); Serial.println("Plant IoT with ESP8266 NodeMCU");} //main loopvoid loop(){ float UmidadePercentualLida; int UmidadePercentualTruncada; char FieldUmidade[11]; if (client.connected()) { client.stop(); Serial.println("- Disconnected from ThingSpeak"); Serial.println(); } UmidadePercentualLida = FazLeituraUmidade(); UmidadePercentualTruncada = (int)UmidadePercentualLida; if(!client.connected() && (millis() - lastConnectionTime > INTERVALO_ENVIO_THINGSPEAK)) { sprintf(FieldUmidade,"field1=%d",UmidadePercentualTruncada); EnviaInformacoesThingspeak(FieldUmidade); } delay(1000);}
✓ Results of the IoT Plant on ThingSpeak
After uploading the source code to NodeMCU and running it, you can see your data on ThingSpeak.
Once the data is uploaded to ThingSpeak, you can view the sensor-collected soil data anytime, anywhere.
Project source: hackster.io
More practical project recommendations:
STM32 IoT Smart Home Project
Project Sharing | Step by Step Using MATLAB + Raspberry Pi for Face Recognition
Raspberry Pi + Compute Stick 2 for Real-Time Face Recognition Project
Building Cloud Computing Platform for Embedded Development Board
STM32 Achieves the Simplest Air Mouse
Arduino Rubik’s Cube Robot
STM32 Version “AI Soul Painter”
STM32 Electronic Photo Album Production
STM32 + DDS Homemade Signal Generator
Using Raspberry Pi and Web Interface to Remotely Control Appliances
STM32 “Cloud” Music Player
Raspberry Pi Remote Monitoring
Design of Neon Tube Clock Based on STM32
Homemade FPGA Minimal System Board (PCB can be directly made)
Raspberry Pi 4 to Build NAS, Easily Connect Hard Drives
ESP32 Car Software and Hardware Practical Sharing
Only 79 Lines of Code to Complete Creative Gesture Recognition
IoT + Electronic Ink Screen to Create Custom Display
Build a Pathfinding Robot Worth Over a Thousand Yuan for Dozens of Yuan
Glasses that Can Transmit Video? Reveal the Production Process
DIY Gesture Recognition Module
Practical small designs that can be DIYed from scratch
Raspberry Pi to Create an Intelligent Doorbell + Smart Door Lock with Video
Strange! My development board can play games automatically
Homemade Breathing Machine
ESP8266 + Zigbee Networking Transformation of Wall Switch
Wireless Home Monitoring System
DIY Bionic Arm, a Tool to Free Your Hands
Purely Handmade Air Purifier, All Design Materials Open Source
Technology Toy: Remotely Controlled Bluetooth Artillery
Making LittleBee Monitoring System with ST Sensors, Letting Bees “Talk”
STM32 + Raspberry Pi Achieves 6 Seconds Rubik’s Cube Robot
Blindly Modifying Drone Controller, DIY “Foam” Drone
Making an Intelligent Relay Without Arc Using STM32
Making a Practical New Model Necklace with Only 5 Components
The Simplest Method for Heart Rate Measurement (Suitable for Secondary Development)
Cracking the Magnetic Levitation Globe
Magical Light Can Transmit Video? Revealing the Production Process
DIY Smart Watch with STM32 60FPS Animation
Paying Tribute to Classic Radio, Observing the Production Process
DIY Third Eye: “Special” Glasses with Bluetooth/OLED/Lens Functions
Homemade Solar Charger that Tracks Maximum Power Point
Night Vision Glasses Without MCU, Just Connect Wires
The Correct Way to DIY Flow Meter, Hobbyist Modifier
Homemade High-Difficulty Racing Timer (Lap/Heat Sensitive Printing)
DIY WiFi Controlled LED Dice
Gas Burning Power Bank
Homemade Simple Raspberry Pi Security System
Using Microcontroller + ESP8266 to Build a Small Weather Station
Super Mini & Highly Expandable Palm Machine Car
Dream Link, Remote Development of Microcontroller with Raspberry Pi
Automatic Pathfinding + Pest Recognition Plant Protection Robot
uECG Achieves Heartbeat LED Lamp Ring
Wireless Smart High-Power Switch
Making ESP8266 Smart Health Watch from Scratch
Collecting Old MCUs to Turn Waste into Treasure
Pi Pico + Edge Impulse Deploying Intruder Detection System
DIY WiFi Signal Strength Detector
Completing Real-Time Face Recognition with Raspberry Pi in Seven Steps
Ultrasonic Distance Measurement with Radar Appearance
Making IoT Power Meter (Voltage/Current/Power)
Homemade Measuring Instrument: Using ESP32 + OLED to Draw CO2 Level Curve


