#Introduction
I have a large capacity mechanical hard drive that is currently unused, and I want to utilize it during the weekend. The requirements are:
-
I have a Raspberry Pi at home, which is running <span>OpenWRT</span>as a standalone router. -
I now need to connect the mechanical hard drive to the Raspberry Pi and share it as a home network file. -
The ultimate goal is that as long as the device connects to the home <span>WIFI</span>, it can access the mechanical hard drive via the<span>smb</span>protocol.
<span>SMB</span>(<span>Server Message Block</span>) is a network file sharing protocol primarily used for sharing files, printers, serial ports, and communication resources over a local area network. It allows applications or users to read and write files and request services between computers on the network.<span>SMB</span>was originally developed by<span>IBM</span>and later extended and promoted by Microsoft, widely used across major operating systems.
#1. Installing Samba
My main environment here is
<span>OpenWrt</span>(<span>Linux</span>), using<span>Samba</span>to achieve network sharing.
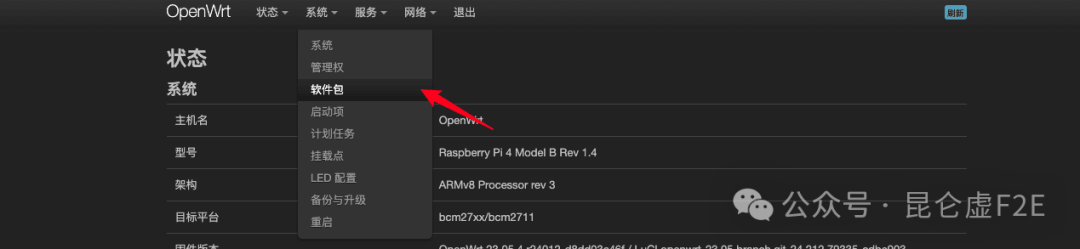
Access the <span>OpenWrt</span> backend page and go to the software package section.
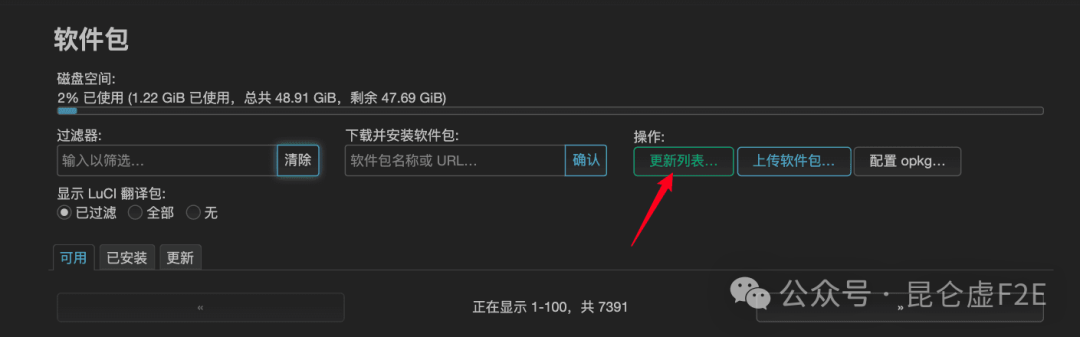
First, we need to update the package list.
After updating the package, search for <span>samba4</span> in the search bar and select <span>luci-app-samba4</span> for installation.
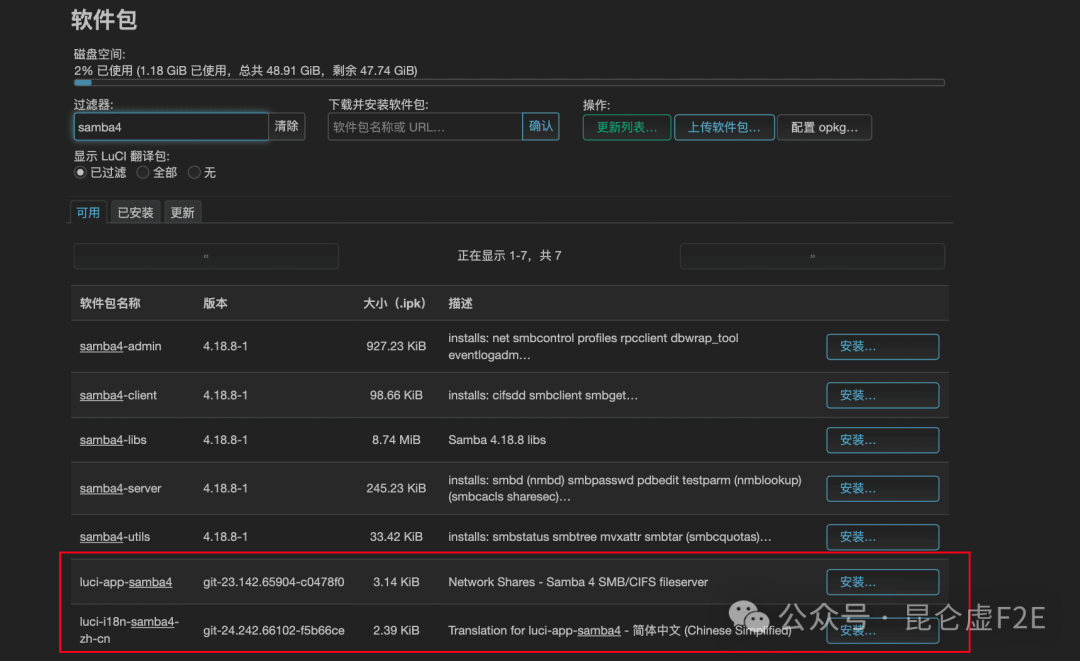
When installing <span>luci-app-samba4</span>, it will actually install all the required packages, as shown in the following image, with four packages installed.
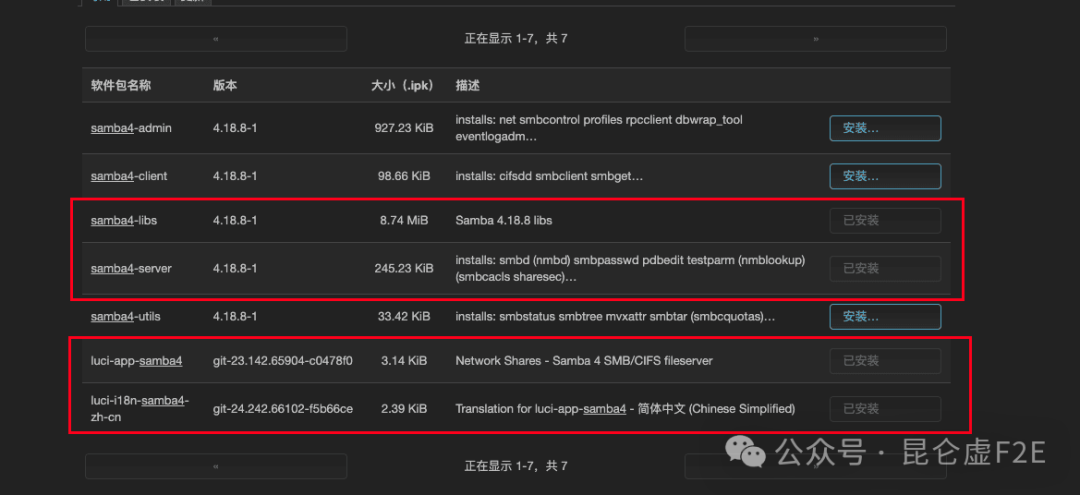
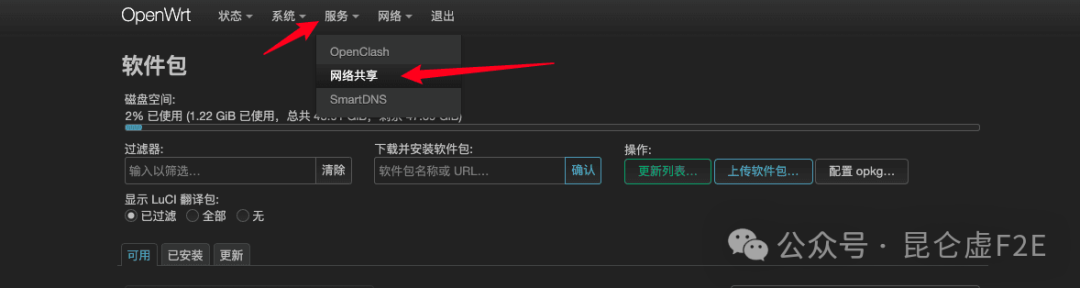
After installation, refreshing the page will show a network sharing menu in the services section.
#2. Creating Samba User
When sharing over the network, we should avoid using the <span>root</span> user to log in to the <span>samba</span> server. Therefore, we need to create a separate user for accessing the <span>Samba</span> server and assign it access permissions to the folder.
Next, we need to perform operations on <span>OpenWrt</span>, so we need to access it via SSH first.
ssh [email protected]Before we begin, we can install two software packages in advance:
<span>shadow-useradd</span>
: Provides the <span>useradd</span>command, which can be used to add users.<span>shadow-userdel</span>
: Provides the <span>userdel</span>command, which can be used to delete users (if needed).
opkg update# Update the packageopkg install shadow-useradd# First install shadow-useradd packageopkg install shadow-userdel# First install shadow-userdel package, provides userdel commandNext, we will try to add a new user <span>test</span>; later we will control permissions for the shared directory (only the <span>test</span> user can access the shared directory).
useradd test# Use useradd command to create test user smbpasswd -a test# Create Samba service password for user test, will prompt for setting and confirming password
Note: If the created user is no longer needed, you can delete it using the following command:
smbpasswd -x test# Delete user test password userdel test# Delete user#3. Creating Shared Directory
Next, create the shared file directory <span>/share</span> and add a test file <span>test.txt</span>
mkdir -p /share cd /share echo "string" &gt; test.txt
After creating the directory, we also need to set permissions for the shared directory user.
# Change the 'owner' and 'group' of /share directory and all its subdirectories and files to test, replace with your set username chown -R test:test /share
#4. Samba Configuration
Access the <span>OpenWrt</span> backend management page and go to the network sharing page, as shown in the following image.
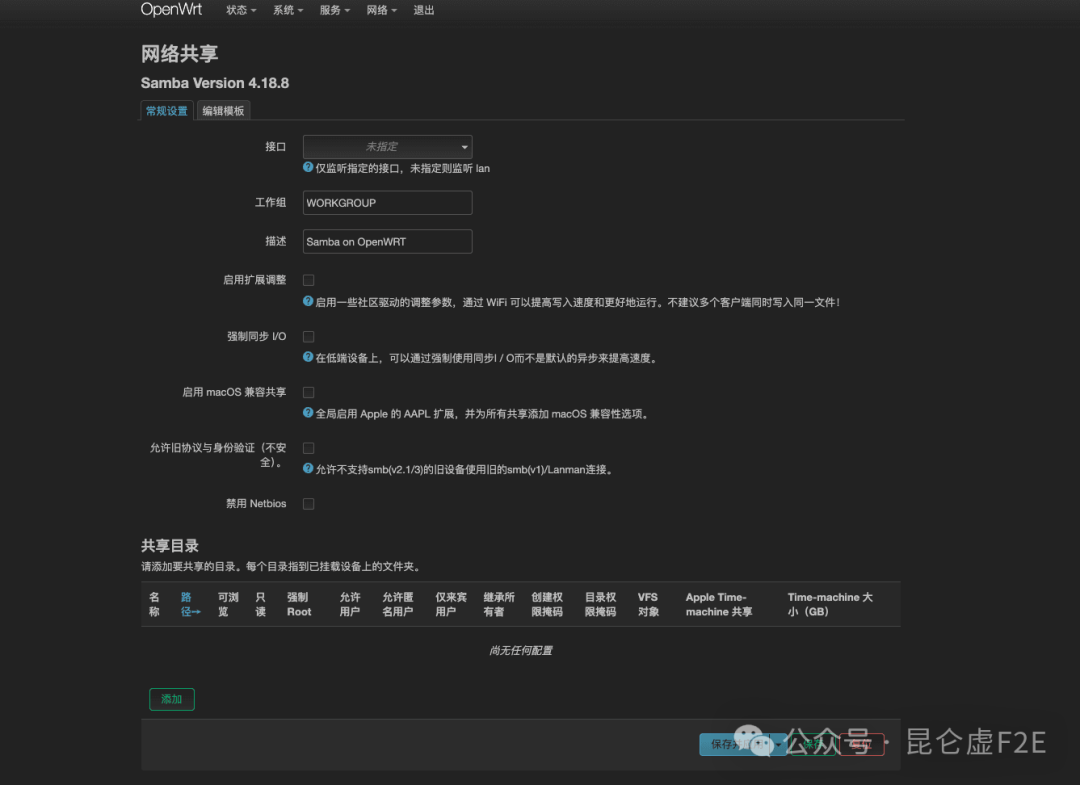
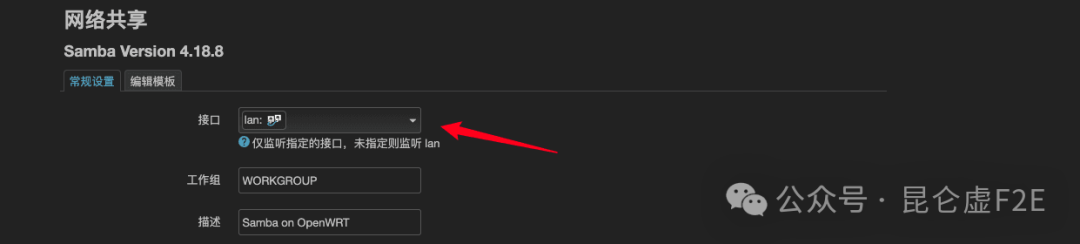
First, set the interface.
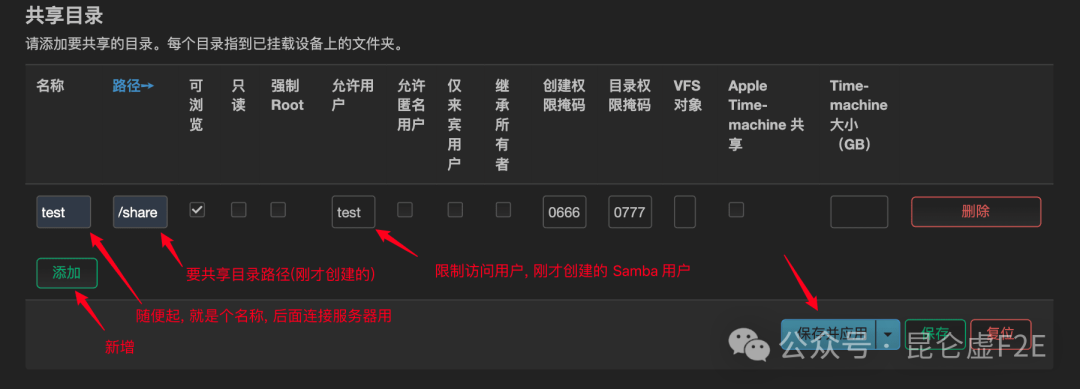
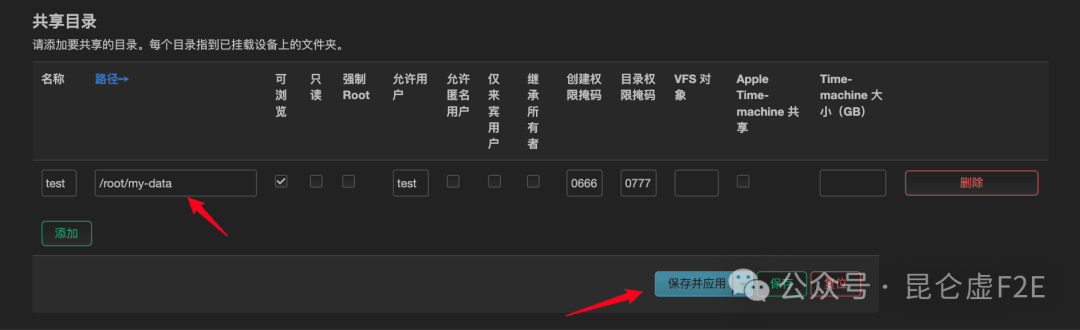
Add a new entry and fill in the relevant information (see the image for specific description), then save and apply.
#5. Connecting from Mac
After configuring above, the entire network shared directory has actually been set up, now let’s start testing:
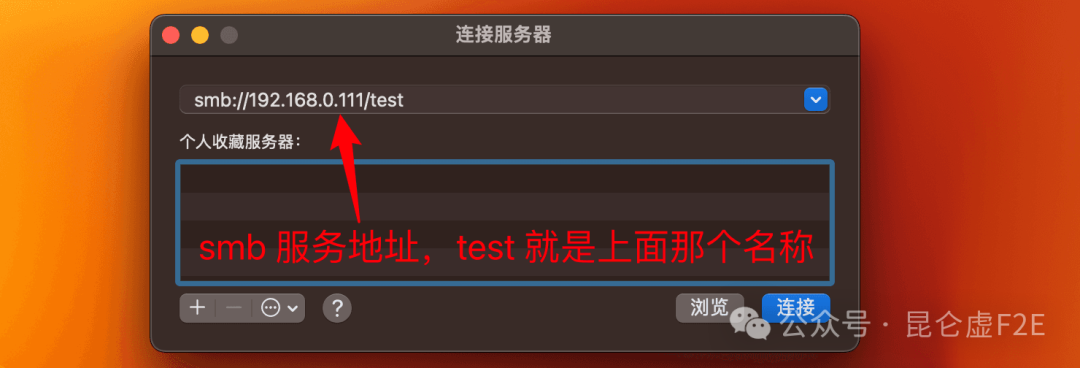
<span>On Mac</span>, find <span>Go</span> in the menu bar -><span>Connect to Server</span>

A pop-up window will appear, enter the <span>Smb</span> server address, formatted as follows:<span>smb://192.168.0.111/test</span><span>IP</span> is the address of my Raspberry Pi, <span>test</span> is the name set during the new configuration above.
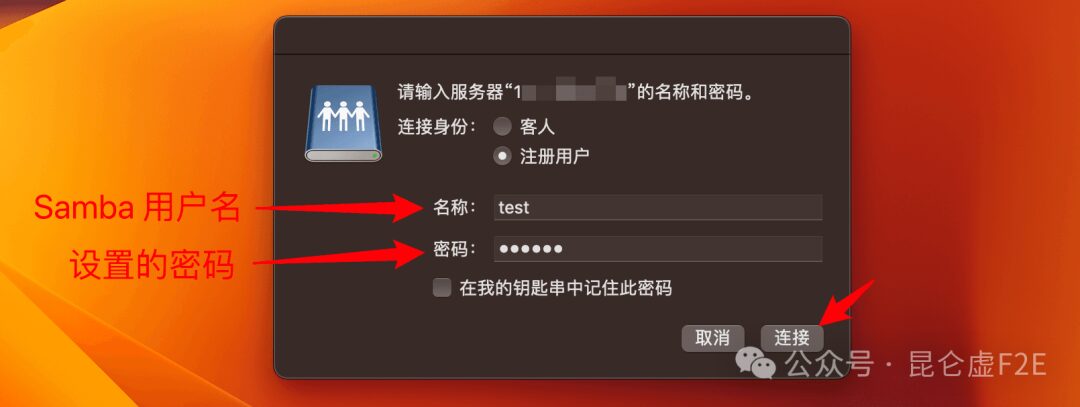
Then click connect, select <span>Registered User</span>, the name is the Samba username we set at the beginning, the password is the corresponding user password, and finally click connect.
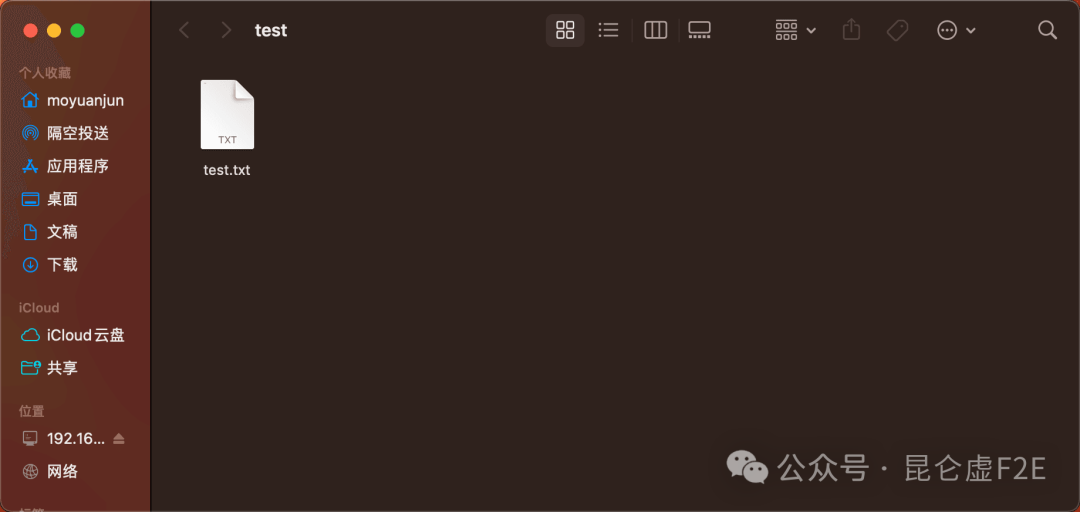
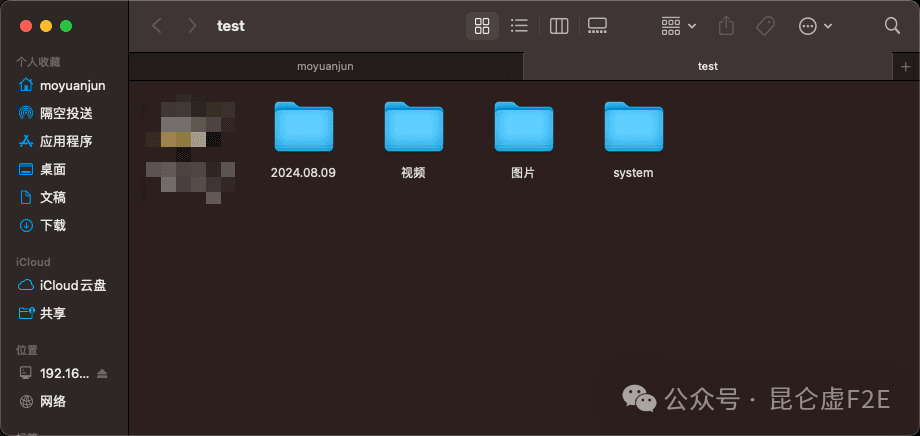
If everything goes well, you should be able to access the shared file directory, as shown in the following image:
We can also try dragging a file in here.
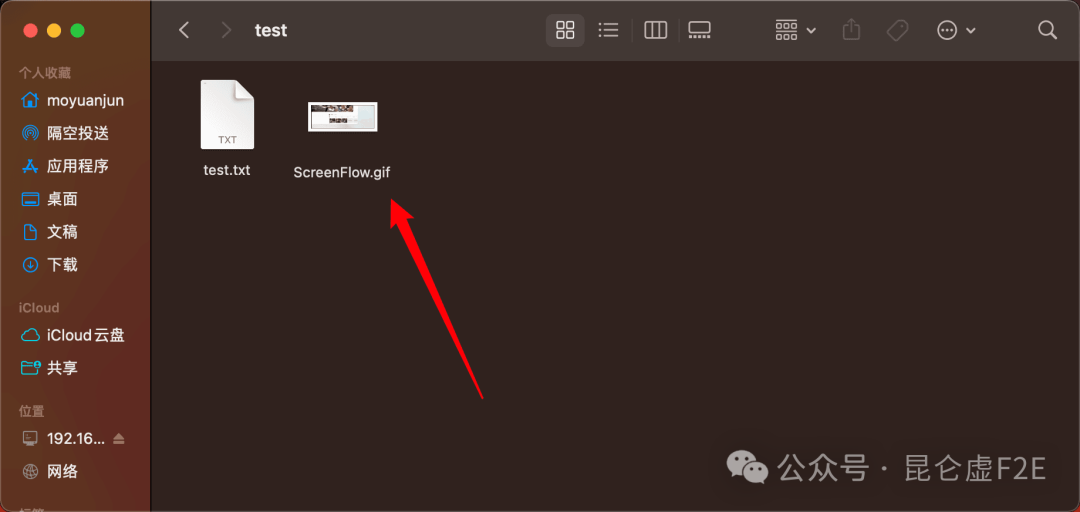
Then on the Raspberry Pi, you can synchronize and see the file.

#6. Mounting the Hard Drive
Above, we created a shared directory on the <span>OpenWrt</span> host machine, which is just a demonstration; our actual goal is to set the external hard drive as a shared directory. However, we need to mount the hard drive to <span>OpenWrt</span> first.
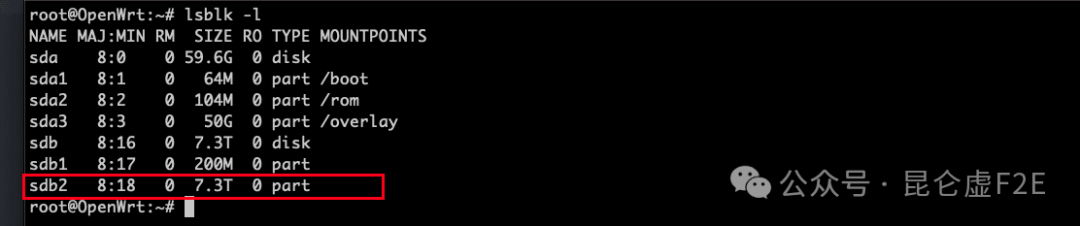
Before starting, use <span>lsblk</span> to check the hard drive information: the purpose is to find the path of the hard drive to be mounted.
lsblk -lFrom the result below, determine that the path to mount the hard drive is <span>/dev/sdb2</span> (determined by the size of the hard drive).
Note: In Unix-like operating systems (such as
<span>Linux</span>), the path before the hard drive<span>/dev</span>represents<span>device</span>; this is because in these operating systems, all hardware devices (including hard drives, optical drives,<span>USB</span>devices, etc.) are represented as files in the filesystem, and these files are usually located in the<span>/dev</span>directory.
Having determined the hard drive device path, we also need to create a directory to serve as the mount point.
mkdir -p my-data
Since this directory will later serve as the shared directory, we need to set the owner and group of the directory and files (set to <span>Samba</span> user <span>test</span>).
chown -R test:test my-data
Now we can start mounting the hard drive.
mount /dev/sdb2 my-data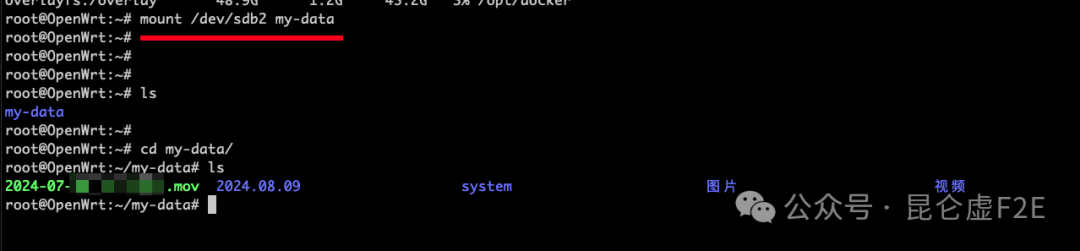
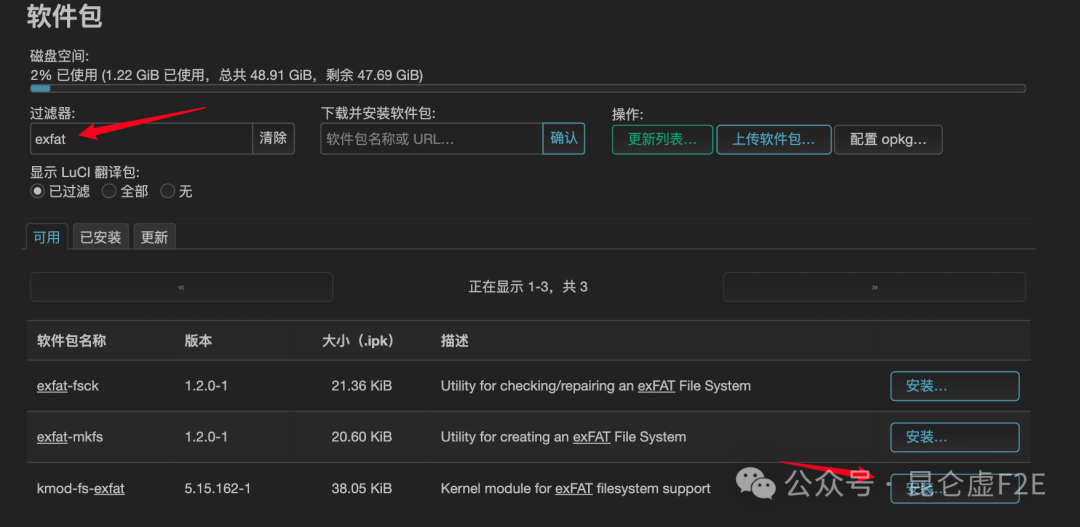
Encountered issue: Since my hard drive is formatted as
<span>Exfat</span>, the mount failed, and the reason for the failure is that by default,<span>OpenWrt</span>does not support<span>Exfat</span>file formats. To solve this problem, I separately installed<span>kmod-fs-exfat</span>to add support for<span>Exfat</span>format.
#7. Sharing the Hard Drive
After mounting the hard drive, we need to modify the network sharing settings we configured above, changing the shared file path to the mounted path of the hard drive, and finally click save and apply.
Testing:<span>Reconnect from Mac</span> to the <span>Smb</span> server.
#8. References
-
How to add users on a Samba server -
Raspberry Pi Diary: Setting Up a Home Shared Directory